初投稿!
本当はサーバレスまで一つの記事に入れたかったけど間に合わなかった・・・。
ということで今回はスクレイピング編になります。
やりたいこと
定期的に情報が更新されるwebページを自動でスクレイピングしたい!
目標
Yahoo!天気(東京)のデータを6時間おきに取得。
方法
Python + Scrapy + AWSlambda + CroudWatchEventsあたりでいけそう・・・?
とりあえずやってみる
まずはスクレイピングから
以下手順でクローリング、スクレイピング部分を作成。
- Scrapyインストール
- Scrapy projectを作成
- spiderの作成
- 実行
1. Scrapyインストール
$ python3 -V
Python 3.7.4

$ pip3 install scrapy
...
Successfully installed

$ scrapy version
Scrapy 1.8.0
2. Scrapy projectを作成
コマンドを入力した階層にプロジェクトのフォルダが作成されます。
$ scrapy startproject yahoo_weather_crawl
New Scrapy project 'yahoo_weather_crawl'

$ ls
yahoo_weather_crawl
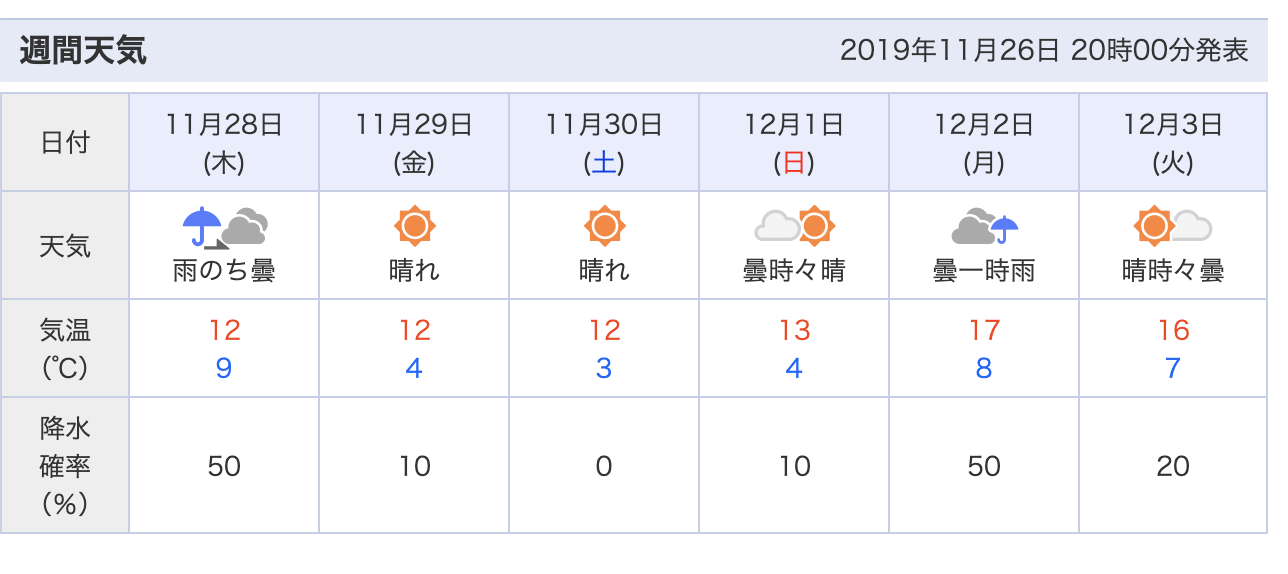
今回はyahoo天気のこの部分を取得してみます。

発表日時、日付、天気、気温、降水確率を拾ってみます。
Scrapyはコマンドラインシェルがあり、コマンドを入力して取得対象がちゃんと取れているか確認することが可能なので、一旦それで確認しつつ進めてみます。
取得対象をxpathで指定します。
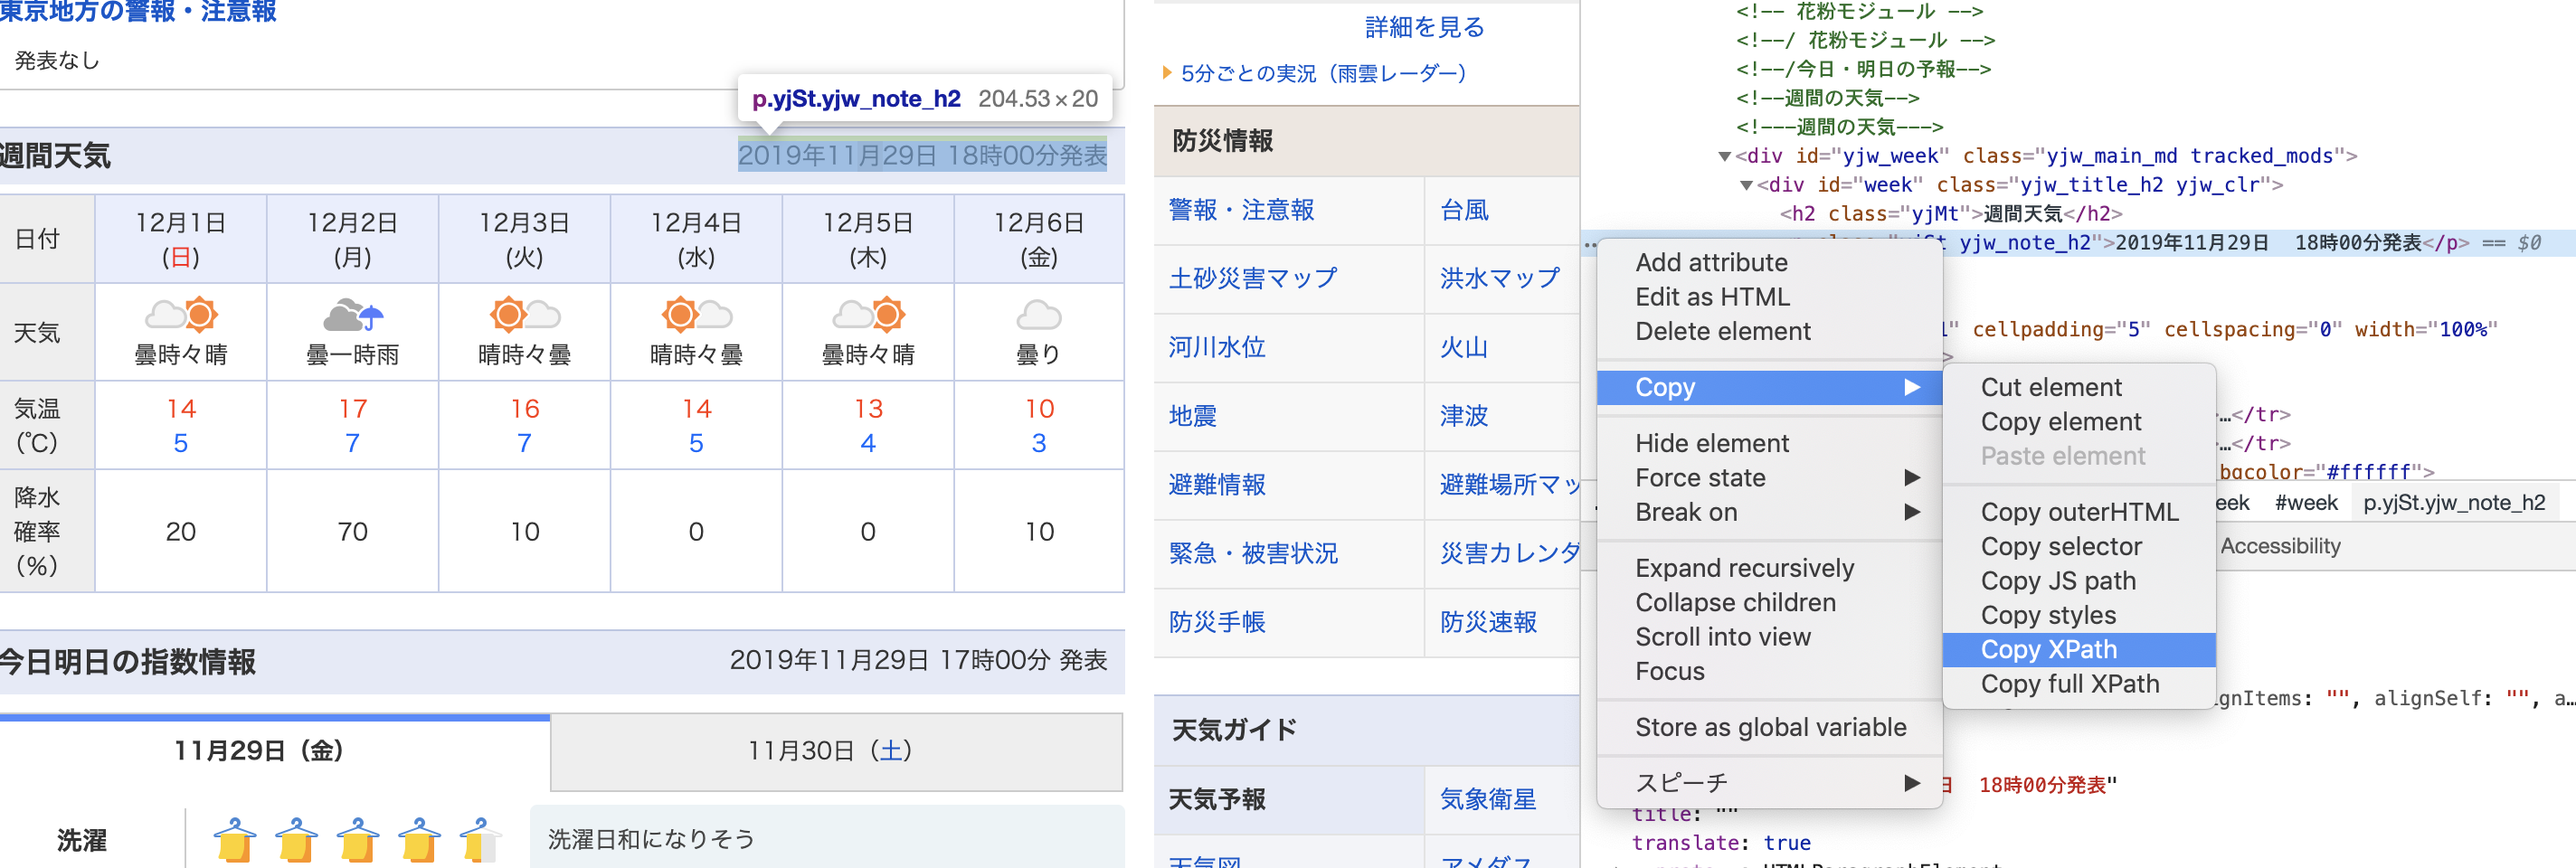
xpathはgoogle chromeのデベロッパーツール(F12押すと出るやつ)から簡単に取得することができます。
今回取得した発表日時のxpathは以下
//*[@id="week"]/p
これをresponceから抜いてみます。
# scrapy shellの起動
$ scrapy shell https://weather.yahoo.co.jp/weather/jp/13/4410.html

>>> announcement_date = response.xpath('//*[@id="week"]/p/text()').extract_first()
>>> announcement_date
'2019年11月29日  18時00分発表'
text()を指定すると、本文のみを取得することが可能です。
詳しくは、参考文献参照。
とりあえず日時はとれたので、他も同様に取得していきましょう。
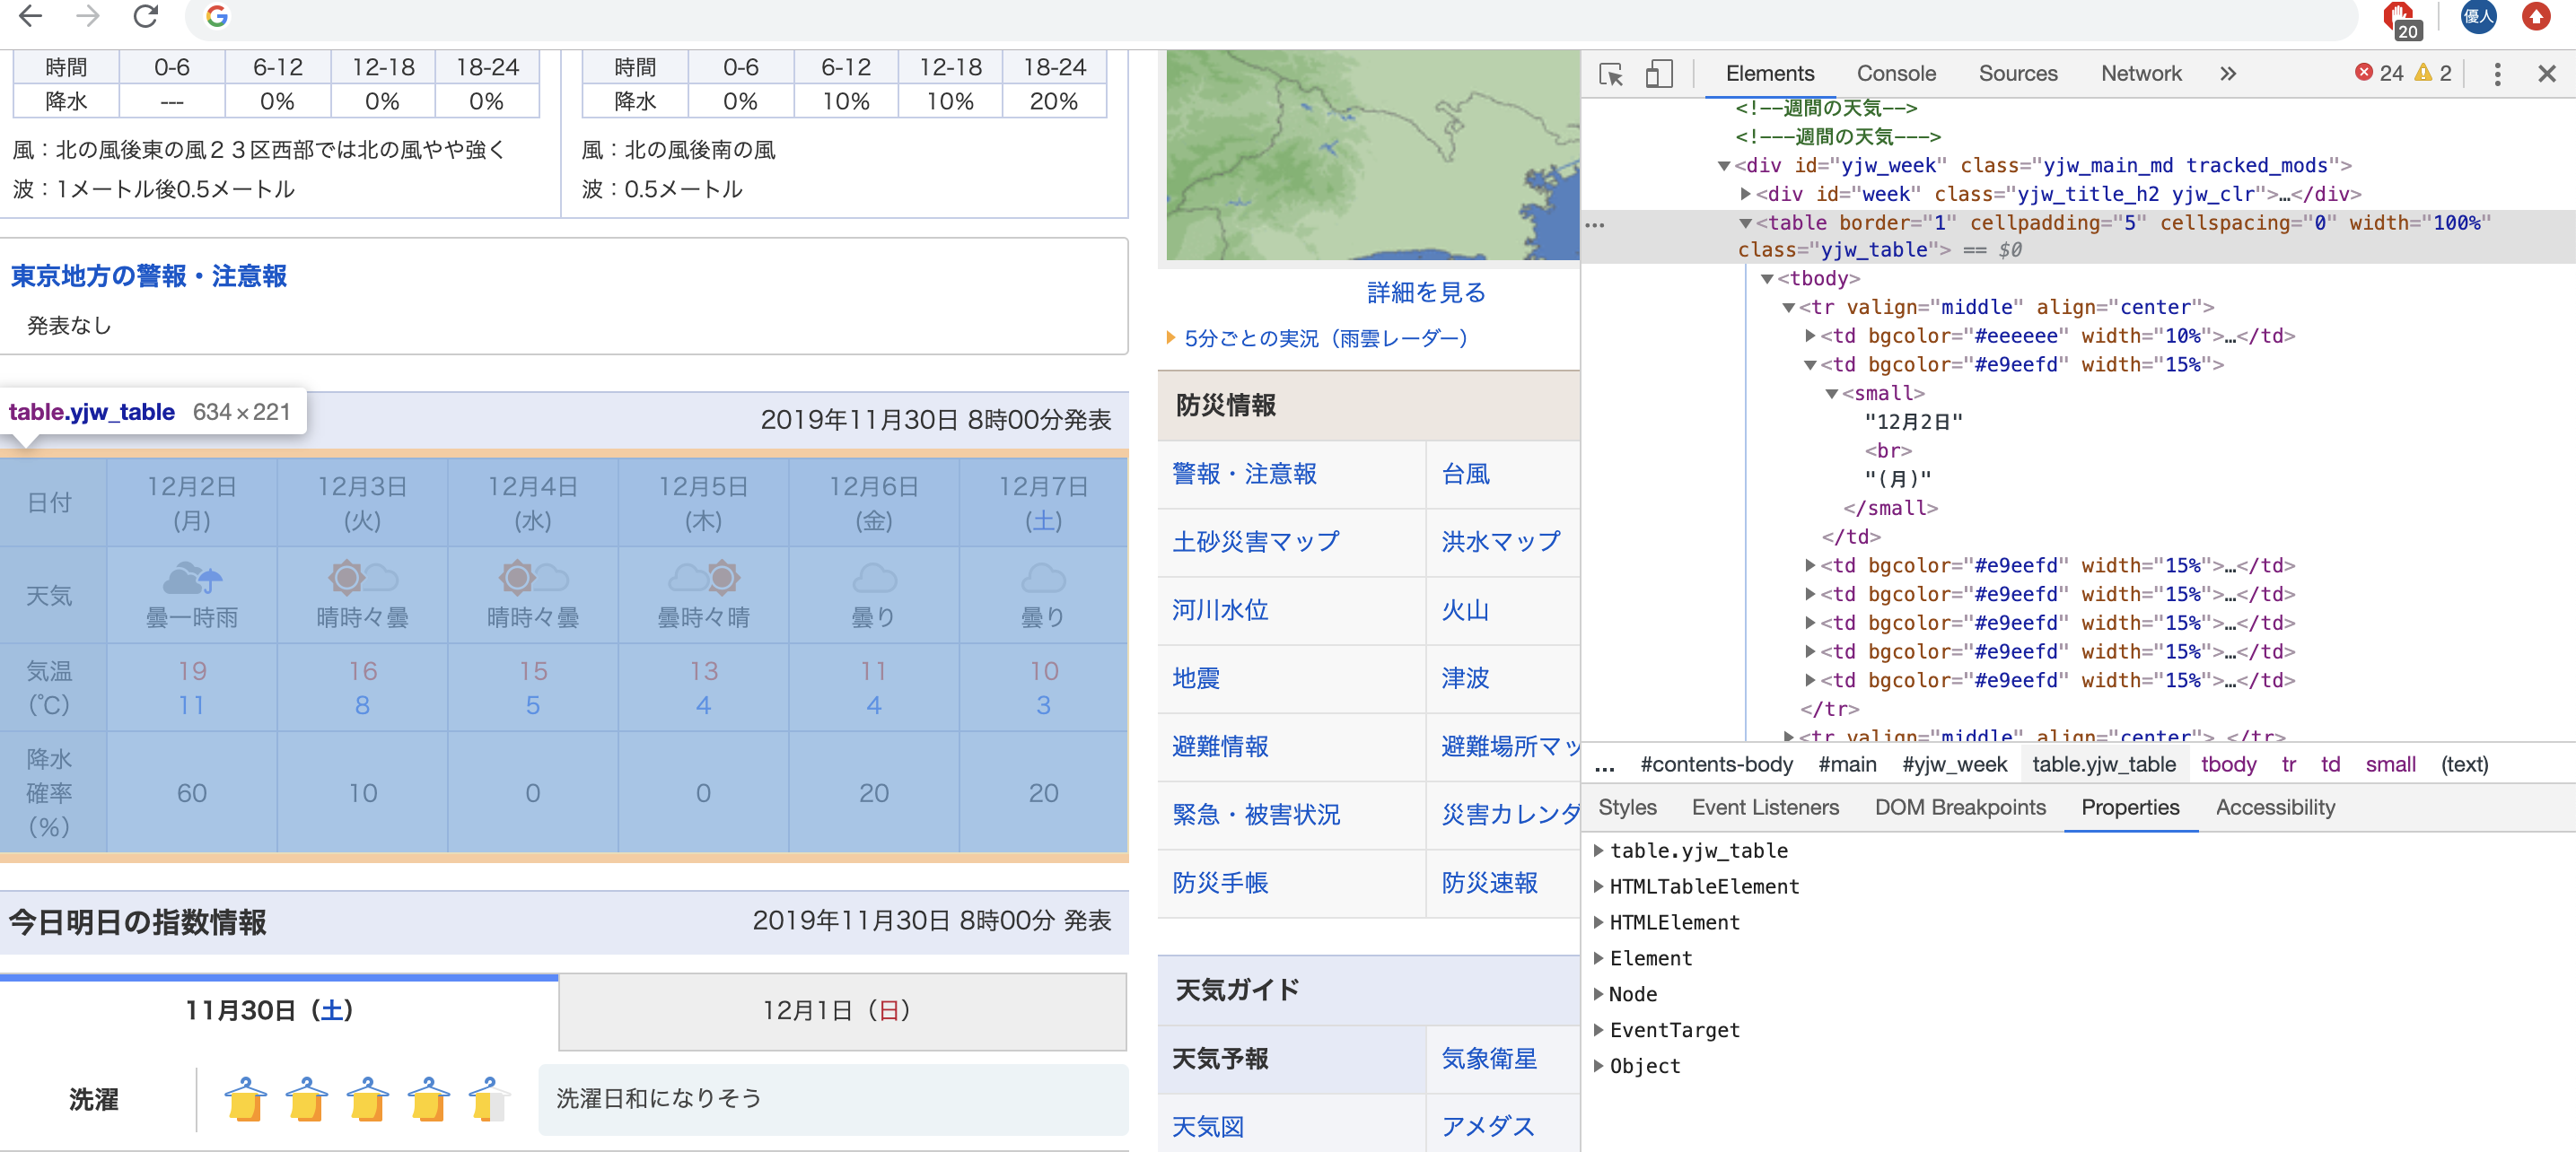
他の情報はtableタグの中にあるので、一度tableの中身を全て取得します。
>>> table = response.xpath('//*[@id="yjw_week"]/table')
これで、id="yjw_week"のテーブルタグ内の要素が取得できました。
ここから各要素を取得していきます。
# 日付
>>> date = table.xpath('//tr[1]/td[2]/small/text()').extract_first()
>>> date
'12月1日'

# 天気
>>> weather = table.xpath('//tr[2]/td[2]/small/text()').extract_first()
>>> weather
'曇時々晴'

# 気温
>>> temperature = table.xpath('//tr[3]/td[2]/small/font/text()').extract()
>>> temperature
['14', '5']

# 降水確率
>>> rainy_percent = table.xpath('//tr[4]/td[2]/small/text()').extract_first()
>>> rainy_percent
'20'
これでそれぞれの取得方法がわかったので、
Spider(処理のメイン部分)を作成していきます。
3. spiderの作成
先ほど作成したプロジェクトフォルダの構成は以下のようになっています。
.
├── scrapy.cfg
└── yahoo_weather_crawl
    ├── __init__.py
    ├── __pycache__
    ├── items.py
    ├── middlewares.py
    ├── pipelines.py
    ├── settings.py
    └── spiders
        ├── __init__.py
        └── __pycache__
まずは取得するitemsを定義しておきます。
import scrapy

class YahooWeatherCrawlItem(scrapy.Item):
    announcement_date = scrapy.Field()  # 発表日時
    date = scrapy.Field()               # 日付
    weather = scrapy.Field()            # 天気
    temperature = scrapy.Field()        # 気温
    rainy_percent = scrapy.Field()      # 降水確率
次に、spiderの本体をspidersフォルダ内に作成します。
# -*- coding: utf-8 -*-
import scrapy
from yahoo_weather_crawl.items import YahooWeatherCrawlItem

# spider
class YahooWeatherSpider(scrapy.Spider):

    name = "yahoo_weather_crawler"
    allowed_domains = ['weather.yahoo.co.jp']
    start_urls = ["https://weather.yahoo.co.jp/weather/jp/13/4410.html"]

    # レスポンスに対する抽出処理
    def parse(self, response):
        # 発表日時
        yield YahooWeatherCrawlItem(announcement_date = response.xpath('//*[@id="week"]/p/text()').extract_first())
        table = response.xpath('//*[@id="yjw_week"]/table')

        # 日付ループ
        for day in range(2, 7):

            yield YahooWeatherCrawlItem(
                # データ抽出
                date=table.xpath('//tr[1]/td[%d]/small/text()' % day).extract_first(),
                weather=table.xpath('//tr[2]/td[%d]/small/text()' % day).extract_first(),
                temperature=table.xpath('//tr[3]/td[%d]/small/font/text()' % day).extract(),
                rainy_percent=table.xpath('//tr[4]/td[%d]/small/text()' % day).extract_first(),
                )
4. いざ実行!
scrapy crawl yahoo_weather_crawler

2019-12-01 20:17:21 [scrapy.core.scraper] DEBUG: Scraped from <200 https://weather.yahoo.co.jp/weather/jp/13/4410.html>
{'announcement_date': '2019年12月1日  17時00分発表'}
2019-12-01 20:17:21 [scrapy.core.scraper] DEBUG: Scraped from <200 https://weather.yahoo.co.jp/weather/jp/13/4410.html>
{'date': '12月3日',
 'rainy_percent': '10',
 'temperature': ['17', '10'],
 'weather': '晴れ'}
2019-12-01 20:17:21 [scrapy.core.scraper] DEBUG: Scraped from <200 https://weather.yahoo.co.jp/weather/jp/13/4410.html>
{'date': '12月4日',
 'rainy_percent': '0',
 'temperature': ['15', '4'],
 'weather': '晴れ'}
2019-12-01 20:17:21 [scrapy.core.scraper] DEBUG: Scraped from <200 https://weather.yahoo.co.jp/weather/jp/13/4410.html>
{'date': '12月5日',
 'rainy_percent': '0',
 'temperature': ['14', '4'],
 'weather': '晴時々曇'}
2019-12-01 20:17:21 [scrapy.core.scraper] DEBUG: Scraped from <200 https://weather.yahoo.co.jp/weather/jp/13/4410.html>
{'date': '12月6日',
 'rainy_percent': '10',
 'temperature': ['11', '4'],
 'weather': '曇り'}
2019-12-01 20:17:21 [scrapy.core.scraper] DEBUG: Scraped from <200 https://weather.yahoo.co.jp/weather/jp/13/4410.html>
{'date': '12月7日',
 'rainy_percent': '30',
 'temperature': ['9', '3'],
 'weather': '曇り'}
上手く取れてそうですね!
せっかくなので、ファイルに出力してみましょう。
ファイルに出力する際はデフォルトだと日本語が文字化けしてしまうため、
settings.pyにエンコードの設定を加えておきます。
FEED_EXPORT_ENCODING='utf-8'
$ scrapy crawl yahoo_weather_crawler -o weather_data.json
...
[
{"announcement_date": "2019年12月1日  17時00分発表"},
{"date": "12月3日", "weather": "晴れ", "temperature": ["17", "10"], "rainy_percent": "10"},
{"date": "12月4日", "weather": "晴れ", "temperature": ["15", "4"], "rainy_percent": "0"},
{"date": "12月5日", "weather": "晴時々曇", "temperature": ["14", "4"], "rainy_percent": "0"},
{"date": "12月6日", "weather": "曇り", "temperature": ["11", "4"], "rainy_percent": "10"},
{"date": "12月7日", "weather": "曇り", "temperature": ["9", "3"], "rainy_percent": "30"}
]
出力できました!
次回はこの処理とAWSを組み合わせてサーバレスで動かしてみようと思います。
参考文献
Scrapy 1.8 documentation
https://doc.scrapy.org/en/latest/index.html
10分で理解する Scrapy
https://qiita.com/Chanmoro/items/f4df85eb73b18d902739
ScrapyによるWebスクレイピング
https://qiita.com/Amtkxa/items/4c1172c932264ae941b4

