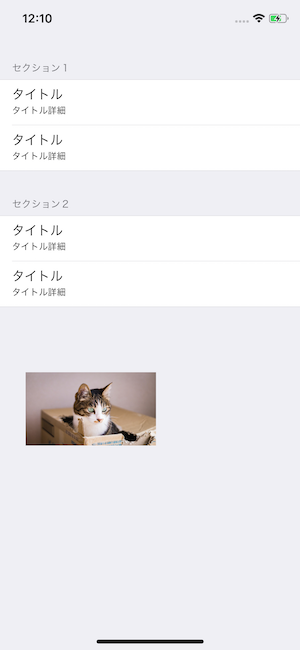
UIViewのxibの使い方(ソースからオートレイアウト)
利用方法に問題がないか、より良いやり方がないかわからないので、
情報を得るために共有しました。コメントに共有お願いします。
(オートレイアウトの優先度に詳しい方、ぜひコメントお願いします)
Step1.xibファイルを作成する。

1−1.xibファイルをプロジェクトに追加する。(ファイル名:SubviewMockUpView.xib)。
1−2.ストーリボードで取り込むViewはImageViewなので、外観を見やすく調整する。Freeformにしてマウスでサイズを調整すると、上の画像のようになる。
1−3.イメージビューを追加し、画像を設定する。イメージビューが中央に来るように下記の制約を追加する。(イメージビューのみを選択し、下記の操作を行う)。
 #### 1−4.画像のアスペクト比を設定する。(イメージビューのみを選択し、下記の操作を行う)。
 #### 1−5.設定したアスペクト比を調整する。(失敗した制約は、対象のアイテムを選択し、ここで削除できる)。
 ### Step2.xibのついになるクラスを作成する。ファイルはxibと同じ階層に置く。
```swift
//
// SubviewMockUpView.swift
// IOSMockUp
//
// Created by 神谷亮太 on 2018/10/20.
// Copyright © 2018年 神谷亮太. All rights reserved.
//
import UIKit
@IBDesignable
class SubviewMockUpView: UIView {
@IBOutlet weak var imageView: UIImageView!
required init?(coder aDecoder: NSCoder) {
    super.init(coder: aDecoder)
    loadView()
}

override init(frame: CGRect) {
    super.init(frame: frame)
    loadView()
}

func loadView() {
    // 自分のクラス名と同じ名前のxibファイルを読み込む。
    let xibName = String(describing: type(of: self))
    let xib = UINib(nibName: xibName, bundle: Bundle(for: type(of: self)))
    let view = xib.instantiate(withOwner: self, options: nil).first as! UIView

    // xibのview直下のイメージビューを自分のサブビューにする。
    guard let additionalTarget: UIView = view.subviews.first as? UIImageView else {
        print("First view type is \(String(describing: view.subviews.first)).")
        return
    }
    addSubview(additionalTarget)

    // ソースからオートレイアウトを設定する。

    // 親に同じ制約を設定する。
    addConstraints(additionalTarget.constraints)

    // オートレイアウトを有効にする。
    additionalTarget.translatesAutoresizingMaskIntoConstraints = false
    // イメージビューのアスペクト比の制約を自身の制約に追加する。
    // オートレイアウトの対象を設定する。
    let views = ["view": additionalTarget, "parent": self]
    // 優先度1000(規定値)の設定。
    // VFLでオートレイアウトを設定する。
    // Hは水平方向の制約、|は親ビューを示し、親ビューにviewが隣接する。また、幅はparent以下。
    addConstraints(NSLayoutConstraint.constraints(
        withVisualFormat: "H:|[view(<=parent)]", metrics:nil, views: views))
    // Vは垂直方向の制約。
    addConstraints(NSLayoutConstraint.constraints(
        withVisualFormat: "V:|[view(<=parent)]", metrics: nil, views: views))
    // 優先度750の設定。
    //(優先度250では適用されず。詳しい方教えてください)。
    // 画像の縦幅が親より小さい場合、親のサイズに調整する。
    addConstraints(NSLayoutConstraint.constraints(
        withVisualFormat: "H:[view(==parent@750)]", metrics:nil, views: views))
}
}
### Step3.xibの所有者を設定する。(@IBOutlet weak var imageView: UIImageView!を設定できるようになる)
<img width="1177" alt="スクリーンショット 2018-10-22 11.38.15.png" src="https://qiita-image-store.s3.amazonaws.com/0/203986/241d9f2e-5e8a-0ac2-17cd-5d8143e9f740.png">
### Step4.ストーリーボードに設定する。
<img width="1111" alt="スクリーンショット 2018-10-22 11.40.26.png" src="https://qiita-image-store.s3.amazonaws.com/0/203986/75a3c46b-903d-a9a3-d851-9e5cea06f5a1.png">
#### 3−1.制約なしでViewのすぐ下(見える場所)にUIViewを配置する。
#### 3−2.上の画像のようにCustom Classに作成したクラスを設定する。
#### 3−3.画像のサイズを調整すると、アスペクト比を維持する。ストリーボード上からも同じアスペクト比で制約を追加する。
<img width="159" alt="スクリーンショット 2018-10-22 11.41.02.png" src="https://qiita-image-store.s3.amazonaws.com/0/203986/c80c0702-5e7f-c387-35fa-af52b0ad713a.png">
<img width="115" alt="スクリーンショット 2018-10-22 11.41.21.png" src="https://qiita-image-store.s3.amazonaws.com/0/203986/72781b1c-84a9-d741-0855-257fbf26f0b7.png">
