冬のボーナスでメモリ64GBのミニPCを購入したため、思い立ってマスター1台、ワーカー2台構成のOpenShift 4クラスターを作ってみようかと。
ホストマシンの環境
CPU 2.59GHz 6コア。メモリ 64GB。HDD 1TB。
OSはWindows 10 Pro。仮想化ソフトはVMware Workstation 16 Pro。
ホストオンリーネットワークのDHCPは無効にしておく。
bastionサーバーを作る
1.仮想マシンとして、bastionサーバーを作る。
CPU 2個、メモリ 2GB、HDD 20GB。
今回はCentOS 8.3を利用。https://www.centos.org/download/
Minimalインストール。
NICは2つ付けて、1つはインターネット接続可能に、1つはOCP環境用の閉じたネットワークに接続。
インターネット側:ブリッジネットワーク->ens33、OCP環境用:ホストオンリーネットワーク->ens34。
インターネット側NIC(ens33)のIPアドレスは192.168.0.200に、OCP側NIC(ens34)のIPアドレスは192.168.1.1。
192.168.1.1はOCPの各ノードがゲートウェイとして利用する。
2.FirewallとSELinuxを緩める。ルーティングを有効にする。タイムゾーンをUTCにする。
ちな、externalゾーンはmasqueradeがデフォルトで有効になっている。
# nmcli connection modify ens33 connection.zone external
# nmcli connection modify ens34 connection.zone trusted
# setenforce permissive
# sed -i 's/SELINUX=enforcing/SELINUX=permissive/' /etc/selinux/config
# echo "net.ipv4.ip_forward = 1" >> /etc/sysctl.conf
# sysctl -p
# timedatectl set-timezone UTC
3./etc/hostsファイルを編集する。
以下行を追加。
192.168.0.200 bastion api.ocp.example.com
192.168.1.1 api-int.ocp.example.com
192.168.1.2 bootstrap.ocp.example.com
192.168.1.3 master1.ocp.example.com etcd-0.ocp.example.com
192.168.1.4 worker1.ocp.example.com
192.168.1.5 worker2.ocp.example.com
4.dnsmasqをインストールする。
# yum install -y dnsmasq bind-utils
port=53
address=/apps.ocp.example.com/192.168.0.200
srv-host=_etcd-server-ssl._tcp.ocp.example.com,etcd-0.ocp.example.com,2380
domain=ocp.example.com

no-dhcp-interface=ens33
dhcp-range=192.168.1.2,192.168.1.10,12h
dhcp-host=00:00:00:00:00:02,bootstrap.ocp.example.com,192.168.1.2
dhcp-host=00:00:00:00:00:03,master1.ocp.example.com,192.168.1.3
dhcp-host=00:00:00:00:00:04,worker1.ocp.example.com,192.168.1.4
dhcp-host=00:00:00:00:00:05,worker2.ocp.example.com,192.168.1.5
dhcp-option=option:router,191.168.1.1
dhcp-option=option:dns-server,191.168.1.1
dhcp-option=option:ntp-server,192.168.1.1
# systemctl start dnsmasq
# systemctl enable dnsmasq
5.ntpを構成する
(以下行のコメントを外す)
allow 192.168.0.0/16
# systemctl restart chronyd
6.HAProxyをインストールする。
(参考)https://medium.com/swlh/guide-okd-4-5-single-node-cluster-832693cb752b
→ https://github.com/cragr/okd4_files/blob/master/haproxy.cfg
# yum install -y haproxy
global
    maxconn     20000
    log         /dev/log local0 info
    chroot      /var/lib/haproxy
    pidfile     /var/run/haproxy.pid
    user        haproxy
    group       haproxy
    daemon

defaults
    mode                    http
    log                     global
    option                  httplog
    option                  dontlognull
    option http-server-close
    option forwardfor       except 127.0.0.0/8
    option                  redispatch
    retries                 3
    timeout http-request    10s
    timeout queue           1m
    timeout connect         10s
    timeout client          300s
    timeout server          300s
    timeout http-keep-alive 10s
    timeout check           10s
    maxconn                 20000

frontend api
    bind *:6443
    mode tcp
    default_backend api
backend api
    balance source
    mode tcp
    server bootstrap 192.168.1.2:6443 check
    server master1 192.168.1.3:6443 check

frontend mc
    bind *:22623
    mode tcp
    default_backend mc
backend mc
    balance source
    mode tcp
    server bootstrap 192.168.1.2:22623 check
    server master1 192.168.1.3:22623 check

frontend http
    bind *:80
    mode tcp
    default_backend http
backend http
    balance source
    mode tcp
    server worker1 192.168.1.4:80 check
    server worker2 192.168.1.5:80 check

frontend https
    bind *:443
    mode tcp
    default_backend https
backend https
    balance source
    mode tcp
    server worker1 192.168.1.4:443 check
    server worker2 192.168.1.5:443 check
# systemctl start haproxy
# systemctl enable haproxy
# firewall-cmd --zone=external --add-port=6443/tcp --add-port=80/tcp --add-port=443/tcp --permanent
# firewall-cmd --reload
7.httpdをインストールする。
Ignitionファイルダウンロード用。HAProxyにポート80がとられているので、8080でリスンする。
# yum install -y httpd
# sed -i 's/^Listen 80$/Listen 8080/' /etc/httpd/conf/httpd.conf
# systemctl start httpd
# systemctl enable httpd
OpenShiftのインストーラー等を準備する
(参考)https://access.redhat.com/documentation/ja-jp/openshift_container_platform/4.6/html/installing_on_bare_metal/index
サブスクリプションを購入しなくても、60日間は試用できる。
1.Red Hatアカウントを作る。
https://access.redhat.com/
必要ならgmailでメールアカウントを作るところから。
https://www.google.com/intl/ja/gmail/about/
2.以下のページからPull Secret(のみ)を手に入れる。
https://cloud.redhat.com/openshift/install/metal/user-provisioned
3.OCPインストーラー、クライアントを入手する。
一応インストールするバージョンを固定するため、これを書いている時点で入手できる最新版の4.6.9。
http://mirror.openshift.com/pub/openshift-v4/clients/ocp/4.6.9/
openshift-install-linux-4.6.9.tar.gz
openshift-client-linux-4.6.9.tar.gz
入手したら、OCPインストーラー、クライアントはbastionサーバーにコピーする。
4.RHCOSのISOを入手する。4.6系からRAWファイルは要らなくなった。
http://mirror.openshift.com/pub/openshift-v4/x86_64/dependencies/rhcos/4.6/4.6.8/
rhcos-live.x86_64.iso
5.ssh鍵を作っておく。以下をbastionサーバーで実行する。
# ssh-keygen -t rsa -b 4096 -N ''
6.OCPインストーラーを展開する。
# tar xvzf openshift-install-linux-4.6.9.tar.gz
7.OCクライアントを展開する。
# tar xvzf openshift-client-linux-4.6.9.tar.gz
# mv oc kubectl /usr/local/bin
8.インストール用の設定ファイルを作る。
install-config.yaml内のpullSecretの値は、先にダウンロードしたpull-secret.txtの内容で置き換える。
sshKeyの値は~/.ssh/id_rsa.pubの内容で置き換える。
# mkdir ocp-install
apiVersion: v1
baseDomain: example.com
compute:
- hyperthreading: Disabled
  name: worker
  replicas: 2
controlPlane:
  hyperthreading: Disabled
  name: master
  replicas: 1
metadata:
  name: ocp
networking:
  clusterNetwork:
  - cidr: 10.128.0.0/14
    hostPrefix: 23
  networkType: OpenShiftSDN
  serviceNetwork:
  - 172.30.0.0/16
platform:
  none: {}
fips: false
pullSecret: '{"auths":...'
sshKey: 'ssh-rsa AAAAB...'
9.Ignition設定ファイルとかを作る。
ここから先、OCPのインストール完了までを24時間以内に終える必要がある。
なお、cluster-scheduler-02-config.ymlのmastersSchedulableは、デフォルトでfalseになる様だ?
# cp ocp-install/install-config.yaml ./install-config.yaml.bk
# ./openshift-install create manifests --dir=ocp-install
# ./openshift-install create ignition-configs --dir=ocp-install
10.Ignitionファイルをhttpdでダウンロードできるように配置する。
# cp ocp-install/*.ign /var/www/html/
# chmod 644 /var/www/html/*.ign
OpenShiftをインストールする。
手順1~2は例として、bootstrapのみ。master1、worker1、worker2も同様に仮想マシンを作る必要がある。
1.bootstrap仮想マシンを作る。
CPUは4つ、メモリは16GB。ディスクは120GB。
ネットワークは192.168.1.xのセグメント(ホストオンリーネットワーク)につなぐ。
NICのMACアドレスをDHCPで指定したものに合わせる(bootstrapなら00:00:00:00:00:02)。
先にダウンロードしたCoreOSのISO(rhcos-live.x86_64.iso)で起動するようCDドライブを設定する。
2.仮想マシンを起動し、プロンプトが表示されたら、以下のコマンドを実行する。
4.6系からRAWファイルをWEBサーバーから入手する必要はない。
ここが手入力というのが難儀。
ロケールが英語なので、「=」は日本語キーボードでは「^」、「:」は「Shift+;」で入力できると思う。
# sudo coreos-installer install --ignition-url=http://192.168.1.1:8080/bootstrap.ign /dev/nvme0n1 --insecure-ignition
# reboot
なお、手前の導入環境がVMware Workstationでディスクがssdなので、インストール先ディスクのデバイス名がnvme0n1。
デバイス名が不明な場合はlsblkコマンドを実行するとそれらしいのが推定できる。
OSが再起動するとログインプロンプトが表示されるが、この状態で放っておく。
3.仮想マシンを作ってCoreOSをインストールする手順を、master1、worker1、worker2に対しても同様に行う。
仮想マシンのスペックは、
master1: CPU x4、メモリ 16 GB、HDD 120 GB
worker1,2: CPU x2、メモリ 8 GB、HDD 120 GB
coreosのプロンプトで実行するコマンドはmaster、workerそれぞれ以下の通り。
ignファイル名はmasterはmaster.ign(数字なし)、workerはworker.ign(数字なし)なので注意。
# sudo coreos-installer install --ignition-url=http://192.168.1.1:8080/master.ign /dev/nvme0n1 --insecure-ignition
# reboot
# sudo coreos-installer install --ignition-url=http://192.168.1.1:8080/worker.ign /dev/nvme0n1 --insecure-ignition
# reboot
4.シングルマスターだとetcdが3つ起動しないため、インストーラー実行中に以下の様にetcd設定を書き換えないとインストールが最後まで完了しない。
https://bugzilla.redhat.com/show_bug.cgi?id=1805034
# export KUBECONFIG=ocp-install/auth/kubeconfig
# oc patch etcd cluster -p='{"spec": {"unsupportedConfigOverrides": {"useUnsupportedUnsafeNonHANonProductionUnstableEtcd": true}}}' --type=merge
5.すべての仮想マシンを作成したら、bastionサーバーで以下を実行してOpenShiftのセットアップ完了を待つ。
# ./openshift-install --dir=ocp-install wait-for bootstrap-complete
(実行結果)
INFO Waiting up to 20m0s for the Kubernetes API at https://api.ocp.example.com:6443...
INFO API v1.19.0+7070803 up
INFO Waiting up to 30m0s for bootstrapping to complete...
INFO It is now safe to remove the bootstrap resources
INFO Time elapsed: 0s
6.haproxy設定からbootstrapの割り振りを外す。
(以下、2行にコメントを付けて保存)
#    server bootstrap 192.168.1.2:6443 check
...
#    server bootstrap 192.168.1.2:22623 check
# systemctl restart haproxy
7.ワーカーノードを承認する。
# oc get nodes
# oc get csr -o go-template='{{range .items}}{{if not .status}}{{.metadata.name}}{{"\n"}}{{end}}{{end}}' | xargs oc adm certificate approve
(何回か同じコマンドを実行する必要があるかも)
# oc get csr -o go-template='{{range .items}}{{if not .status}}{{.metadata.name}}{{"\n"}}{{end}}{{end}}' | xargs oc adm certificate approve
# oc get nodes
(実行結果)
[root@bastion ~]# oc get csr
NAME        AGE     SIGNERNAME                                    REQUESTOR                                                                   CONDITION
csr-2px68   155m    kubernetes.io/kubelet-serving                 system:node:master1                                                         Approved,Issued
csr-46kc7   10m     kubernetes.io/kube-apiserver-client-kubelet   system:serviceaccount:openshift-machine-config-operator:node-bootstrapper   Approved,Issued
csr-4kxjf   2m5s    kubernetes.io/kubelet-serving                 system:node:worker2                                                         Approved,Issued
csr-7bd8d   2m1s    kubernetes.io/kubelet-serving                 system:node:worker1                                                         Approved,Issued
csr-8v4ll   156m    kubernetes.io/kube-apiserver-client-kubelet   system:serviceaccount:openshift-machine-config-operator:node-bootstrapper   Approved,Issued
csr-cwd65   5m41s   kubernetes.io/kube-apiserver-client-kubelet   system:serviceaccount:openshift-machine-config-operator:node-bootstrapper   Approved,Issued
csr-h2z7g   25m     kubernetes.io/kube-apiserver-client-kubelet   system:serviceaccount:openshift-machine-config-operator:node-bootstrapper   Approved,Issued
csr-jx5mj   2m49s   kubernetes.io/kube-apiserver-client-kubelet   system:serviceaccount:openshift-machine-config-operator:node-bootstrapper   Approved,Issued
[root@bastion ~]# oc get nodes
NAME      STATUS   ROLES    AGE     VERSION
master1   Ready    master   155m    v1.19.0+7070803
worker1   Ready    worker   2m9s    v1.19.0+7070803
worker2   Ready    worker   2m13s   v1.19.0+7070803
8.各種オペレーターが起動してくるのを待つ。
authenticationはFalseのままでOK。現時点でシングルマスター非対応のため。
# watch -n5 oc get clusteroperators
(実行結果)
[root@bastion ~]# oc get clusteroperators
NAME                                       VERSION   AVAILABLE   PROGRESSING   DEGRADED   SINCE
authentication                             4.6.9     False       False         True       168m
cloud-credential                           4.6.9     True        False         False      179m
cluster-autoscaler                         4.6.9     True        False         False      167m
config-operator                            4.6.9     True        False         False      168m
console                                    4.6.9     True        False         False      2m32s
csi-snapshot-controller                    4.6.9     True        False         False      43m
dns                                        4.6.9     True        False         False      146m
etcd                                       4.6.9     True        False         False      55m
image-registry                             4.6.9     True        False         False      51m
ingress                                    4.6.9     True        False         False      14m
insights                                   4.6.9     True        False         False      168m
kube-apiserver                             4.6.9     True        False         False      54m
kube-controller-manager                    4.6.9     True        False         False      166m
kube-scheduler                             4.6.9     True        False         False      166m
kube-storage-version-migrator              4.6.9     True        False         False      14m
machine-api                                4.6.9     True        False         False      167m
machine-approver                           4.6.9     True        False         False      168m
machine-config                             4.6.9     True        False         False      167m
marketplace                                4.6.9     True        False         False      146m
monitoring                                 4.6.9     True        False         False      8m27s
network                                    4.6.9     True        False         False      169m
node-tuning                                4.6.9     True        False         False      168m
openshift-apiserver                        4.6.9     True        False         False      50m
openshift-controller-manager               4.6.9     True        False         False      167m
openshift-samples                          4.6.9     True        False         False      41m
operator-lifecycle-manager                 4.6.9     True        False         False      167m
operator-lifecycle-manager-catalog         4.6.9     True        False         False      167m
operator-lifecycle-manager-packageserver   4.6.9     True        False         False      10m
service-ca                                 4.6.9     True        False         False      168m
storage                                    4.6.9     True        False         False      168m
9.ログインユーザーadminを作る。パスワードもadminで。
# htpasswd -c -B -b admin.htpasswd admin admin
# oc create secret generic htpass-secret --from-file=htpasswd=admin.htpasswd -n openshift-config
apiVersion: config.openshift.io/v1
kind: OAuth
metadata:
  name: cluster
spec:
  identityProviders:
  - name: my_htpasswd_provider
    mappingMethod: claim
    type: HTPasswd
    htpasswd:
      fileData:
        name: htpass-secret
# oc apply -f htpasswd.yaml
# oc adm policy add-cluster-role-to-user cluster-admin admin
OpenShiftにログインする
1.Webブラウザを実行するPCのhostsファイルに以下のエントリを追加する。
(notepad C:\windows\system32\drivers\etc\hosts)
192.168.0.200 console-openshift-console.apps.ocp.example.com oauth-openshift.apps.ocp.example.com
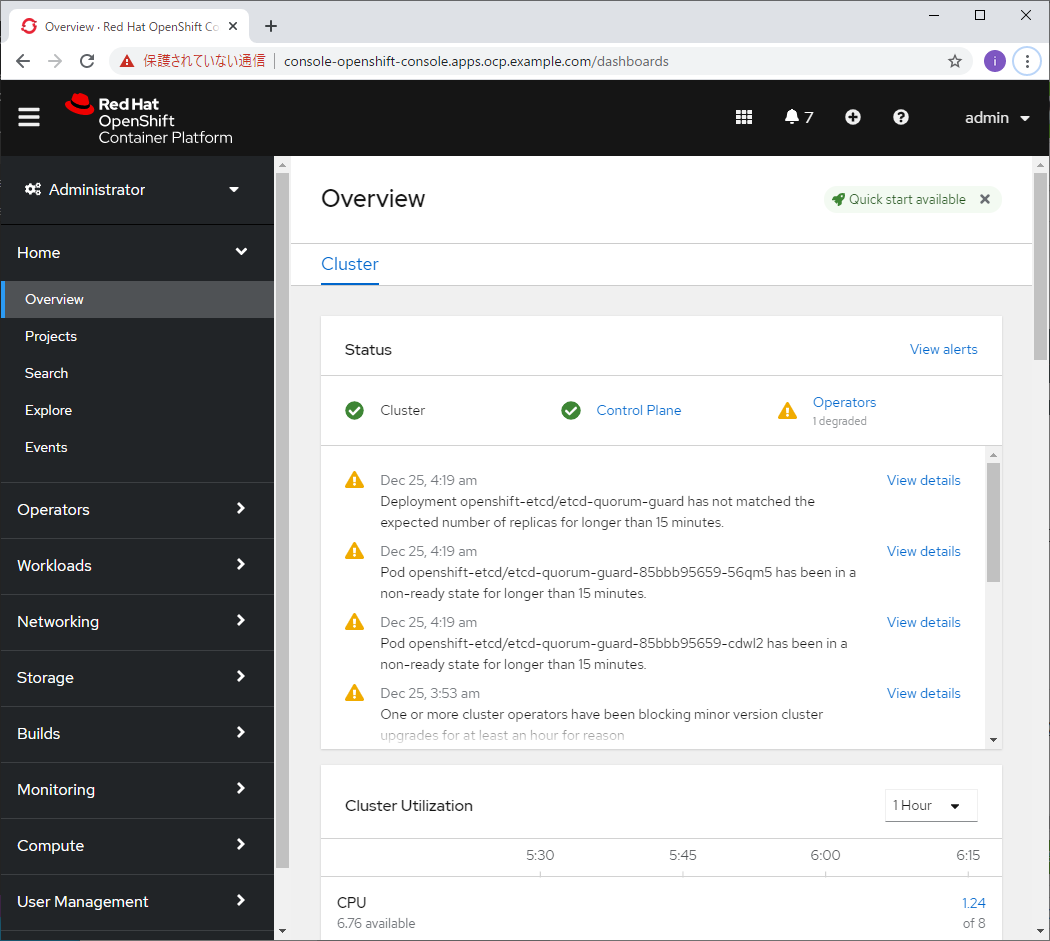
2.Webブラウザで以下のURLにアクセスする。
https://console-openshift-console.apps.ocp.example.com
3.my_htpasswd_providerを選び、ユーザー名admin、パスワードadminでログインする。
おわりに
シングルマスター構成、シングルノード構成か、CRC向けに公式でも現在対応中の案件らしい。
https://github.com/openshift/enhancements/pull/482