昨日作ったJitsi MeetサーバーにIP電話で音声参加できるよう、AsterikでSIPサーバーを作る。
仮想マシンを準備する
1.例によって、Amazon Lightsailで仮想マシンを作る。
https://lightsail.aws.amazon.com/
インスタンスロケーションの選択: ap-northeast、ゾーンD
インスタンスイメージの選択: Linux/unix、OSのみ、Ubuntu 20.04 LTS
インスタンスプランの選択: $3.5USD(メモリ 512 GB、CPU 1個、SSD 20GB)
インスタンスを確認: asterisk
2.インスタンス作成後、インスタンス管理画面 > ネットワークにて以下の設定を追加。
・一応、静的IPアドレスを割り当てておく。
・ファイアウォールのルールは以下の様に設定する。
SSH TCP 22
カスタム UDP 5060
なお、5060ポートに対してはボルチモアとかの海外からブルートフォース的な認証失敗アクセスがそこそこやってくるので、接続元のIPアドレスはせめて日本国内からに絞るのがよさそう。
https://www.nic.ad.jp/ja/dns/jp-addr-block.html
3.DNS名を割り当てておく。
一応、静的IPを割り当ててDNSにレコード登録しておく。
例としては以降、asterisk.example.com。
Asteriskをインストールする
これを書いている時点で最新版はv18.1か。
https://github.com/asterisk/asterisk
1.インストールというか野良ビルド。Asteriskサーバーにssh接続し、rootユーザーで以下のコマンドを実行する。
# apt-get update
# apt-get install build-essential
# git clone https://github.com/asterisk/asterisk
# cd asterisk
# apt-get install libedit-dev
# apt-get install uuid-dev
# apt-get install libjansson-dev
# apt-get install libxml2-dev
# apt-get install libsqlite3-dev
# ./configure
# make
# make install
# make samples
2.Asteriskの構成ファイルを2つ、修正する。
とりあえず、番号/ユーザー6001がJitsi Meet用。
6002がスマホとかのSIPクライアント用。
[transport-udp-nat]
type=transport
protocol=udp
bind=0.0.0.0
local_net=172.26.0.0/20
external_media_address=<asteriskサーバーのPublicの静的IP>
external_signaling_address=<asteriskサーバーのPublicの静的IP>

[6001]
type=endpoint
context=from-internal
disallow=all
allow=ulaw
auth=6001
aors=6001

[6001]
type=auth
auth_type=userpass
password=<パスワード>
username=6001

[6001]
type=aor
max_contacts=10

[6002]
type=endpoint
context=from-internal
disallow=all
allow=ulaw
auth=6002
aors=6002

[6002]
type=auth
auth_type=userpass
password=<パスワード>
username=6002

[6002]
type=aor
max_contacts=10
(ファイルの最後に以下を追加)

exten = 6001,1,Dial(PJSIP/6001,30,r)
same = n.Hangup()

exten = 6002,1,Dial(PJSIP/6002,30,r)
same = n.Hangup()
3.Asteriskを起動する。
# make config
# systemctl enable asterisk
# systemctl start asterisk
Jitsi MeetをAsteriskに接続する
1.Jisti Meetサーバーにsshでログインして以下を実行。
Jigasiという、Jitsi Meetと連携するSIPクライアントを導入する。
# sudo apt install jigasi
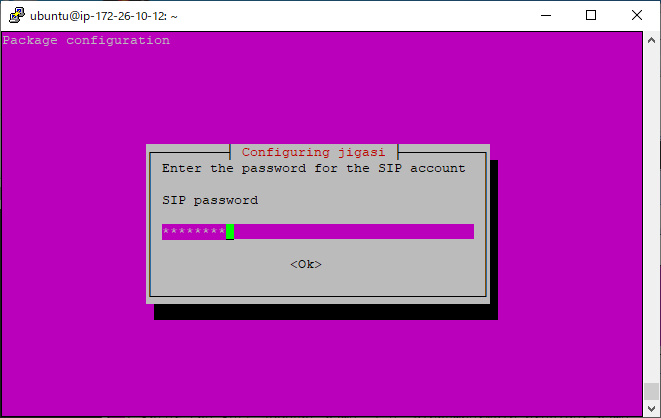
導入中にSIPユーザー名とパスワードを聞かれるので以下入力する。
SIP username: 6001@asterisk.example.com
SIP password: <パスワード>


2.jigasiの設定ファイルの最後に以下を追加する。
(最終行に追加)
net.java.sip.communicator.impl.protocol.sip.acc1403273890647.AUTHORIZATION_NAME=6001
net.java.sip.communicator.service.gui.ALWAYS_TRUST_MODE_ENABLED=true
3.もしかすると、/etc/hostsを修正してjitsi-meet、asteriskサーバーがお互いにLightsailの内部アドレスで名前解決できるようにすると(NATを経由せずにお互いが通信できると)良いことがあるかもしれない。
(割愛)
4.jigasiを起動する。ついでにjicofoを再起動する。
# systemctl stop jicofo
# systemctl stop jigasi
# systemctl start jigasi
# systemctl start jicofo
4.PCのWebブラウザからJitsi Meetにアクセスし、「siptest」という会議室を開く。(外からのSIP接続がsiptestという名前の会議室につながるため)
5.画面上の「Invite more people」をクリックして、「Invite your contacts」の入力Boxが追加されていればOK。


スマホのSIPクライアントでAsteriskにつなぐ
1.詳細割愛するが、例えばMIZUDROIDとかのSIPクライアントをPlayストアからインストールし、Settingから以下を設定する。
SIPサーバー: asterisk.example.com
Username: 6002
Password: <パスワード>
2.6001番(Jitsi Meet)に電話をかける。
3.Jitsi Meetの画面で6002番のユーザーが接続されたのを確認する。

これでお互いの音声が聞こえるようなら成功だが、まあ、クソ不安定でなかなか難しい。jigasiがSIPサーバーにログインしに行くタイミングがいまいちつかめなかったり、片方からしか音声聞こえなかったり、NATの影響とかが良くわからなかったり、一回保留して解除すると声が聞こえ始めるようになるとか。
SIPとか使わずにJitsi Meetで音声やり取りできればいいだろうという事である。
(追記)NATで片方からしか音声が聞こえない件は、IBM Cloudの仮想マシンがパブリックIPを直接持てるのでそれで解決した。
https://qiita.com/rk05231977/items/d7360724806f10346089
