はじめに
Prometheusの公式サイトに公開された数多くあるExporterの中からMySQL用のExporterをKubernetes環境(というかICP:IBM Cloud Private環境)でデプロイしてメトリクスを取得した事例を記載する。
ExporterをDockerコンテナで実装、もしくはOS上に導入した、という事例はあったのですが、k8s環境で実装という例(わかりやすい例)がなかったのでその実装について書きます。
構成図
※Prometheusが直接アクセスするのはMySQLのPodではなくExporterのPodとなります。(当初勘違いしていました・・。)
構成
Prometheus:v2.3.1(IBMのchart使用:リンク)
MySQL:latestのdockerイメージ使用
ICP:v2.1.0.3
設定作成
下記のマニフェストファイルを作成。
なおICP環境を使用しておりますので、DockerイメージはICPのプライベートレジストリに格納したものを使用しております。(適宜読み替えてください)
・MySQL用デプロイメント
今回はPrometheusのExporter検証のため特にMySQLの設定はいじっていません。
apiVersion: apps/v1
kind: Deployment
metadata:
  name: mysql
  namespace: default
spec:
  replicas: 1
  selector:
    matchLabels:
      app: mysql
  strategy:
    type: Recreate
  template:
    metadata:
      labels:
        app: mysql
    spec:
      containers:
      - image: mycluster.icp:8500/default/mysql:latest
        name: mysql
        env:
        - name: MYSQL_ROOT_PASSWORD
          valueFrom:
            secretKeyRef:
              name: mysql-secret
              key: root-password
        ports:
        - containerPort: 3306
          name: mysql
・MySQL用のsecret(パスワード:password)
apiVersion: v1
kind: Secret
metadata:
  name: mysql-secret
  namespace: default
type: Opaque
data:
  root-password: cGFzc3dvcmQ=
・MySQL用のservice
apiVersion: v1
kind: Service
metadata:
  name: mysql
  namespace: default
spec:
  ports:
  - port: 3306
  selector:
    app: mysql
・MySQL Exporter用デプロイメント
Annotationに次の2行及び接続情報を追加すればPrometheusがscrape処理によりメトリクスを自動で取得してくれます。
prometheus.io/scrape: "true"
prometheus.io/port: "9104"
apiVersion: extensions/v1beta1
kind: Deployment
metadata:
  name: mysqld-exporter
spec:
  selector:
    matchLabels:
      app: mysqld-exporter
  replicas: 1
  template:
    metadata:
      annotations:
        prometheus.io/scrape: "true"
        prometheus.io/port: "9104"
      labels:
        app: mysqld-exporter
    spec:
      containers:
      - name: mysqld-exporter
        image: mycluster.icp:8500/default/prom/mysqld-exporter:latest
        env:
        - name: DATA_SOURCE_NAME
          valueFrom:
            secretKeyRef:
              name: mysql-ex-secret
              key: password
        ports:
        - containerPort: 9104
・MySQL Exporter用のsecret(パスワードはpassword、port番号を含めています)
apiVersion: v1
kind: Secret
metadata:
  name: mysql-ex-secret
  namespace: default
type: Opaque
data:
  password: cm9vdDpwYXNzd29yZEAobXlzcWw6MzMwNikv
# echo "cm9vdDpwYXNzd29yZEAobXlzcWw6MzMwNikv" | base64 -d
root:password@(mysql:3306)/
↑ エンコードの際は# echo -n "root:password@(mysql:3306)/" | base64コマンドで。-nを忘れないようにしないと改行が入ってしまいます。
あとは、すべて作成すればOK。
# kubectl create -f mysql-secret.yaml
# kubectl create -f mysql-deploymant.yaml
# kubectl create -f mysql-service.yaml
# kubectl create -f mysql-ex-secret.yaml
# kubectl create -f mysql-ex-deployment_a.yaml
作成結果を確認。
# kubectl get pod
NAME                                 READY     STATUS    RESTARTS   AGE
mysql-7cc9b5d75d-4qgtg               1/1       Running   0          10d
mysqld-exporter-7d875c99c0-p8rsx     1/1       Running   0          10d
#
# kubectl get svc
NAME           TYPE        CLUSTER-IP   EXTERNAL-IP   PORT(S)           AGE
mysql          ClusterIP   10.0.0.6     <none>        3306/TCP          10d
#
# kubectl get secret
NAME                  TYPE                                  DATA      AGE
mysql-ex-secret       Opaque                                1         10d
mysql-secret          Opaque                                1         10d
OK。
Prometheusではどう見えるか
まずはCLI。
ExporterのIP確認。→IP:10.1.123.176
# kubectl describe po mysqld-exporter-7d875c99c0-p8rsx
Name:           mysqld-exporter-7d875c99c0-p8rsx
Namespace:      default
(中略)
IP:             10.1.123.176
(後略)
Curlでアクセスし、mysql**というメトリクスが取れているかを確認。
# curl http://10.1.123.176:9104/metrics
# HELP go_gc_duration_seconds A summary of the GC invocation durations.
# TYPE go_gc_duration_seconds summary
(中略)
 HELP mysql_exporter_collector_duration_seconds Collector time duration.
# TYPE mysql_exporter_collector_duration_seconds gauge
mysql_exporter_collector_duration_seconds{collector="collect.global_status"} 0.004177075
mysql_exporter_collector_duration_seconds{collector="collect.global_variables"} 0.010698232
mysql_exporter_collector_duration_seconds{collector="collect.info_schema.tables"} 0.043587385
mysql_exporter_collector_duration_seconds{collector="collect.slave_status"} 0.04456449
mysql_exporter_collector_duration_seconds{collector="connection"} 0.001885118
# HELP mysql_exporter_last_scrape_error Whether the last scrape of metrics from MySQL resulted in an error (1 for error, 0 for success).
(後略)
取得OK!
(参考)取得したメトリクスは2379行分。
# curl http://10.1.123.176:9104/metrics | wc -l
  % Total    % Received % Xferd  Average Speed   Time    Time     Time  Current
                                 Dload  Upload   Total   Spent    Left  Speed
100  177k  100  177k    0     0  3238k      0 --:--:-- --:--:-- --:--:-- 3220k
2379
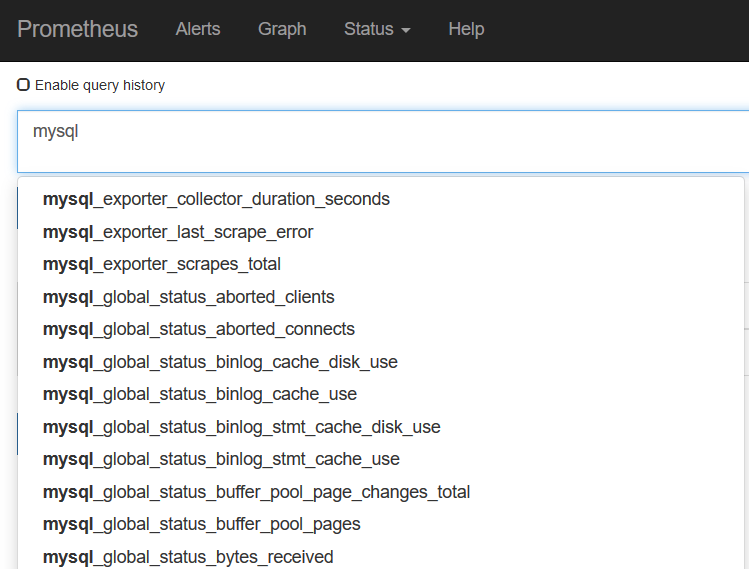
GUIでも、、↓はい、取得OK!
まとめ
Exporter用のデプロイメントyamlファイルの書き方がわからなかったのですが、Annotationに必要次項とEnvにMySQLの接続情報を記載すればよいだけのようです。
参考
kubernetes-engine-samples
Exporters and integrations
mysqld_exporter

