環境
- OS:RHEL-7.2_HVM_GA-20151112-x86_64-1-Hourly2-GP2(Redhat 7.2)
- Zabbix 2.4.8
- AWS RDS MySQL 5.6
※RDSは事前に作成しておいてください。
インストール
rootユーザへ
$ sudo su
zabbixのリポジトリを指定
# rpm -ivh http://repo.zabbix.com/zabbix/2.4/rhel/7/x86_64/zabbix-2.4.8-1.el7.x86_64.rpm

http://repo.zabbix.com/zabbix/2.4/rhel/7/x86_64/zabbix-2.4.8-1.el7.x86_64.rpm を取得中
警告: /var/tmp/rpm-tmp.A5Chm8: ヘッダー V4 DSA/SHA1 Signature、鍵 ID 79ea5ed4: NOKEY
準備しています...              ################################# [100%]
更新中 / インストール中...
   1:zabbix-2.4.8-1.el7               ################################# [100%]
IUS/EPELのリポジトリを設定
RHELはデフォルトのリポジトリだとzabbix-web-mysqlに必要なphp-mbstringなどのライブラリが入っていない。そのため、デフォルトのphpをアンインストールし、IUSのリポジトリから新規でphp56を追加する。IUSはepelに依存するので、まずはepelのリポジトリをRPMで追加する。
# rpm -Uvh http://download-i2.fedoraproject.org/pub/epel/7/x86_64/e/epel-release-7-6.noarch.rpm
http://download-i2.fedoraproject.org/pub/epel/7/x86_64/e/epel-release-7-6.noarch.rpm を取得中
警告: /var/tmp/rpm-tmp.CFcYCI: ヘッダー V3 RSA/SHA256 Signature、鍵 ID 352c64e5: NOKEY
準備しています...              ################################# [100%]
更新中 / インストール中...
   1:epel-release-7-6                 ################################# [100%]
リポジトリをアップデート
# yum update
続いてIUSのリポジトリをRPMで追加
# rpm -ivh http://dl.iuscommunity.org/pub/ius/stable/Redhat/7/x86_64/ius-release-1.0-14.ius.el7.noarch.rpm
http://dl.iuscommunity.org/pub/ius/stable/Redhat/7/x86_64/ius-release-1.0-14.ius.el7.noarch.rpm を取得中
警告: /var/tmp/rpm-tmp.mKMIqR: ヘッダー V4 DSA/SHA1 Signature、鍵 ID 9cd4953f: NOKEY
準備しています...              ################################# [100%]
更新中 / インストール中...
   1:ius-release-1.0-14.ius.el7       ################################# [100%]
リポジトリをアップデート
# yum update
PHP,Apache,MariaDBのインストール
PHPをインストール
# yum --enablerepo=ius,epel -y install php56u
Apacheをインストール
# yum -y install httpd
MariaDBをインストール
# yum -y install mariadb
Zabbixのインストール
yumでパッケージをインストール
# yum -y install zabbix-server-mysql zabbix-web-mysql zabbix-web-japanese zabbix-agent
apache起動
# systemctl enable httpd
Created symlink from /etc/systemd/system/multi-user.target.wants/httpd.service to /usr/lib/systemd/system/httpd.service.
# systemctl start httpd
zabbix-agentの起動
# systemctl enable zabbix-agent
Created symlink from /etc/systemd/system/multi-user.target.wants/zabbix-agent.service to /usr/lib/systemd/system/zabbix-agent.service.
# systemctl start zabbix-agent
zabbix-serverの起動
# systemctl enable zabbix-server
Created symlink from /etc/systemd/system/multi-user.target.wants/zabbix-server.service to /usr/lib/systemd/system/zabbix-server.service.
# systemctl start zabbix-server
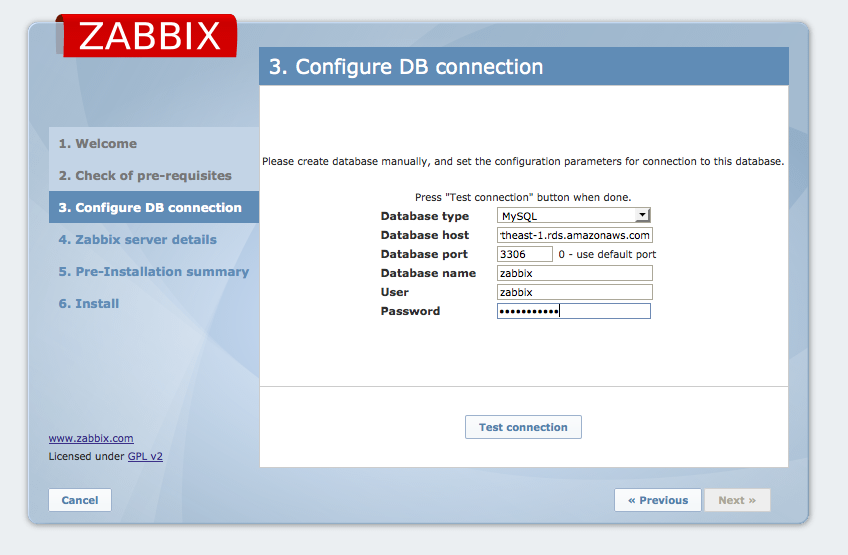
RDSに接続し、Zabbixの設定を流し込む
RDSを作成済みであることを条件に、下記コマンドでDBサーバにログインできるか確認
# mysql -u zabbix -p -h 作成したRDS MySQLのPublic DNS名
DBを作成
MySQL [(none)]> create database zabbix character set utf8 collate utf8_bin;
DBへZabbixのテーブル作成
zabbixユーザなら全てのホストからアクセスできるように設定
MySQL [(none)]> grant all privileges on zabbix.* to zabbix@"%" identified by 'Password';
一度MySQLからログアウトし、Zabbixの初期設定テーブル作成のsqlがあるディレクトリへ移動
# cd /usr/share/doc/zabbix-server-mysql-2.4.8/create
下記のコマンドを実行。zabbix databaseにsqlでテーブルを作成。
# mysql -u zabbix -p zabbix -h 作成したRDS MySQLのPublic DNS名 < schema.sql
# mysql -u zabbix -p zabbix -h 作成したRDS MySQLのPublic DNS名 < images.sql
# mysql -u zabbix -p zabbix -h 作成したRDS MySQLのPublic DNS名 < data.sql
Zabbixの設定ファイルにDBアクセスを追加
zabbixのconfファイルに接続するDBのパブリックDNS名を登録
# vi /etc/zabbix/zabbix_server.conf
DBHost=作成したRDS MySQLのPublic DNS名
DBName=zabbix
DBUser=zabbix
DBPassword=Password
PHPの設定ファイル変更
# sed -i -e "s/;date.timezone =/date.timezone = Asia\/Tokyo/g" /etc/php.ini
# sed -i -e "s/;always_populate_raw_post_data/always_populate_raw_post_data/g" /etc/php.ini
SELinuxの無効化
SELinuxが有効状態だとZabbixがDB接続できないため、SELinuxを無効化する
# getenforce
Enforcing
# setenforce Permissive
# getenforce
Permissive
下記ファイルを書き換え、永久無効にする。
# vi /etc/selinux/config
 #SELINUX=enforcing
 SELINUX=disabled
ZabbixとApacheを再起動
systemctl restart zabbix-server.service
systemctl restart httpd.service
Zabbix Webコンソールへアクセス
http://IPアドレス/zabbix/ へアクセス

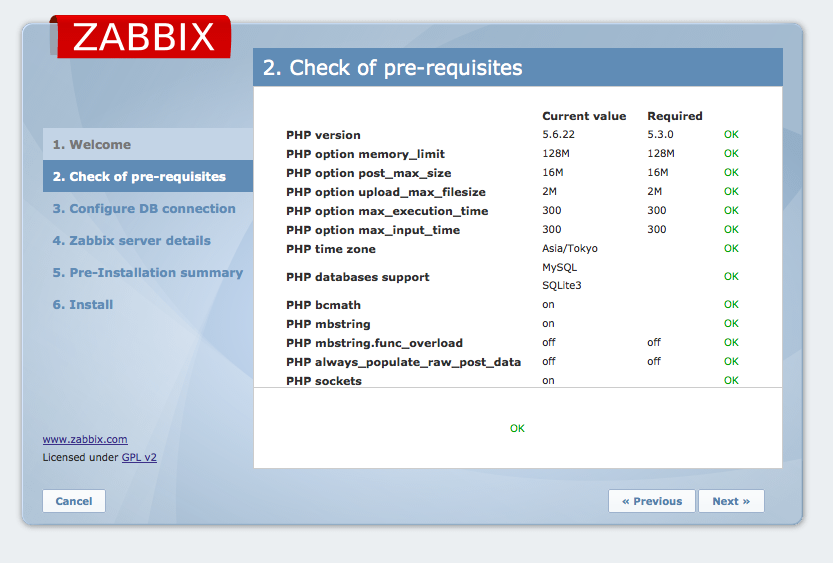
PHPのTimezoneの設定等に問題なければ全てOKとなるはずです。
SELinuxの無効化をしていない場合はここでエラーが発生する可能性があります。
まとめ
AWS上でRHEL7を立てた場合、サブスクリプションを購入していなければ、上記のようなリポジトリ追加が必要となりました。AWSではRHELのサポート体制も持ち込みライセンスか、そうでないかでサポートも異なりますので、その点注意の上、インストールを行う必要があります。
今回のZabbixサーバの方は特に冗長化をしておりませんので、次はZabbix側のHA化をしたいと思います。
