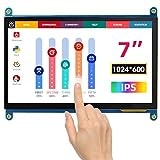
Raspberry Pi用として売られている7インチのディスプレイには色々なものがありますが、ここでは1024x600pxでUSB接続のタッチスクリーンのものの設定方法を説明します。
あ、英語が理解できるならWaveShareのWIkiを見た方が正確で手っ取り早いです。。。
購入
今回は下記の製品を購入しました。
Elecrow7インチHDMI液晶ディスプレイ1024X600高解像度 Raspberry Pi B+/2B/3/Pcduino Banana Pi対応
この製品はWaveShare 7inch HDMI LCD (C)のコピー品(?)のようです。そちらも同じ設定で動くかもしれません。←動きました。
イメージの作成
Raspbianの公式サイトから"RASPBIAN JESSIE WITH PIXEL"というイメージファイルをダウンロードして、microSDに書き込みます。~~MacならApplePi Bakerというアプリを使うのが便利。~~公式からRaspberry Pi Imagerが出てるのでそれを使うのが便利。イメージを焼いたら、ルートディレクトリにsshという名前の空ファイルを置いておきます。こうしないとsshでログインできません。
config.txtの設定
このディスプレイを使うにはconfig.txtに解像度の設定を記述しておく必要があります。microSDカードをMacでマウントして、ルートディレクトリにあるconfig.txtを開き、下記の行を追加します。
# Force use HDMI
hdmi_force_hotplug=1
# force a specific HDMI mode
hdmi_group=2
hdmi_mode=87

# custom display resolution (480x320 looks good , and 720x480 is not too bad too,3rd res is: 810x540 )
#          /----------------- Width: 480px ( or 720px /or 810px)
#          |   /------------- Height: 320px ( or 480px /or 540px)
#          |   |   /--------- Refresh: 60Hz
#          |   |   | /------- Aspect ratio: 6=15:9 (1=4:3, 2=14:9, 3=16:9, 4=5:4, 5=16:10)
#          |   |   | | /----- Margins: 0=disabled (1=enabled)
#          |   |   | | | /--- Interlace: 0=progressive (1=interlaced)
#          |   |   | | | | /- Reduced blanking: 0=normal (1=reduced)
#          |   |   | | | | |
hdmi_cvt 1024 600 60 3 0 0 0

# uncomment to force a HDMI mode rather than DVI. This can make audio work in
# DMT (computer monitor) modes
hdmi_drive=2
タッチの設定
何もする必要はありません。そのままでタッチ機能は動作します。ただしキャリブレーションは必要かもしれません。
