はじめに
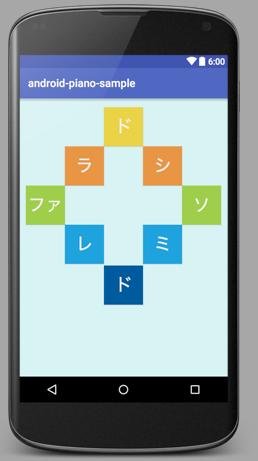
 こんな感じのものを作っていきます。
ボタンを押すと音がなる簡単なアプリを作った状態から、それを参考にしながら作る形式で紹介していきます。
このページの読者はプログラミングの初級者を想定しているので、表現が回りくどい部分があります。あらかじめご了承ください。
ページに間違い等がございましたら、コメントでご指摘くださると嬉しいです。
オリジナルの状態
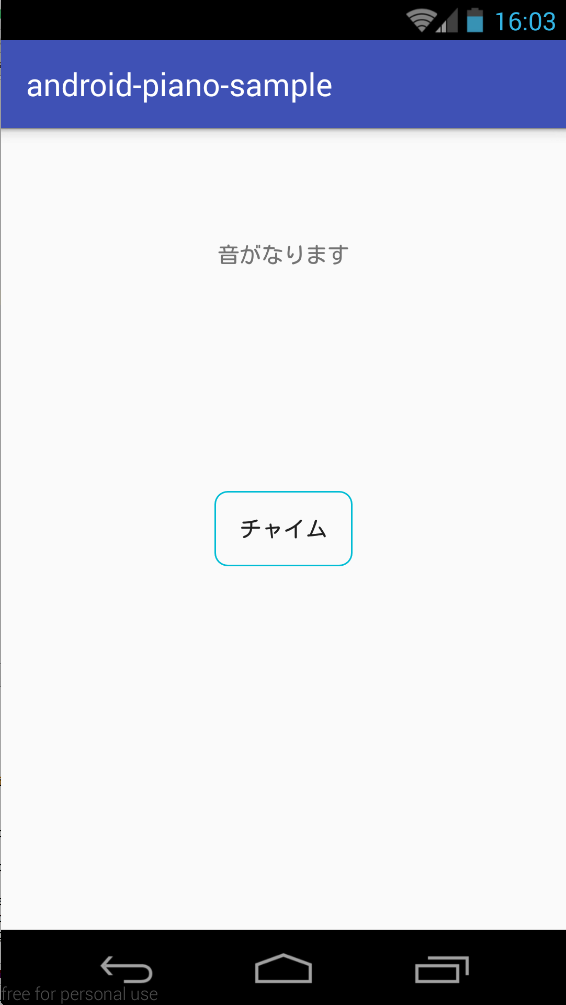
上の画像のようにボタンを押すとチャイムの音がなるアプリの改造として作っていきます。
もともとの MainActivity と、Clap のコードは以下のようなものをイメージしています。
[MainActivity.java]
public class MainActivity extends AppCompatActivity {

    //"変数"を宣言している。値を入れる箱を作っているイメージ。何も指定しなければ、値は入っていない(=空箱)
    Button button;
    Clap clapInstance;

    @Override
    protected void onCreate(Bundle savedInstanceState) {
        super.onCreate(savedInstanceState);
        setContentView(R.layout.activity_main);

        //箱の中身を詰めている。
        button = (Button) findViewById(R.id.button);
        clapInstance = new Clap(getApplicationContext());

        //ボタンが押された時の処理を書いている。
        button.setOnClickListener(new View.OnClickListener() {
            @Override
            public void onClick(View v) {
                clapInstance.play();
            }
        });
    }
}
[Clap.java]
public class Clap {
    private SoundPool soundPool;
    private int soundId;

    public Clap(Context context) {
        soundPool = new SoundPool(1, AudioManager.STREAM_MUSIC, 0);
        soundId = soundPool.load(context, R.raw.sound_chime, 1);
    }

    public void play() {
        soundPool.play(soundId, 1.0f, 1.0f, 0, 0, 1.0f);
    }
}
音源の準備
Androidアプリの音源ファイルを用意してください。
今回は、こちらのサイトから、ogg音源をダウンロードさせてもらっています。
ピアノアプリ作成
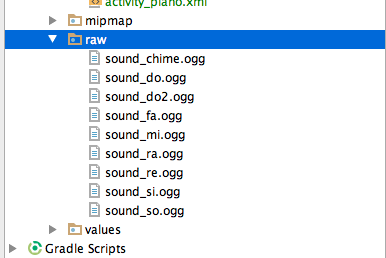
音源ファイルをrawファイルに入れる
res/rawファイルの場所に、ダウンロードしてきたファイルを入れます。

レイアウトファイルの作成
ファイルの新規作成
layoutのフォルダから右クリックで新しいレイアウトファイルを作成します。今回のサンプルでは activity_piano という名前にしています。
LinearLayoutからRelativeLayoutに変える
レイアウトについて...
AndroidStudioでプロジェクトを新規作成した場合のRelativeLayoutですが、ファイルの新規作成はデフォルトだとLinearLayoutを追加することになります。
慣れた方がやりやすい!? ということで、RelativeLayoutに変更しちゃいましょう。
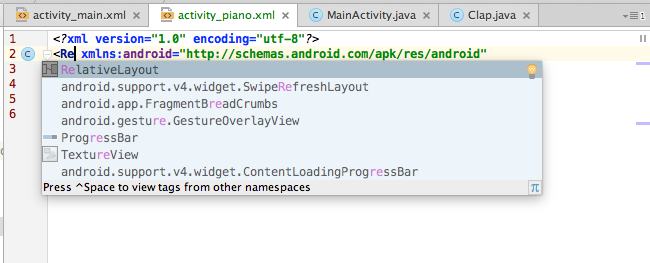
↓RelativeLayoutのReを入力するとAndroidStudioが補完してくれるので、エンターを押しちゃいましょう(楽!)。
Buttonを配置する
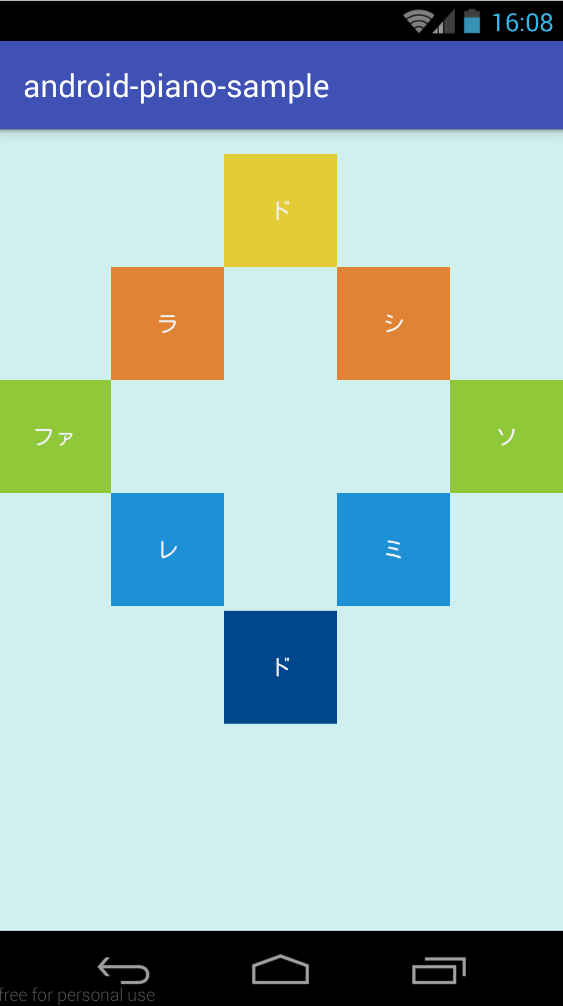
"ドレミファソラシド"の8音を鳴らす予定なので、ボタンを8つ配置します。配置は自由にやっていただいて大丈夫です。
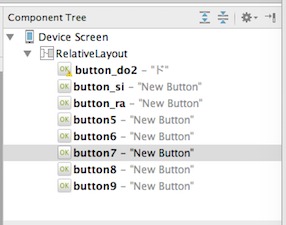
↓RelativeLayoutにButtonを8つ配置していきます。

Buttonに文字とidを設定する
ButtonのTextを"ド", "レ", ...と言った文字を設定して、さらにidも割り振っていきましょう。
デザイン調整
デフォルトのままでも動きますが、見た目が残念なので、少しでもよくするために
- Buttonの色
- Buttonの大きさ
- ButtonのTextの色
- 背景の色
を変更していきます。
Buttonの色を変更していきます。
色のバリエーションはCOLORS > 今回使った色の組み合わせのページから選んでいます。
Buttonの色は background に色を設定することで変えることができます。
(*textとidを割り振る前の画像を表示しています)
設定した値をまとめると以下のようになります。
| 設定する場所 | 設定する値 |
|---|---|
| background | それぞれの値 |
| textColor | #d0f0f0 |
| textSize | 32sp |
| width/height | 72dp |
Pianoクラスの作成
サンプルの Clap と作りは全く同じです。
ただ、Clapの場合には鳴らす音は1種類だけでしたが、Pianoでは8種類の音を鳴らすことになる点だけ注意が必要です。
public class Piano {
    private SoundPool soundPool;

    private int soundIdDo;
    private int soundIdRe;
    private int soundIdMi;
    private int soundIdFa;
    private int soundIdSo;
    private int soundIdRa;
    private int soundIdSi;
    private int soundIdDo2;

    public Piano(Context context) {
        soundPool = new SoundPool(1, AudioManager.STREAM_MUSIC, 0);

        //rawファイルから音楽データをとってくる
        soundIdDo = soundPool.load(context, R.raw.sound_do, 1);
        soundIdRe = soundPool.load(context, R.raw.sound_re, 1);
        soundIdMi = soundPool.load(context, R.raw.sound_mi, 1);
        soundIdFa = soundPool.load(context, R.raw.sound_fa, 1);
        soundIdSo = soundPool.load(context, R.raw.sound_so, 1);
        soundIdRa = soundPool.load(context, R.raw.sound_ra, 1);
        soundIdSi = soundPool.load(context, R.raw.sound_si, 1);
        soundIdDo2 = soundPool.load(context, R.raw.sound_do2, 1);
    }

    //音を鳴らすための"メソッド"を書いていく
    public void playDo() {
        soundPool.play(soundIdDo, 1.0f, 1.0f, 0, 0, 1.0f);
    }

    public void playRe() {
        soundPool.play(soundIdRe, 1.0f, 1.0f, 0, 0, 1.0f);
    }

    public void playMi() {
        soundPool.play(soundIdMi, 1.0f, 1.0f, 0, 0, 1.0f);
    }

    public void playFa() {
        soundPool.play(soundIdFa, 1.0f, 1.0f, 0, 0, 1.0f);
    }

    public void playSo() {
        soundPool.play(soundIdSo, 1.0f, 1.0f, 0, 0, 1.0f);
    }

    public void playRa() {
        soundPool.play(soundIdRa, 1.0f, 1.0f, 0, 0, 1.0f);
    }

    public void playSi() {
        soundPool.play(soundIdSi, 1.0f, 1.0f, 0, 0, 1.0f);
    }

    public void playDo2() {
        soundPool.play(soundIdDo2, 1.0f, 1.0f, 0, 0, 1.0f);
    }
}
MainActivityを変更する
準備したレイアウトファイルと、Pianoクラスを実装していきます。
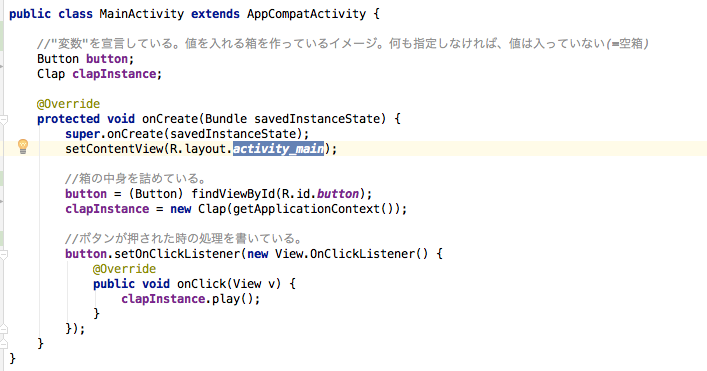
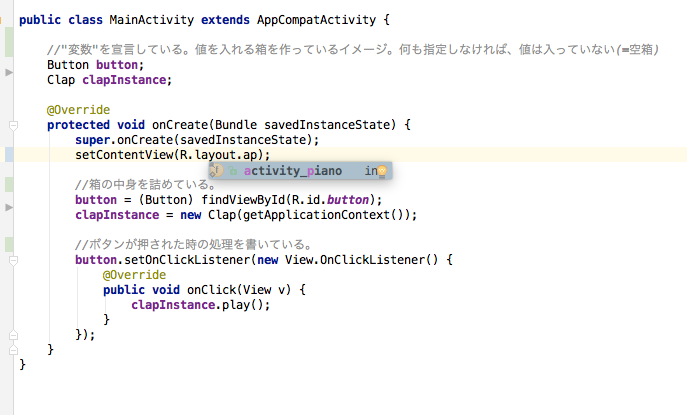
レイアウトファイルを適用する
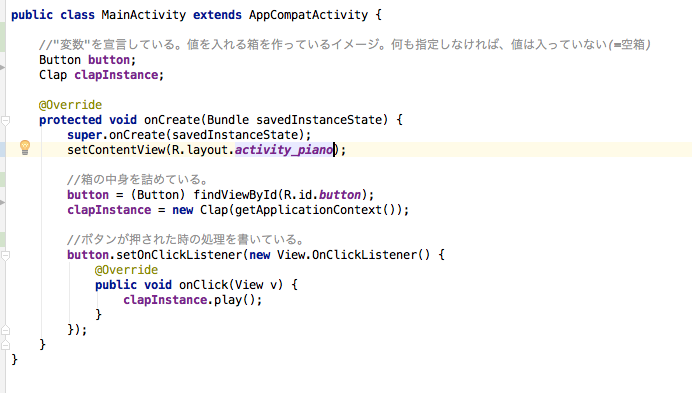
Pianoクラスを実装する
ドの音だけ実装したのがしたのコードになります。
他の音も同様に実装できます。
public class MainActivity extends AppCompatActivity {

    //"変数"を宣言している。値を入れる箱を作っているイメージ。何も指定しなければ、値は入っていない(=空箱)
    Button button;
    Clap clapInstance;

    Button buttonDo;
    Piano pianoInstance;

    Button[] buttons = new Button[8];

    @Override
    protected void onCreate(Bundle savedInstanceState) {
        super.onCreate(savedInstanceState);
        setContentView(R.layout.activity_piano);
//
//        //箱の中身を詰めている。
//        button = (Button) findViewById(R.id.button);
//        clapInstance = new Clap(getApplicationContext());
//
//        //ボタンが押された時の処理を書いている。
//        button.setOnClickListener(new View.OnClickListener() {
//            @Override
//            public void onClick(View v) {
//                clapInstance.play();
//            }
//        });

        buttonDo = (Button) findViewById(R.id.button_do);

        pianoInstance = new Piano(getApplicationContext());

        buttonDo.setOnClickListener(new View.OnClickListener() {
            @Override
            public void onClick(View v) {
                pianoInstance.playDo();
            }
        });
    }
}
完成
実装まで終わればとりあえず、アプリは動くようになります。
コードを短く
public class MainActivity extends AppCompatActivity {

    //"変数"を宣言している。値を入れる箱を作っているイメージ。何も指定しなければ、値は入っていない(=空箱)
    Button button;
    Clap clapInstance;

    Button buttonDo;
    Piano pianoInstance;

    Button[] buttons = new Button[8];

    @Override
    protected void onCreate(Bundle savedInstanceState) {
        super.onCreate(savedInstanceState);
        setContentView(R.layout.activity_piano);

        buttonDo = (Button) findViewById(R.id.button_do);

        pianoInstance = new Piano(getApplicationContext());

        buttonDo.setOnClickListener(new View.OnClickListener() {
            @Override
            public void onClick(View v) {
                pianoInstance.playDo();
            }
        });

        getViews();
        setOnClicks();
    }

    private void getViews() {
        buttons[0] = (Button) findViewById(R.id.button_do);
        buttons[1] = (Button) findViewById(R.id.button_re);
        buttons[2] = (Button) findViewById(R.id.button_mi);
        buttons[3] = (Button) findViewById(R.id.button_fa);
        buttons[4] = (Button) findViewById(R.id.button_so);
        buttons[5] = (Button) findViewById(R.id.button_ra);
        buttons[6] = (Button) findViewById(R.id.button_si);
        buttons[7] = (Button) findViewById(R.id.button_do2);
    }

    private void setOnClicks() {
        for (int i = 0; i < 8; i++) {
            final int index = i;
            buttons[index].setOnClickListener(new View.OnClickListener() {
                @Override
                public void onClick(View v) {
                    pianoInstance.play(index);
                }
            });
        }
    }
}
public class Piano {
    private SoundPool soundPool;

    private int soundIdDo;
    private int soundIdRe;
    private int soundIdMi;
    private int soundIdFa;
    private int soundIdSo;
    private int soundIdRa;
    private int soundIdSi;
    private int soundIdDo2;

    public Piano(Context context) {
        soundPool = new SoundPool(1, AudioManager.STREAM_MUSIC, 0);

        //rawファイルから音楽データをとってくる
        soundIdDo = soundPool.load(context, R.raw.sound_do, 1);
        soundIdRe = soundPool.load(context, R.raw.sound_re, 1);
        soundIdMi = soundPool.load(context, R.raw.sound_mi, 1);
        soundIdFa = soundPool.load(context, R.raw.sound_fa, 1);
        soundIdSo = soundPool.load(context, R.raw.sound_so, 1);
        soundIdRa = soundPool.load(context, R.raw.sound_ra, 1);
        soundIdSi = soundPool.load(context, R.raw.sound_si, 1);
        soundIdDo2 = soundPool.load(context, R.raw.sound_do2, 1);
    }

    //音を鳴らすための"メソッド"
    public void play(int key) {
        switch (key) {
            case 0:
                soundPool.play(soundIdDo, 1.0f, 1.0f, 0, 0, 1.0f);
                break;
            case 1:
                soundPool.play(soundIdRe, 1.0f, 1.0f, 0, 0, 1.0f);
                break;
            case 2:
                soundPool.play(soundIdRe, 1.0f, 1.0f, 0, 0, 1.0f);
                break;
            case 3:
                soundPool.play(soundIdMi, 1.0f, 1.0f, 0, 0, 1.0f);
                break;
            case 4:
                soundPool.play(soundIdSo, 1.0f, 1.0f, 0, 0, 1.0f);
                break;
            case 5:
                soundPool.play(soundIdRa, 1.0f, 1.0f, 0, 0, 1.0f);
                break;
            case 6:
                soundPool.play(soundIdSi, 1.0f, 1.0f, 0, 0, 1.0f);
                break;
            case 7:
                soundPool.play(soundIdDo2, 1.0f, 1.0f, 0, 0, 1.0f);
                break;

        }
    }
}
レイアウト別案

<LinearLayout xmlns:android="http://schemas.android.com/apk/res/android"
    android:layout_width="match_parent"
    android:layout_height="match_parent"
    android:background="#d0f0f0"
    android:orientation="horizontal">

    <Button
        android:id="@+id/button_do"
        android:layout_width="0dp"
        android:layout_height="match_parent"
        android:layout_margin="1dp"
        android:layout_weight="1"
        android:background="#00468C"
        android:text="ド"
        android:textColor="#f0f0f0"
        android:textSize="32sp" />


    <Button
        android:id="@+id/button_re"
        android:layout_width="0dp"
        android:layout_height="match_parent"
        android:layout_margin="1dp"
        android:layout_weight="1"
        android:background="#1E91D6"
        android:text="レ"
        android:textColor="#f0f0f0"
        android:textSize="32sp" />

    <Button
        android:id="@+id/button_mi"
        android:layout_width="0dp"
        android:layout_height="match_parent"
        android:layout_margin="1dp"
        android:layout_weight="1"
        android:background="#1E91D6"
        android:text="ミ"
        android:textColor="#f0f0f0"
        android:textSize="32sp" />


    <Button
        android:id="@+id/button_fa"
        android:layout_width="0dp"
        android:layout_height="match_parent"
        android:layout_margin="1dp"
        android:layout_weight="1"
        android:background="#8FC93A"
        android:text="ファ"
        android:textColor="#f0f0f0"
        android:textSize="32sp" />

    <Button
        android:id="@+id/button_so"
        android:layout_width="0dp"
        android:layout_height="match_parent"
        android:layout_margin="1dp"
        android:layout_weight="1"
        android:background="#8FC93A"
        android:text="ソ"
        android:textColor="#f0f0f0"
        android:textSize="32sp" />

    <Button
        android:id="@+id/button_ra"
        android:layout_width="0dp"
        android:layout_height="match_parent"
        android:layout_margin="1dp"
        android:layout_weight="1"
        android:background="#E18335"
        android:text="ラ"
        android:textColor="#f0f0f0"
        android:textSize="32sp" />

    <Button
        android:id="@+id/button_si"
        android:layout_width="0dp"
        android:layout_height="match_parent"
        android:layout_margin="1dp"
        android:layout_weight="1"
        android:background="#E18335"
        android:text="シ"
        android:textColor="#f0f0f0"
        android:textSize="32sp" />

    <Button
        android:id="@+id/button_do2"
        android:layout_width="0dp"
        android:layout_height="match_parent"
        android:layout_margin="1dp"
        android:layout_weight="1"
        android:background="#E4CC37"
        android:text="ド"
        android:textColor="#f0f0f0"
        android:textSize="32sp" />


</LinearLayout>
