こんばんは!GxPのよこがわ(@riki_ykgw)です!
この記事はグロースエクスパートナーズ Advent Calendar 2022の15日目です。
よろしくお願いいたします!!
今年のアドベントカレンダーは、クリスマスらしいテーマで書きたいと考えていました。
今年はreactを使った案件の中で、svgでグラフのようなものを描画する機能を作りました。
その際にsvgの基本的な使い方を学んだので今回はサンタクロース描いて、svgの基本操作をお伝えできればと思います!
まずは設計
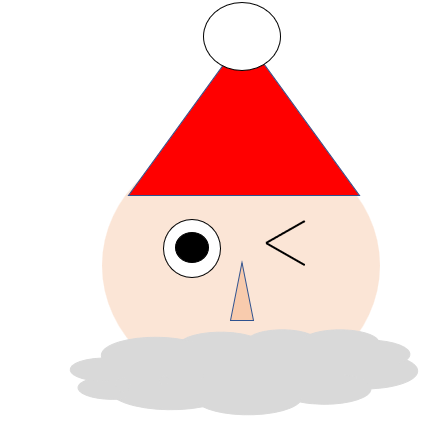
プログラムを書く前には設計ですよね。簡単にパワポで設計します。
こんな感じのサンタを描いていきたいと思います。
続いて実装
まずはsvgでサンタを描く領域を作ります
widthとheightで縦横の大きさを決めます。今回は横1000px、縦700pxとします。
viewBoxは描画エリアの中の要素の相対的なサイズを決定します。今回はsvgの大きさと合わせておきます。
const App = () => (
    <svg
        width="1000"
        height="700"
        viewBox={`0 0 1000 700`}
    >
        {/* ここにそれぞれの要素を書いていく */}
    </svg>
)

export default App;
顔を描いていきます
顔にはcircleを使います。
circleは中心座標と半径を指定して円を描画します。
今回は左から500px、上から300pxの位置に半径150pxの円をfillで指定した色で描きます。
const App = () => (
    <svg
        width="1000"
        height="700"
        viewBox={`0 0 1000 700`}
    >
        {/* 顔 */}
        <circle fill="#FFEFD5" cx="500" cy="300" r="150"/>
    </svg>
)

export default App;
目を描きましょう
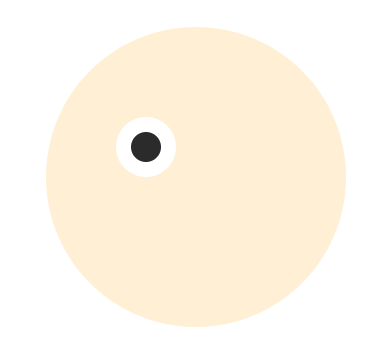
まずは向かって左のサンタの右目から描きます。ここは顔と同じくcircleを使います。circleを二つ重ねて白目と黒目を描いていきます。
const App = () => (
    <svg
        width="1000"
        height="700"
        viewBox={`0 0 1000 700`}
    >
        {/* 顔 */}
        <circle fill="#FFEFD5" cx="500" cy="300" r="150"/>
        {/* 右目(白目) */}
        <circle fill="#ffffff" cx="450" cy="270" r="30"/>
        {/* 右目(黒目) */}
        <circle fill="#2b2b2b" cx="450" cy="270" r="15"/>
    </svg>
)

export default App;
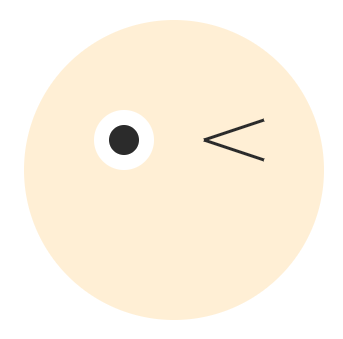
左目はlineを使います。lineは2つの点をつなぐ直線を作成するために使用します。
x1は線の始点のX座標を定義し、x2は線の終点のX座標を定義します。
y1は線の始点のY座標を定義し、y2は線の終点のY座標を定義します。
いい感じの場所に線を引いていきます。
const App = () => (
    <svg
        width="1000"
        height="700"
        viewBox={`0 0 1000 700`}
    >
        {/* 顔 */}
        <circle fill="#FFEFD5" cx="500" cy="300" r="150"/>
        {/* 右目(白目) */}
        <circle fill="#ffffff" cx="450" cy="270" r="30"/>
        {/* 右目(黒目) */}
        <circle fill="#2b2b2b" cx="450" cy="270" r="15"/>
        {/* 左目 */}
        <line x1="530" y1="270" x2="590" y2="250" stroke="#2b2b2b"  strokeWidth="3px" />
        <line x1="530" y1="270" x2="590" y2="290" stroke="#2b2b2b"  strokeWidth="3px" />
    </svg>
)

export default App;
お次は鼻
鼻は三角形で表現します。今回はpathを使います。pathは複雑な図形を描画できる図形で、d属性の中にパスデータを記述することで好きな図形を描くことができます。
今回はM 500 300 L 520 350 L 480 350 zと定義しています。
Mは現在の点を新しく設定します。(x y)
Lは現在の点から (x y) で与えられる座標へ直線を描き、その座標を新しく現在の点とします。
zは終了を意味します。
const App = () => (
    <svg
        width="1000"
        height="700"
        viewBox={`0 0 1000 700`}
    >
        {/* 顔 */}
        <circle fill="#FFEFD5" cx="500" cy="300" r="150"/>
        {/* 右目(白目) */}
        <circle fill="#ffffff" cx="450" cy="270" r="30"/>
        {/* 右目(黒目) */}
        <circle fill="#2b2b2b" cx="450" cy="270" r="15"/>
        {/* 左目 */}
        <line x1="530" y1="270" x2="590" y2="250" stroke="#2b2b2b"  strokeWidth="3px" />
        <line x1="530" y1="270" x2="590" y2="290" stroke="#2b2b2b"  strokeWidth="3px" />
        {/* 鼻 */}
        <path fill="#f4be9b" stroke="#2b2b2b" d="M 500 300 L 520 350 L 480 350 z" />
    </svg>
)

export default App;
ひげを描きます
今回ひげは小さいcircleを並べてひげを表現しようと思います。
x座標を持つ配列をy座標ごとにループを回してcircleを並べてみました。
ここはいろいろ実装方法あると思いますので、コメントいただけると嬉しいです。
const App = () => (
    <svg
        width="1000"
        height="700"
        viewBox={`0 0 1000 700`}
    >
        {/* 顔 */}
        <circle fill="#FFEFD5" cx="500" cy="300" r="150"/>
        {/* 右目(白目) */}
        <circle fill="#ffffff" cx="450" cy="270" r="30"/>
        {/* 右目(黒目) */}
        <circle fill="#2b2b2b" cx="450" cy="270" r="15"/>
        {/* 左目 */}
        <line x1="530" y1="270" x2="590" y2="250" stroke="#2b2b2b"  strokeWidth="3px" />
        <line x1="530" y1="270" x2="590" y2="290" stroke="#2b2b2b"  strokeWidth="3px" />
        {/* 鼻 */}
        <path fill="#f4be9b" stroke="#2b2b2b" d="M 500 300 L 520 350 L 480 350 z" />
        {/* ひげ */}
        {[400,450,500,550,600].map((v) => <circle fill="#f8f8ff"  cx={v} cy="400" r="35"/>)}
        {[450,500,550].map((v) => <circle fill="#f8f8ff"  cx={v} cy="430" r="35"/>)}
        {/* ↓ここは配列である必要ないが何となく上と合わせたほうがわかりやすいのでこうしました */}
        {[500].map((v) => <circle fill="#f8f8ff"  cx={v} cy="450" r="35"/>)}
    </svg>
)

export default App;
最後に帽子をかぶらせてあげましょう
帽子はpathで三角形、circleで丸を描きサンタらしい帽子を表現します。
const App = () => (
    <svg
        width="1000"
        height="700"
        viewBox={`0 0 1000 700`}
    >
        {/* 顔 */}
        <circle fill="#FFEFD5" cx="500" cy="300" r="150"/>
        {/* 右目(白目) */}
        <circle fill="#ffffff" cx="450" cy="270" r="30"/>
        {/* 右目(黒目) */}
        <circle fill="#2b2b2b" cx="450" cy="270" r="15"/>
        {/* 左目 */}
        <line x1="530" y1="270" x2="590" y2="250" stroke="#2b2b2b"  strokeWidth="3px" />
        <line x1="530" y1="270" x2="590" y2="290" stroke="#2b2b2b"  strokeWidth="3px" />
        {/* 鼻 */}
        <path fill="#f4be9b" stroke="#2b2b2b" d="M 500 300 L 520 350 L 480 350 z" />
        {/* ひげ */}
        {[400,450,500,550,600].map((v) => <circle fill="#f8f8ff"  cx={v} cy="400" r="35"/>)}
        {[450,500,550].map((v) => <circle fill="#f8f8ff"  cx={v} cy="430" r="35"/>)}
        {/* ↓ここは配列である必要ないが何となく上と合わせたほうがわかりやすいのでこうしました */}
        {[500].map((v) => <circle fill="#f8f8ff"  cx={v} cy="450" r="35"/>)}
        {/* 赤い帽子 */}
        <path fill="#e60033" d="M 500 50 L 620 200 L 380 200 z" />
        {/* 帽子の上のポンポン */}
        <circle fill="#ffffff" stroke="#2b2b2b" cx="500" cy="50" r="25"/>
    </svg>
)

export default App;
まとめ
今回はsvgの基本図形のみでだいぶシンプルなサンタを描きましたが、svgはとにかくいろいろな図形を描くことができます。
これを読んだ方に少しでも楽しんでいただけたり参考になることがあれば、これ以上嬉しいことはありません。
最後まで読んでいただきありがとうございました。
それでは、良いクリスマスを!!メリークリスマス!
