はじめに
今回は、目のマークを使用したパスワードの表示切り替えについて、まとめました。

実装内容の詳細については、以下参照ください。
こちらは、表示切替ボタン( 表示する ⇄ 非表示にする )を使用しています。
参照:【jQuery】パスワードの表示切り替え・フォームのsubmit
この記事の目的
以下内容のアウトプット
- Font Awesomeの使い方
この記事の内容
- Font Awesomeからアイコンを取得
- ビューの作成
- レイアウト
- jsの作成
1. Font Awesomeからアイコンを取得
Font Awesomeとは、Webサイトでアイコンフォントを簡単に導入することができるサービスです。
早速、今回使用するアイコンを公式サイトからダウンロードします。
ヘッドタブの Icons をクリックします。

検索フォームにて、アイコンを検索します。
今回必要なアイコンは、以下2点です。
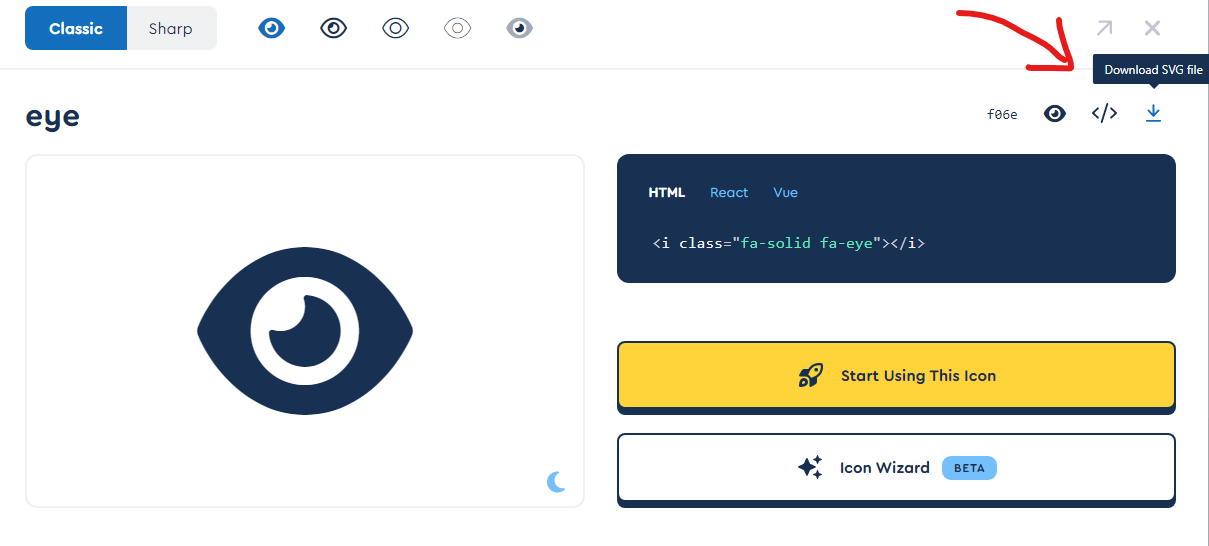
- f06e(開いてる目のマーク)
- f070(閉じてる目のマーク)
Freeのフィルターをかけます。
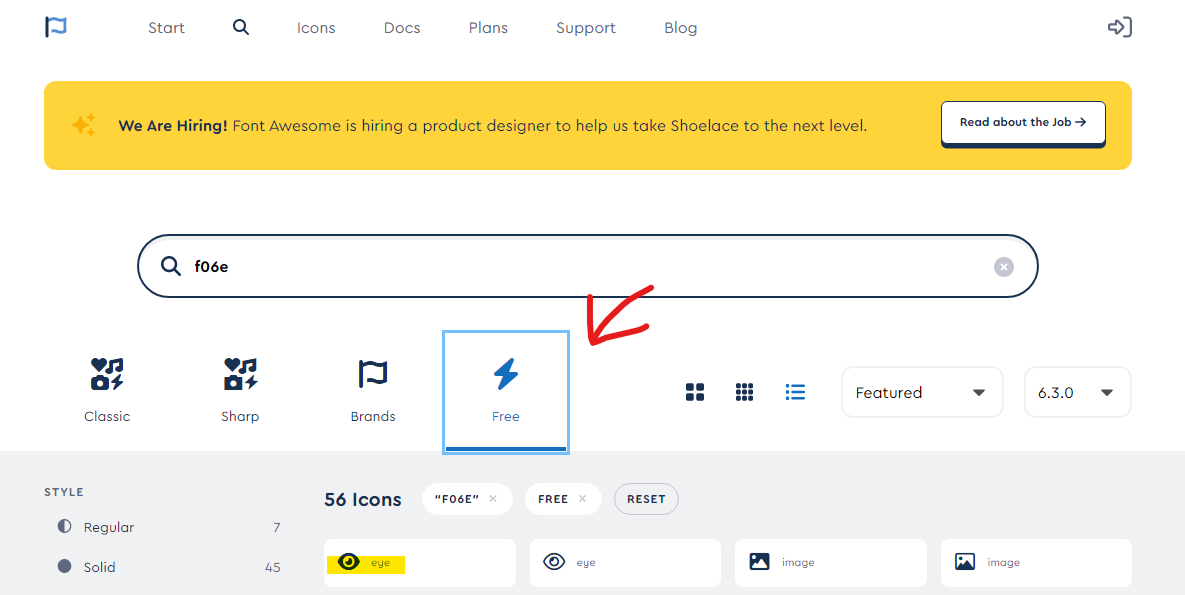
Download SVG file をクリックし、SVG形式にてダウンロードします。
同様に、f070(閉じてる目のマーク)もダウンロードします。
ダウンロードしたsvgファイルは、public/images に配置します。

2. ビューの作成
ビューを作成します。
以下の属性名は、後ほどjsで使用します。
- formタグ
class="password-wrap" - inputタグ
class="password-input" - imgタグ
class="eye-slash-solid",class="eye-solid"
xxxx.blade.php
※cssとjsを読み込む記述は省略

<form class="password-wrap" action="{{ route('xxxx') }}" method="POST">
  省略
  <dt>パスワード</dt>
  <dd>
    <input type="password" class="password-input" placeholder="パスワード" name="password">
    <img class="eye-slash-solid" src="{{ asset('images/eye-slash-solid.svg') }}">
    <img class="eye-solid" src="{{ asset('images/eye-solid.svg') }}" style="display: none;">
    <span class="err-msg">{{$errors->first('password')}}</span>
  </dd>
</dl>
省略
</form>
Tips:
- imgタグでは、asset関数を使用しsvgファイルを呼び出しています。
- imgタグの片方(開いてる目のマーク)は、
style="display: none;で非表示にしています。
3. レイアウト
CSSを作成します。
目のマークが、パスワード入力フォームの右端に来るようにします。

xxxx.css
/* パスワード目のマーク */
.password-wrap dl dd {
  position: relative;
}

.password-wrap dl dd img {
  position: absolute;
  top: 50%;
  right: 10px;
	transform: translateY(-50%);
  width: 15px;
}
4. jsの作成
jsを作成します。
style="display: none; を切り替え、パスワードと同時に表示切り替えを行います。
xxxx.js
$(function() {
	// 表示する
	if($('.eye-slash-solid').on('click', function() {
		$('.eye-slash-solid').css('display', 'none');
		$('.eye-solid').show();
		$('.password-input').attr('type','text');
	}));

    // 非常時にする
	if($('.eye-solid').on('click', function() {
		$('.eye-solid').css('display', 'none');
		$('.eye-slash-solid').show();
		$('.password-input').attr('type','password');
	}));
 });
TIps:
ビューのinputタグに付与した class="password-input" について、
パスワードの入力フォームが1つの場合、id属性として付与しても問題ありません。
パスワード確認用など、入力フォームが複数ある時、
id属性で指定すると、1つ目のフォームしか適用されないので注意です。