pythonを使用してExcelファイルの操作を勉強しています。
本日の気づき(復習)は、セルの色と文字の配置に関してです。
pythonでExcelを操作するため、openpyxlというパッケージを使用しています。
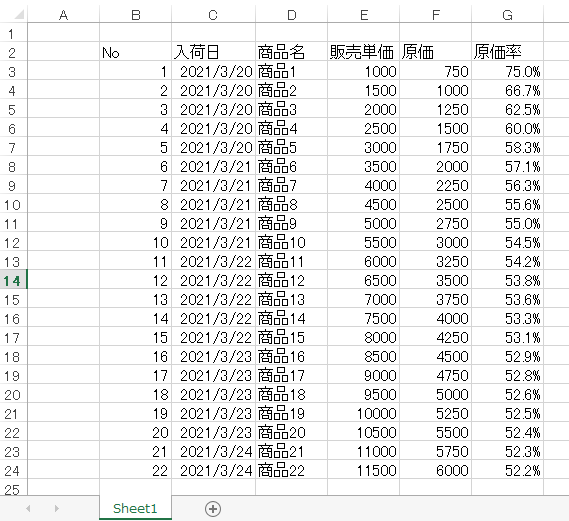
上記のようなブック「商品リストを」

この様な表に変更したいです。
PatternFillオブジェクト
cell.fill = PatternFill(fgColor='RGB形式の色',
                        bgColor='RGB形式の色',
                        fill_type='パターンの種類')
セルの塗りつぶしを設定するには、PatternFillオブジェクトを使用し
そちらをセルのfill属性に代入することで、塗りつぶせるのですが
どうにも「fgColor」「bgColor」「fill_type」の各引数がすんなり頭に入ってこず
色々試した結果このようなコードを一旦書いてみました。
お試し塗りつぶしコード
from openpyxl import load_workbook
from openpyxl.styles import Alignment, PatternFill

wb = load_workbook('商品リスト.xlsx')
ws = wb.active

# 各種塗りつぶし方法。
darkH_fill = PatternFill(
    fgColor='ff0000', bgColor='ffff00', fill_type='darkHorizontal')

lightH_fill = PatternFill(
    fgColor='ff0000', bgColor='ffff00', fill_type='lightHorizontal')

darkV_fill = PatternFill(
    fgColor='ff0000', bgColor='ffff00', fill_type='darkVertical')

lightV_fill = PatternFill(
    fgColor='ff0000', bgColor='ffff00', fill_type='lightVertical')

darkT_fill = PatternFill(
    fgColor='ff0000', bgColor='ffff00', fill_type='darkTrellis')

lightT_fill = PatternFill(
    fgColor='ff0000', bgColor='ffff00', fill_type='lightTrellis')

darkG_fill = PatternFill(
    fgColor='ff0000', bgColor='ffff00', fill_type='darkGray')

lightG_fill = PatternFill(
    fgColor='ff0000', bgColor='ffff00', fill_type='lightGray')

solid_fill = PatternFill(
    fgColor='ff0000', bgColor='ffff00', fill_type='solid')

g125_fill = PatternFill(
    fgColor='ff0000', bgColor='ffff00', fill_type='gray125')

g0625_fill = PatternFill(
    fgColor='ff0000', bgColor='ffff00', fill_type='gray0625')

# 各種文字の配置
center_alignment = Alignment(horizontal='center', vertical='center')
left_top_alignment = Alignment(horizontal='left', vertical='top')
right_bottom_alignment = Alignment(horizontal='right', vertical='bottom')

# 実際に塗りつぶしてみる。
for row in ws['B2:G2']:
    for cell in row:
        cell.fill = darkH_fill
        cell.alignment = center_alignment

for row in ws['B3:G3']:
    for cell in row:
        cell.fill = lightH_fill
        cell.alignment = left_top_alignment

for row in ws['B4:G4']:
    for cell in row:
        cell.fill = darkV_fill
        cell.alignment = right_bottom_alignment

for row in ws['B5:G5']:
    for cell in row:
        cell.fill = lightV_fill
        cell.alignment = center_alignment

for row in ws['B6:G6']:
    for cell in row:
        cell.fill = lightT_fill
        cell.alignment = center_alignment

for row in ws['B7:G7']:
    for cell in row:
        cell.fill = lightT_fill
        cell.alignment = center_alignment

for row in ws['B8:G8']:
    for cell in row:
        cell.fill = darkG_fill
        cell.alignment = center_alignment

for row in ws['B9:G9']:
    for cell in row:
        cell.fill = lightG_fill
        cell.alignment = center_alignment

for row in ws['B10:G10']:
    for cell in row:
        cell.fill = solid_fill
        cell.alignment = center_alignment

for row in ws['B11:G11']:
    for cell in row:
        cell.fill = g125_fill
        cell.alignment = center_alignment

for row in ws['B12:G12']:
    for cell in row:
        cell.fill = g0625_fill
        cell.alignment = center_alignment

wb.save('商品リスト_見出変更.xlsx')
お試し塗りつぶしコードの結果

結果はこうなりました。
塗りつぶしパターンのまとめ
「bgColor」で設定した色は背景の色と考えて・・・
- darkHorizontal:「fgColor」で設定した色の太い横線。
- lightHorizontal:「fgColor」で設定した色の細い横線。
- darkVertical:「fgColor」で設定した色の太い縦線。
- lightVertical:「fgColor」で設定した色の細い縦線。
- darkTrellis:「fgColor」で設定した色の細い交差線。
- lightTrellis:「darkTrellis」との差はない。
- darkGray:「fgColor」で設定した色の太い点線。
- lightGray:「fgColor」で設定した色の細い点線。
- solid:「fgColor」で設定した色で塗りつぶし。「bgColor」も「fgColor」と同じにした方が良い。
- gray125:「fgColor」で設定した色の小さな点の水玉模様。間隔は狭い。
- gray0625:「fgColor」で設定した色の小さな点の水玉模様。間隔は広い。
という結果になりました。
他にもパターンはあると思いますが、正直なところ
「塗りつぶし(solid)以外に使うところあるのかな?」
と言う、内なるツッコミによって調べるのを諦めました。
Alignmentオブジェクト
cell.alignment = Alignment(horizontal='横位置',
                           vertical='縦位置',
                           wrap_text=「折返して全体表示」にする時はTrue,
                           shrink_to_fit=「縮小して全体表示」にする時はTrue)
horizontalの引数に記述するのは・・・
- left:左詰め
- center:中央ぞろえ
- right:右詰め
verticalの引数に記述するのは・・・
- top:上詰め
- center:中央ぞろえ
- bottom:下詰め
最終的なコード
from openpyxl import load_workbook
from openpyxl.styles import Alignment, PatternFill

wb = load_workbook('商品リスト.xlsx')
ws = wb.active

# 塗りつぶし方法。
gray_fill = PatternFill(
    fgColor='C6E0B4', fill_type='solid')

# 文字の配置
center_alignment = Alignment(horizontal='center', vertical='center')

# 実際に塗りつぶしてみる。
for row in ws['B2:G2']:
    for cell in row:
        cell.fill = gray_fill
        cell.alignment = center_alignment
wb.save('商品リスト_見出変更.xlsx')
今回パターンを調べるのにえらく時間がかかってしまいました。
「調べて試してまた調べる」のサイクルって楽しいですよね。
だいたい途中で脱線してしまって本来の目的を忘れてしまうのですが・・・。
もう少し「本線」を見据えて勉強していくようにしま・・・したいですね。