0 環境、IDE、DB Software
1 データベース、及びテーブルの作成
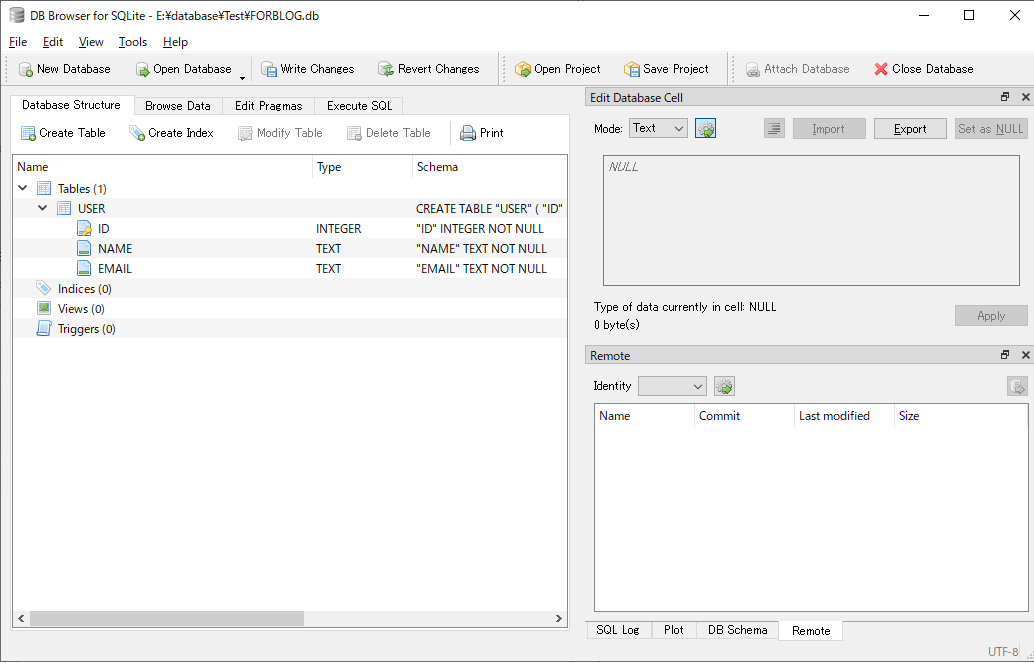
1.1 ユーザテーブル項目
- ID、名前、メールアドレス
1.2 データベース、テーブル作成ステップ
- DB Browserを起動する
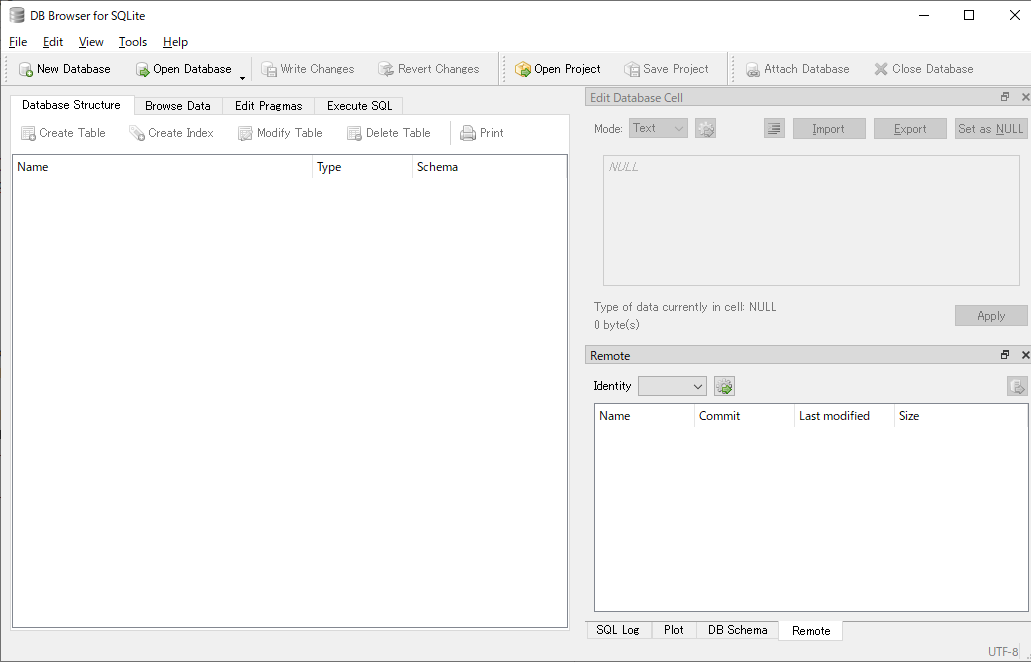
- New Databaseをクリックする
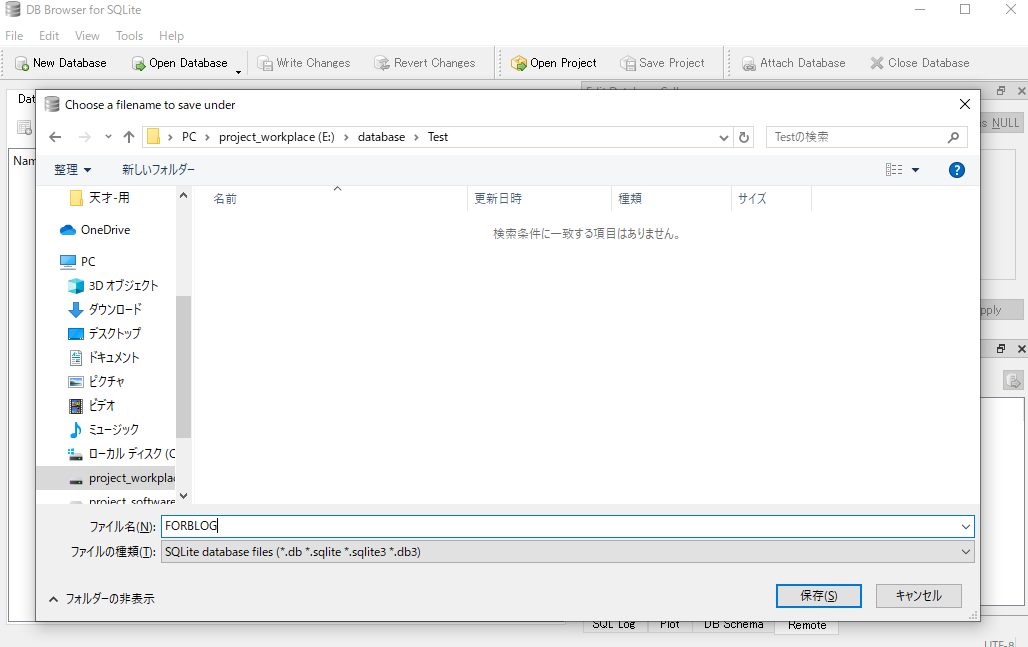
- データベース名前を入力し、保存する

- テーブル名と項目を入力する(項目はAdd fieldのクリック)

- OKボタンを押すとデータベースとテーブルが作成される
3 プロジェクトの新規
- Spring Boot新規
- Eclipse → ファイル → 新規 → その他 → Spring Boot

- 次へクリック

- Spring Web、Thymeleaf、MyBatis Frameworkを選択する

- 完了

4 ユーザ登録機能実装
4.1 Sqlite機能追加
※Projectが正常動くために、最初にやっている
- pom.xmlにSqliteのdependencyを追加する
pom.xml
<dependency>
    <groupId>org.xerial</groupId>
    <artifactId>sqlite-jdbc</artifactId>
    <version>3.21.0.1</version>
</dependency>
- application.propertiesにデータベース情報を追加する
application.properties
spring.datasource.driver-class-name=org.sqlite.JDBC
spring.datasource.url=jdbc:sqlite:E:\\database\\Test\\FORBLOG.db
spring.datasource.username=
spring.datasource.password=
- MyBatisConfigクラスを作成する(Sqliteを使用できる為)
MyBatisConfig.java
package com.example.demo.config;

import javax.sql.DataSource;

import org.springframework.beans.factory.annotation.Autowired;
import org.springframework.boot.autoconfigure.jdbc.DataSourceProperties;
import org.springframework.context.annotation.Bean;
import org.springframework.context.annotation.Configuration;
import org.sqlite.SQLiteDataSource;

@Configuration
public class MyBatisConfig {
    @Autowired
    private DataSourceProperties dataSourceProperties;

    @Bean(name="dataSource")
    public DataSource dataSource() {
        SQLiteDataSource dataSource = new SQLiteDataSource();
        dataSource.setUrl(dataSourceProperties.getUrl());
        return dataSource;
    }
}
4.2 ユーザ属性クラス作成
※ユーザテーブルと同じ
UserModel.java
package com.example.demo.model;

public class UserModel {
    private String Id;
    private String Name;
    private String Email;

    public String getId() {
		return Id;
    }
    public void setId(String id) {
    	Id = id;
    }

    public String getName() {
        return Name;
    }
    public void setName(String name) {
        Name = name;
    }

    public String getEmail() {
        return Email;
	}
	public void setEmail(String email) {
		Email = email;
	}
}
4.3 マッパーインターフェース作成
※SQLを書く箇所
UserMapper.java
package com.example.demo.mapper;

import java.util.List;

import org.apache.ibatis.annotations.Delete;
import org.apache.ibatis.annotations.Insert;
import org.apache.ibatis.annotations.Mapper;
import org.apache.ibatis.annotations.Select;
import org.apache.ibatis.annotations.Update;
import org.springframework.stereotype.Component;

import com.example.demo.model.UserModel;

@Mapper
@Component
public interface UserMapper {
    @Insert("INSERT INTO USER(Id, Name, Email)"
    		+ "VALUES(#{Id}, #{Name}, #{Email})")
    int insert(UserModel model);

    @Select("SELECT * FROM USER")
    List<UserModel> selectAll();
}
4.4 スキャンクラスの作成
※サーバとデータベース接続に使用する
MyBatisMapperScannerConfig.java
package com.example.demo.config;

import org.mybatis.spring.mapper.MapperScannerConfigurer;
import org.springframework.context.annotation.Bean;
import org.springframework.context.annotation.Configuration;


@Configuration
public class MyBatisMapperScannerConfig {
    @Bean
    public MapperScannerConfigurer mapperScannerConfigurer() {
        MapperScannerConfigurer mapperScannerConfigurer = new MapperScannerConfigurer();
        mapperScannerConfigurer.setSqlSessionFactoryBeanName("sqlSessionFactory");

        mapperScannerConfigurer.setBasePackage("com.example.demo.mapper");

        return mapperScannerConfigurer;
    }

}
####### ※com.example.demo.mapperと4.3のパスと同じようになること
4.5 アプリケーションクラスの修正
####### ※@MapperScan("com.example.demo.mapper")を追加する
DemoApplication.java
package com.example.demo;

import org.mybatis.spring.annotation.MapperScan;
import org.springframework.boot.SpringApplication;
import org.springframework.boot.autoconfigure.SpringBootApplication;

@SpringBootApplication
@MapperScan("com.example.demo.mapper")
public class DemoApplication {

	public static void main(String[] args) {
		SpringApplication.run(DemoApplication.class, args);
	}

}
4.6 サービスクラス作成
####### ※クライアントとテーブルに使用しているデータを修正する箇所
UserService.java
package com.example.demo.service;

import java.util.List;

import org.springframework.beans.factory.annotation.Autowired;
import org.springframework.stereotype.Service;

import com.example.demo.mapper.UserMapper;
import com.example.demo.model.UserModel;

@Service
public class UserService {

    private final UserMapper dao;

    @Autowired
    public UserService(UserMapper dao) {
        this.dao = dao;
    }

    public boolean insert(UserModel user) {
        return dao.insert(user) > 0;
    }

    public List<UserModel> selectAll() {
        return dao.selectAll();
    }
}
4.7 コントローラーの作成
####### ※クライアントとサーバーを繋ぐ箇所
UserController.java
package com.example.demo.controller;

import java.util.List;

import org.springframework.beans.factory.annotation.Autowired;
import org.springframework.stereotype.Controller;
import org.springframework.ui.Model;
import org.springframework.validation.annotation.Validated;
import org.springframework.web.bind.annotation.GetMapping;
import org.springframework.web.bind.annotation.ModelAttribute;
import org.springframework.web.bind.annotation.PostMapping;
import org.springframework.web.bind.annotation.RequestMapping;

import com.example.demo.model.UserModel;
import com.example.demo.service.UserService;

@Controller
public class UserController {
	private final UserService userService;

    @Autowired
    public UserController(UserService userService) {
        this.userService = userService;

    }

    @RequestMapping("/new")
    public String addUser(Model model) {
    	model.addAttribute("User", new UserModel());
        return "NewUser.html";
    }

    @PostMapping("/new")
    public String create(@Validated @ModelAttribute UserModel user, Model model) {
    	userService.insert(user);
        return "redirect:userlist";
    }

    @GetMapping("/userlist")
    public String displayUsers(Model model) {
    	List<UserModel> users = userService.selectAll();
    	model.addAttribute("users", users);
        return "UserList.html";
    }
}
4.8 画面作成
ユーザ新規画面
NewUser.html
<!DOCTYPE html>
<html xmlns:th="http://www.thymeleaf.org">
  <head>
    <meta charset="UTF-8" />
    <title>新規作成画面</title>
  </head>
  <body>
    <h1>新規登録</h1>
    <div><a th:href="@{/userlist}">一覧はこちら</a></div>
    <form action="#" th:action="@{/new}" th:object="${User}" method="post">
      <table>
        <tr>
          <th class="cell_title">ID</th>
          <td><input type="text" th:field="*{Id}"></td>
        </tr>
        <tr>
          <th class="cell_title">名前</th>
          <td><input type="text" th:field="*{Name}"></td>
        </tr>
        <tr>
          <th class="cell_title">メール</th>
          <td><input type="text" th:field="*{Email}"></td>
        </tr>
      </table>
      <button type="submit">新規</button>
      <input type="button" value="終了" onclick="window.open('about:blank', '_self').close()">
    </form>
  </body>
</html>
ユーザ一覧画面
UserList.html
<!DOCTYPE html>
<html xmlns:th="http://www.thymeleaf.org">
  <head>
    <meta charset="UTF-8" />
    <title>一覧画面</title>
  </head>
  <body>
    <h1>ユーザ一覧</h1>
    <div><a th:href="@{/new}">新規登録はこちら</a></div>
    <table>
    <thead>
      <tr>
        <th>ID</th>
        <th>名前</th>
        <th>メール</th>
      </tr>
    </thead>
    <tbody>
        <tr th:each="user : ${users}" th:object="${user}">
            <td th:text="*{Id}"></td>
            <td th:text="*{Name}"></td>
            <td th:text="*{Email}"></td>
        </tr>
      </tbody>
  </table>
  <input type="button" value="終了" onclick="window.open('about:blank', '_self').close()">
  </body>
</html>
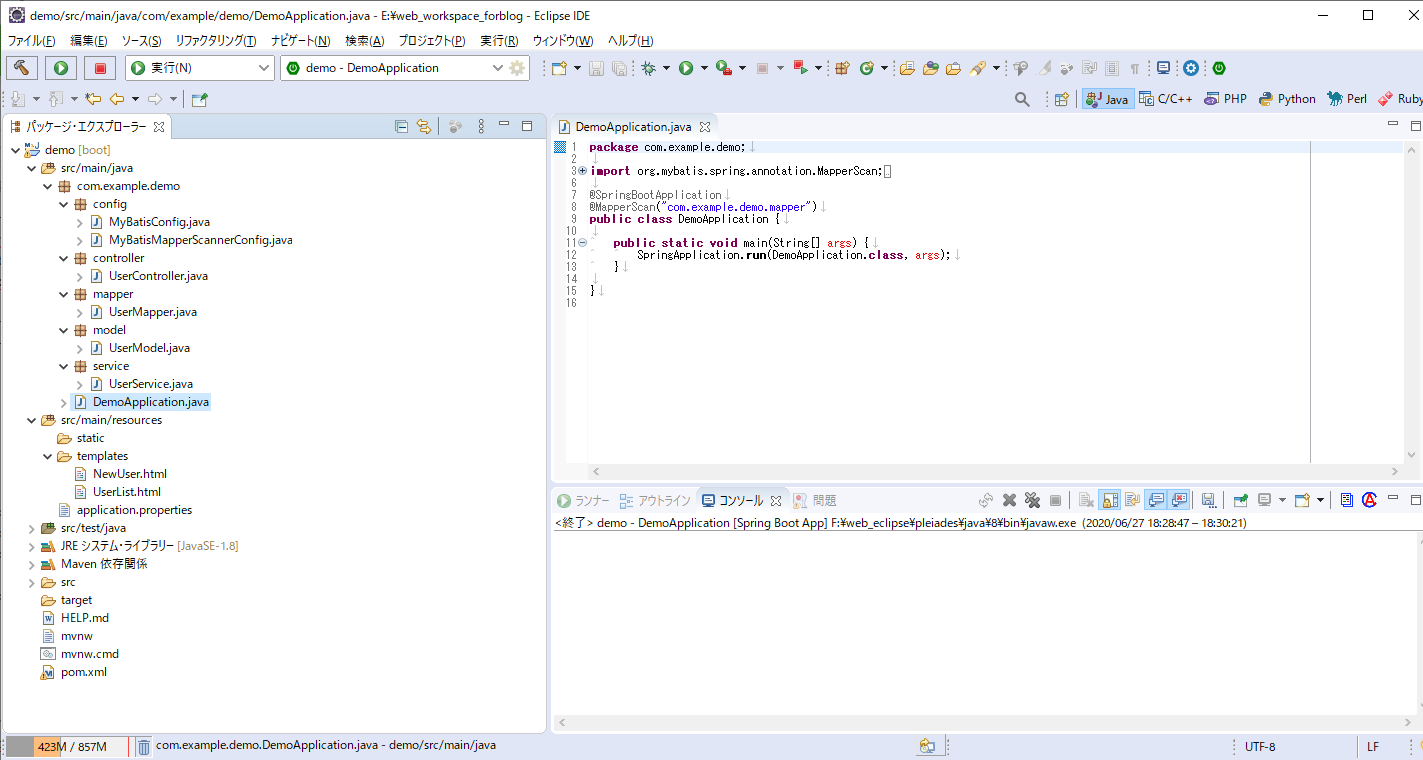
5 ソース完成構造
6 デモ
6.1 プロジェクト起動
起動方法
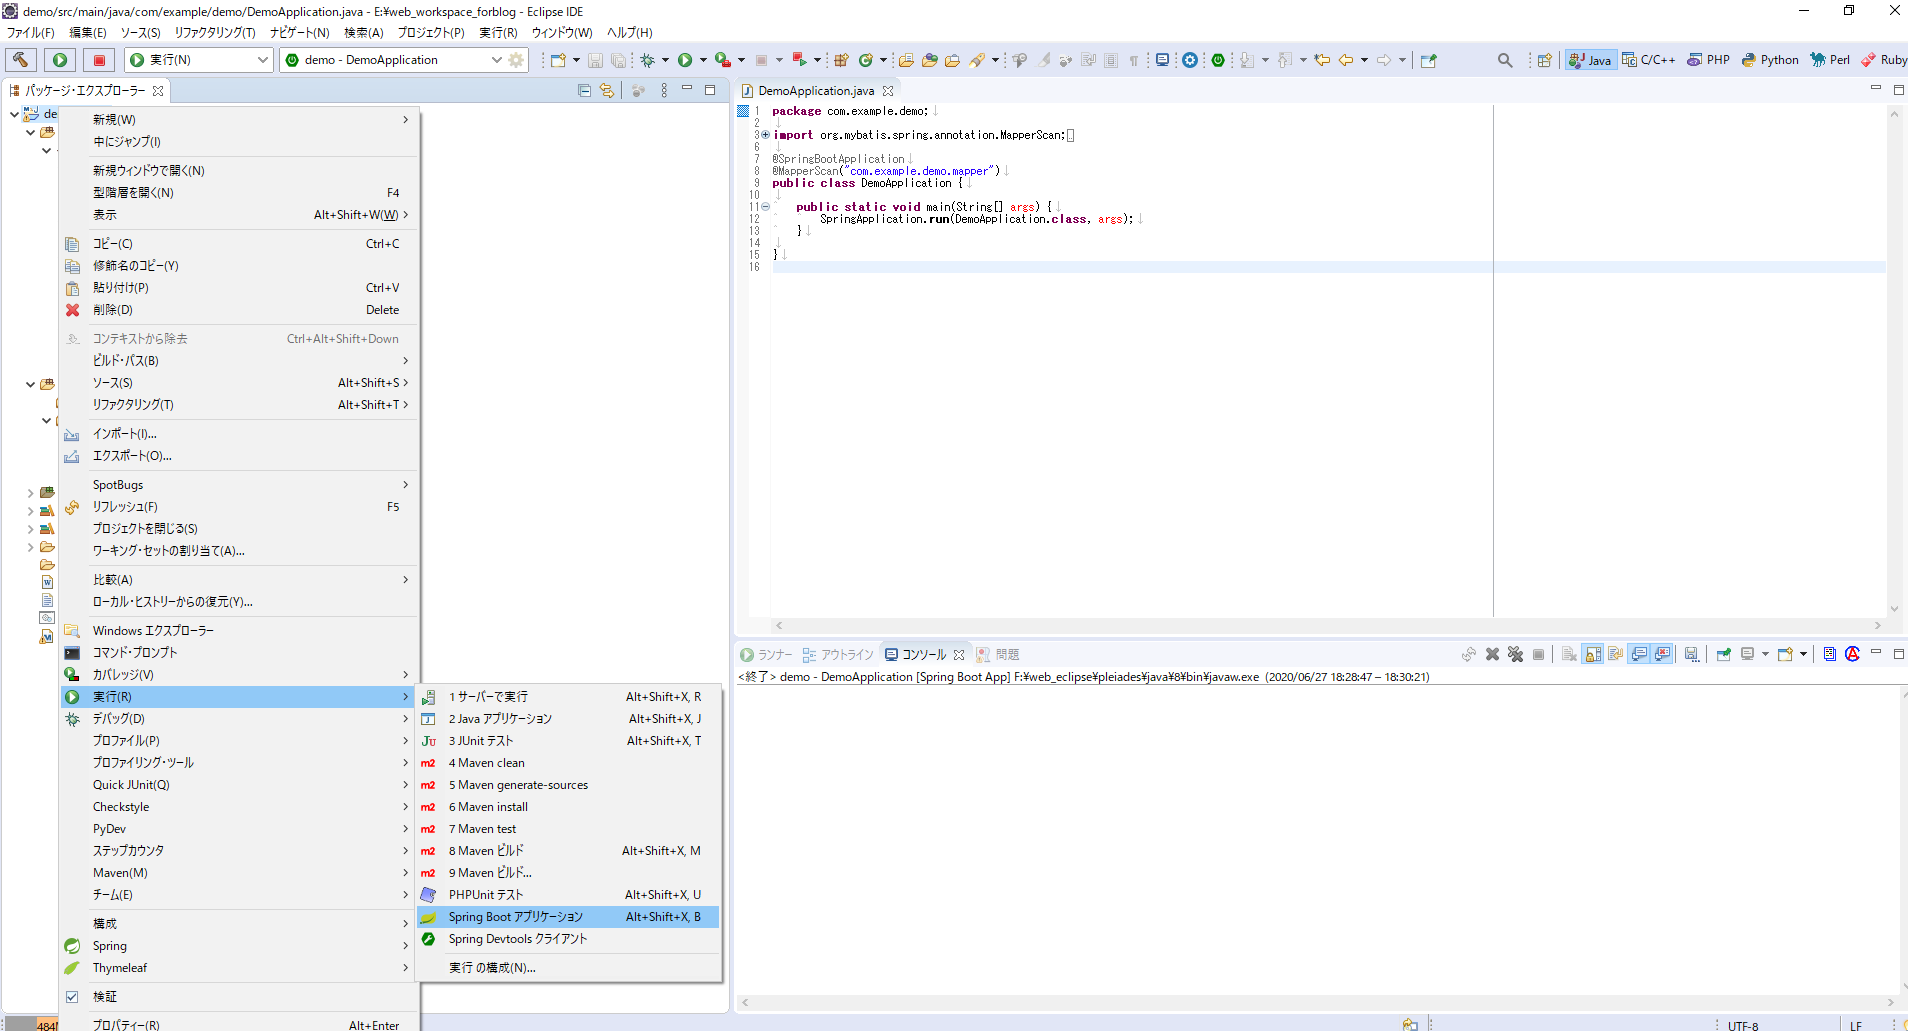
起動成功

6.2 ユーザ新規登録

6.3 ユーザ新規登録

6.4 データベース確認

7 終わり
ここまで実装が終わったら、ユーザ新規登録とユーザ一覧が表示できると思っています。
初めに、書いていますが、不十分な内容があると思うので、ご指摘お願いいたします。
SpringSecurityとBootstrap等について、未だ書いていませんが、後の章にて書くと思います。