Djangoチュートリアルも、かなり大詰めにはいってきました。みなさん元気にdjangoしてますでしょうか

今回は、前回出てきたテンプレートをゴリゴリ書いていきます。detailページは今のところ選択肢が出ているだけですが、ここから選択肢を選んで投票できるように、投票フォームをつくっていきます。
テンプレートを書く前に、プログラミング&HTMLコーディング初心者の方向けに、formタグの基本構造をおさらいしておきます。テンプレートを入れると見た目がごちゃごちゃしてしまうので。慣れている方も一旦おさらいしましょう。
<form action="送信先のURL" method="get/post">
    <div>
        名前 <input type="text" name="name">
    </div>
    <div>
        メールアドレス <input type="text" name="email">
    </div>
    <div>
        問い合わせ内容
    </div>
    <input type="button" value="送信">
</form>
See the Pen Untitled by ricky-sensei (@ricky-sensei) on CodePen.
formタグのmethodプロパティを見てみましょう。
getとpost
クライアントからサーバーにリクエストをする場合の、HTTPメソッドです。
get:サーバーから情報ちょうだい!
サーバーから単に情報をもらうだけなのがgetメソッド
post:サーバー側に情報をあげる!
今回のようにformから情報をサーバーに渡し、それをDBに登録したりする場合に使います。他にもブログ記事投稿やユーザーの追加などで使います。
これを踏まえた上で、detail.htmlを編集していきましょう。
<html lang="ja">
<head>
    <meta charset="UTF-8">
    <title>Title</title>
</head>
    <form action="{% url 'polls:vote' question.id %}" method="post">
        <fieldset>
            <legend><h1>{{ question.question_text }}</h1></legend>
            {% if error_message %}
                <p><strong>{{ error_message }}</strong></p>
            {% endif %}

            {% for choice in question.choice_set.all %}
                <input type="radio" name="choice" id="choice{{ forloop.counter }}" value="{{ choice.id }}">
                <label for="choice{{ forloop.counter }}">{{ choice.choice_text }}</label> <br>
            {% endfor %}
        </fieldset>
        <input type="submit" value="投票">
    </form>
</html>
この中で、初心者的にあまり見かけないタグは、legendタグくらいでしょうか。lengendタグは伝説のタグ、ではなく、各fieldsetに対しての説明文を入れたりするタグです。
pythonライクな書き方とhtmlが混在しているようなカタチで、最初は分かりづらいかもしれませんが、大体何が書いてあるか分かりますでしょうか。
error_messageというパラメータを確認し。それがtrueならエラー文を表示、そうでなければfor文を用いて選択肢を表示します。
urls.pyで、vote関数がこうなっていましたね。name=voteとしているから、{% url vote %}で指定できることを思い出してください。(前回参照)
path("<int:question_id>/vote/", views.vote, name="vote"),
views.pyののviews関数を編集しましょう。
ついでに。get_object_or_404やrenderのショートカットを使いましょう。
# 追加
from django.http import HttpResponse, HttpResponseRedirect
from django.shortcuts import get_object_or_404, render
# 追加
from django.urls import reverse
# 追加
from .models import Choice, Question

def vote(request, question_id):
    question = get_object_or_404(Question, pk=question_id)
    try:
        # request.Post にchoiceがあった場合、そのidを文字列として返す
        selected_choice = question.choice_set.get(pk=request.POST["choice"])
    except (KeyError, Choice.DoesNotExist):
        # request.Post にchoiceがなかったとき、エラーメッセージを返す
        # formから入力内容を再表示
        return render(
            request,
            "polls/detail.html",
            {
                "question": question,
                "error_message": "You didn't select a choice.",
            },
        )
    else:
        selected_choice.votes += 1
        selected_choice.save()

        # reverse関数で、関数名からURLを逆引きし、そのURLにリダイレクトする。戻るボタンを使って2回送信されることを防ぐとこができる。
        return HttpResponseRedirect(reverse("polls:results", args=(question.id,)))
reverse関数は、ハードコードを防ぐのにも一役買っています。reverse("polls:results", args=(question.id))は、"polls/3/results"を返します。
現在、voteのページはこんな感じになってるはずです。
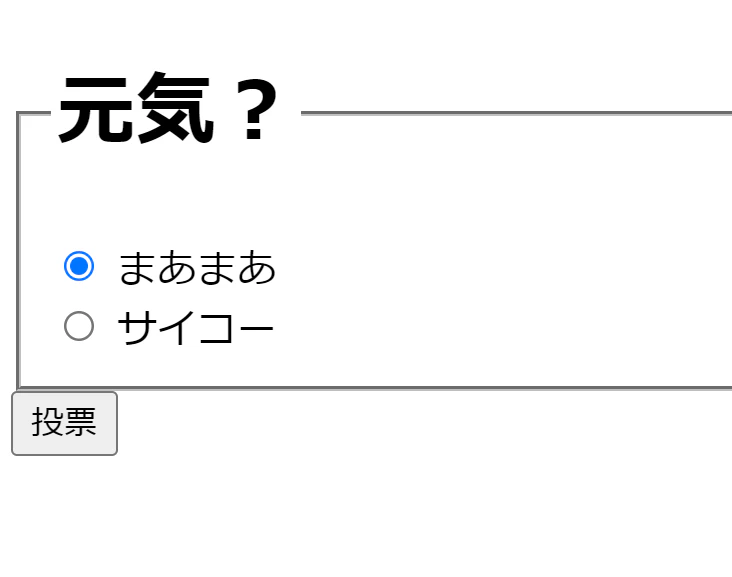
投票をクリックしたあとに結果ページに飛ぶんですが、そのビューを書いていきましょう。
...

def results(request, question_id):
    question = get_object_or_404(Question, pk=question_id)
    return render(request, "polls/results.html", {"question":question})
results.htmlをご指名なので、テンプレートをつくっていきましょう。
<!DOCTYPE html>
<html lang="en">
<head>
    <meta charset="UTF-8">
    <title>results</title>
</head>
<body>
    <h1>{{ question.question_text }}</h1>
    <ul>
        {% for choice in question.choice_set.all %}
            <li>{{ choice.choice_text }} -- {{ choice.votes }} vote{{ choice.votes | pluralize }}</li>
        {% endfor %}
    </ul>
    <a href="{% url "polls:detail" question.id %}">もう一度投票する?</a>
</body>
</html>
日本語サイトではほとんど使うことはないかもしれませんが、読んで頂いてるみなさんはだいぶテンプレートに慣れてきて,{{ choice.votes | pluralize }}ってなんじゃい、って思う方も多いと思いますので、一応解説しとくと,
はるか昔ピカピカの中学一年生のときに英語でならったあの「複数形」にしてくれる機能です。djangoにわざわざこの機能いる?って思ったりしますが、欧米のみなさんにはダイジな機能なんでしょう。許してあげてください。

レッツリファクタリング
urlconfの修正
index →IndexViewのように、ビューの名前を変更します。また、question_idとpkが混在しているので、pkに統一します。as_viewですが、クラスベースのviewを参照するときに使います。(後述)
urlpatterns = [
    path("", views.IndexView.as_view(), name="index"),
    path("<int:pk>/", views.DetailView.as_view(), name="detail"),
    path("<int:pk>/result/", views.ResultView.as_view(), name="results"),
    path("<int:question_id>/vote/", views.VoteView.as_view(), name="vote"),
]
次に,views.pyを編集します。
編集前のdetailとresultsのビューを見てみると、とてもシンプルなビューなのに、冗長な書き方になっています。今のviews.pyは関数ベースの書き方担っていますが、クラスを使った書き方に変更し、デフォルトで用意されているビューを使うことで、コードを短縮していきます。
from django.http import HttpResponseRedirect
from django.shortcuts import get_object_or_404, render
from django.urls import reverse
from django.views import generic

from .models import Choice, Question


class IndexView(generic.ListView):
    template_name = "polls/index.html"
    context_object_name = "latest_question_list"

    def get_queryset(self):
        """Return the last five published questions."""
        return Question.objects.order_by("-pub_date")[:5]


class DetailView(generic.DetailView):
    model = Question
    template_name = "polls/detail.html"


class ResultsView(generic.DetailView):
    model = Question
    template_name = "polls/results.html"


def vote(request, question_id):
    ...  # same as above, no changes needed.
チュートリアルにはいろいろ書いてありますが、とりあえず簡単にまとめると、django.viesのgenericの中の、ListViewとDetailViewというビューを使っている、ということと、ぞれぞでデータの渡し方がきまっており、例えばDetailViewでは「PK」という名前でプライマリキーを渡すことが決まっているので、先程question_idからpkに変えたわけです。
それぞれデフォルトのテンプレートも用意されていますが、template_nameを指定することで、自分で用意したテンプレートを使うことができます。
私が一回やったミスなのですが、class ResultsView(generic.DetailView):のところ、誤ってgeneric.ListViewとしてしまって、
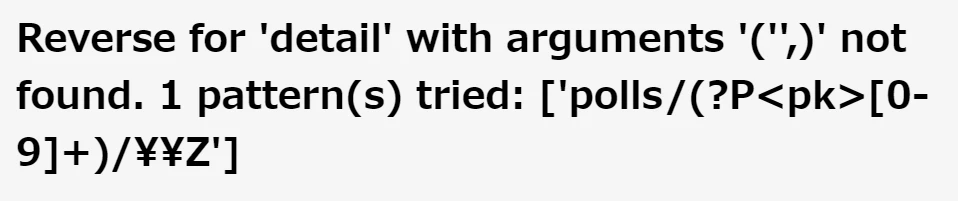
というエラーが出ました。当然ですが、それぞれの汎用viewで要求されている引数の種類が違う、ということですね。
ここであんまりそれぞれの汎用ビューにこだわりすぎると、djangoの本質を見失うことになりかねないので、初心者の方はとりあえず一旦おいておくことをオススメします。次行きましょ次!気になる人は先輩の言う通りここでも覗いてみればいいんじゃないでしょうか。
無事投稿機能が実装できました!ここいらで一旦その1に戻って、自分の手で実装してみるのもいいかもしれません。 自分が作ることを想定した投票機能にしてみるとか。
では、その5に続きます。