本記事は2021年1月時点での内容になります。最新情報については公式サイトなどを確認願います。
ShopifyでGoogleアナリティクスの拡張eコマースの設定方法
ShopifyはGoogleアナリティクスの設定がとても簡単です。特に自分でやるのはかなり面倒な拡張eコマースもあっという間にできてしまうので、絶対にやっておくことをおすすめします。
Googleアナリティクスの設定方法
Googleアナリティクスの設定とユニバーサルアナリティクス(以下UA)の拡張eコマースの設定方法についてはShopifyの「Googleアナリティクスを設定」を参照してください。
GA4でのeコマース設定
UAの拡張eコマースはShopify側で自動的に収集してくれますが、GA4版は2020年12月末時点ではまだ未実装なので、自分で実装する必要があります。今回はテーマ「Debut」で説明しますので、それ以外のテーマを使っている方は各自のテーマに合わせてください。
商品 / アイテムリストの表示回数とインプレッションを測定
collection.liquidの修正
商品リストのインプレッションの測定では、表示される商品の情報をdataLayerに挿入する必要があるため、 collection.liquid を修正します。下記のスクリプトを{% endcomment %} と {% section ‘collection-template’ %} の間に入れます。
  var items = [];
  var item_num = 1;
  {% for product in collection.products  %}
    {% assign current_variant = product.selected_or_first_available_variant %}
    var item = {
      'item_name': "{{product.title}}",
         'item_id': "{{ current_variant.sku }}",
         'price': "{{ current_variant.price | divided_by: 100.00}}",
         'item_brand':"{{product.vendor}}",
         'item_category': "{{product.collections[0].title}}",
         'item_category2':"{{product.collections[1].title}}",
         'item_category3': "{{product.collections[2].title}}",
         'item_category4': "{{product.collections[3].title}}",
         'item_category5': "{{product.collections[4].title}}",
         'item_list_name': "{{ collection.title }}",
         'item_list_id':  "{{ collection.id }}",
      {% if product.has_only_default_variant %}
         'item_variant':  "{{product.variant.title}}", // put defualt variant
      {% else  %}
         'item_variant':  "{{current_variant.title}}", // put first variant
      {% endif %}
         'index': item_num,
         'quantity': '1'
       }
    items.push(item);
    item_num +=1;
  {% endfor %}

window.dataLayer = window.dataLayer || [];
window.dataLayer.push({
  'event': 'view_item_list',
  'ecommerce': {
    'items': items
  }
});
なお、ShopifyではSKUは必須ではないためSKUが入っていないサイトではvurrent_variant.skuの代わりに商品番号(current_variant.id)を入れましょう。
GTM側の設定
次にGTM側の設定です。まず最初にdataLayerから商品情報を取得するために、変数を作成します。

- 変数名:DLV – ecommerce.items ※任意
- 変数のタイプ:データレイヤー変数
- データレイヤーの変数名:ecommerce.items
- データレイヤーのバージョン:バージョン2
次に、dataLayerに’view_item’イベントを入れていますので、GTM側でカスタムイベントを追加します。

- イベント変数名:Event – view_item_list ※任意
- トリガーのタイプ:カスタム イベント
- イベント名:view_item_list
- このトリガーの発生場所:すべてのカスタムイベント
最後にイベントタグを作成します。

- 名前:GA4 ecommerce – view_item_list ※任意
- 設定タグ:なし – 手動設定したID
- 測定ID:GA4測定ID(Googleアナリティクスの管理画面→プロパティ→データストリーム→Webをクリック→Gで始まるID)
- イベント名:view_item_list
- イベントパラメータ
- パラメータ名:items、値:{{DV – ecommerce.items}}
- トリガー:Event – view_item_list
これで商品リストのインプレッションの測定の設定は完了です。
ですが、このイベントはページが表示されたタイミングでこのページに含まれる全商品のインプレッションが計測されます。きちんと表示された商品だけ計測したい場合は下記のような修正が必要です。
- トリガーに「要素の表示」を使用
- collection.liquidを修正(各商品のタグにSKUを入れる)
- 商品をecommerce.itemsではなく別の変数に入れる
- ページに商品が出現した際に、ecommerce.itemsに商品を追加し、イベントタグをコールする
商品 / アイテムの詳細表示回数とインプレッションを測定する
product.liquidの修正
次に商品ページなどで商品の詳細表示を測定する方法です。商品リストのインプレッションの測定と同様に、表示される商品の情報をdataLayerに挿入する必要があります。Shopify側のproduct.liquidの{% endcomment %}と{% section ‘product-template’ %}の間にスクリプトを追加します。
<script>
  var items = [];
  var item_num = 1;
    {% assign current_variant = product.selected_or_first_available_variant %}
    {%- for variant in product.variants -%}
    var item = {
      'item_name': "{{product.title}}",
         'item_id': "{{ variant.sku }}",
      	 'price': "{{ variant.price | divided_by: 100.00}}",
         'item_brand':'{{product.vendor}}',
         'item_category': "{{product.collections[0].title}}",
         'item_category2':"{{product.collections[1].title}}",
         'item_category3': "{{product.collections[2].title}}",
         'item_category4': "{{product.collections[3].title}}",
         'item_category5': "{{product.collections[4].title}}",
         'item_list_name': "{{ collection.title }}",
         'item_list_id':  "{{ collection.id }}",
      {% if product.has_only_default_variant %}
         'item_variant':  "{{variant.title}}", // put defualt variant
      {% else  %}
         'item_variant':  "{{current_variant.title}}", // put first variant
      {% endif %}
         'index': item_num,
         'quantity': '1'
       }
    items.push(item);
    item_num +=1;
  {% endfor %}

window.dataLayer = window.dataLayer || [];
window.dataLayer.push({
  'event': 'view_item',
  'ecommerce': {
    'items': items[0]
  }
});
</script>
GTM側の設定
続いてGTM側の設定です。DataLayer変数はDLV – ecommerce.itemsをすでに追加しているのでそれを使います。ですのでここでは最初にカスタムイベントを追加します。
カスタムイベントのイベント名はview_itemになります。それ以外は先ほどと同じです。

- イベント変数名:Event – view_item ※任意
- トリガーのタイプ:カスタム イベント
- イベント名:view_item
- このトリガーの発生場所:すべてのカスタムイベント
次にイベントタグを作成します。

- 名前:GA4 ecommerce – view_item ※任意
- 設定タグ:なし – 手動設定したID
- 測定ID:GA4測定ID(Googleアナリティクスの管理画面→プロパティ→データストリーム→Webをクリック→Gで始まるID)
- イベント名:view_item
- イベントパラメータ
- パラメータ名:items、値:{{DV – ecommerce.items}}
- トリガー:Event – view_item
ショッピングカートへの追加
次はショッピングカートへの追加の測定になります。今回は商品詳細ページから商品をショッピングカートへ追加する場合になります。それ以外のページから商品をショッピングカートへ追加する場合は今回は省略します。
ですが、これまではページが表示されたタイミングでDataLayerに送るようにしていましたが、今回はカートへ追加する場合なので方法が変わります。
- 商品情報を取得(前述「商品 / アイテムの詳細表示回数とインプレッションを測定する」で設定済み)
- カートへ追加した時にSKUを取得
- 取得したSKUの商品情報を上記1から取得して、DataLayerに送る
という手順になります。
商品情報を取得
前述(商品 / アイテムの詳細表示回数とインプレッションを測定する)でproduct.liquidにスクリプトを追加する部分と全く同じなので省略します。
product-template.liquidの修正
カートへ追加した時にSKUを取得するために、Shopify側のproduct-template.liquidを修正します。
182行目あたりに下記のコードがあります。ここの、<option value=”{{ variant.id }}” の後ろに data-sku=”{{variant.sku}}” を挿入します。
<select name="id" id="ProductSelect-{{ section.id }}" class="product-form__variants no-js">
  {% for variant in product.variants %}
    <option value="{{ variant.id }}" data-sku="{{variant.sku}}" {%- if variant==current_variant %} selected="selected" {%- endif -%} >
      {{ variant.title }}  {%- if variant.available == false %} - {{ 'products.product.sold_out' | t }}{% endif %}</option>
  {% endfor %}
</select>
GTM側の設定
次にGTM側の設定ですが、これまでのイベントとGA4タグとは別に、カートに追加された時にDataLayerにデータを送るためのカスタムHTMLタグを追加します。
※Shopify側で実装しても良いのですが、Clickしたタイミングで送るという処理はGTM側だと設定1つで済むのでGTM側で実装しています。
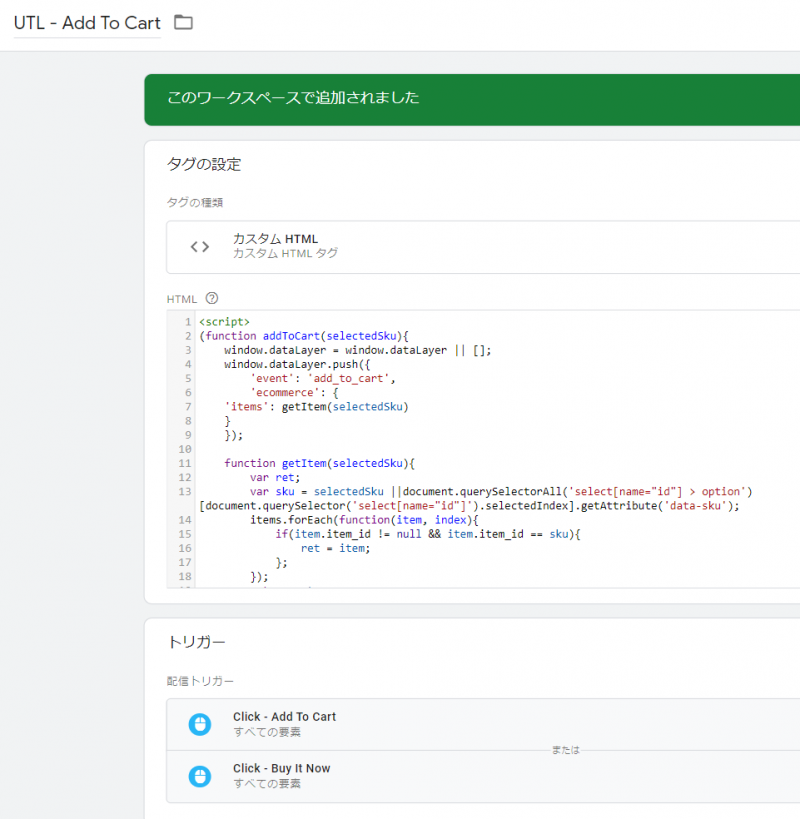
- タグ名:UTL – Add To Cart ※任意
- タグの種類:カスタムHTML
- HTML:下記のスクリプト
- トリガー:Click – Add To Cart , Click – Buy It Now ※下記参照
HTML内に記述するスクリプト
<script>
(function addToCart(selectedSku){
	window.dataLayer = window.dataLayer || [];
	window.dataLayer.push({
		'event': 'add_to_cart',
		'ecommerce': {
    'items': getItem(selectedSku)
    }
	});

	function getItem(selectedSku){
		var ret;
		var sku = selectedSku ||document.querySelectorAll('select[name="id"] > option')[document.querySelector('select[name="id"]').selectedIndex].getAttribute('data-sku');
		items.forEach(function(item, index){
			if(item.item_id != null && item.item_id == sku){
				ret = item;
			};
		});
		return ret;
	};
};
)();
</script>
トリガーは以下のとおり。

- トリガー名:Click – Add To Cart ※任意
- トリガーのタイプ:クリック すべての要素
- このトリガーの発生場所:一部のクリック
- Click Classes 含む product-form__cart-submit
- Click Classes 含む btn–secondary-accent

- トリガー名:Click – Buy It Now ※任意
- トリガーのタイプ:クリック すべての要素
- このトリガーの発生場所:一部のクリック
- Click Classes 含む shopify-payment-button__button
次にこれまでと同じようにカスタムイベントを追加します。

- イベント変数名:Event – add_to_cart ※任意
- トリガーのタイプ:カスタム イベント
- イベント名:add_to_cart
- このトリガーの発生場所:すべてのカスタムイベント
次にイベントタグを作成します。
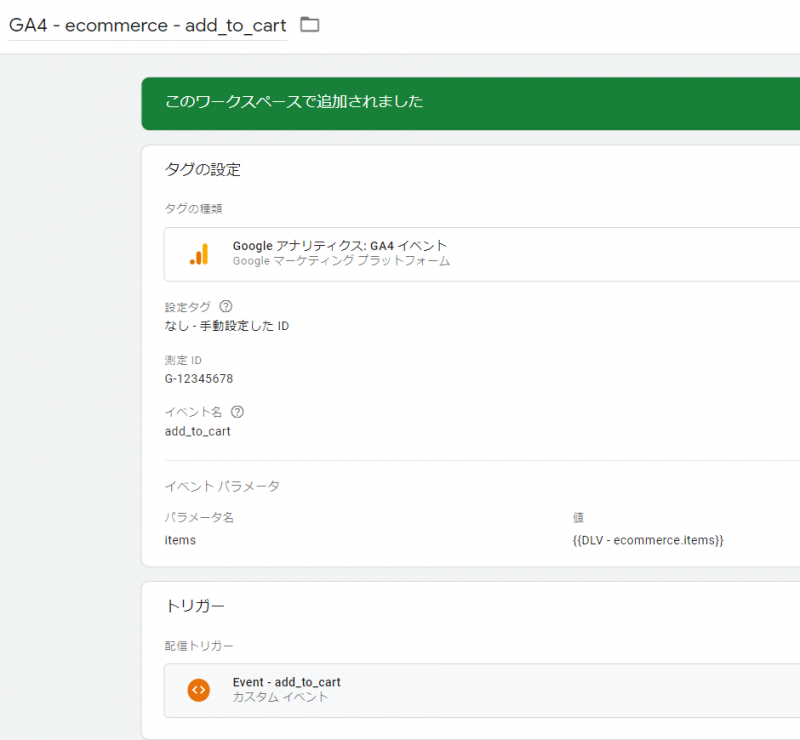
- 名前:GA4 ecommerce – add_to_cart ※任意
- 設定タグ:なし – 手動設定したID
- 測定ID:GA4測定ID(Googleアナリティクスの管理画面→プロパティ→データストリーム→Webをクリック→Gで始まるID)
- イベント名:add_to_cart
- イベントパラメータ
- パラメータ名:items、値:{{DV – ecommerce.items}}
- トリガー:Event – add_to_cart
購入を測定する
最後は購入の測定になります。購入完了ページが表示されたら購入情報や商品情報をDataLayerに送ります。
Shopifyの変更
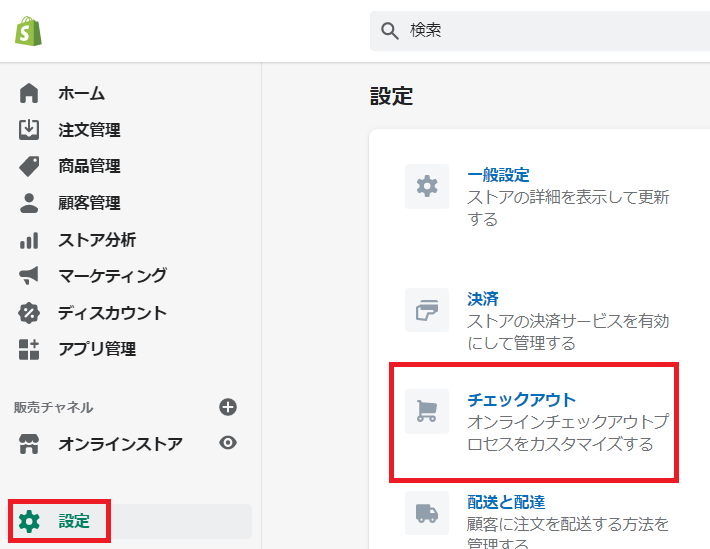
購入は設定->チェックアウト->注文処理->追加スクリプトで下記のスクリプトを追加します。

スクリプト:
<script>
var ga4_ecommerce_items = [];
{% for item in checkout.line_items  %}
		{% if item %}
		var unit_price = {{item.final_price}}/100;
		var item = {
			'item_name': "{{item.title}}",
			'item_id': "{{item.sku}}",
			'item_price': unit_price.toString(),
			'item_brand': "{{item.vendor}}",
			'item_variant': "{{item.variant.title}}",
			'item_category': "{{item.product.collections[0].title}}",
    	'item_coupon': "{{ item.discount_allocations[0].discount_application.title }}",
			'quantity': {{item.quantity}}
		}
 		ga4_ecommerce_items.push(item);
		{% endif %}
{% endfor %}

window.dataLayer = window.dataLayer || [];
window.dataLayer.push({
 'event': 'purchase',
  'ecommerce': {
    'purchase': {
      'transaction_id': '{{checkout.order_number}}',
      'affiliation': '{{ shop.permanent_domain }}',
      'value': '{{ checkout.total_price | money_without_currency }}',
      'tax': '{{ checkout.tax_price | money_without_currency }}',
      'shipping': '{{ checkout.shipping_price | money_without_currency }}',
      'currency': '{{ shop.currency }}',
      'coupon': '{{ checkout.cart_level_discount_applications[0].title }}',
	  'items':ga4_ecommerce_items
	}
}
});
</script>
GTM側の設定
次にカスタムイベントを追加します。

- イベント変数名:Event – purchase ※任意
- トリガーのタイプ:カスタム イベント
- イベント名:purchase
- このトリガーの発生場所:すべてのカスタムイベント

- 名前:GA4 ecommerce – purchase ※任意
- 設定タグ:なし – 手動設定したID
- 測定ID:GA4測定ID(Googleアナリティクスの管理画面→プロパティ→データストリーム→Webをクリック→Gで始まるID)
- イベント名:purchase
- イベントパラメータ
- パラメータ名:items、値:{{DV – ecommerce.items}}
- トリガー:Event – purchase
本来ならば商品クリックやショッピングカートからの削除、決済時なども測定すべきですが、今回は省略しました。/checkoutから始まる決済ページ(住所入力等)はShopify Plusを契約していないと編集できません。
なお、カートページや購入完了ページで商品IDを取得できるline_item.idは、ページによって取得内容が異なりますので、あまり使わないことをおすすめします。
おまけ)Google広告のコンバージョンタグ
Googleアナリティクス以外でも購入完了ページでタグを入れることはよくあります。中でもGoogle広告のコンバージョンタグはよく使われます。
<script>
  gtag('event', 'conversion', {
    'send_to': 'AW-XXXXXXXXX/ABCDEFGHIJKLMNOPQR', // Google広告のIDで、Google広告の管理画面から取得
    'value': '{{checkout.subtotal_price|money_without_currency}}' , // 商品小計
    'currency': '{{ shop.currency }}',
    'transaction_id': '{{ order_number }}'
  });
</script>