OpenAIから、o3-mini、o3-mini-highがリリースされました。STEM系の推論が強化されたようで、コーディング能力もアップしたそうです。マインクラフトクローンや、3Dマリオっぽいゲームもさくっと作れてしまうそうです。
私もさっそく試してみようということで、何か、ぐるぐる動くデモ動画を作るのに挑戦してみました。ちなみに、私のpythonの普段使いはデータ分析やテキスト解析で、3D画像の処理はまったくの素人です。
完成品はこちら。これがものの30分くらいで完成できてしまいました。馬(直方体:ピンクの面が頭)をドローンカメラが追跡して、周回したりズームアウト/ズームインするようなカメラワークで撮影した時の、馬とドローンの位置を左画面、ドローンカメラからの一人称視点を右画面に表示しています。

これが完成するまでのプロンプトの変化をお伝えしようと思います。
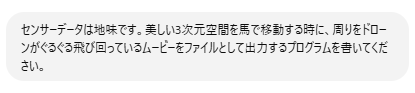
最初、「o3-miniの実力が分かるすごいデモプログラムを書いて」とお願いしたら、センサーデータを描画するプログラムを出してきたので、もうちょっと派手なデモプログラムを書くよう願いしました。
すると、下記のような動画を出力するプログラムが出てきました。

たしかに、馬の周りをドローンが飛び回って、全体がぐるぐる回っている画像ですね。。。
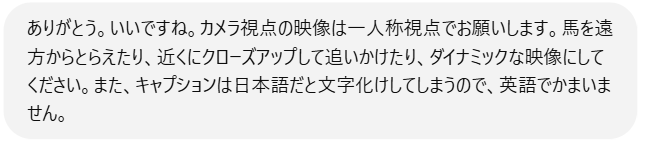
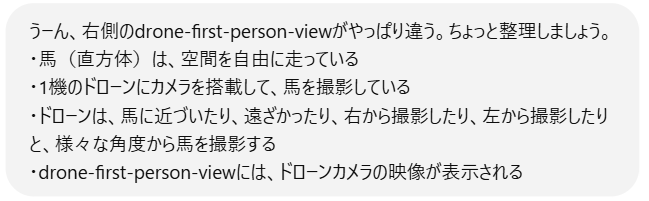
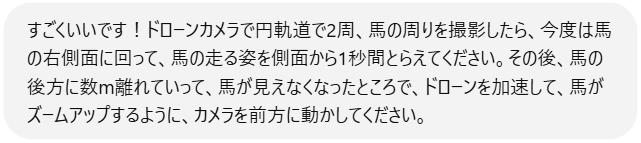
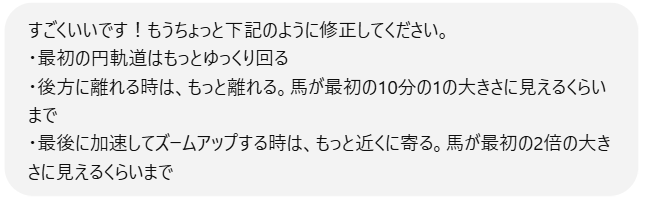
あとは、これに肉付けしていくような指示を追加しながら、動作を具体化していきました。時には、こちらの指示があいまいすぎて伝わらないこともあったのですが、o3-miniがどこを勘違いしているかを分析しながら、プロンプトをアジャストしていった感じです。
プロンプトの履歴のダイジェストは下記のような感じです。途中、何度かエラーが出ましたが、その都度、エラーメッセージを入力すると、しっかり解決してくれました(以前のGPT-4oだと「ライブラリのバージョンが最新版か確認してください」のような感じでお茶を濁されていましたが、しっかり原因分析して対策を考えてくれているようでした。)


最終的なソースコードは下記の通り。300行くらい。この分量を30分程度で何往復も試行錯誤できるのがすごいと思いました。あと、指示はいきなりかっちりしたものを書いた方が良いかもしれないと思いつつ、想定通り動かなかった時のショックが大きいので、まずはざっくりとあいまいな指示からはじめて、できているところは残しつつ、イメージとギャップがあるところを直していくのが良さそうだと感じました。
import numpy as np
import matplotlib as mpl
import matplotlib.pyplot as plt
from matplotlib.animation import FuncAnimation, FFMpegWriter
from mpl_toolkits.mplot3d import Axes3D
from mpl_toolkits.mplot3d.art3d import Poly3DCollection
import math
import matplotlib.lines as mlines  # For custom legend handles

# Set ffmpeg path (adjust as needed)
mpl.rcParams['animation.ffmpeg_path'] = r"C:\Users\qovop\Downloads\ffmpeg-master-latest-win64-gpl-shared\ffmpeg-master-latest-win64-gpl-shared\bin\ffmpeg.exe"

# ---------------------------
# Function Definitions
# ---------------------------
def horse_position(t):
    """The horse follows an elliptical path with slight vertical oscillation."""
    x = 10 * np.cos(t)
    y = 6 * np.sin(t)
    z = 1 + 0.5 * np.sin(2 * t)
    return np.array([x, y, z])

def drone_position_phase1(t, frame):
    """
    Phase 1: Circular orbit around the horse.
    ここでは、100フレームで1周だった従来のものを、150フレームで2周するように設定。
    """
    r = 3.0
    angle = 4 * np.pi * frame / 150.0  # frame 0~150で 0~4π (2周)
    offset = np.array([r * np.cos(angle), r * np.sin(angle), 1.5])
    return horse_position(t) + offset

def compute_drone_position(frame, t):
    """
    ドローンの位置を3つのフェーズで決定する。
      Phase 1 (frame 0~150): 馬の周囲を2周する円軌道
      Phase 2 (frame 151~200): 円軌道終了時の位置から、馬の後方へ大きく離れる
      Phase 3 (frame 201~250): 後方から急速に前方へ移動し、ズームアップ
    """
    up = np.array([0,0,1])
    H = horse_position(t)
    delta = 1e-3
    H_next = horse_position(t + delta)
    forward_horse = H_next - H
    norm_f = np.linalg.norm(forward_horse)
    if norm_f < 1e-6:
        forward_horse = np.array([1,0,0])
    else:
        forward_horse = forward_horse / norm_f
    right_horse = np.cross(up, forward_horse)
    right_horse = right_horse / np.linalg.norm(right_horse)

    if frame <= 150:
        return drone_position_phase1(t, frame)
    elif frame <= 200:
        pos_start = compute_drone_position(150, t)  # Phase 1の最終位置
        pos_target = H - 30.0 * forward_horse + np.array([0,0,1.5])
        frac = (frame - 150) / 50.0
        return (1-frac)*pos_start + frac*pos_target
    else:
        pos_phase2_end = H - 30.0 * forward_horse + np.array([0,0,1.5])
        pos_target = H + 0.5 * forward_horse + np.array([0,0,1.5])
        frac = (frame - 200) / (total_frames - 200)
        return (1-frac)*pos_phase2_end + frac*pos_target

def get_oriented_box_faces(center, size, R_box):
    """
    与えられた中心 center、サイズ size=(L, w, h) の直方体を、
    カノニカルな座標系(x: front, y: right, z: up)で定義し、
    R_box (3x3) を用いてワールド座標系に変換する。
    戻り値は各面の頂点リストのリスト(順番:0: bottom, 1: top, 2: front (head side), 3: back, 4: right, 5: left)。
    """
    L, w, h = size
    vertices = np.array([
       [-L/2, -w/2, -h/2],
       [ L/2, -w/2, -h/2],
       [ L/2,  w/2, -h/2],
       [-L/2,  w/2, -h/2],
       [-L/2, -w/2,  h/2],
       [ L/2, -w/2,  h/2],
       [ L/2,  w/2,  h/2],
       [-L/2,  w/2,  h/2],
    ])
    transformed = (R_box.dot(vertices.T)).T + center
    faces = [
       transformed[[0,1,2,3]],  # bottom
       transformed[[4,5,6,7]],  # top
       transformed[[1,2,6,5]],  # front (head side)
       transformed[[0,3,7,4]],  # back
       transformed[[2,3,7,6]],  # right
       transformed[[0,1,5,4]],  # left
    ]
    return faces

def compute_horse_orientation(t):
    """
    馬の進行方向に合わせた直方体の回転行列を計算する。
    (列ベクトルとして [forward, right, up] を返す)
    """
    delta = 1e-3
    H = horse_position(t)
    H_next = horse_position(t+delta)
    forward = H_next - H
    norm_f = np.linalg.norm(forward)
    if norm_f < 1e-6:
        forward = np.array([1,0,0])
    else:
        forward = forward / norm_f
    up = np.array([0,0,1])
    right = np.cross(up, forward)
    norm_r = np.linalg.norm(right)
    if norm_r < 1e-6:
        right = np.array([0,1,0])
    else:
        right = right / norm_r
    R_box = np.column_stack((forward, right, up))
    return R_box

def compute_lookat_camera_frame(cam_pos, target):
    """ドローンカメラが常に馬を向くようなカメラ座標系を計算する。"""
    forward = target - cam_pos
    norm_forward = np.linalg.norm(forward)
    if norm_forward < 1e-6:
        forward = np.array([0,0,1])
    else:
        forward = forward / norm_forward
    up = np.array([0,0,1])
    right = np.cross(forward, up)
    norm_right = np.linalg.norm(right)
    if norm_right < 1e-6:
        right = np.array([1,0,0])
    else:
        right = right / norm_right
    up = np.cross(right, forward)
    R = np.vstack([right, up, forward])
    return R

def project_to_camera(P, cam_pos, R, focal_length):
    """3D点 P を、カメラ位置 cam_pos, カメラ回転 R, 焦点距離 focal_length を用いて2Dに投影する。"""
    rel = P - cam_pos
    cam_coords = R.dot(rel)
    if cam_coords[2] <= 0:
        return None
    x_img = (focal_length * cam_coords[0]) / cam_coords[2]
    y_img = (focal_length * cam_coords[1]) / cam_coords[2]
    return np.array([x_img, y_img])

# ---------------------------
# Fixed Parameters
# ---------------------------
# 馬は (2, 1, 1) の直方体
horse_size = (2, 1, 1)
fov_deg = 60
half_fov_rad = np.radians(fov_deg/2)
focal_length = 1 / np.tan(half_fov_rad)

total_frames = 250
fps = 30
t_values = np.linspace(0, 2 * np.pi, total_frames)

# ---------------------------
# Figure and Subplots
# ---------------------------
fig = plt.figure(figsize=(16,8))

# Global 3D view (left)
ax_global = fig.add_subplot(121, projection='3d')
ax_global.set_xlabel("X")
ax_global.set_ylabel("Y")
ax_global.set_zlabel("Z")
ax_global.set_title("Global Scene")

# Drone First-Person View (right) as 2D image
ax_fp = fig.add_subplot(122)
ax_fp.set_title("Drone First-Person View")
ax_fp.set_xlabel("Image X")
ax_fp.set_ylabel("Image Y")

# ---------------------------
# Global Ground Grid
# ---------------------------
Xg, Yg = np.meshgrid(np.linspace(-20,20,30), np.linspace(-20,20,30))
Zg = np.zeros_like(Xg)
ax_global.plot_surface(Xg, Yg, Zg, color='lightgrey', alpha=0.3,
                         rstride=1, cstride=1, edgecolor='none')

# ---------------------------
# Initialize Global Objects
# ---------------------------
h_init = horse_position(t_values[0])
d_init = compute_drone_position(0, t_values[0])
R_horse = compute_horse_orientation(t_values[0])
horse_faces = get_oriented_box_faces(h_init, horse_size, R_horse)
# 面の色: [bottom, top, front, back, right, left] -> front を pink, その他は sandybrown
face_colors = ['sandybrown', 'sandybrown', 'pink', 'sandybrown', 'sandybrown', 'sandybrown']
horse_box_global = Poly3DCollection(horse_faces, facecolors=face_colors, edgecolors='k', alpha=0.9)
ax_global.add_collection3d(horse_box_global)
drone_marker_global, = ax_global.plot([d_init[0]], [d_init[1]], [d_init[2]],
                                       '^', color='red', markersize=10)

# Trajectory lines (optional)
horse_traj_data = [[], [], []]
drone_traj_data = [[], [], []]
horse_traj_global, = ax_global.plot([], [], [], color='brown', linestyle='--', linewidth=1)
drone_traj_global, = ax_global.plot([], [], [], color='red', linestyle='--', linewidth=1)

global_handles = [
    mlines.Line2D([], [], color='sandybrown', marker='s', linestyle='None', markersize=12, label='Horse'),
    mlines.Line2D([], [], color='red', marker='^', linestyle='None', markersize=10, label='Drone')
]
ax_global.legend(handles=global_handles, loc='upper right')

# ---------------------------
# Animation Update Function
# ---------------------------
def update(frame):
    t = t_values[frame]
    H = horse_position(t)
    D = compute_drone_position(frame, t)

    # Update global trajectories
    horse_traj_data[0].append(H[0])
    horse_traj_data[1].append(H[1])
    horse_traj_data[2].append(H[2])
    drone_traj_data[0].append(D[0])
    drone_traj_data[1].append(D[1])
    drone_traj_data[2].append(D[2])
    horse_traj_global.set_data(horse_traj_data[0], horse_traj_data[1])
    horse_traj_global.set_3d_properties(horse_traj_data[2])
    drone_traj_global.set_data(drone_traj_data[0], drone_traj_data[1])
    drone_traj_global.set_3d_properties(drone_traj_data[2])

    # Global view: update axis limits and view
    global_zoom = 15 + 3 * np.sin(2 * np.pi * frame / total_frames)
    ax_global.set_xlim(-global_zoom, global_zoom)
    ax_global.set_ylim(-global_zoom, global_zoom)
    ax_global.set_zlim(0, global_zoom * 0.66)
    ax_global.view_init(elev=20, azim=frame * 360 / total_frames)

    # Global view: update oriented horse box and drone marker
    R_horse = compute_horse_orientation(t)
    new_faces = get_oriented_box_faces(H, horse_size, R_horse)
    horse_box_global.set_verts(new_faces)
    horse_box_global.set_facecolor(face_colors)
    drone_marker_global.set_data([D[0]], [D[1]])
    drone_marker_global.set_3d_properties([D[2]])

    # ---------------------------
    # Drone First-Person View (Projection)
    # ---------------------------
    # ドローンカメラは常に馬を向く (look-at)
    R_cam = compute_lookat_camera_frame(D, H)
    faces_H = get_oriented_box_faces(H, horse_size, R_horse)
    proj_faces = []
    for idx, face in enumerate(faces_H):
        proj_face = []
        for vertex in face:
            proj = project_to_camera(vertex, D, R_cam, focal_length)
            if proj is not None:
                proj_face.append(proj)
        if len(proj_face) >= 3:
            proj_faces.append((idx, np.array(proj_face)))

    ax_fp.cla()
    ax_fp.set_title("Drone First-Person View")
    ax_fp.set_xlabel("Image X")
    ax_fp.set_ylabel("Image Y")

    if proj_faces:
        all_pts = np.concatenate([pf[1] for pf in proj_faces])
        min_xy = np.min(all_pts, axis=0)
        max_xy = np.max(all_pts, axis=0)
    else:
        min_xy = np.array([-1,-1])
        max_xy = np.array([1,1])
    margin = 0.2
    ax_fp.set_xlim(min_xy[0]-margin, max_xy[0]+margin)
    ax_fp.set_ylim(min_xy[1]-margin, max_xy[1]+margin)
    ax_fp.set_aspect('equal', adjustable='box')

    # 各面を面のインデックスに応じた色で描画
    for idx, proj_face in proj_faces:
        color = face_colors[idx]
        poly = plt.Polygon(proj_face, color=color, ec='k', alpha=0.9)
        ax_fp.add_patch(poly)

    proj_center = project_to_camera(H, D, R_cam, focal_length)
    if proj_center is not None:
        ax_fp.plot(proj_center[0], proj_center[1], 'o', color='brown', markersize=12)
    ax_fp.plot(0, 0, 'x', color='red', markersize=12)

    return (horse_box_global, drone_marker_global, horse_traj_global, drone_traj_global)

# ---------------------------
# Create and Save Animation
# ---------------------------
anim = FuncAnimation(fig, update, frames=total_frames, interval=1000/fps, blit=False)
writer = FFMpegWriter(fps=fps, metadata=dict(artist='YourName'), bitrate=1800)
anim.save("global_fp_drone_first_person.mp4", writer=writer)

print("Video file 'global_fp_drone_first_person.mp4' has been saved.")