やりたいこと
そのままタイトル通りです
現場でVue2は使っているんですけどNuxtは使ったことがないので、安定版も出たことだし勉強も兼ねていっちょ最新版のNuxt3を使うので備忘録も兼ねて記事に書いておきます
デザインは基本的にvuetifyを使って、細かいcssはBootStap以外のcssフレームワークに手を出すためにtailwindでやっていきます
# セットアップ
環境
Nuxt3 stable3 + vuetify + tailwindcss
環境構築
ありがたいことにドキュメントがあるのでその通りにやっていきましょう
Node.js - v16.10.0 or newer
Text editor - We recommend Visual Studio Code with the Volar Extension
Nodeはv16.10.0以上じゃなきゃダメなんですね
node --version
v16.15.1
ギリギリセーフなのでとりあえずインストール
npx nuxi init einherjar
少しでもモチベを上げるためにかっこいいプロジェクトネームつけておきます
yarn install
yarn installでNuxt3の準備は完了
tailwindインストール
続いてtailwindインストール
npx tailwindcss init
これでtailwindを入れて
Rootフォルダにできたtailwind.config.jsに適応範囲を追加します
/** @type {import('tailwindcss').Config} */
module.exports = {
  content: [
    './*.vue',
    './components/**/*.vue',
    './layouts/**/*.vue',
    './pages/**/*.vue'
  ],
  theme: {
    extend: {}
  },
  plugins: []
}
それからRootフォルダにassets/cssフォルダとtailwind.cssを作って

以下の文章を書き加える
@tailwind base;
@tailwind components;
@tailwind utilities;
それから今作ったnuxt.config.tsにtailwind.cssを参照する記述をしましょう
// https://nuxt.com/docs/api/configuration/nuxt-config
export default defineNuxtConfig({
  postcss: {
    plugins: { tailwindcss: {} }
  },
  css: ['~/assets/css/tailwind.css'],
  modules: ['@nuxtjs/tailwindcss']
})
vuetifyに関しては以下のサイトを参考にしたため省略します。
起動
これでyarn dev -oしてNuxt3は起動!
チュートリアルページ?みたいなとこに飛ばされました

さて、起動できたならtailwindやらが動くのかを確認したいところですが、まずはなぜチュートリアルが開かれたかですね。
どうやら<NuxtWelcome />ってのがチュートリアル画面を開くコンポーネントらしい
<template>
  <div>
    <NuxtWelcome />
  </div>
</template>
ならばここを置き換えてみましょう
tailwind適用済みか確認のためにtailwindのクラスを付与してみます!
<template>
  <div>
    <h1 class="underline">Hello world!</h1>
  </div>
</template>
左上にちっさく表示されてる!
しかもtailwindも適用されてるっぽい!
これで環境構築という開発時最大の敵は仕留めたぞ!
ルーティング
どうやらNuxtではpagesフォルダにあるファイルを自動でルーティングしてくれる機能があるらしいので試してみる
npx nuxi add page index
pagesフォルダが見当たらない1ので、pagesフォルダ作成の専用コマンド実行
pagesフォルダとindex.vueファイルができてる!

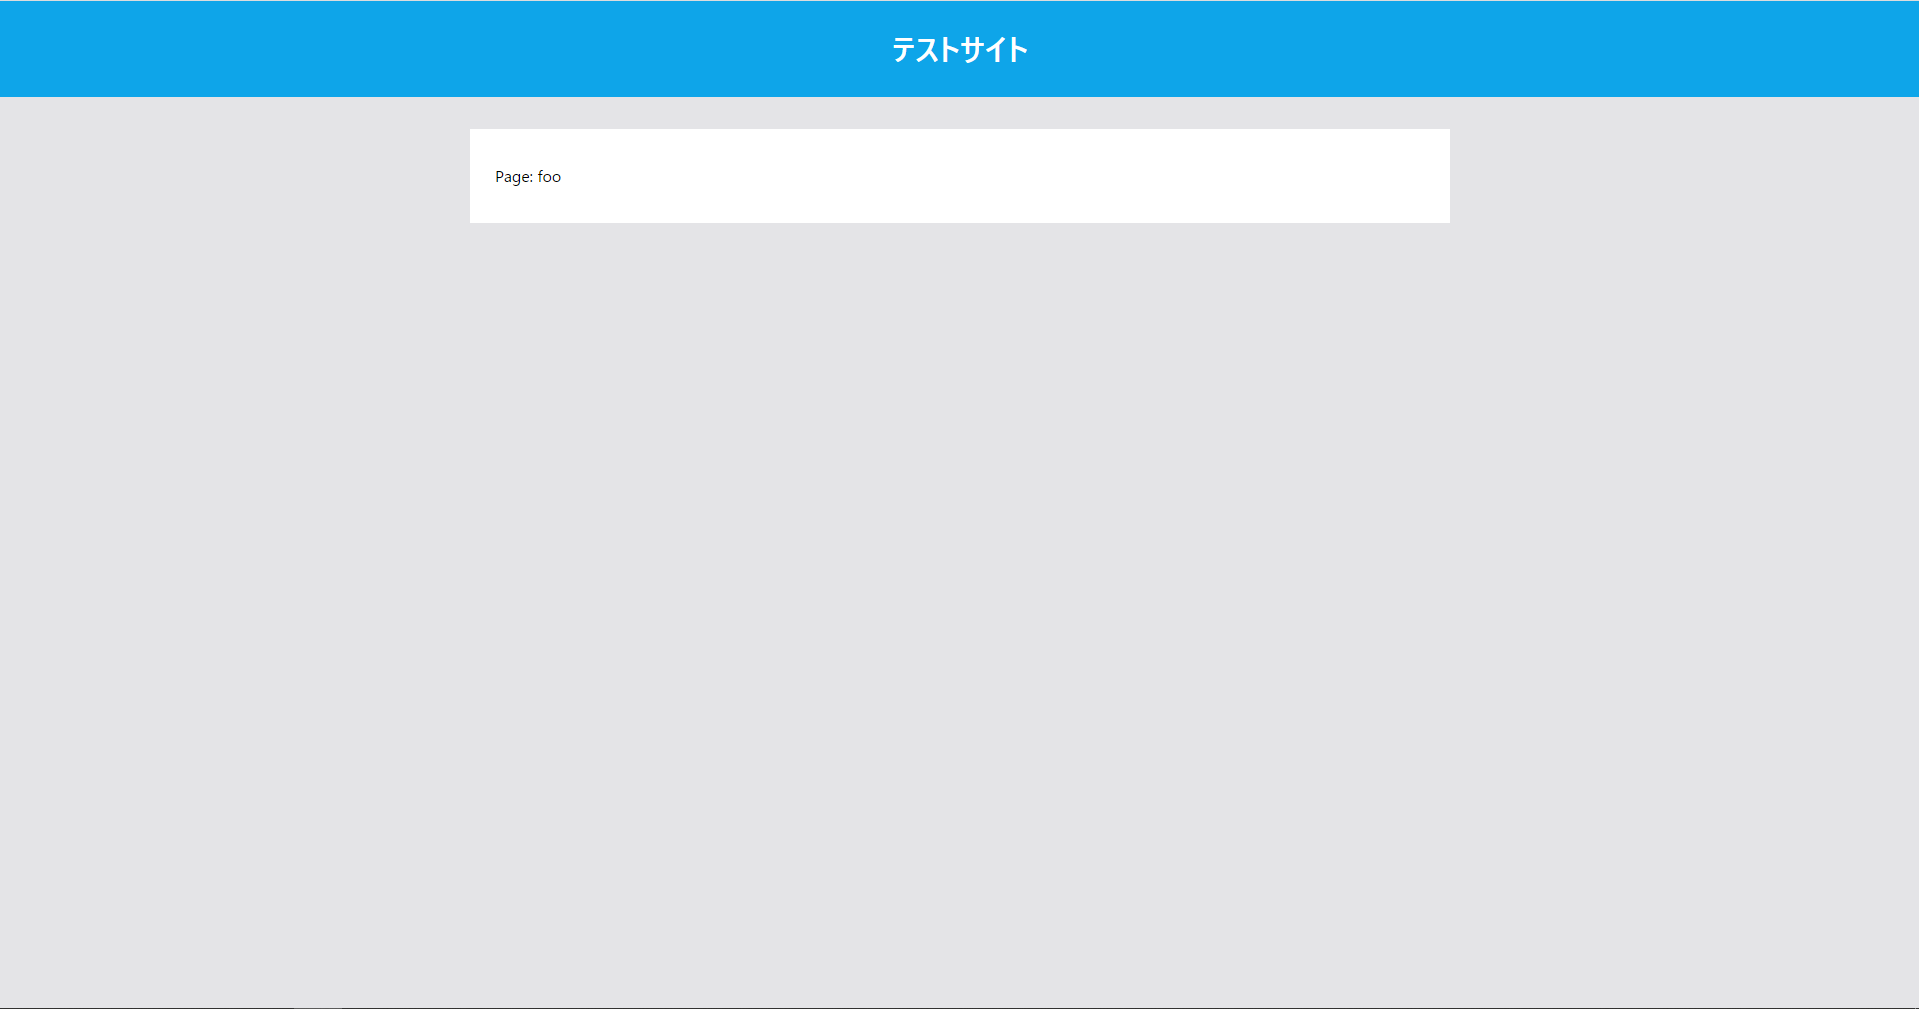
<template>
  <div>Page: foo</div>
</template>
さて、ではこのページにどうやってルーティングするのかというとapp.vueに<NuxtPage />を追加すればいいみたいですね
じゃあ、<NuxtWelcome />は必要ないので置き換えてしまいましょう
<template>
  <div>
    <NuxtPage />
  </div>
</template>
ちゃんとルーティングされてますね!
nuxtなしvue.jsではいちいちルーティング用のファイルにパスを書き加えなきゃいけなかったのでこれは大変便利!
レイアウト
Nuxtでは共通レイアウト機能もサポートしてくれてるみたいですね
<NuxtPage />を<NuxtLayout>で挟み込むとlayoutsフォルダの.vueファイルを読み込んでるとのこと
こんな感じ
<template>
  <div>
    <NuxtLayout>
      <NuxtPage />
    </NuxtLayout>
  </div>
</template>
それじゃあ、実際に作って適当なスタイルを書き込んでみる2

<template>
  <div class="bg-zinc-200 h-screen w-screen">
    <header
      class="bg-sky-500 top-0 z-40 h-24 flex justify-center items-center text-white font-bold text-3xl"
    >
      テストサイト
    </header>
    <div class="flex justify-center">
      <nav></nav>
      <div class="bg-white w-[980px] mt-8 px-[25px] py-[35px]"><slot /></div>
    </div>
  </div>
</template>

<script setup lang="ts"></script>

<style></style>
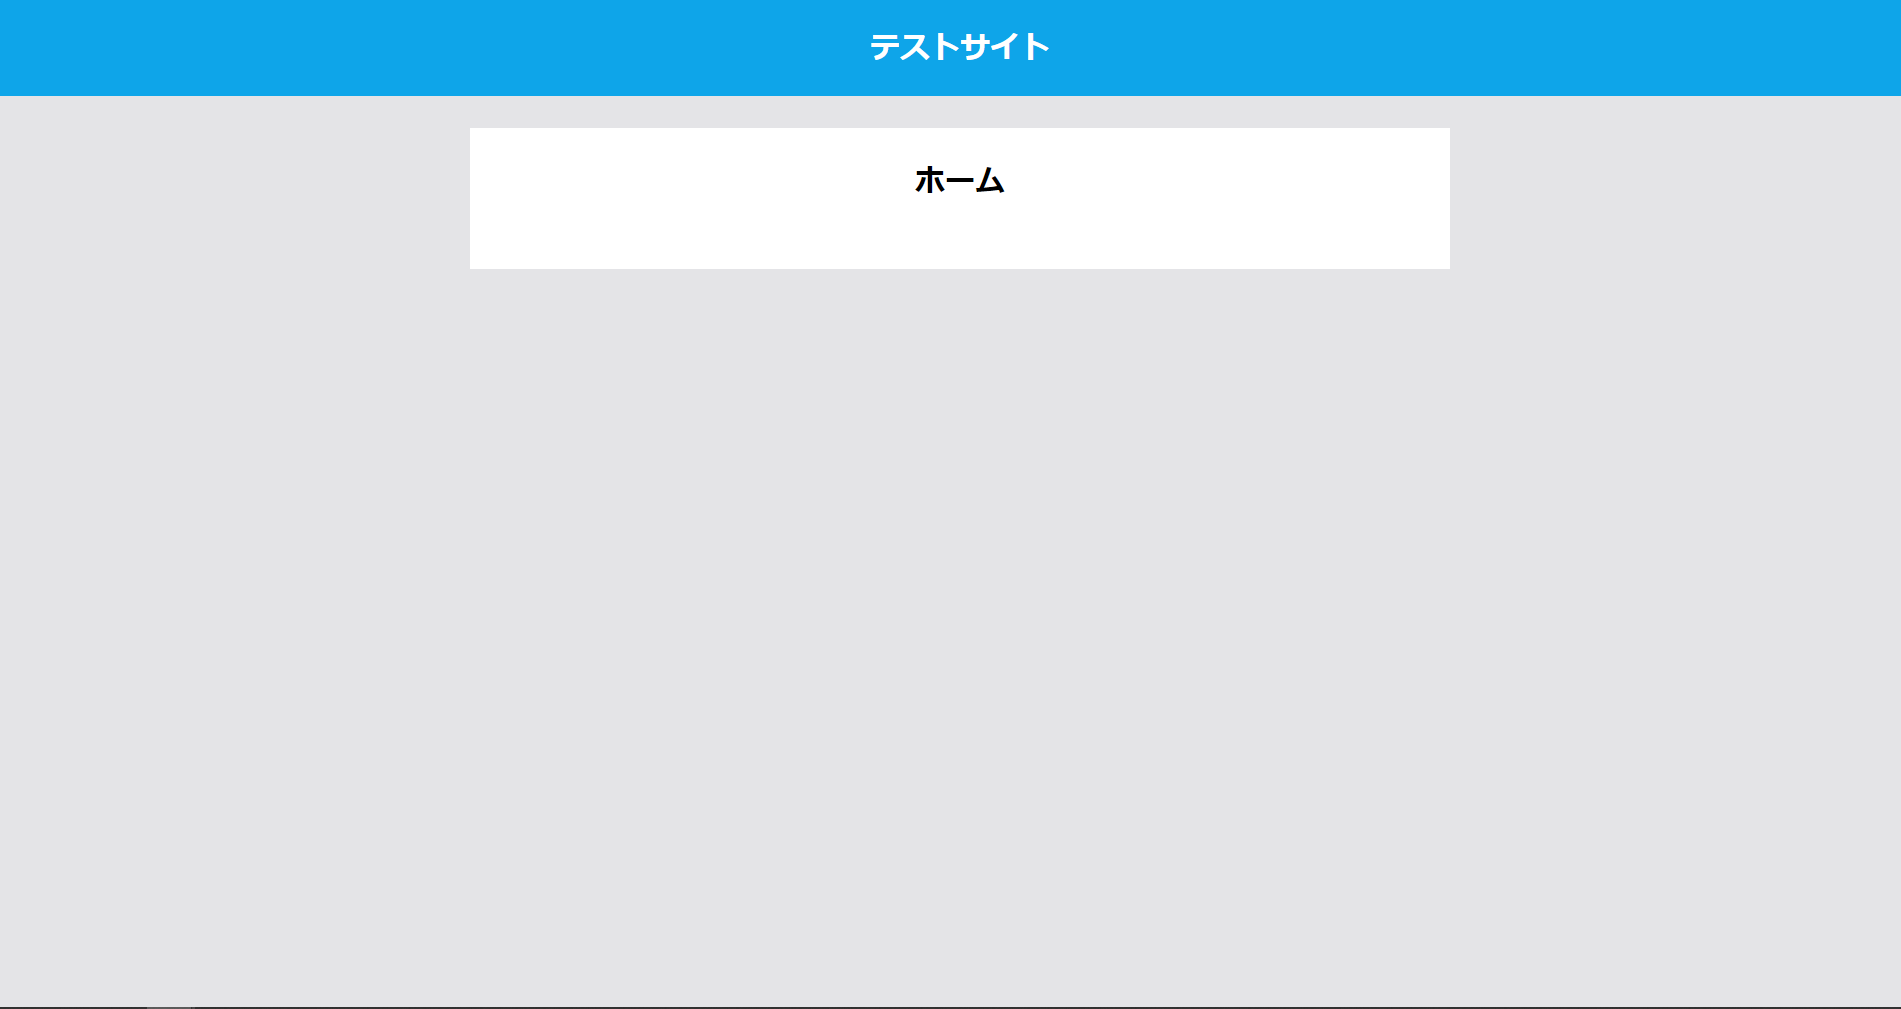
メチャクチャダサいけど、とりあえずレイアウトが適応されたからヨシ!👉
コンポーネント
コンポーネントはバニラのvueでもありましたね
ただcomponentsフォルダにコンポーネントを入れると明示的にimportしなくても自動でimportしてくれるみたいです。
ということで機能は必要最低限な感じで、適当なコンポーネントを作りました
<template>
  <div class="flex justify-center">
    <span class="px-[25px] pb-[35px] font-bold text-center text-3xl">
      {{ title }}
    </span>
  </div>
</template>

<script setup lang="ts">
  interface Props {
    title: string
  }

  withDefaults(defineProps<Props>(), {
    title: ''
  })
</script>
んで、コンポーネントを読み込んで
<template>
  <div>
    <PageTitle :title="title"></PageTitle>
  </div>
</template>

<script lang="ts" setup>
  const title = 'ホーム'

  onMounted(() => useHead({ title }))
</script>

<style scoped></style>
サウナ検索サイト作成
基本的なNuxt3の使い方を覚えたところで、適当になんかそれっぽいサイトを作りたい…
せっかくなら前々から試したいと思っていたGoogleMapApiも使ってみたい…
ならサウナにハマってるし市のサウナを検索できるサイトでも作ってみよう!(サウナイキタイでいいというツッコミは無視します)
GoogleApi登録
Google Cloudに登録してPlaces APIをオンにします

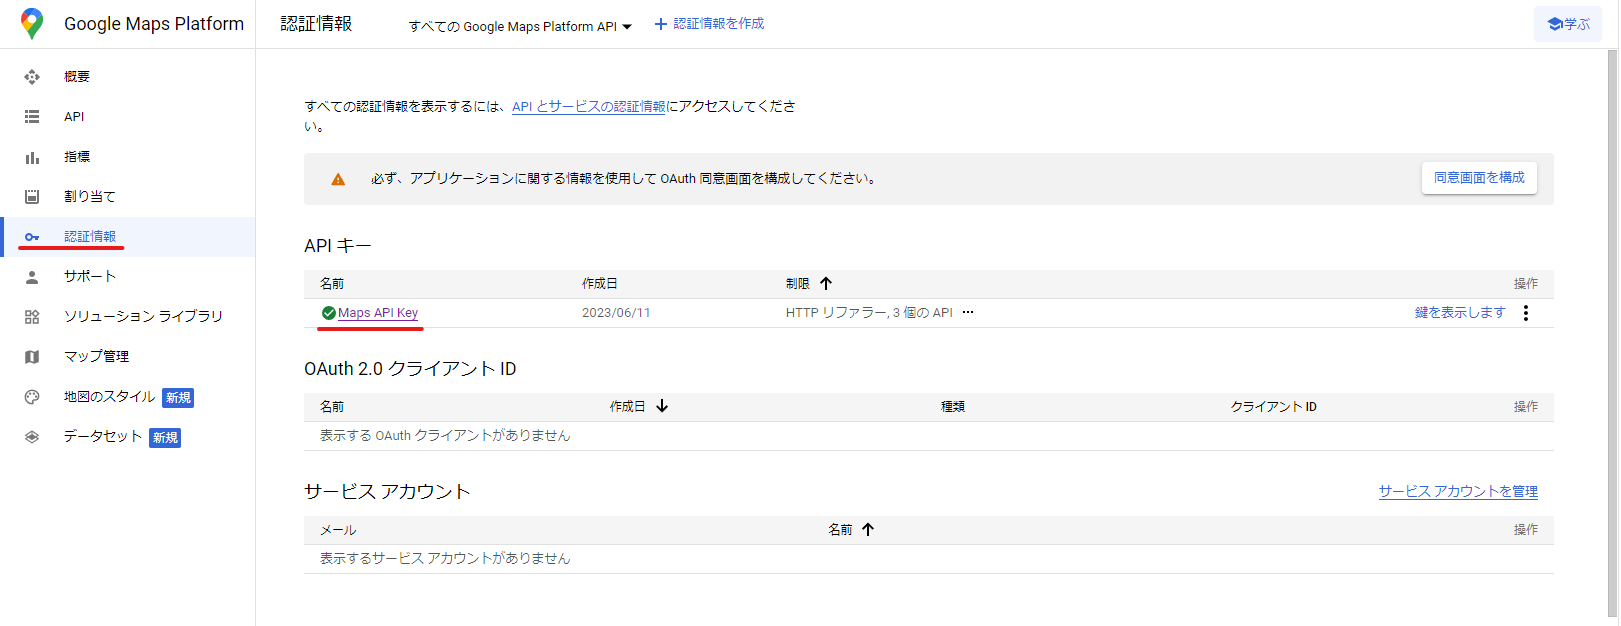
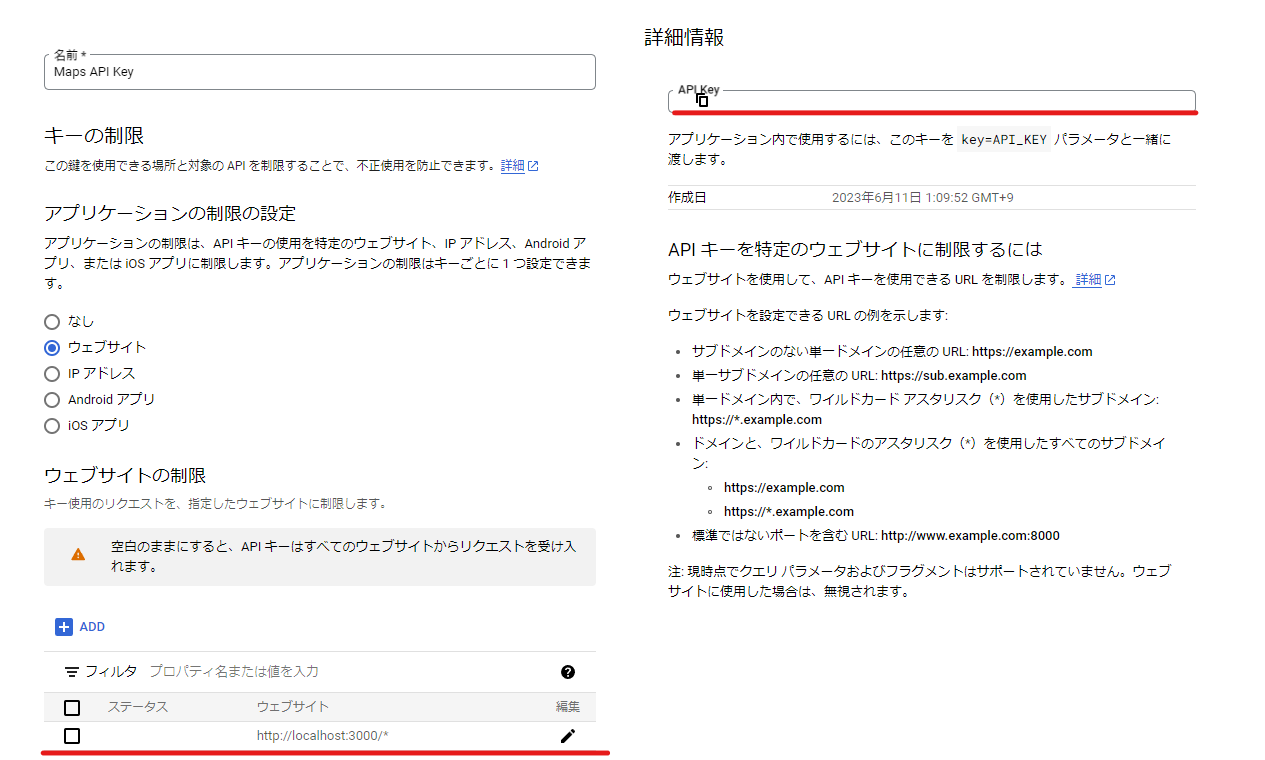
すると認証情報にMapsAPIKeyが生成されるので、ページをクリックしてAPIKeyの詳細画面に入ります。
右上の赤線部分に個人用のAPIKeyが生成されるので、GoogleMapApi使用にはそれを使います3
念のため左下でApiを使用できる範囲をlocalhost:3000以下のページに制限しておきましょう
検索ページ作成
ページを作っていく上で言及しなかったが使用したNuxt3の機能があるので解説
Composables
下のコードでcomposablesというフォルダが出てきますが、共通関数を収めるフォルダです
今回はjs-api-loaderを使ってGoogleMapApiを使用するのですが、loaderを全く同じ設定で使用しているページに飛んでからページバックするとloader must not be called again with different options.と怒られたため、loaderのオブジェクトをstate化して参照するために使用しました。
もともとは検索ロジックなどもここに入る予定だったのですが、検索結果の返し方など考えるとすごく迂遠な処理になるため、loaderのオブジェクト以外はきれいさっぱり消えました。
これならばuseState()を使ってstate化したほうがよかったですね…
[slug].vue(動的ページ)
Nuxt3からの機能だそうですが、動的にページURLを作成するには[slug].vueと、動的にしたいところを[]で括ってページ作成を行うみたいです。
今回私が使ったみたいにトークン又はIDの文字列をURLに組み込んでページを開いてから、値をもとにデータを引っ張るという使い方が多いと思うのですが、[]部分の取得方法は次のようにuseRoute()を使えばOKです
  const route = useRoute()
  const queryPlaceId = route.params.id as string
最終成果物
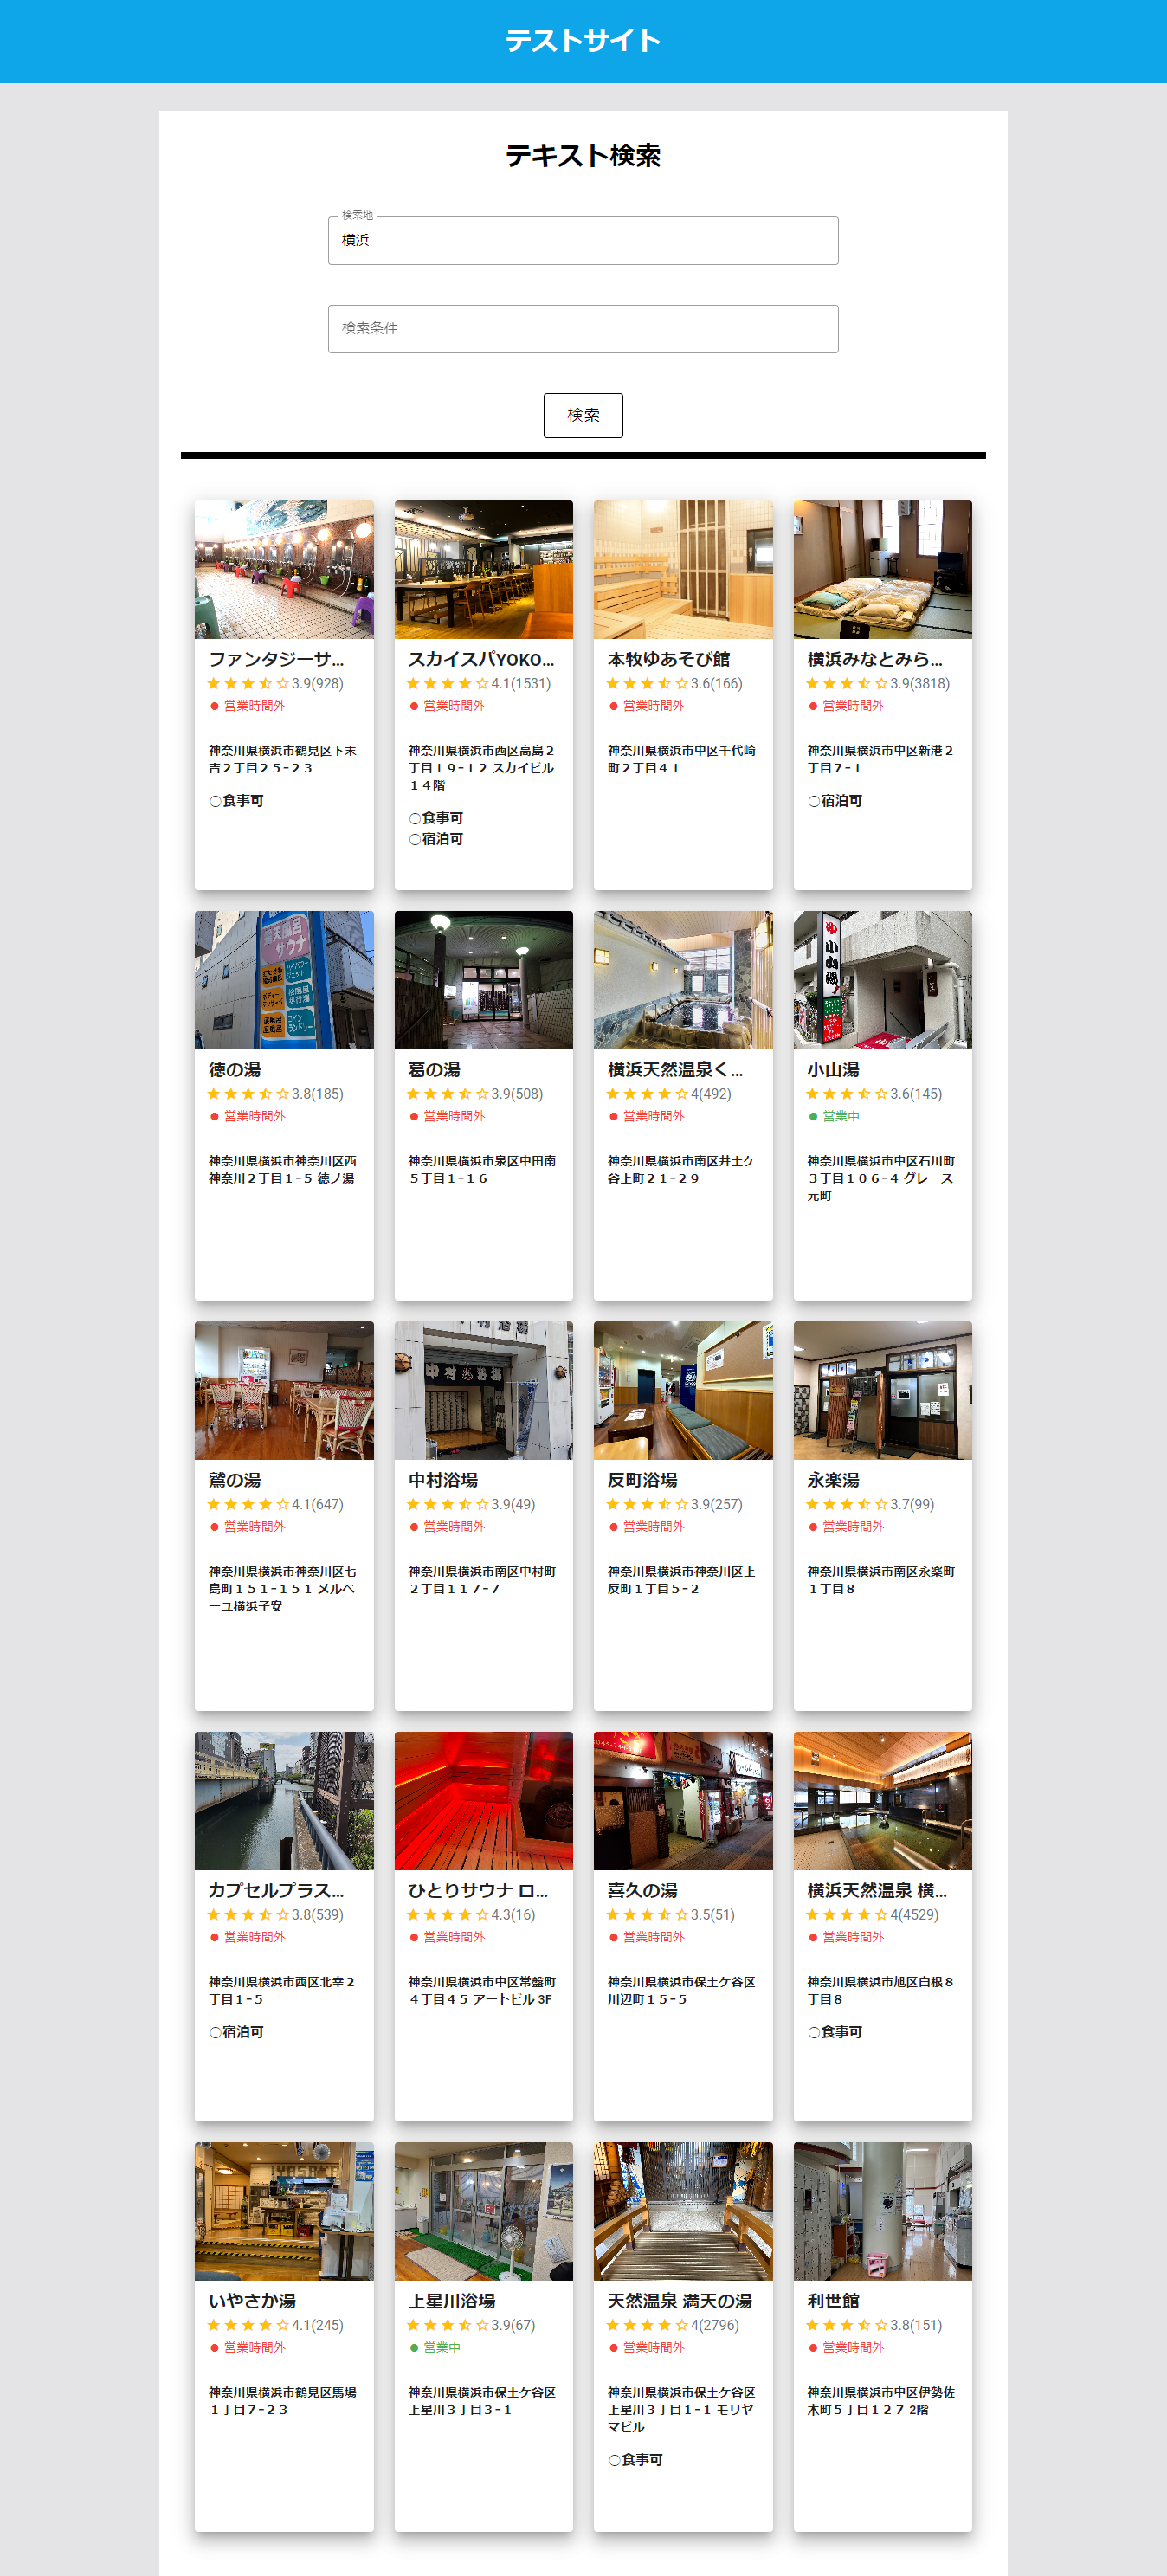
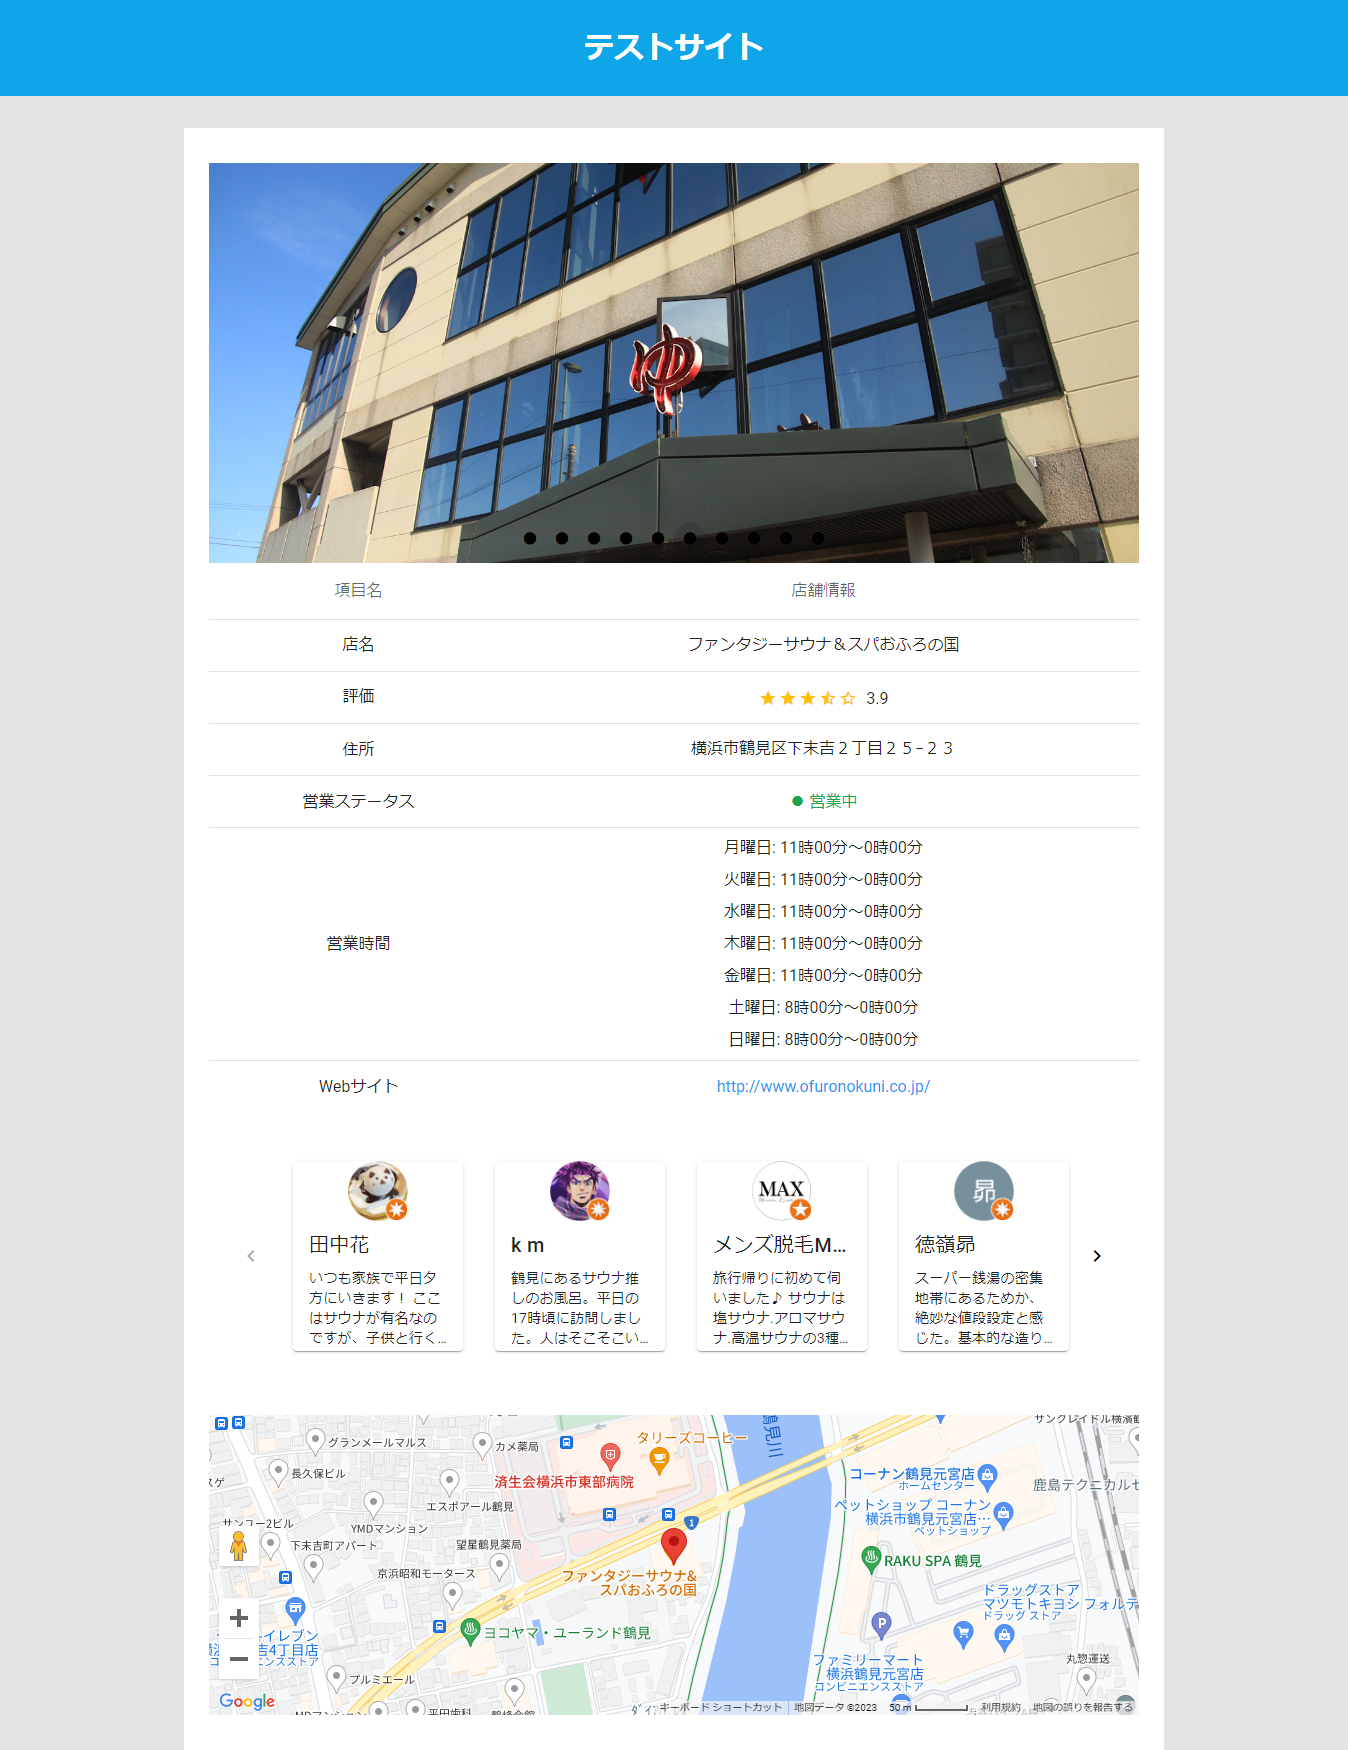
実際にGoogleMapApiを使ったApiサイトを作った結果がこちらになります
結果一覧ページ
結果一覧のコード
<template>
  <div>
    <PageTitle :title="title"></PageTitle>
    <SearchBox @get-datas="getDatas"></SearchBox>
    <SearchResult
      v-model:result="searchConditions"
      v-model:isSearched="isSearched"
    ></SearchResult>
  </div>
</template>

<script lang="ts" setup>
  const title = 'テキスト検索'
  const searchConditions = ref([])
  const isSearched = ref(false)
  const getDatas = (val: any[]): void => {
    isSearched.value = true
    searchConditions.value = val
  }

  onMounted(() => useHead({ title }))
</script>

<style scoped></style>
<template>
  <div class="border-b-8 border-black mb-8">
    <v-container>
      <v-row class="flex justify-center">
        <v-col sm="8" class="flex justify-center items-center">
          <v-text-field
            v-model:model-value="searchPoint"
            label="検索地"
            placeholder="例) 横浜"
            type="text"
            variant="outlined"
            clearable
            :rules="[required]"
          >
            <template #append-inner>
              <v-fade-transition leave-absolute>
                <v-progress-circular
                  v-if="loading"
                  color="info"
                  indeterminate
                  size="24"
                ></v-progress-circular>
              </v-fade-transition>
            </template>
          </v-text-field>
        </v-col>
        <v-col sm="8" class="flex justify-center items-center">
          <v-text-field
            v-model:model-value="searchCondition"
            label="検索条件"
            placeholder="例) 水風呂 ロウリュ"
            type="text"
            variant="outlined"
            clearable
          >
            <template #append-inner>
              <v-fade-transition leave-absolute>
                <v-progress-circular
                  v-if="loading"
                  color="info"
                  indeterminate
                  size="24"
                ></v-progress-circular>
              </v-fade-transition>
            </template>
          </v-text-field>
        </v-col>
        <v-col sm="8" class="flex justify-center items-center">
          <v-btn
            :disabled="!searchPoint"
            variant="outlined"
            size="x-large"
            @click="getData"
            >検索</v-btn
          >
        </v-col>
      </v-row>
    </v-container>
  </div>
</template>

<script lang="ts" setup>
  interface Emits {
    (e: 'getDatas', value: any[]): void
  }
  const emits = defineEmits<Emits>()

  const searchPoint = ref('')
  const searchCondition = ref('')
  const loading = ref(false)
  const required = computed(() => {
    return !!searchPoint.value || '必ず入力してください'
  })
  const loader = useGoogle().loader
  const getData = (): void => {
    const searchResult = ref([])
    loader
      .load()
      .then((google) => {
        const geocoder = new google.maps.Geocoder()
        let latLng: google.maps.LatLng = new google.maps.LatLng(0, 0)
        geocoder.geocode(
          {
            // クエリパラメータにある指定都市の名称をリクエスト
            address: searchPoint.value
          },
          (result: any, status) => {
            // レスポンスとステータスを引数に取れる
            if (status === google.maps.GeocoderStatus.OK) {
              // 周辺検索用に緯度と経度を取得する
              const center = result[0]
              latLng = center.geometry.location
            }
          }
        )
        const map = new google.maps.Map(document.createElement('div'))
        const service = new google.maps.places.PlacesService(map)
        // テキスト検索用のリクエスト
        service.textSearch(
          {
            // 緯度経度
            location: latLng,
            // 検索する半径
            radius: 2000,
            // 検索ワード
            query:
              'サウナ' + ' ' + searchPoint.value + ' ' + searchCondition.value,
            // レスポンス言語
            language: 'ja'
          },
          // 第二引数で処理
          (result, status) => {
            // レスポンスとステータスを引数に取れる
            if (
              status === google.maps.places.PlacesServiceStatus.OK ||
              status === google.maps.places.PlacesServiceStatus.ZERO_RESULTS
            ) {
              result!.forEach((element) => {
                const format = element.formatted_address!.slice(12)
                element.formatted_address = format
              })
              searchResult.value = result!
              emits('getDatas', searchResult.value)
            }
          }
        )
      })
      .catch(() => {
        // do something
      })
  }
</script>

<style scoped></style>
<template>
  <div>
    <v-container>
      <v-row>
        <v-col v-for="(spa, index) in props.result" :key="index" cols="3">
          <v-card
            v-ripple
            elevation="12"
            class="h-[450px] w-full flex flex-col"
          >
            <NuxtLink :to="`/sauna/${spa.place_id}`">
              <img
                v-if="spa.photos"
                :src="spa.photos[0].getUrl()"
                aspect-ratio="5"
                class="h-[160px] w-full object-cover"
              /><img
                v-else
                src="@/assets/img/noimage.png"
                aspect-ratio="5"
                class="h-[160px] w-full object-cover"
              /><v-tooltip bottom :text="spa.name">
                <template #activator="{ isActive: on, props: attrs }">
                  <v-card-title
                    v-bind="attrs"
                    class="font-weight-black"
                    v-on="on"
                  >
                    {{ spa.name }}
                  </v-card-title>
                </template>
              </v-tooltip>
              <v-row align="center">
                <v-rating
                  :model-value="spa.rating"
                  class="ml-6"
                  color="amber"
                  density="compact"
                  half-increments
                  readonly
                  size="small"
                ></v-rating>
                <span class="text-gray-500 mt-1">
                  {{ spa.rating }}({{ spa.user_ratings_total }})
                </span>
              </v-row>
              <!--isOpenメソッドはお金かかるからopen_nowで代用 -->
              <div v-if="spa.opening_hours">
                <v-card-text v-if="spa.opening_hours.open_now" class="text-red"
                  >● 営業時間外</v-card-text
                >
                <v-card-text v-else class="text-green">● 営業中</v-card-text>
              </div>
              <div v-else>
                <v-card-text>● 営業ステータス不明</v-card-text>
              </div>

              <v-card-text class="font-weight-black">
                {{ spa.formatted_address }}
              </v-card-text>

              <div
                v-for="(info, index2) in getInfomation(spa.types)"
                :key="index2"
                class="font-bold ml-4"
              >
                ○{{ info }}
              </div>
            </NuxtLink>
          </v-card>
        </v-col>
      </v-row>
      <span
        v-if="props.result.length === 0 && props.isSearched"
        class="flex justify-center"
        >検索結果がありませんでした。
      </span>
    </v-container>
  </div>
</template>

<script lang="ts" setup>
  interface Props {
    result: Array<google.maps.places.PlaceResult>
    isSearched: boolean
  }

  const props = withDefaults(defineProps<Props>(), {
    result: () => [],
    isSearched: false
  })

  const getInfomation = (val: Array<string>): Array<string> => {
    const array = []
    if (useSome(val, (value) => value === 'food' || value === 'restaunant')) {
      array.push('食事可')
    }

    if (useIncludes(val, 'lodging')) {
      array.push('宿泊可')
    }
    return array
  }
</script>

<style scoped></style>
import { Loader } from '@googlemaps/js-api-loader'

export const useGoogle = () => {
  const loader = new Loader({
    apiKey: '*************************',
    version: 'weekly',
    libraries: ['places', 'drawing', 'geometry']
  })

  return { loader }
}
詳細ページ
詳細ページのコード
<template>
  <div>
    <v-carousel
      :model-value="0"
      cycle
      height="400"
      hide-delimiter-background
      show-arrows="hover"
    >
      <v-carousel-item v-for="(photo, i) in spa.photos" :key="i" eager>
        <a :href="spa.url" target="_blank"
          ><img :src="photo.getUrl()" class="h-full w-full object-cover"
        /></a>
      </v-carousel-item>
    </v-carousel>

    <v-table>
      <thead>
        <tr>
          <th class="text-center">項目名</th>
          <th class="text-center">店舗情報</th>
        </tr>
      </thead>
      <tbody>
        <tr>
          <td class="text-center">店名</td>
          <td class="text-center">{{ spa.name }}</td>
        </tr>
        <tr>
          <td class="text-center">評価</td>
          <td class="flex justify-center items-center">
            <v-rating
              :model-value="spa.rating"
              color="amber"
              density="compact"
              half-increments
              readonly
              size="small"
            ></v-rating>
            <span class="ml-2 mt-1">{{ spa.rating }}</span>
          </td>
        </tr>
        <tr>
          <td class="text-center">住所</td>
          <td class="text-center">{{ spa.vicinity }}</td>
        </tr>
        <tr>
          <td class="text-center">営業ステータス</td>
          <td
            v-if="spa.opening_hours?.isOpen()"
            class="text-center text-green-600"
          >
            ● 営業中
          </td>
          <td v-else class="text-center text-red-600">● 営業時間外</td>
        </tr>
        <tr>
          <td class="text-center">営業時間</td>
          <td class="text-center">
            <div
              v-for="(weekDay, index) in spa.opening_hours?.weekday_text"
              :key="index"
              class="my-2"
            >
              {{ weekDay }}
            </div>
          </td>
        </tr>
        <tr>
          <td class="text-center">Webサイト</td>
          <td class="text-center text-blue">
            <a :href="spa.website" target="_blank">{{ spa.website }}</a>
          </td>
        </tr>
      </tbody>
    </v-table>
    <v-slide-group class="mt-4 pa-4">
      <v-slide-group-item v-for="(review, ind) in spa.reviews" :key="ind">
        <v-card
          class="ma-4"
          height="190"
          width="170"
          @click="
            setDialogData(
              review.author_name,
              review.profile_photo_url,
              review.text
            )
          "
        >
          <v-img height="60px" :src="review.profile_photo_url" />
          <v-card-title>
            {{ review.author_name }}
          </v-card-title>
          <v-card-text class="line-clamp-4">{{ review.text }} </v-card-text>
        </v-card>
      </v-slide-group-item>
    </v-slide-group>
    <v-dialog v-model="activateDialog" width="600px" scrollable>
      <v-card>
        <v-card-title>
          <v-img height="120px" :src="reviewer.src" />
          <span>{{ reviewer.name }}</span>
        </v-card-title>
        <v-card-text class="whitespace-pre-line">
          {{ reviewer.content }}
        </v-card-text>
      </v-card>
    </v-dialog>
    <v-sheet id="map" class="pa-0 h-[300px] w-full mt-8" :light="true">
      google map
    </v-sheet>
  </div>
</template>

<script lang="ts" setup>
  const route = useRoute()
  const { reviewer, setDialogData } = useDialog()
  // 一覧ページから遷移時に渡されたplace_id(データが持つ一意のid)を取得
  const queryPlaceId = route.params.id as string
  const activateDialog = ref(false)
  const spa = ref<google.maps.places.PlaceResult>({})
  onMounted(() => {
    const loader = useGoogle().loader
    loader
      .load()
      .then((google) => {
        const map = new google.maps.Map(document.getElementById('map'), {
          // 初期表示設定
          // この段階でcenterに動的数字入れてもアフリカ(0,0)の海が表示されるだけなのでとりあえず適当な数字入れておく
          zoom: 17,
          center: new google.maps.LatLng(0, 0),
          fullscreenControl: false,
          mapTypeControl: false,
          streetViewControl: true,
          streetViewControlOptions: {
            position: google.maps.ControlPosition.LEFT_BOTTOM
          },
          zoomControl: true,
          zoomControlOptions: {
            position: google.maps.ControlPosition.LEFT_BOTTOM
          },
          scaleControl: true
        })
        const service = new google.maps.places.PlacesService(map)

        service.getDetails(
          {
            placeId: queryPlaceId
          },
          (place, status) => {
            if (status === google.maps.places.PlacesServiceStatus.OK) {
              spa.value = place
              useHead({ title: spa.value.name })
              map.setCenter(
                new google.maps.LatLng(
                  place.geometry.location.lat(),
                  place.geometry.location.lng()
                )
              )

              // eslint-disable-next-line no-new
              new google.maps.Marker({
                map,
                position: new google.maps.LatLng(
                  place.geometry.location.lat(),
                  place.geometry.location.lng()
                )
              })
            }
          }
        )
      })
      .catch(() => {})
  })

  function useDialog() {
    const reviewer = reactive({ name: '', src: '', content: '' })

    const setDialogData = (name: string, src: string, content: string) => {
      reviewer.name = name
      reviewer.src = src
      reviewer.content = content
      activateDialog.value = true
    }
    return { reviewer, setDialogData }
  }
</script>
あとがき
Nuxtってめっちゃ便利!
特にルーティング関係をいちいち気にしなくていいのが本当にいいですね!
バニラのvueですと、.vueファイルを作ったらいちいちroute.tsやらroute.jsやらにパスを追記していかないといけなかったのが、ファイルを作るだけで解決するんだから最高に便利ですね
他にもuseState()やらuseRoute()などのuse**()系のメソッドがまとめられててNuxtの高評価の理由が理解できました
今回は基本的な機能しか使いませんでしたが、Nuxt3のドキュメント見ているとmiddlewareやらなんやら他にもいろいろな機能があるので、もっといろいろ触って時代に追いついていきたいですね


