はじめに
Notion上でGitHubの草(コントリビューション)を確認できると便利だと思い、ウィジェットを作成してみました。
使い方
URLのクエリパラメータにusernameを指定して、自分のGitHubアカウント名を入力します。
https://notion-contribution-widget.azurewebsites.net/?username=your_github_username
background_colorやcolor_shcemeなどを指定することで自分好みにカスタマイズすることができます。
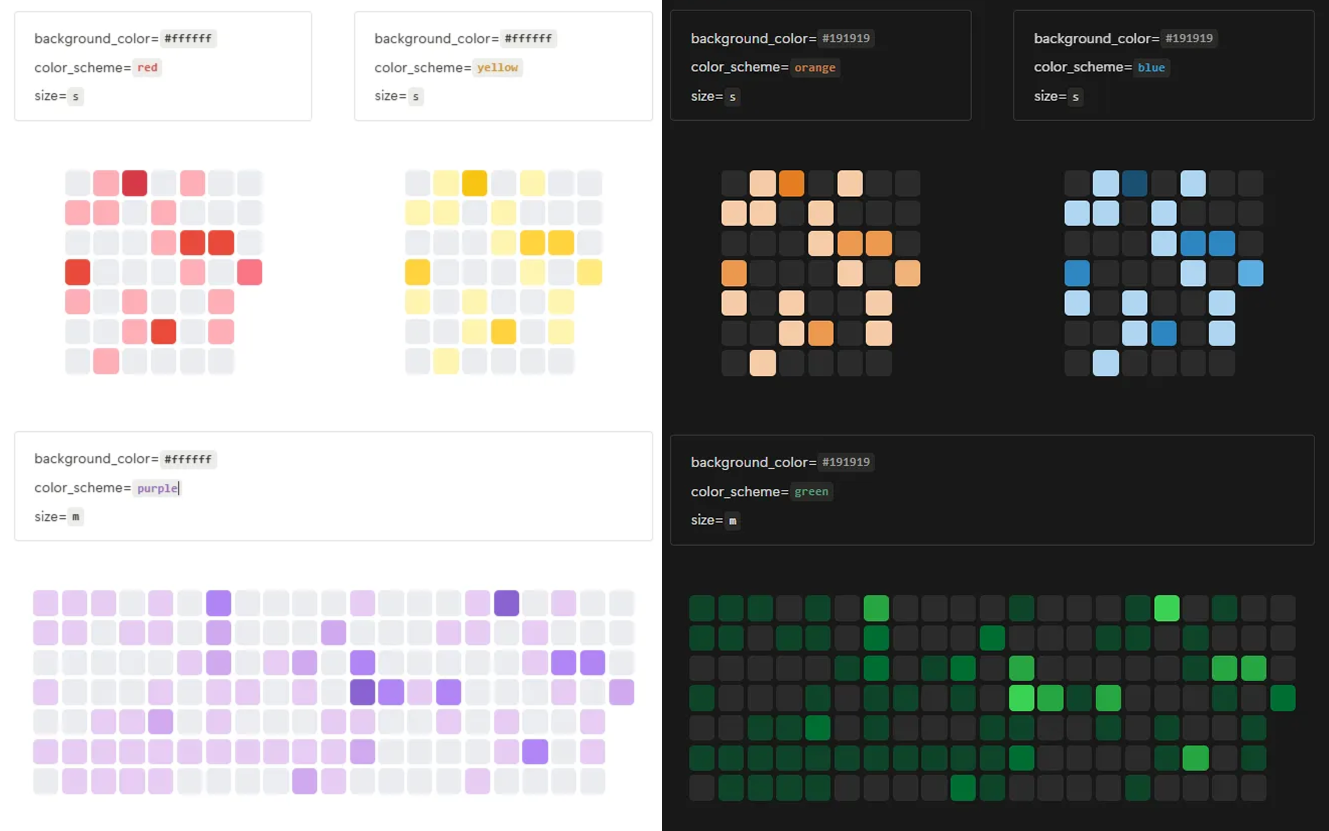
デモページです。
iPhoneのウィジェットを参考にして作ってみました。
実装
1. GitHubAPIを叩いてコントリビューションを取得する
プライベートリポジトリへのコントリビューション数も取得したいので、GitHubが提供するGraphQL APIを使用します。
-
GitHubのアクセストークンを取得する
- GitHubにログインし、右上の自分のアイコンをクリックして、Settingsを選択します。次に左側のタブから
Developer settingsを選択しPersonal Access Tokens (classic)のページに移動します -
Generate new tokenをクリックし、必要なスコープを選択してトークンを生成します - トークンをコピーしておきます
- GitHubにログインし、右上の自分のアイコンをクリックして、Settingsを選択します。次に左側のタブから
-
GraphQLクエリの作成
以下のようなGraphQLクエリを作成して、特定のユーザー(username)の各日(date)のコントリビューションデータ(contributionCount)を取得します。query($username: String!) { user(login: $username) { contributionsCollection { contributionCalendar { weeks { contributionDays { date contributionCount } } } } } } -
Pythonでの実装
以下に、Pythonを使用してGitHub GraphQL APIを叩き、コントリビューションデータを取得するプログラムを示します。
TOKEN = os.getenv('TOKEN')
GITHUB_GRAPHQL_URL = "https://api.github.com/graphql"

def load_contributions(username):
    headers = {
        "Authorization": f"Bearer {TOKEN}",
        "Content-Type": "application/json"
    }

    # GraphQLクエリ
    query = """
    query($username: String!) {
        user(login: $username) {
            contributionsCollection {
                contributionCalendar {
                    weeks {
                        contributionDays {
                            date
                            contributionCount
                        }
                    }
                }
            }
        }
    }
    """

    # リクエスト
    payload = {
        "query": query,
        "variables": {"username": username}
    }

    response = requests.post(GITHUB_GRAPHQL_URL, json=payload, headers=headers)
    data = response.json()

    # 中略

    return contributions, max_count
2. Webサイトを作成する
コントリビューショングラフの色分けには以下の基準を使用します。
- レベル0:コントリビューションなし
- レベル1: $(0, \frac{最大値}{4}]$
- レベル2: $(\frac{最大値}{4}, \frac{最大値}{2}]$
- レベル3: $(\frac{最大値}{2}, \frac{3 *最大値}{4}]$
- レベル4: $(\frac{3*最大値}{4},最大値]$
また、描画する日数を計算しなければいけません。例えば今日が水曜日だとすると7×6+4で合計46日間のデータが必要です。

datetimeモジュールのweekdayメソッドを使うと日付の曜日を数値で取得することができます。月曜日の場合は0を返すので工夫しました。以下にFlaskの処理例を示します。
@app.route('/')
def index():

	# 中略

    today = datetime.now()
    dow = (6 if today.weekday() == 6 else 5 - today.weekday()) # 曜日
    size = 49 # サイズ(7の倍数)

    # カレンダー
    calendar_data = []
    for i in range(size - dow):
        day = today - timedelta(days=size - dow - i - 1)
        date_str = day.strftime("%Y-%m-%d")
        count = contributions.get(date_str, 0)
        calendar_data.append({"day": day.day, "color": get_color(count)})

    show_data = [[] for _ in range(len(calendar_data) // 7 + 1)]
    for i in range(len(calendar_data)):
        show_data[i // 7].append(calendar_data[i])

    return render_template('index.html', calendar=show_data, username=username)
続いてフロント側の処理も書いていきます。このとき以下のようにWebサイトの中央にウィジェットとして表示したいものが来るようにします。

コントリビューションレベルに応じたカラーコードは以下の通りです。
| レベル | カラーコード |
|---|---|
| 0 | #2b2b2b |
| 1 | #0e4429 |
| 2 | #006d32 |
| 3 | #26a641 |
| 4 | #39d353 |
また、Notionの背景色とそろえておく必要があります。
| モード | カラーコード |
|---|---|
| ライト | #ffffff |
| ダーク | #191919 |
3. AzureWebAppsでデプロイする
今回、Azureにデプロイする際にGitHub Actionsを使いたいのでGitHubにコードを上げます。アプリケーションのコードを以下のような構成で整理し、GitHubにアップロードします。このとき、app.py(またはapplication.py)とrequirements.txtはルートディレクトリに置かなければいけません。HTMLはtemplatesフォルダに、CSSはstaticフォルダに置きます。
project/
├── app.py                # メインのアプリケーションコード
├── requirements.txt      # 必要なPythonライブラリを記載
├── static/               # CSSや画像など静的ファイル
│   ├── styles.css
├── templates/            # HTMLファイル
│   ├── index.html
└── .github/
    └── workflows/        # GitHub Actionsの設定ファイル
        └── deploy.yml
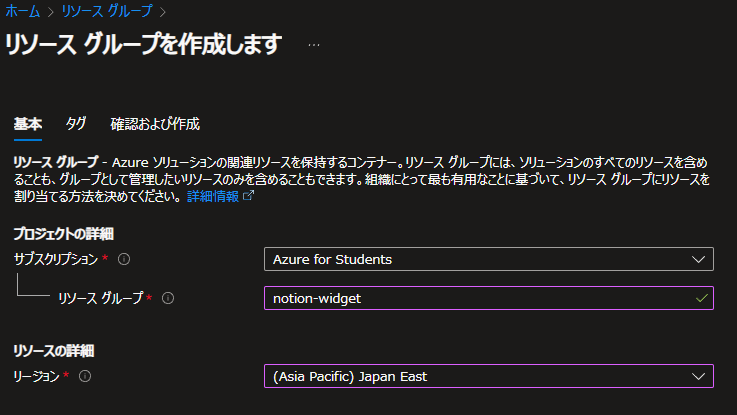
Azureポータルにアクセスし、必要であればリソースグループを新規作成します。リソースグループは、アプリケーションや関連リソースをまとめて管理するための単位です。
App ServiseからWebアプリを新規作成します。ランタイムスタックにPythonを指定します。デプロイの項目は作成完了後に設定が可能になります。

作成後、デプロイセンターに移動します。デプロイオプションでGitHubを選択し、自分のリポジトリとブランチを指定します。
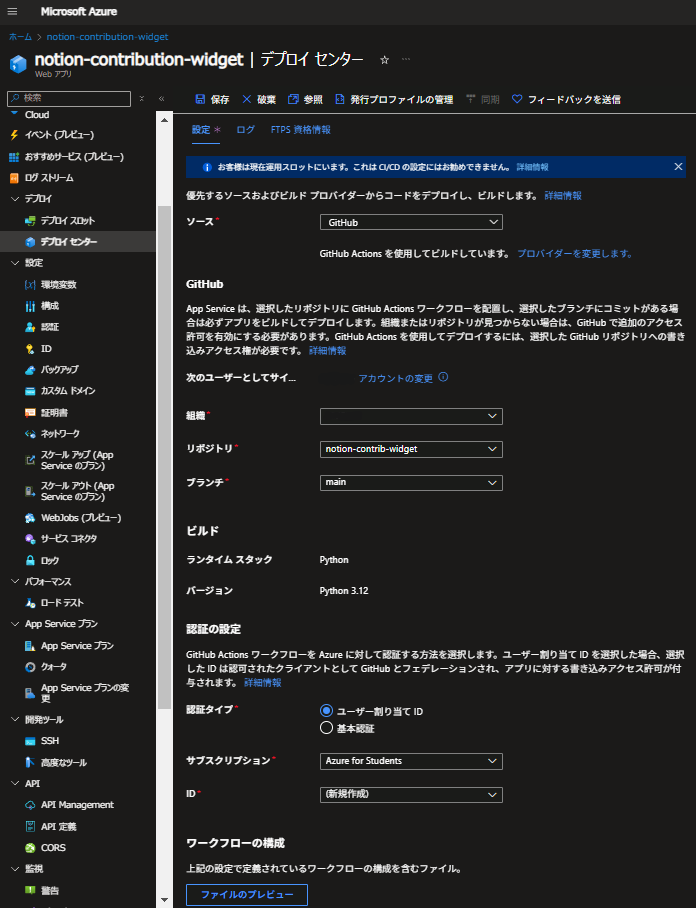
保存をクリックするとデプロイが開始されGitHubリポジトリのActionsタブで確認することができます。

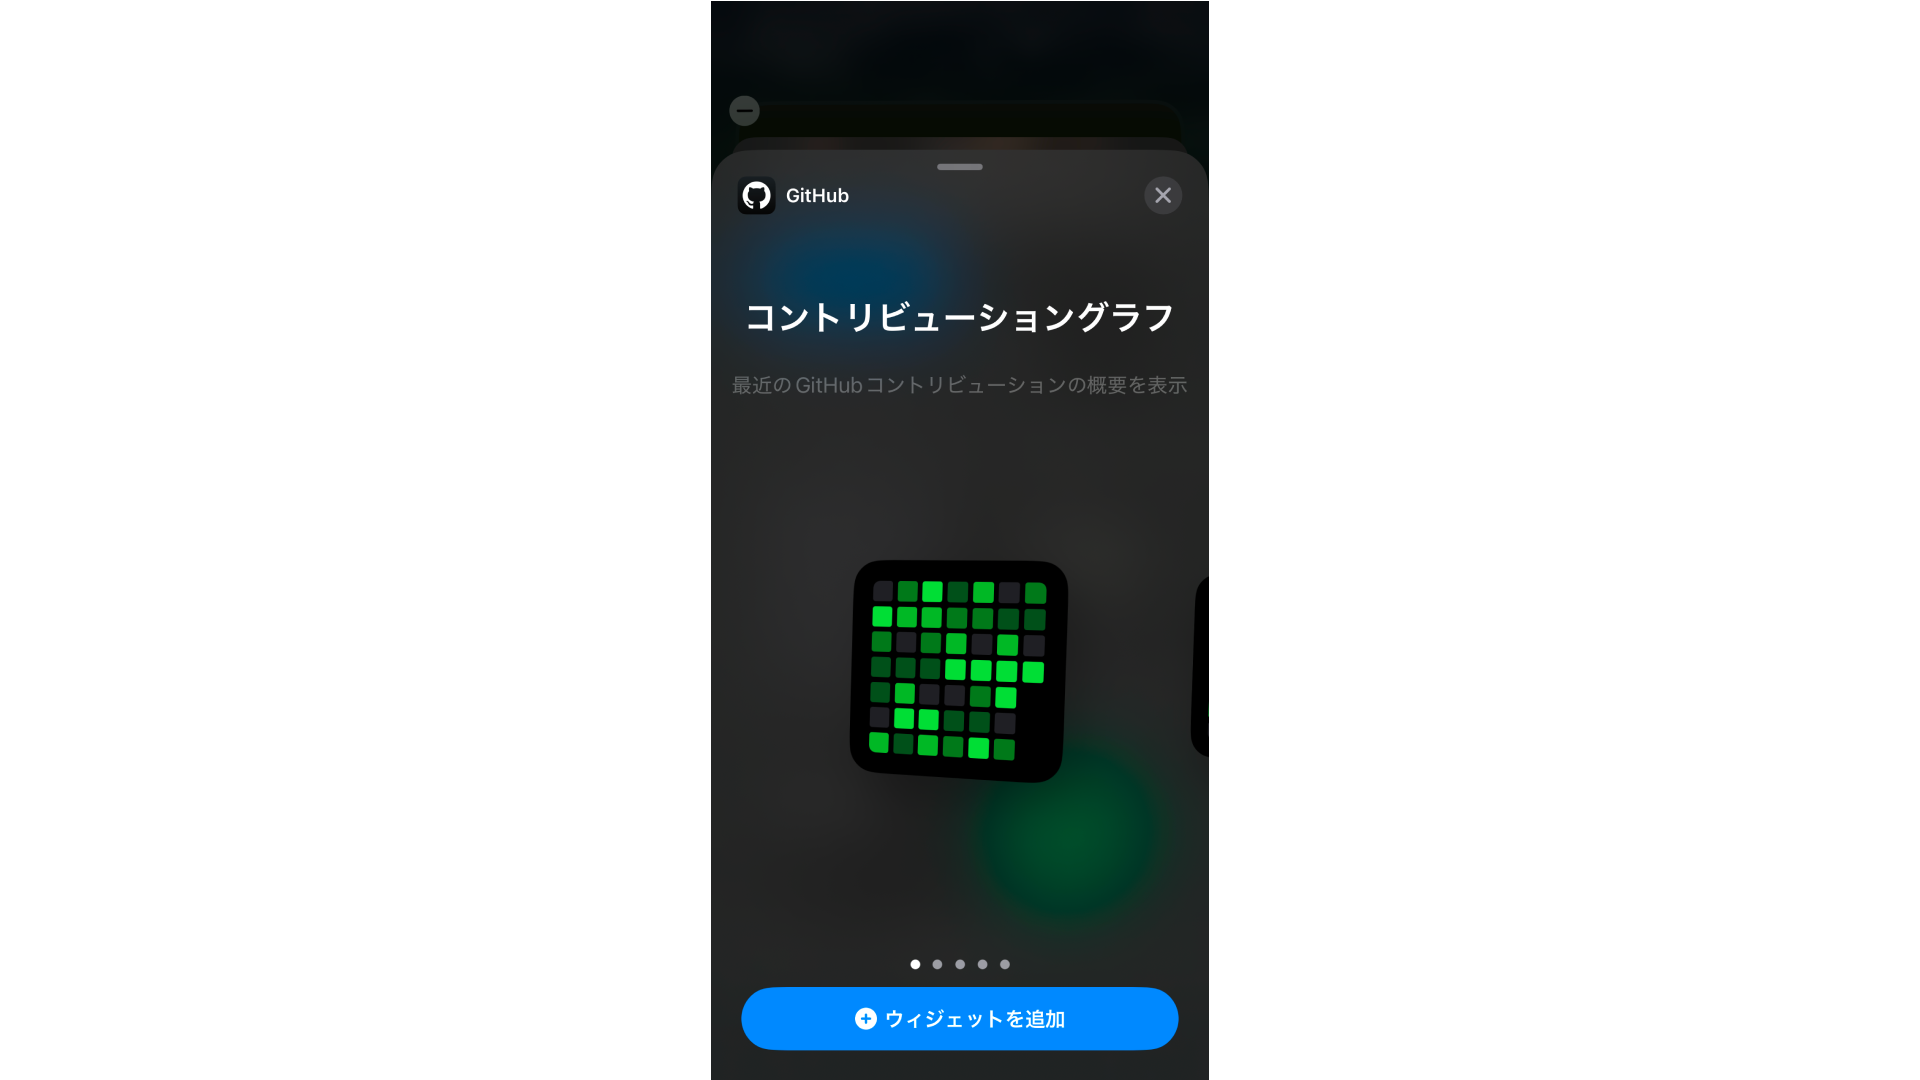
6. Notionに埋め込む
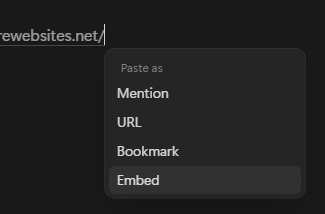
デプロイが完了し、Webサイトが問題なく表示されたらNotionに埋め込みます。
サイトのURLをNotionに張り付けて「埋め込み」を選択すれば完成です。
おわりに
今回、Notionのウィジェットを制作してみましたが、実際にはWebサイトを埋め込むだけで簡単に作れました。ここまで読んでいただきありがとうございました。
参考にしたサイト等