はじめに
こんにちは。rendaman0215です。
最近業務でサーバサイドKotlinを扱うことになりました。
Spring Bootは、Java時代に若干触ったので馴染みがありましたが、
対抗馬のKotlin純正のKtorは、全くの初見のため日本語訳しつつチュートリアルの体験記をまとめることとしました。
動作環境
OS: MacOS Ventura
CPU: Apple M1 Pro
IDE: IntelliJ IDEA Community
Kotlin: 2.1.3
Ktorとは

Kotlinを開発しているJetBrains社が開発しているKotlin純正のマイクロサービスやWebアプリケーションを作成するための非同期フレームワークです。
コルーチンを駆使して作られ、軽量といった特徴があり、人気があります。
- シンプル
- 楽しい
- 非同期
などのテーマがあるようです。
Getting Started!
まずは公式ページのGetting Startedをやってみようと思います。
Ktorプロジェクトの新規作成(Creating a new Ktor project)
ここでは、簡単な Ktor アプリケーションを作成、実行、およびテストする方法を紹介します。
Ktorのプロジェクトを新規作成するには、IDEによって手法が異なります。
-
IntelliJ IDEA Ultimateの場合
- 専用プラグインを使用する
- それ以外の場合
- Webベースのプロジェクトジェネレーターを使用する
私はIntelliJ IDEAのコミュニティ版を使用しているので、今回はそれ以外の場合の方で進めていきます。
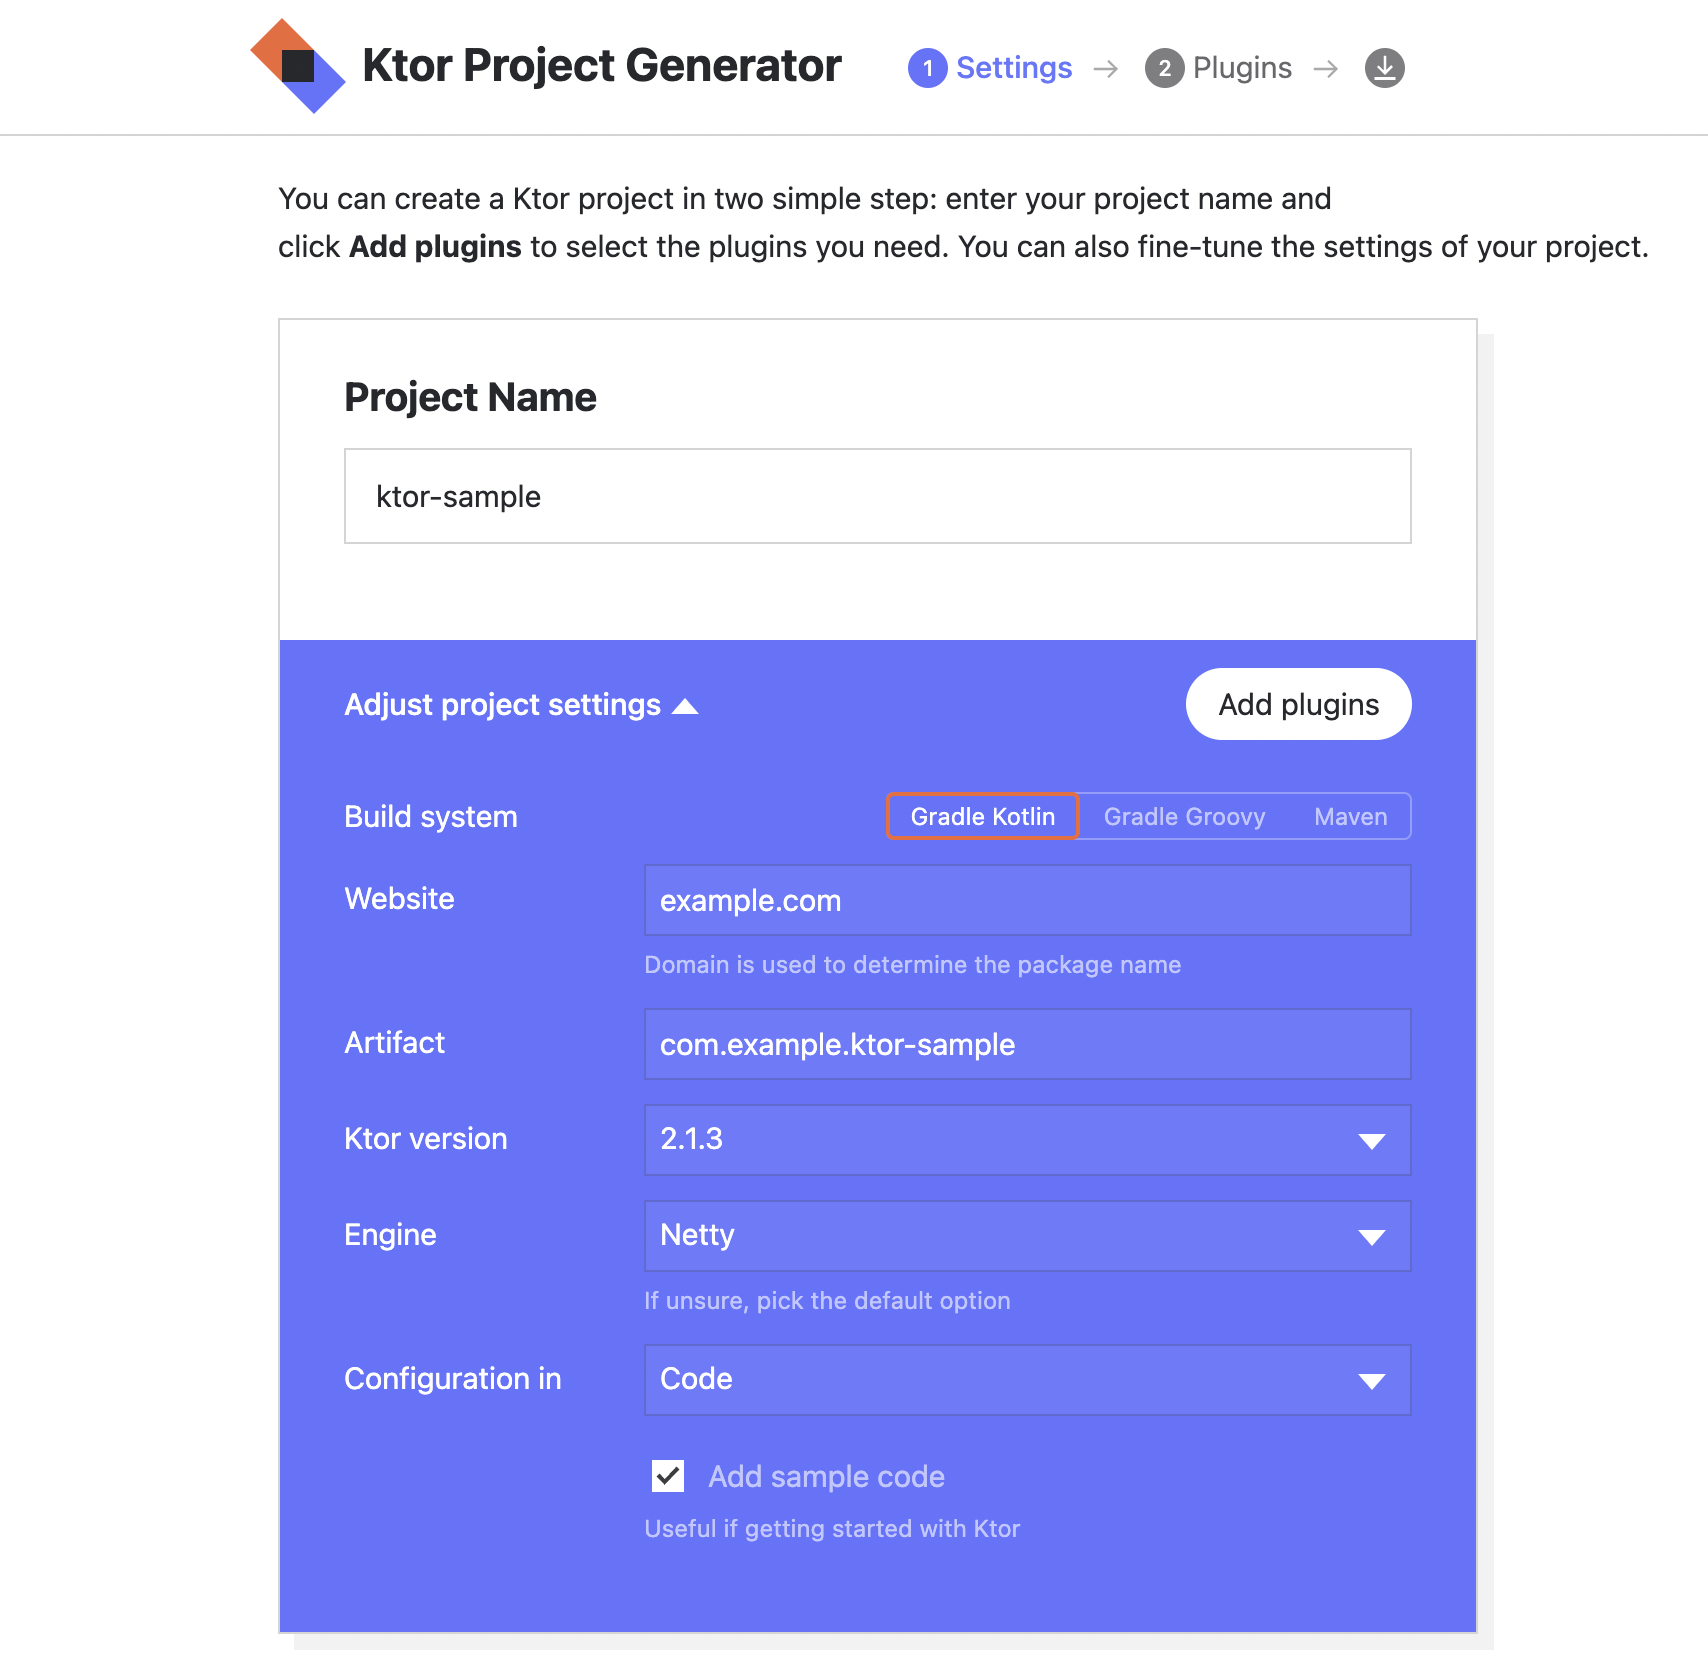
プロジェクトジェネレータ
公式の手順では、IntelliJ IDEA Ultimateを使っていますが、同じ設定をします。(とはいえ名前以外デフォルトのままでOK)
設定が終わったらAdd pluginsボタンを押しましょう。

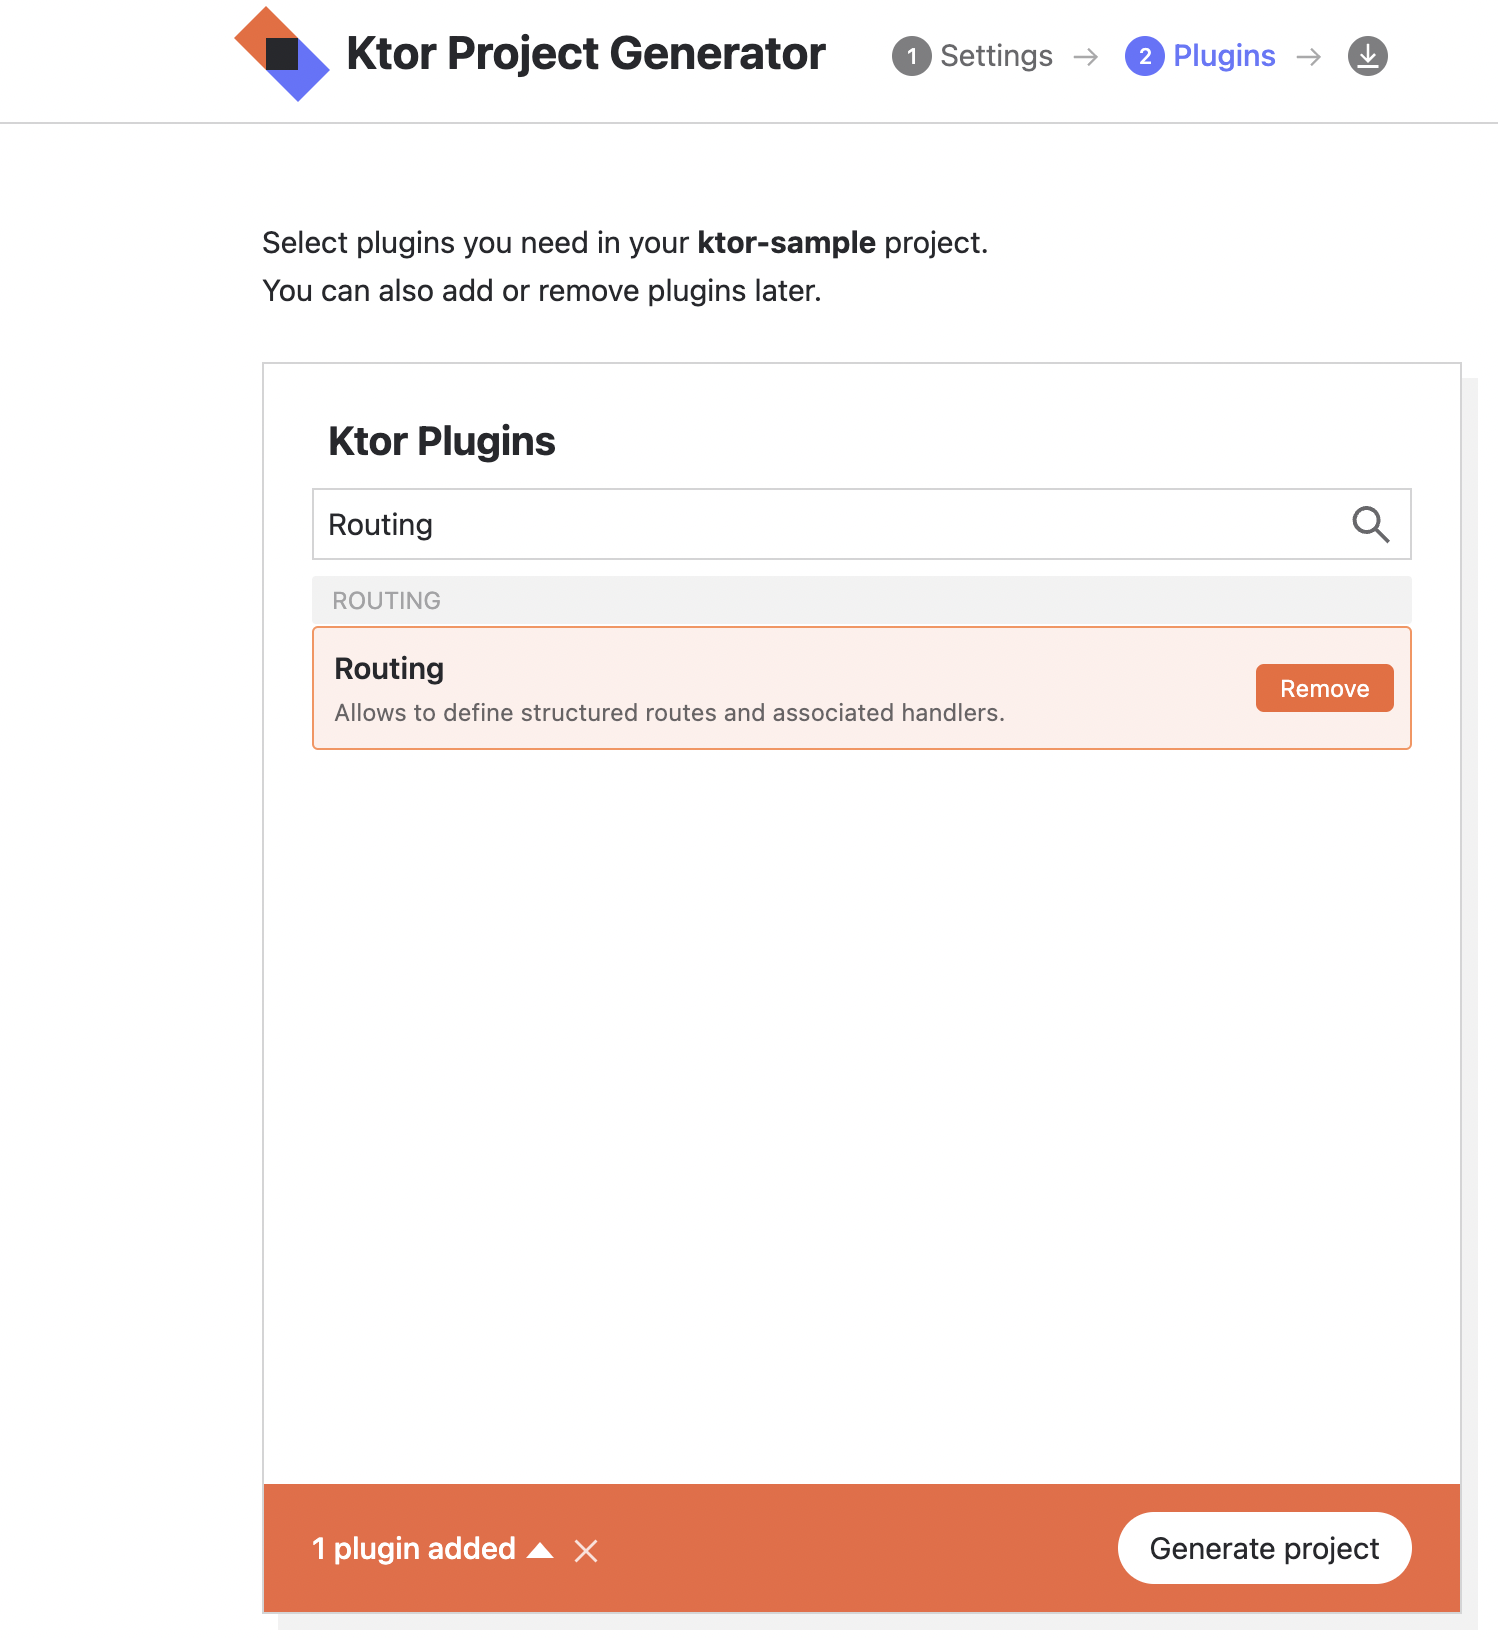
次の画面では、プラグインのセットを選択することができます。
例)認証、シリアライズ、コンテンツエンコーディング、圧縮、クッキーのサポートなど、Ktor アプリケーションの共通機能を提供しています。
ここでは、公式の手順に沿って、Routingのみ追加しましょう。
Addボタンで追加したら、Generate projectボタンを押下しましょう。

すると、zipファイルがダウンロードされるので、解凍して任意のディレクトリに配置しましょう。
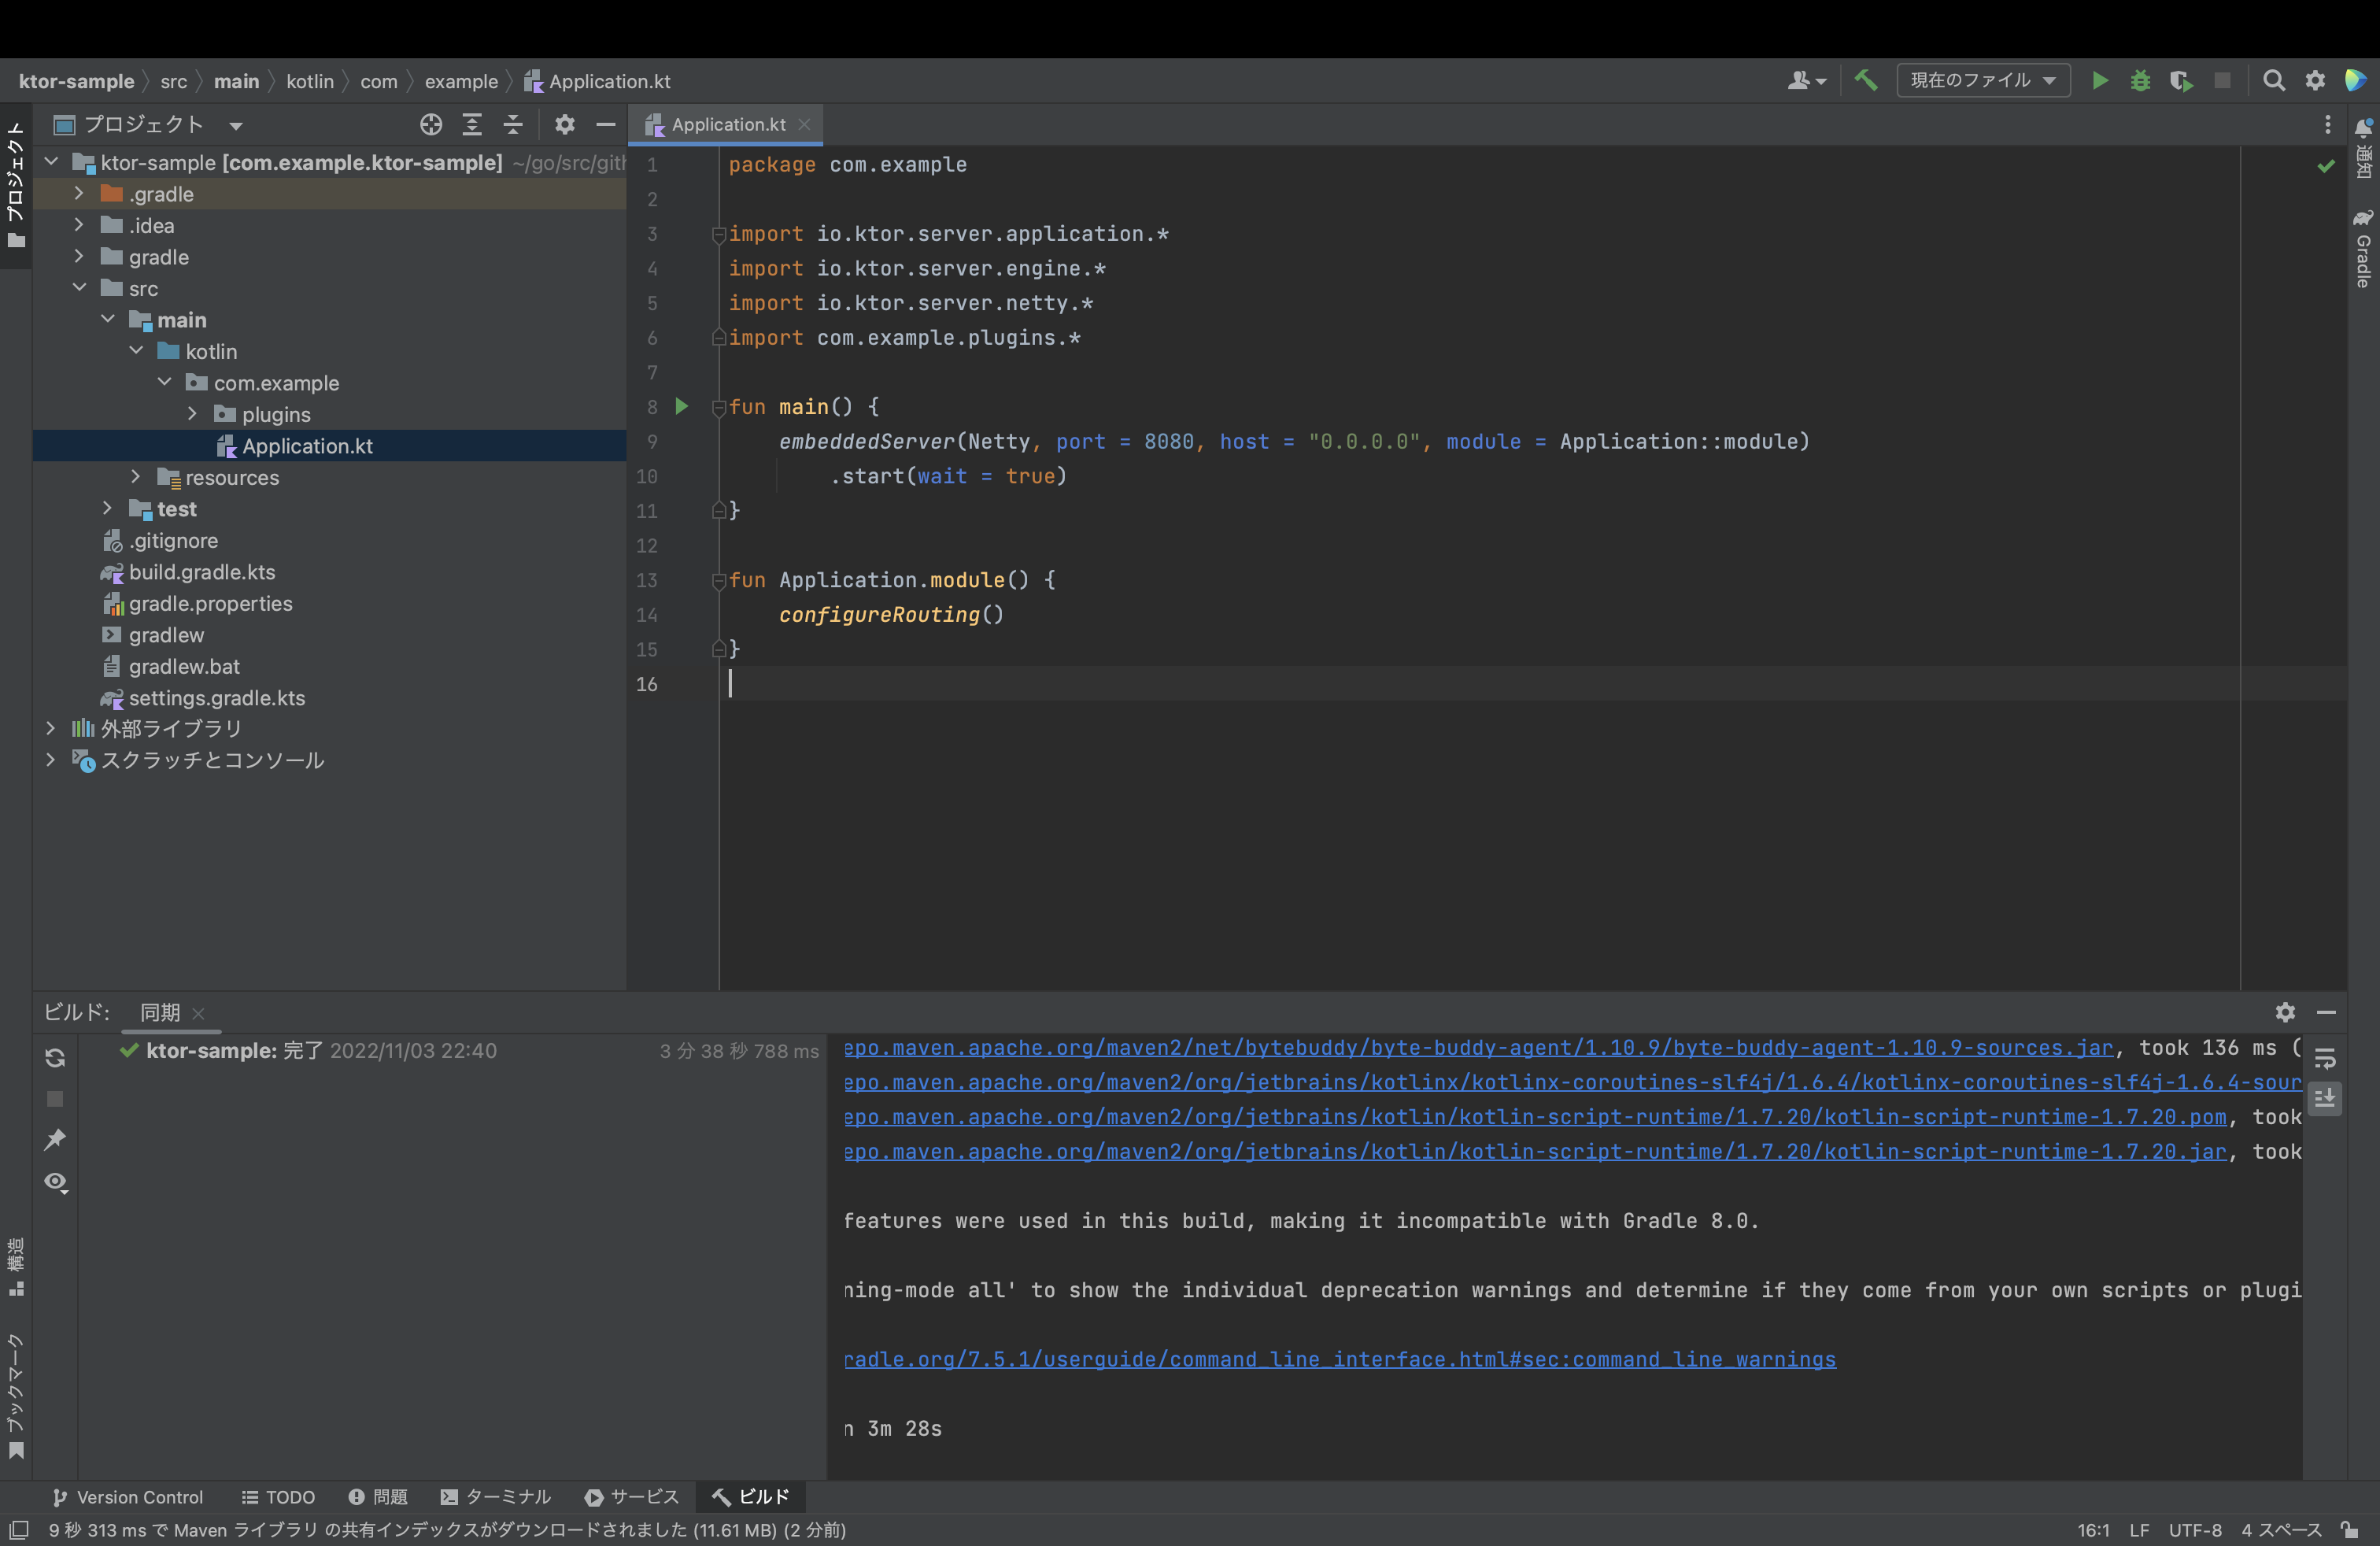
配置が完了したら、IntelliJ IDEAから先ほどのktor-sampleディレクトリを開きましょう。
Ktorアプリケーションを実行する(Run a Ktor application)
プロジェクトビューから以下のパスにあるApplication.ktを開きます。
src/main/kotlin/com/example/Application.kt
開くと以下のようなソースコードになっているはずです。
package com.example

import io.ktor.server.application.*
import io.ktor.server.engine.*
import io.ktor.server.netty.*
import com.example.plugins.*

fun main() {
    embeddedServer(Netty, port = 8080, host = "0.0.0.0", module = Application::module)
        .start(wait = true)
}

fun Application.module() {
    configureRouting()
}
主なポイントは以下の通りです。
-
embeddedServer関数は、コード内でサーバーのパラメータを設定し、アプリケーションを実行するために使用されます。 -
configureRoutingは、ルーティングを定義する拡張関数です。この関数はpluginsパッケージという別のパッケージで宣言されており、以下のようなコードになっています。
package com.example.plugins

import io.ktor.server.routing.*
import io.ktor.http.*
import io.ktor.server.application.*
import io.ktor.server.response.*
import io.ktor.server.request.*

fun Application.configureRouting() {

    routing {
        get("/") {
            call.respondText("Hello World!")
        }
    }
}
そしたら、Application.ktのmain関数に戻り、実行ボタンを押下します。
アプリケーションがIntelliJ IDEAで実行されるまで待機すると、以下のログが表示されます。
[main] INFO  ktor.application - Autoreload is disabled because the development mode is off.
[main] INFO  ktor.application - Application started in 0.566 seconds.
[DefaultDispatcher-worker-1] INFO  ktor.application - Responding at http://0.0.0.0:8080
メッセージ内容より、サーバがhttp://0.0.0.0:8000でリクエストを受け付ける準備ができたということですので、実際にブラウザでアクセスしてみましょう。
するとHello World!と表示されるはずです。

Ktorアプリケーションのテスト(Test a Ktor application)
以下のパスのファイルを開くきます。
src/test/kotlin/com/example/ApplicationTest.kt
ここでは、testApplication関数を使って、/にGETリクエストを行い、レスポンスのステータスと内容を確認しています。
testApplication関数を実行すると、以下のログが表示され、テストが成功していることがわかります。
2022-11-03 23:01:03.699 [DefaultDispatcher-worker-1 @call-context#2] INFO  ktor.test - No ktor.deployment.watch patterns specified, automatic reload is not active.
2022-11-03 23:01:03.728 [DefaultDispatcher-worker-1 @call-context#2] INFO  ktor.test - Application started in 0.056 seconds.
BUILD SUCCESSFUL in 2s
6 actionable tasks: 1 executed, 5 up-to-date
23:01:04:  ':test --tests "com.example.ApplicationTest"' の実行を完了しました。
まとめ
今回は、Ktorの標準的なチュートリアルでHello World!まで行きました。
筆者が体験した感じ、テストが書きやすいのはいいなと思いました。
一方で、ルーティングについても直感的に理解しやすい表現で書かれているなという印象でした。
次回は、チュートリアルの続きを行なって、APIの開発まで行きたいと思います。
