こんにちは。
ZOZOテクノロジーズ 開発部の杉山です。
nginxのdockerイメージをプライベートリポジトリに確保しておく必要があったので、
nginx公式からDockerfileで作りました。
docker-hubに公式イメージがあるとはいえ、サービスを運営するうえでは、開発の時点での「immutableなイメージ」をプライベートリポジトリで確保して使用するというのは、安定運用やセキュリティー的にもよいのでは思います。
手順
公式ページを参考にDockerfileを作成します。
今回は1.15.8-alpineを使用します。
Dockerfileを作成します。
Dockerfile
FROM alpine:3.9

LABEL maintainer="NGINX Docker Maintainers <docker-maint@nginx.com>"

ENV NGINX_VERSION 1.15.8

RUN GPG_KEYS=B0F4253373F8F6F510D42178520A9993A1C052F8 \
	&& CONFIG="\
		--prefix=/etc/nginx \
		--sbin-path=/usr/sbin/nginx \
		--modules-path=/usr/lib/nginx/modules \
		--conf-path=/etc/nginx/nginx.conf \
		--error-log-path=/var/log/nginx/error.log \
		--http-log-path=/var/log/nginx/access.log \
		--pid-path=/var/run/nginx.pid \
		--lock-path=/var/run/nginx.lock \
		--http-client-body-temp-path=/var/cache/nginx/client_temp \
		--http-proxy-temp-path=/var/cache/nginx/proxy_temp \
		--http-fastcgi-temp-path=/var/cache/nginx/fastcgi_temp \
		--http-uwsgi-temp-path=/var/cache/nginx/uwsgi_temp \
		--http-scgi-temp-path=/var/cache/nginx/scgi_temp \
		--user=nginx \
		--group=nginx \
		--with-http_ssl_module \
		--with-http_realip_module \
		--with-http_addition_module \
		--with-http_sub_module \
		--with-http_dav_module \
		--with-http_flv_module \
		--with-http_mp4_module \
		--with-http_gunzip_module \
		--with-http_gzip_static_module \
		--with-http_random_index_module \
		--with-http_secure_link_module \
		--with-http_stub_status_module \
		--with-http_auth_request_module \
		--with-http_xslt_module=dynamic \
		--with-http_image_filter_module=dynamic \
		--with-http_geoip_module=dynamic \
		--with-threads \
		--with-stream \
		--with-stream_ssl_module \
		--with-stream_ssl_preread_module \
		--with-stream_realip_module \
		--with-stream_geoip_module=dynamic \
		--with-http_slice_module \
		--with-mail \
		--with-mail_ssl_module \
		--with-compat \
		--with-file-aio \
		--with-http_v2_module \
	" \
	&& addgroup -S nginx \
	&& adduser -D -S -h /var/cache/nginx -s /sbin/nologin -G nginx nginx \
	&& apk add --no-cache --virtual .build-deps \
		gcc \
		libc-dev \
		make \
		openssl-dev \
		pcre-dev \
		zlib-dev \
		linux-headers \
		curl \
		gnupg1 \
		libxslt-dev \
		gd-dev \
		geoip-dev \
	&& curl -fSL https://nginx.org/download/nginx-$NGINX_VERSION.tar.gz -o nginx.tar.gz \
	&& curl -fSL https://nginx.org/download/nginx-$NGINX_VERSION.tar.gz.asc  -o nginx.tar.gz.asc \
	&& export GNUPGHOME="$(mktemp -d)" \
	&& found=''; \
	for server in \
		ha.pool.sks-keyservers.net \
		hkp://keyserver.ubuntu.com:80 \
		hkp://p80.pool.sks-keyservers.net:80 \
		pgp.mit.edu \
	; do \
		echo "Fetching GPG key $GPG_KEYS from $server"; \
		gpg --keyserver "$server" --keyserver-options timeout=10 --recv-keys "$GPG_KEYS" && found=yes && break; \
	done; \
	test -z "$found" && echo >&2 "error: failed to fetch GPG key $GPG_KEYS" && exit 1; \
	gpg --batch --verify nginx.tar.gz.asc nginx.tar.gz \
	&& rm -rf "$GNUPGHOME" nginx.tar.gz.asc \
	&& mkdir -p /usr/src \
	&& tar -zxC /usr/src -f nginx.tar.gz \
	&& rm nginx.tar.gz \
	&& cd /usr/src/nginx-$NGINX_VERSION \
	&& ./configure $CONFIG --with-debug \
	&& make -j$(getconf _NPROCESSORS_ONLN) \
	&& mv objs/nginx objs/nginx-debug \
	&& mv objs/ngx_http_xslt_filter_module.so objs/ngx_http_xslt_filter_module-debug.so \
	&& mv objs/ngx_http_image_filter_module.so objs/ngx_http_image_filter_module-debug.so \
	&& mv objs/ngx_http_geoip_module.so objs/ngx_http_geoip_module-debug.so \
	&& mv objs/ngx_stream_geoip_module.so objs/ngx_stream_geoip_module-debug.so \
	&& ./configure $CONFIG \
	&& make -j$(getconf _NPROCESSORS_ONLN) \
	&& make install \
	&& rm -rf /etc/nginx/html/ \
	&& mkdir /etc/nginx/conf.d/ \
	&& mkdir -p /usr/share/nginx/html/ \
	&& install -m644 html/index.html /usr/share/nginx/html/ \
	&& install -m644 html/50x.html /usr/share/nginx/html/ \
	&& install -m755 objs/nginx-debug /usr/sbin/nginx-debug \
	&& install -m755 objs/ngx_http_xslt_filter_module-debug.so /usr/lib/nginx/modules/ngx_http_xslt_filter_module-debug.so \
	&& install -m755 objs/ngx_http_image_filter_module-debug.so /usr/lib/nginx/modules/ngx_http_image_filter_module-debug.so \
	&& install -m755 objs/ngx_http_geoip_module-debug.so /usr/lib/nginx/modules/ngx_http_geoip_module-debug.so \
	&& install -m755 objs/ngx_stream_geoip_module-debug.so /usr/lib/nginx/modules/ngx_stream_geoip_module-debug.so \
	&& ln -s ../../usr/lib/nginx/modules /etc/nginx/modules \
	&& strip /usr/sbin/nginx* \
	&& strip /usr/lib/nginx/modules/*.so \
	&& rm -rf /usr/src/nginx-$NGINX_VERSION \
	\
	# Bring in gettext so we can get `envsubst`, then throw
	# the rest away. To do this, we need to install `gettext`
	# then move `envsubst` out of the way so `gettext` can
	# be deleted completely, then move `envsubst` back.
	&& apk add --no-cache --virtual .gettext gettext \
	&& mv /usr/bin/envsubst /tmp/ \
	\
	&& runDeps="$( \
		scanelf --needed --nobanner --format '%n#p' /usr/sbin/nginx /usr/lib/nginx/modules/*.so /tmp/envsubst \
			| tr ',' '\n' \
			| sort -u \
			| awk 'system("[ -e /usr/local/lib/" $1 " ]") == 0 { next } { print "so:" $1 }' \
	)" \
	&& apk add --no-cache --virtual .nginx-rundeps $runDeps \
	&& apk del .build-deps \
	&& apk del .gettext \
	&& mv /tmp/envsubst /usr/local/bin/ \
	\
	# Bring in tzdata so users could set the timezones through the environment
	# variables
	&& apk add --no-cache tzdata \
	\
	# forward request and error logs to docker log collector
	&& ln -sf /dev/stdout /var/log/nginx/access.log \
	&& ln -sf /dev/stderr /var/log/nginx/error.log

COPY nginx.conf /etc/nginx/nginx.conf
COPY nginx.vh.default.conf /etc/nginx/conf.d/default.conf

EXPOSE 80

STOPSIGNAL SIGTERM

CMD ["nginx", "-g", "daemon off;"]
設定ファイルを作成します。
nginx.conf
user  nginx;
worker_processes  1;

error_log  /var/log/nginx/error.log warn;
pid        /var/run/nginx.pid;


events {
    worker_connections  1024;
}


http {
    include       /etc/nginx/mime.types;
    default_type  application/octet-stream;

    log_format  main  '$remote_addr - $remote_user [$time_local] "$request" '
                      '$status $body_bytes_sent "$http_referer" '
                      '"$http_user_agent" "$http_x_forwarded_for"';

    access_log  /var/log/nginx/access.log  main;

    sendfile        on;
    #tcp_nopush     on;

    keepalive_timeout  65;

    #gzip  on;

    include /etc/nginx/conf.d/*.conf;
}
nginx.vh.default.conf
server {
    listen       80;
    server_name  localhost;

    #charset koi8-r;
    #access_log  /var/log/nginx/host.access.log  main;

    location / {
        root   /usr/share/nginx/html;
        index  index.html index.htm;
    }

    #error_page  404              /404.html;

    # redirect server error pages to the static page /50x.html
    #
    error_page   500 502 503 504  /50x.html;
    location = /50x.html {
        root   /usr/share/nginx/html;
    }

    # proxy the PHP scripts to Apache listening on 127.0.0.1:80
    #
    #location ~ \.php$ {
    #    proxy_pass   http://127.0.0.1;
    #}

    # pass the PHP scripts to FastCGI server listening on 127.0.0.1:9000
    #
    #location ~ \.php$ {
    #    root           html;
    #    fastcgi_pass   127.0.0.1:9000;
    #    fastcgi_index  index.php;
    #    fastcgi_param  SCRIPT_FILENAME  /scripts$fastcgi_script_name;
    #    include        fastcgi_params;
    #}

    # deny access to .htaccess files, if Apache's document root
    # concurs with nginx's one
    #
    #location ~ /\.ht {
    #    deny  all;
    #}
}
ビルドする
タグをつけて「nginx」という名前のイメージをビルドします。
docker build -t nginx:v.1.15.8 ./
イメージができたか確認
$ docker images
REPOSITORY      TAG       IMAGE ID      CREATED       SIZE
nginx         1.15.8    xxxxxxxxx    1 hour ago     109MB
基本のイメージができました。
コンテナを起動して確認してみる
dockerコマンドで起動
docker run -d -it --name nginx -p 8080:80 --hostname localhost nginx:v.1.15.8
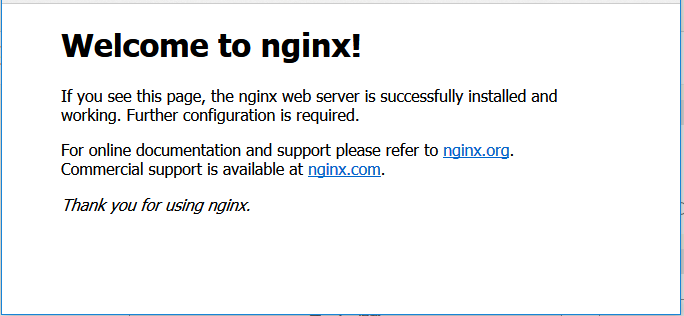
起動したらhttp://localhost:8080/へアクセスしてみましょう。
起動できました。
docker-composeで起動してみる(最低限の設定)
docker-composeファイルを作成します。
docker-compose.yml
version: "2"
services:
  web:
    build: .
    ports:
      - "8080:80"
実行してみます。
$ docker-compose up -d
起動したらhttp://localhost:8080/へアクセスしてみましょう。
こちらでも起動できました。
AZURE ACR(Azure Container Registory)にプッシュする
AzureCLIとdockerコマンド使って、ご自身のACRリポジトリにプッシュしましょう。
ローカルでビルドしたイメージを、ACRの階層に合わせたエイリアスを作成してプッシュします。
実際の手順を、簡単なシェルスクリプトにすると、ワンぽちできるので便利です。
docker-push.sh
# !/usr/bin/env bash

echo "-----------------------------------------------------";
echo "-----------------------------------------------------";
echo "--------      Azure ACR Docker Push Shell     -------";
echo "--------   ---------------------------------  -------";

echo "Please enter image tag. e.g.[v.0.0.1] :"
read tag

if [ -z $tag ] ; then

    echo "stdin error"
    exit
else
    #acrログイン
    az login
    az acr login --resource-group <YOUR_ACR_RESOURECE_GROUP> --name <YOUR_ACR_REGISTORY_NAME>

    #イメージ作成
    docker build -t nginx:${tag} ./

    #イメージができたことを確認
    docker images

    #エイリアス作成
    docker tag nginx:${tag} <YOUR_ACR_REGISTORY_NAME>.azurecr.io/nginx:${tag}

    #エイリアスができたことを確認
    docker images

    #プッシュ
    docker push <YOUR_ACR_REGISTORY_NAME>.azurecr.io/nginx:${tag}

fi
実行します。
$ ./docker-push.sh
-----------------------------------------------------
-----------------------------------------------------
--------      Azure ACR Docker Push Shell     -------
--------   ---------------------------------  -------

Please enter image tag. e.g.[v.0.0.1] :
v.1.15.8
タグを入力してenterを叩き、ブラウザでaz login認証をすると、どかどかと処理が走って、プッシュ完了します。
成功したら、Azureポータルで確認しましょう。
以上。
