リリースしたら自動でマイグレーションコマンドが実行されてDBスキーマが更新されるようにします。
開発用 PC は mac を想定です。以下、淡々と。
console
# ディレクトリ作成と移動
# 作成するディレクトリは GOPATH 配下ではないようにする
cd heroku-go-migration && cd $_

# go.mod の作成
go mod init $(basename `pwd`)

# main.goの作成
touch main.go
main.go
package main

import (
	"net/http"
	"os"

	"github.com/labstack/echo/v4"
)

var e = createMux()

func init() {
	e.GET("/", func(c echo.Context) error {
		return c.String(http.StatusOK, "Hello World!")
	})
}

func main() {
	port := os.Getenv("PORT")
	if port == "" {
		e.Logger.Fatal("$PORT must be set")
	}

	e.Logger.Fatal(e.Start(":" + port))
}

func createMux() *echo.Echo {
	e := echo.New()
	return e
}
console
# 利用 module を判定
go mod tidy

# direnv のインストール
brew install direnv

# direnv 用の設定を追記
echo 'eval "$(direnv hook bash)"' >> ~/.bash_profile

# シェルを再読み込みして設定を反映
exec $SHELL -l

# .envrc の作成
echo 'export PORT=3000' >> .envrc

# (一応) .gitignoreの作成
echo '.envrc' >> .gitignore

# direnv で環境変数の読み込み
direnv allow

# アプリケーションのテスト起動(バックグラウンド)
go run main.go &

# ブラウザで表示
open http://localhost:3000

# アプリケーションのプロセスを終了
kill $(ps | grep "go run main.go" | cut -d " " -f 1 | head -n 1)
kill $(ps | grep "go-build" | cut -d " " -f 1 | head -n 1)

# heroku-cli のインストール
brew tap heroku/brew && brew install heroku

# heroku にサインアップ
open https://signup.heroku.com/

# heroku-cli で heroku にログイン
heroku login -i

# アプリケーション名を変数に格納
# (注)ごちゃごちゃやってますが任意の文字列で構いません。
# (注)大文字は使えません。
export HEROKU_APP_NAME=$(echo `whoami`-`basename $(pwd)` | awk '{print tolower($0)}')

# アプリケーション名を確認
echo $HEROKU_APP_NAME

# heroku アプリケーションの作成
heroku create $HEROKU_APP_NAME --buildpack heroku/go

# Procfile の作成
echo "web: $(basename `pwd`)" > Procfile

# git リポジトリの作成
git init
git add .
git commit -m "Initial commit"

# push 先を登録
heroku git:remote --app $HEROKU_APP_NAME

# デプロイ
git push heroku master

# 確認
heroku open --app $HEROKU_APP_NAME

# heroku mysql addon を追加
heroku addons:add cleardb

# DATABASE_URL の確認
heroku config | grep DATABASE_URL

# DATABASE_URLは次のような構造になっている。
# mysql://ユーザ名:パスワード@ホスト名/データベース名?reconnect=true
# ユーザ名・パスワード・ホスト名・データベース名をそれぞれ抽出して以下の環境変数に設定する
heroku config:set USER="ユーザ名"
heroku config:set PASSWORD="パスワード"
heroku config:set Host="ホスト名"
heroku config:set DBNAME="データベース名"
heroku config:set GOOSE_CONNECTION="tcp:ホスト名:3306*データベース名/ユーザ名/パスワード"

# 環境変数の確認
heroku config

# goose のダウンロード
go get -u bitbucket.org/liamstask/goose/cmd/goose

# ディレクトリ作成
mkdir db

# 設定ファイルのサンプルをコピーして配置
# 途中のパスは各々の環境に合わせること
cp $GOPATH/pkg/mod/bitbucket.org/liamstask/goose@vX.X.X-XXXXXXXX-XXXXXXXX/db-sample/dbconf.yml db/
db/dbconf.yml の production の箇所を次のように編集する。
db/dbconf.yml
・・・・・・

production:
  driver: mymysql
  open: $GOOSE_CONNECTION

・・・・・・
console
# マイグレーションファイルを作成
goose create create_table_users sql
作成された db/migrations/xxxxxxxx_create_table_users.sql を編集する。
db/migrations/xxxxxxxx_create_table_users.sql
-- +goose Up
-- SQL in section 'Up' is executed when this migration is applied
CREATE TABLE users (
    id INT AUTO_INCREMENT,
    name VARCHAR(50),
    PRIMARY KEY(id)
);

-- +goose Down
-- SQL section 'Down' is executed when this migration is rolled back
DROP TABLE users;
console
# go.mod を整理
go mod tidy
go.mod の 1, 2 行目に次のように追記する。
go.mod
+ // +heroku install ./... bitbucket.org/liamstask/goose/cmd/goose
+
  module heroku-go-migration

  go 1.12

  require github.com/labstack/echo/v4 v4.1.10
console
# Procfile の 2 行目にリリース時に実行したいコマンドを追記
echo 'release: goose -env production up' >> Procfile

# ここまでの変更内容をコミット
git add .
git commit -m "Second commit"

# デプロイ
git push heroku master
デプロイ時のログに次のような内容があることを確認する。
remote: Verifying deploy... done.
remote: Running release command...
remote:
remote: goose: migrating db environment 'production', current version: 0, target: xxxxxxxxxxxxxx
remote: OK    xxxxxxxxxxxxxx_create_table_users.sql
remote: Waiting for release.... done.
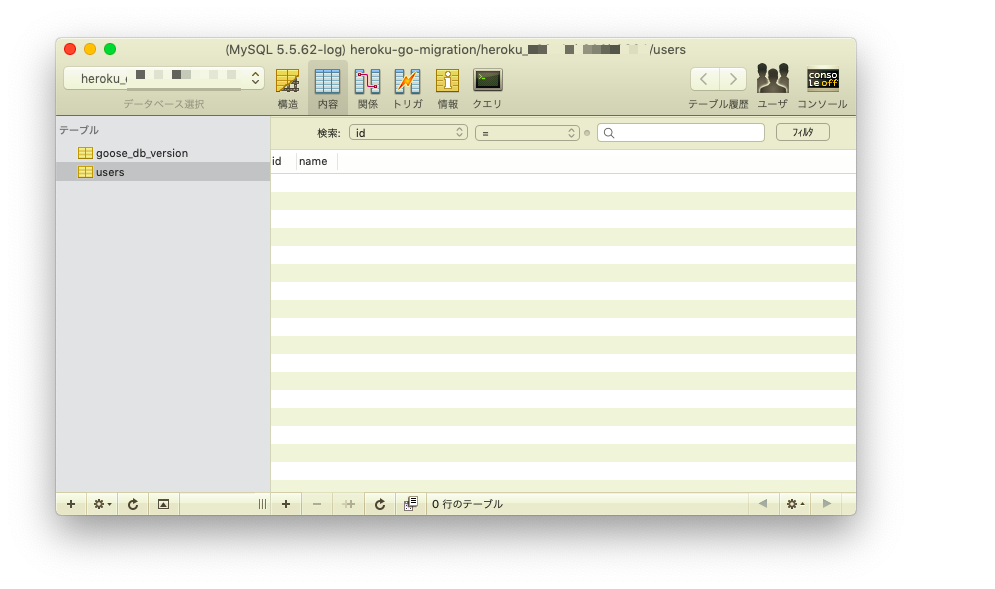
控えたユーザ名・パスワード・ホスト名・データベース名を利用して、SQLクライアントからデータベースに接続して確認する。

