ESLintのインストール
ドキュメント( https://eslint.org/ )通りだと、
npm init @eslint/config
でeslintの初期設定及びインストールができる。
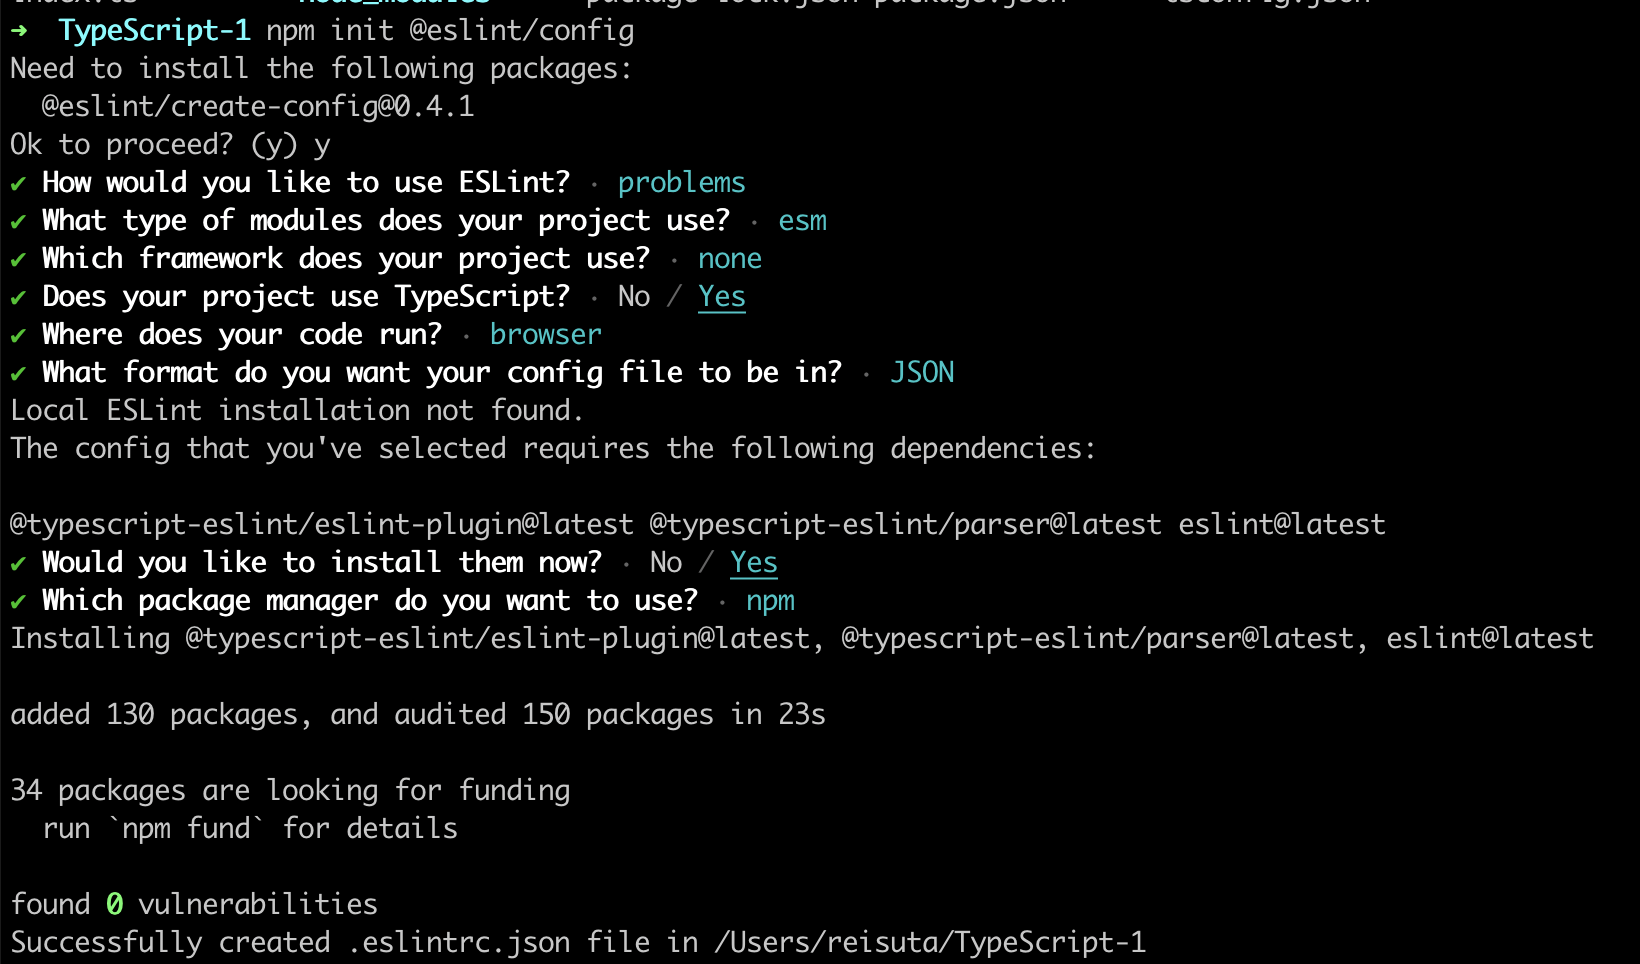
実行すると、下記のように、
色々設定について聞かれるので、
順に答えていく。
すべて答えたら、
インストールが実行され、
.eslintrc.jsonみたいなファイルができるはずだ。
基本的にはこのやり方でいいと思うが、
上記の公式のコマンドが上手く作用しなかったら、
npm経由かyarn経由かどちらかで、
まずはインストールする。
(筆者のプロジェクトだと、なぜかエラーになったので、
下記の方法で導入した)
npm install eslint
yarn add eslint
設定ファイルのeslintrc.jsonなども、
手動で作成することも可能なので、
公式のコマンドがエラーになるときは、
手動で作成してしまったほうが良さそう。
.eslintrc.jsonの設定
さて、.eslintrc.jsonなどのファイルができたら、
そこにeslintの設定をする。
npm init @eslint/configを実行した場合、
こんな感じのコードになっている。
{
    "env": {
        "browser": true,
        "es2021": true
    },
    "extends": [
        "eslint:recommended",
        "plugin:@typescript-eslint/recommended"
    ],
    "overrides": [
    ],
    "parser": "@typescript-eslint/parser",
    "parserOptions": {
        "ecmaVersion": "latest",
        "sourceType": "module"
    },
    "plugins": [
        "@typescript-eslint"
    ],
    "rules": {
    }
}
この中でも重要な部分の一つとして、
  "extends": [
        "eslint:recommended",
    ],
があげられる。
eslint:recommendedの記述で、
こちらの( https://eslint.org/docs/latest/rules/ )ページにある、
checkboxがついたルールが適用されたことになる。
なので、実はこの記述だけで、
最低限のESLintは適用させることができてしまう。
ただ、上記の設定を上書きしたかったり、
追加したいときは、上記では空になっている、
rulesのところに設定を足していく感じになる。
正直、.eslintrc.jsonの設定は奥が深いので、
本記事ではそこまで深入りしない。
運用していくうちに自分だけのベストな.eslintrc.jsonを
模索していくかたちになるだろう。
一旦、設定の目安として、
airbnbのeslintrcが参考になる。
そのまま適用すると厳しすぎる気もするので、
使えそうな部分を足していくのがいいかもしれない。
https://github.com/airbnb/javascript/tree/master/packages/eslint-config-airbnb-base/rules
とりあえず、シングルクォート統一、
セミコロンを必ずつけて、console.logとかは警告がでるような
rulesを追加してみた。
{
    "env": {
        "browser": true,
        "es2021": true
    },
    "extends": [
        "eslint:recommended",
        "plugin:@typescript-eslint/recommended"
    ],
    "overrides": [
    ],
    "parser": "@typescript-eslint/parser",
    "parserOptions": {
        "ecmaVersion": "latest",
        "sourceType": "module"
    },
    "plugins": [
        "@typescript-eslint"
    ],
    "rules": {
      "quotes": ["error", "single"],
      "semi": ["error", "always"],
      "no-console": "warn"
    }
}
ESLint実行
さて、試しにlintを走らせてみる。
package.jsonにlintコマンドを定義する。
   "scripts": {
      "start": "ts-node src/index.ts",
      "lint": "npx eslint src/index.ts",
      "test": "jest"
   }
試しにsrc/index.tsに対してlintを実行するようにした。
import express, { Request, Response } from "express"

const app = express()
const port = 3002

app.get("/", (req: Request, res: Response) => {
  res.send("Hello World")
})

app.listen(port, () => {
  console.log(`Example app listening on port ${port}`);
})
index.tsに、lintがきいているか確かめるため、
文字列はダブルクオーテーションで囲み、
セミコロンは文末につけないで、console.logもコード中に入れている。
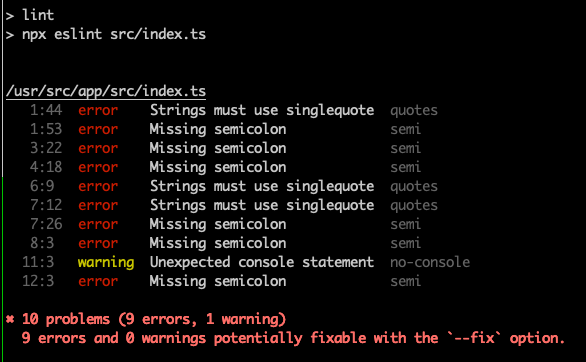
では、実行してみる。
npm run lint
無事ESLintが機能していることがわかる。

