概要
フロントエンドフレームワークとしてBootstrapを使ってみたのでメモしておく。
プログレスバーを作ってみる
作ってみたコードは下記です。
HTML部分
<!DOCTYPE html>
<html lang="ja">
<head>
  <!-- Required meta tags -->
  <meta charset="utf-8">
  <meta name="viewport" content="width=device-width, initial-scale=1, shrink-to-fit=no">
  <title>BootStrap Sample</title>

  <!-- Bootstrap CSS -->
  <link rel="stylesheet" href="https://maxcdn.bootstrapcdn.com/bootstrap/4.0.0/css/bootstrap.min.css" integrity="sha384-Gn5384xqQ1aoWXA+058RXPxPg6fy4IWvTNh0E263XmFcJlSAwiGgFAW/dAiS6JXm" crossorigin="anonymous">
</head>
<body>
  <div class="container">
    <div class="row">
      <div class="col-12">
        <div class="progress mt-3 fade" id="progress">
          <div class="progress-bar" role="progressbar"
               style="width: 0;" data-valuenow="0" data-valuemin="0" data-valuemax="100">
            0%
          </div>
        </div>
        <div class="mt-3 text-center">
          <button type="button" class="btn btn-outline-primary" id="btn">実行</button>
        </div>
      </div>
    </div>
  </div>

  <!-- Optional JavaScript -->
  <!-- jQuery first, then Popper.js, then Bootstrap JS -->
  <script src="https://code.jquery.com/jquery-3.2.1.slim.min.js" integrity="sha384-KJ3o2DKtIkvYIK3UENzmM7KCkRr/rE9/Qpg6aAZGJwFDMVNA/GpGFF93hXpG5KkN" crossorigin="anonymous"></script>
  <script src="https://cdnjs.cloudflare.com/ajax/libs/popper.js/1.12.9/umd/popper.min.js" integrity="sha384-ApNbgh9B+Y1QKtv3Rn7W3mgPxhU9K/ScQsAP7hUibX39j7fakFPskvXusvfa0b4Q" crossorigin="anonymous"></script>
  <script src="https://maxcdn.bootstrapcdn.com/bootstrap/4.0.0/js/bootstrap.min.js" integrity="sha384-JZR6Spejh4U02d8jOt6vLEHfe/JQGiRRSQQxSfFWpi1MquVdAyjUar5+76PVCmYl" crossorigin="anonymous"></script>
  <script>
    // ここに下のオブジェクトスクリプトを記載...
  </script>
  <script>
    // ここに下の実装処理スクリプトを記載...
  </script>
</body>
</html>
処理をオブジェクトにまとめる。
※ 外部ファイルに分離できるようカプセル化する
オブジェクトスクリプト
    /**
     * プログレスバー
     */
    const progressBar = function(id){
      const frame = $(id);
      const bar = $('div.progress-bar', frame);
      let current = 0;
      return {
        current: function(){
          return current;
        },
        set: function(n) {
          current = (n > 100) ? 100 : n;
          bar
            .css('width', current + '%')
            .prop('aria-valuenow', current)
            .text(current + '%');
          return this;
        },
        show: function() {
          this.set(0);
          frame.addClass('show');
          bar.addClass('progress-bar-striped progress-bar-animated');
          return this;
        },
        complete: function(){
          bar.removeClass('progress-bar-striped progress-bar-animated');
          return this;
        }
      };
    };
上記オブジェクトを使っての実装。
実装処理スクリプト
    (function($){
      const progress = new progressBar('#progress');
      const btn = $('#btn');

      btn.on('click', function(){
        progress.show();
        btn.prop("disabled", true);

        // 進行状況チェック (チェック間隔は任意...)
        const timer = setInterval(function() {
          const current = progress.current();
          if (current < 100) {
            // バーを進める ※サンプル:0〜10の乱数を加算する
            const n = Math.floor( Math.random() * 11 );
            progress.set(current + n);
          } else {
            // 100%になれば、チェック(繰り返し)を終了する
            progress.complete();
            clearInterval(timer);

            btn
              .text('終了')
              .addClass('btn-outline-success')
              .removeClass('btn-outline-primary');
          }
        }, 200);
      });
    })(jQuery);
実際に、上記3つを記載したhtmlを実行してみたら、以下のように動きまし♪。
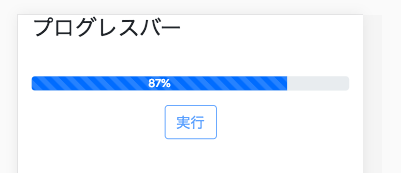
結構、お手軽に実装できますね。
まとめ
バーの表示・非表示について、collapseなどを使ったほうがいいのかも・・・。
もう、スクリプトからの動きの制御は、少し試行錯誤が必要そうだな。
以上です。