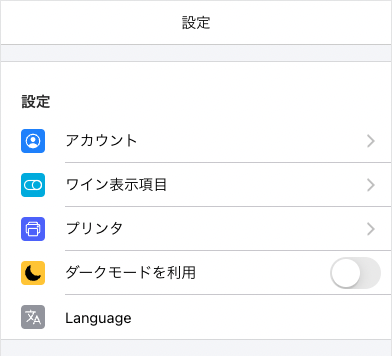
ion-item を使ってるとデザインのために、 lines を設定することはよくあります。よくあるのが、最下部の ion-item を lines=full にして、下にボタンを用意する形でしょうか。
<ion-list>
  <ion-item>...</ion-item>
  <ion-item>...</ion-item>
  <ion-item lines="full">...</ion-item>
</ion-list>
<div class="ion-text-center ion-padding">
  <ion-button>ログイン</ion-button>
</div>
なんてよくしますよね。ただ一方でこのコードはメンテナンス性にあまり優れていません。
- 最下部のion-itemを追加・削除した時、linesも移動しないと
- 最下部のion-itemの表示を条件分岐にしていた場合、linesもプログラムでハンドリングしないと
といったことはよくあります。気づけば、手作業でlinesをメンテナンスするお仕事をしてたりして・・・。
ということは辛いので、CSSの :last-child を使って、さくっと自動的にデザインが当たるようにしましょう。
を見ればわかりますが、 lines 属性がやってることなんて、 Hostとなるタグにclass名をつけてるだけなので。
lines=none
まず簡単な lines=none です。
ion-list {
  ion-item:last-child {
      --border-width: 0px;
      --show-full-highlight: 0;
      --inner-border-width: 0px;
      --show-inset-highlight: 0;
  }
}
を追えばわかりますが、当たってるclassはこれだけなので、直接アタッチしてあげましょう。Androidも同様のスタイルなので、iOSだけの紹介としておきます。
lines=full
これがややこしいのはiOSとAndroidでデザインが変わっていることです。以下のようになります。
ion-list {
  ion-item.ios:last-child {
    --border-width: #{0px 0px .55px 0px};
    --inner-border-width: 0px;
    --show-inset-highlight: 0;
    --show-full-highlight: 1;
  }

  ion-item.md:last-child {
    --border-width: #{0px 0px 1px 0px};
    --inner-border-width: 0;
    --show-inset-highlight: 0;
    --show-full-highlight: 1;
  }
}
これが追うのが手間ですが、iOSとAndroidを別々にみていきましょう。
iOS
まず、あたってるのは以下です。これはわかりやすい。
なのですが、前者に $item-ios-border-bottom-width とSCSSの変数が当たってます。これを追ってみましょう。まず、itemの変数に以下があります。
なのですが、これは $hairlines-width が当たってるので、次はこれを探しましょう。Ionicのグローバルテーマにあります。
なので、 $item-ios-border-bottom-width には、 $hairlines-width で定められた .55px が当たってることがわかりますね。
Android
同様にmdのスタイルから探します。まず当たってるclassはこちら。
で、iOSと同じように $item-md-border-bottom-width が当たっています。こちらは、itemの変数に用意されていますね。
なので、 1px が標準で入ってることがわかりました。
まとめ
ルール化されたコードなのに機械的に属性を手作業でメンテすると必ず見落としがありますし、画像回帰テストをしても下線1本は更新時に見落としてしまう可能性があるので、自動的にスタイルが当たるようにできるといいですよね。
<ion-list>
  <ion-item>...</ion-item>
  <ion-item [lines]="hoge ? undefined: 'full'">...</ion-item>
  <ion-item lines="full" *ngIf="hoge">...</ion-item>
</ion-list>
<div class="ion-text-center ion-padding">
  <ion-button>ログイン</ion-button>
</div>
というコードや
<ion-list>
  <ion-item *ngFor="let item of array; let i = index"
     [lines]="i === array.length - 1 ? 'full' : undefined">...</ion-item>
</ion-list>
みたいなコードからは卒業しましょう(これを気づくまで書いてました)。
CSSの自動ルール適用を使うと、こんなデザインも簡単につくれるようになります。
ion-content[color=light] {
  ion-list {
    margin: 16px 0;
    padding: 0;
    border-top: 1px solid var(--ion-color-light-shade);
    border-bottom: 1px solid var(--ion-color-light-shade);

    ion-item:last-child {
      --border-width: 0px;
      --show-full-highlight: 0;
      --inner-border-width: 0px;
      --show-inset-highlight: 0;
    }
  }
}
ぜひこの記事が役に立てば幸いです。それではまた。
