参考
https://developer.apple.com/reference/coregraphics/cgblendmode
※正直、上を読めば済む話なんだけど、せっかく読んだからメモしておきたかったんだよね。
本題
前提
上記のURL先にも書いてあるが,ざっくり説明すると
R = 結果の画像
S = 元々の画像
D = 混ぜ合わせる画像
Ra, Sa, Da = R, S, D のそれぞれのアルファ値(アルファ値っていうか色情報?aRGBのことかな?)
(ここでいうアルファ値情報は各ピクセルごとだと思います)
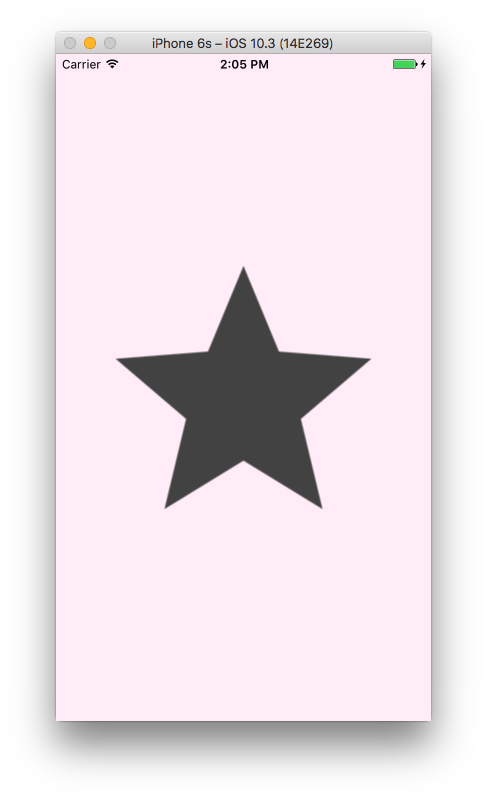
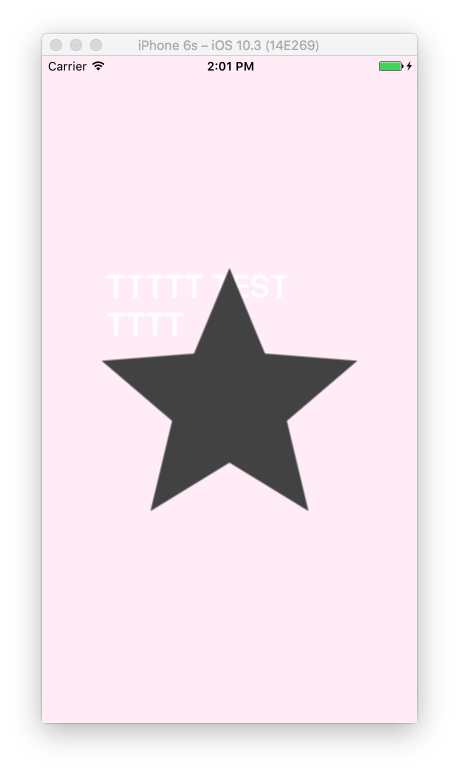
下記のサンプル画像について
S = 白い文字列の画像
D = 黒い星の画像
case clear: R = 0
0なので透明になります

case copy: R = S
元々と同じ画像になります。(アルファ値の情報もコピーされるみたいです)
case sourceIn: R = S*Da
混ぜ合わせる画像のアルファ値で元々の画像をくり抜きます。
SからDと重なっている部分だけ表示されます
(Dの色になります)

case sourceOut: R = S*(1 - Da)
souceInの逆。
DからSと重なっている部分が透明になります。
(Dの色になります)

case sourceAtop: R = SDa + D(1 - Sa)
Sの画像とDの画像が重なっている部分だけDの画像になります。
case destinationOver: R = S*(1 - Da) + D
うまく動かない?(2017/06/02時点
単純に足し合わせた画像ができます

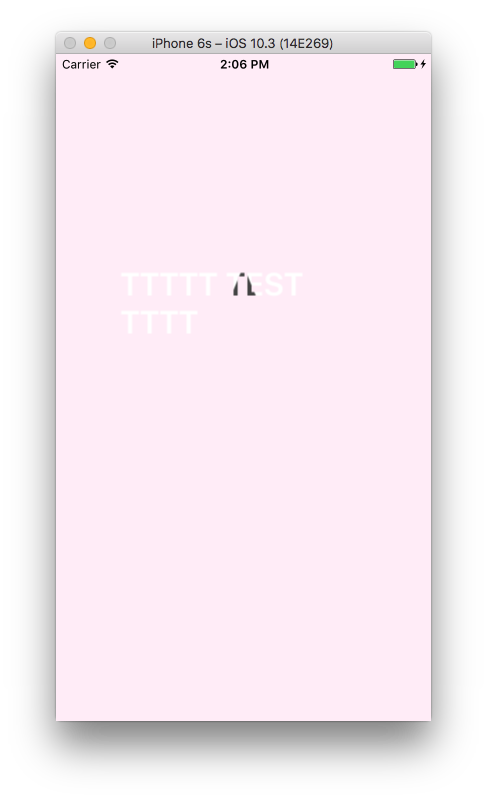
case destinationIn: R = D*Sa
DとSの重なっている部分だけ表示されます
(Sの色になります)

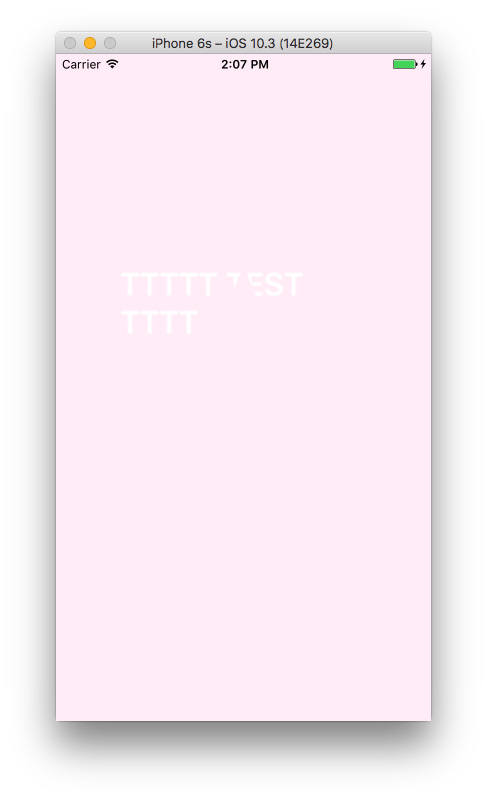
case destinationOut: R = D*(1 - Sa)
Sの画像からDと重なっている部分だけ切り取られます
(Sの色になります)
case destinationAtop: R = S*(1 - Da) + D*Sa
Dの上にSの画像が来て、Sの画像はDと重なっている部分だけ表示されます

case xor:
R = S*(1 - Da) + D*(1 - Sa). This XOR mode is only nominally related to the classical bitmap XOR operation, which is not supported by Core Graphics
DとSが重なっている部分だけ透明になります。

case plusDarker: R = MAX(0, 1 - ((1 - D) + (1 - S)))
Sの上にDを重ねた感じになります。
case plusLighter: R = MIN(1, S + D)
Dの上にSを重ねた感じになります。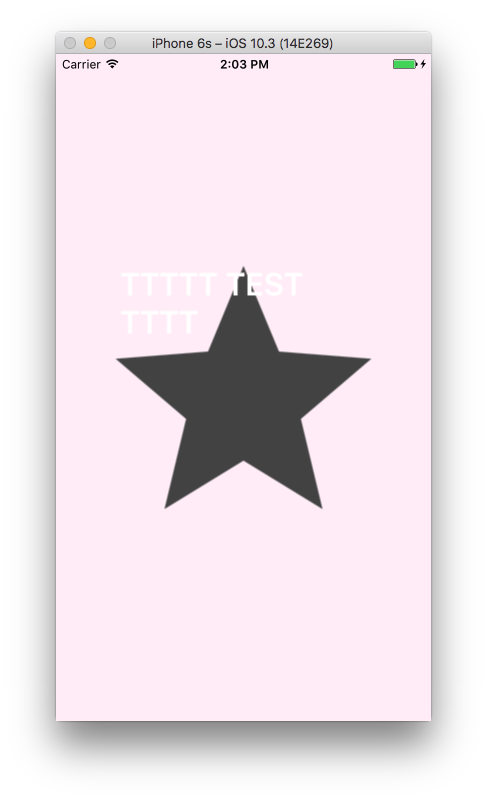
サンプルコード
class ViewController: UIViewController {

    @IBOutlet weak var img: UIImageView!

    override func viewDidLoad() {
        super.viewDidLoad()

        img.image = drawText(image: img.image!)
    }

    func drawText(image :UIImage) ->UIImage
    {
        let text = "TTTTT TEST TTTT"

        let font = UIFont.boldSystemFont(ofSize: 32)
        let imageRect = CGRect(x:0,y:0,width:image.size.width,height:image.size.height)

        UIGraphicsBeginImageContext(image.size);


        let textRect  = CGRect(x:5, y:5, width:image.size.width - 5, height:image.size.height - 5)
        let textStyle = NSMutableParagraphStyle.default.mutableCopy() as! NSMutableParagraphStyle
        let textFontAttributes = [
            NSFontAttributeName: font,
            NSForegroundColorAttributeName: UIColor.white,
            NSParagraphStyleAttributeName: textStyle
        ]

        text.draw(in: textRect, withAttributes: textFontAttributes)
        image.draw(in: imageRect, blendMode: .destinationOut, alpha: 1)


        let newImage = UIGraphicsGetImageFromCurrentImageContext();

        UIGraphicsEndImageContext()

        return newImage!
    }


    override func didReceiveMemoryWarning() {
        super.didReceiveMemoryWarning()
        // Dispose of any resources that can be recreated.
    }


}
あとは適当にStoryboardとかに画像を置いてそれを紐付けてください。