前書き
もともと使ってた第4世代 Intel NUC のスペックに不満を感じ、第12世代 Intel NUC をポチッと購入 (はーと
合わせて購入した SSD と Memory も増設し、週末にワクワクしながら電源ON!
・・・、あれ?
モニタに何も映らない、、、、真っ黒、、、、
初期不良かよっ、と思ってググると BIOS バージョンが古いとアルアルですよと、、、 はい、そうですか。
モニタの解像度によっては表示できないことがあるようで、別解像度のもう1台のモニタに接続すると問題なく表示。
という訳で、では Intel NUC の BIOS アップデートをしましょうね、と
環境
| 機器 | モデル | コメント |
|---|---|---|
| モニタ1 | I-O DATA EX-LD2071TB | 解像度:1920 x 1080 ※表示せず |
| モニタ2 | NEC EA243WM | 解像度:1920 x 1200 ※正常に表示 |
| PC | Intel NUC 12 Pro キット NUC12WSHi7 |
BIOS アップデート手順
Intel NUC の BIOS アップデートとリカバリの手順は こちら から確認が可能です。
私が利用している NUC12WSHi7 用は、下記が直リンクになります。
- インテル® NUC 12 Pro [キット/ミニ PC] NUC12WSXX
https://www.intel.co.jp/content/www/jp/ja/download/739909/bios-update-wsadl357.html
0. BIOS アップデート用の更新データを入手
上記 Intel のサイトから更新データ (WS0085.CAP) をダウンロードします。

1. USB Flash デバイスに更新データを書き込み
USB Flash デバイスは、普通に Windows で読み書きできるように FAT32 でフォーマットしておきます

そこに事前ダウンロードしておいた WS0085.CAP ファイルをコピーしておけば準備完了。
2. BIOS アップデートの実施
アップデート手順は、更新データをダウンロードする Web ページから参照できる Readme の PDF で確認できます。
今回は、「F7 BIOS Update Instructions」という手順でやります。
The F7 BIOS update option allows you to update the system BIOS during the boot process and before the
operating system loads.
 1. Download the .CAP BIOS file and transfer it to a USB flash drive.
 2. Plug the USB device into a USB port of the Intel NUC when it’s turned off (not in Hibernate or Sleep
mode).
 3. Turn on (or restart) the Intel NUC.
 4. During boot, when the F7 prompt is displayed, press F7 to enter the BIOS Flash Update screen.
 5. Select the USB device and press Enter.
 6. Select the .CAP file and press Enter.
 7. Confirm you want to update the BIOS by pressing Enter.
 8. Wait 2-5 minutes for the update to complete.
 9. Remove the USB flash drive.
 10. Restart the computer.
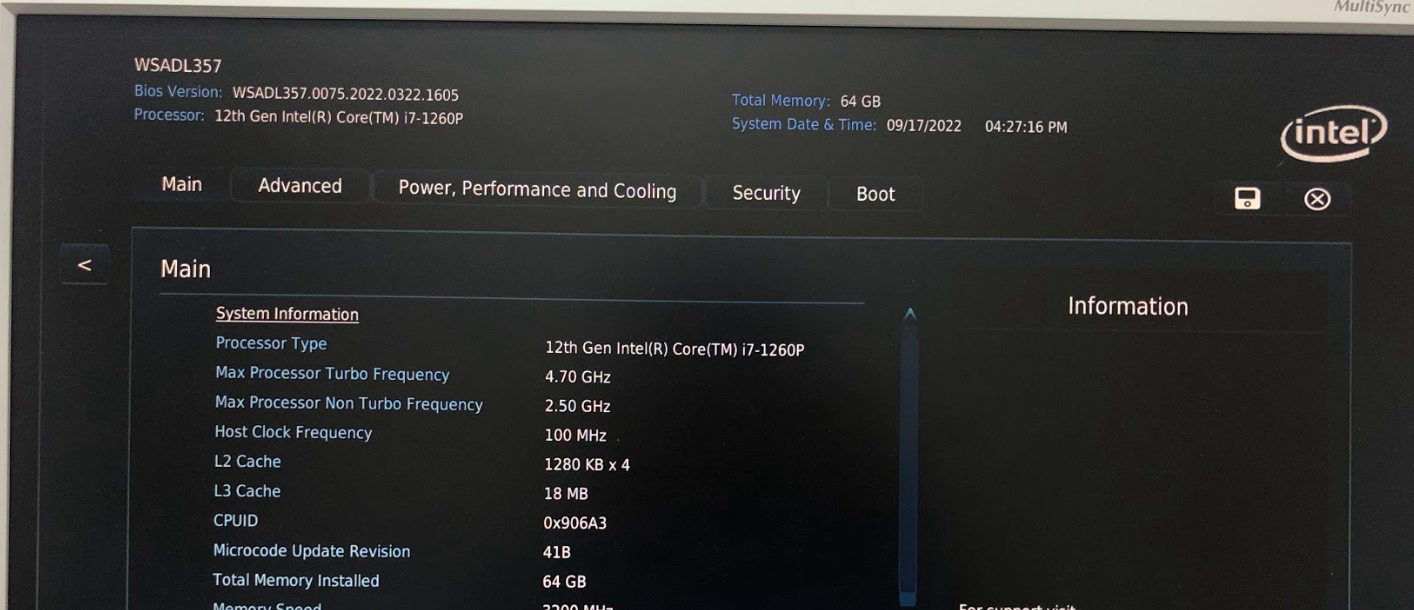
まずは、F2 キーを押下して BIOS 起動して、BIOS バージョンを確認

次に、USB Flash デバイスを NUC に接続して起動しなおし、F7 キーをポチポチ押下して BIOS Flash Update Screen に画面遷移します。
USB Flash デバイス (MF-HSU2) を選択して、

更新データのファイル (WS0085.CAP) を選択して、

下記の順でアップデートが走り、5分ぐらいで完了して自動的に Intel NUC は電源OFFされます。
- OEM FMP Update
- Flash Update
- EC Firmware Update
- ME FW Update
電源ONして F2 押下してBIOSでバージョン確認。無事、バージョンが上がってますね!

3. 最後に
BIOS アップデート後に、最初画面が映らなかった I-O DATA のモニタに接続して正常に表示されることを確認しました。
ということで、やっぱり BIOS バージョンが古いせいだったんですね、、、
やれやれ、、、でもやっと ESXi インストールできる! ウキウキ
