この記事はUnreal Engine (UE) Advent Calendar 2022の22日目です
概要
自動化テストとして少し前に追加されていた Automation Spec とテストのお供として入力をシミュレートできるAutomation Driver についてさわってみた記事です。環境はUE 5.1
Automation Spec & Automation Driver とは?
Automation Spec とはビヘイビア駆動開発(BDD)というテスト手法がUE C++内で使用できる自動化テストフレームワークらしいです。BDDの特徴として、スペック(仕様)がまず先にあり、次に実装が来るので人間にとって理解しやすいコードになります。
もう一つの方の Automation Driver とは、ユーザー入力をコード上からシミュレートできる機能です。今のところキーボードマウスのみ対応しているようです。Automation Specと一緒に使っていきます。
超シンプルなテストを実装してみる
BEGIN_DEFINE_SPEC()~END_DEFINE_SPEC()までで、この二つのマクロでSpecの定義を行います。引数は、Spec名、テスト名(SessionFrontendに表示される)、各種フラグです。
以下の実装ではBeginとEndの間にはまだ何もありませんが、ここに関数や変数を宣言するとSpecのメンバとして利用できます。
// Specの定義
BEGIN_DEFINE_SPEC(MyCustomSpec, "UEAdventCalendar2022",
 EAutomationTestFlags::ProductFilter| EAutomationTestFlags::ApplicationContextMask)
END_DEFINE_SPEC(MyCustomSpec)

void MyCustomSpec::Define()
{
	// テスト
	Describe("Execute", [this]()
	{
		It("TestTrue", [this]()
        {
        	// 正常系テスト
        	TestTrue("value of true", true);
        });

		It("TestFalse", [this]()
		{
			// 異常系テスト
			TestFalse("value of false", false);
		});
	});
};
大体ラムダ式で書かれています。Describe()の中のIt()で実際のテスト記述し、TestTrue()やTestFalse()に入れた値でテストが成功するかを書くことができます。正常系のテストでは「成功したらテスト成功」になり、異常系テストでは「失敗したらテスト成功」です。
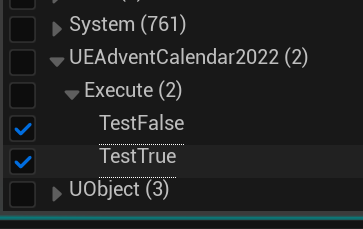
実際に Editor から SessionFrontend 使ってテストを行ってみます。Tools->SessionFrontend を開き、Automation タブから先ほど定義したテストを有効にします。テスト名が反映されていてGUIで操作できるのはいいですね。

有効にした後、StartTest を押すとテストが走り、結果が MessageLog などに表示されます。
今回は値に直接TrueとFalseを入れているので必ず成功するテストでした。

BeforeEach と AfterEach
BeforeEach() と AfterEach() を使用するとテスト前の初期化やクリーンアップが行えます。
    BeforeEach([this]()
    {
      //初期化とか
    });

    It("Test", [this]()
    {
        TestEqual("Test", hoge, foo);
    });

    AfterEach([this]()
    {
        //クリーンアップとか
    });
ちなみにテスト関数の頭に"x"を以下のようにつけると該当のテストコードを無効化することもできます。
    // 無効化されたテスト
	xDescribe("Execute", [this]()
	{
		xIt("TestTrue", [this]()
        {
        	// 正常系テスト
        	TestTrue("value of true", true);
        });
    });
Automation Driver を試してみる
既にエンジンにサンプルと思われるプラグインが存在するのでまずはそちらを見ていきます。Plugins から Automation Driver Tests を有効にします。

Editor を Restart し SessionFrontend を開きます。開けたら System の下のAutomation にチェックを入れて Start Tests を押します。

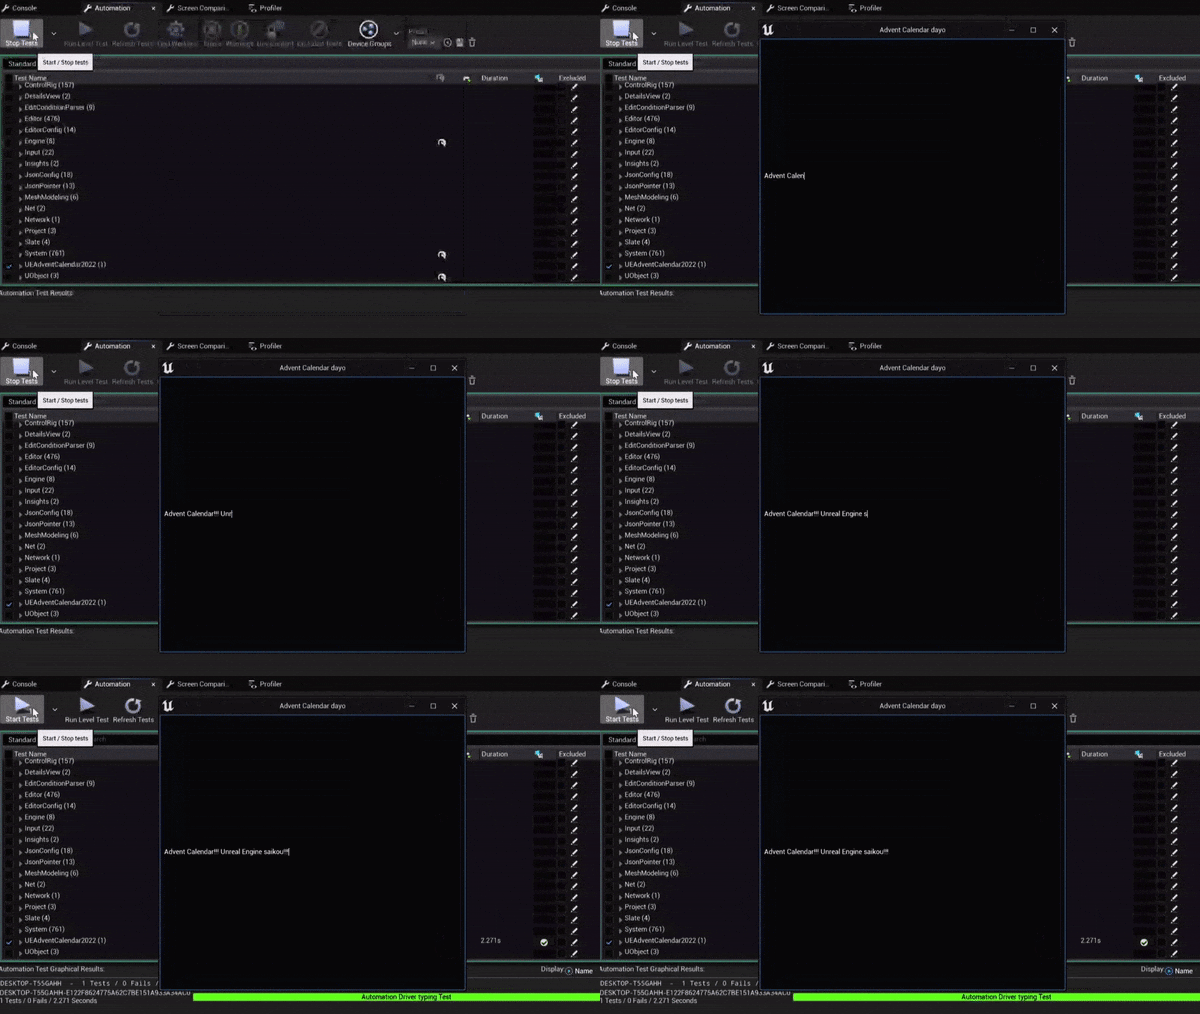
テストが始まると以下の謎のウィンドウが現れて、ユーザーの操作が乗っ取られピアノの鍵盤のようなボタンが何度も押されたり文字が入力されたりするので、テストが終わるまで少し待ちましょう。

テストが終わると MessageLog に大量の結果が表示されていると思います。
この Automation Driver Tests プラグインのテストですが、5.1時点では、失敗しているテストも多く、Editor が最後にはクラッシュしたので使用には注意です。
詳しく見たい方は以下に実装があります。
\Engine\Plugins\Tests\AutomationDriverTests\Source\AutomationDriverTests\Private\AutomationDriver.spec.cpp
Driver と Spec を一緒に使ってみる
Driver で入力をシミュレートし、Spec で簡単なテストをしてみます。任意の文字列を入力させその文字列が入力されたらテスト成功というだけのシンプルなテストです。
#include "IAutomationDriver.h"
#include "IAutomationDriverModule.h"
#include "IDriverElement.h"
#include "LocateBy.h"
#include "Framework/MetaData/DriverMetaData.h"
#include "Widgets/Input/SEditableTextBox.h"

BEGIN_DEFINE_SPEC(MyCustomSpec, "UEAdventCalendar2022", EAutomationTestFlags::ProductFilter | EAutomationTestFlags::ApplicationContextMask)
   TSharedPtr<SWindow> SuiteWindow;
   FAutomationDriverPtr Driver;
END_DEFINE_SPEC(MyCustomSpec)

void MyCustomSpec::Define()
{
      // テスト前の事前処理
      BeforeEach([this]()
      {
         // 入力シミュレートの為にKBMからの入力を停止する
         IAutomationDriverModule::Get().Enable();

         // ウィンドウとテキストボックスを生成
         if (!SuiteWindow.IsValid())
         {
            SuiteWindow = FSlateApplication::Get().AddWindow(
               SNew(SWindow)
                .Title(FText::FromString(TEXT("Advent Calendar dayo")))
                .HasCloseButton(true)
                .SupportsMaximize(true)
                .SupportsMinimize(true)
                .ClientSize(FVector2D(600, 540))
               [
                  SNew(SEditableTextBox)
                  .AddMetaData(FDriverMetaData::Id("SEditableTextBox"))
               ]);
            SuiteWindow->SetOnWindowClosed(FOnWindowClosed::CreateLambda([this](const TSharedRef<SWindow>& Window)
            {
               SuiteWindow.Reset();
            }));
         }
         SuiteWindow->BringToFront(true);
         FSlateApplication::Get().SetKeyboardFocus(SuiteWindow, EFocusCause::SetDirectly);

         // 入力シミュレート用のDriverインスタンスを作成
         Driver = IAutomationDriverModule::Get().CreateDriver();
      });

      Describe("Execute", [this]()
      {
         // Automation Driver 入力シミュレートテスト
         It("Automation Driver typing Test", EAsyncExecution::ThreadPool, [this]()
         {
            FDriverElementRef Element = Driver->FindElement(By::Id("SEditableTextBox"));

            // TEXT を入力させる
            Element->Type(TEXT("Advent Calendar!!! Unreal Engine saikou!!!"));

            // 入力された文字列が一緒だったらテスト成功
            TestEqual(TEXT("Should Same Text"), Element->GetText().ToString(),
                    TEXT("Advent Calendar!!! Unreal Engine saikou!!!"));
         });
      });

      AfterEach([this]()
      {
         Driver.Reset();
         // 入力をKBMに返す
         IAutomationDriverModule::Get().Disable();
      });
}
上記のコードを SessionFrontend からテストしてみると、エンジンのバグっぽい気がするのですが、初回のテストで必ず失敗してしまいました。二回目以降のテストは成功し続けます。
何の意味もないテストですが、勝手に入力がされているのを見るのは楽しいですね。字が小さすぎて見えないですが、Unreal Engine 自身に Unreal Engine Saikou! と言わせることができました。
参考リンク
