らら子です。
昨日の記事に続きまして、本日はCloud One Workload Securityの自動化APIを試していきます。
セキュリティソフトの管理なんてわざわざAPIで自動化することあるの?という疑問は持ちつつ公式ドキュメントを読み進めたところ、以下のような作業がAPIで自動化できることがメリットとして挙げられていました。
- ポリシーの設定とコンピュータの保護設定
- 脆弱性の発見とパッチの適用
- 定期的なメンテナンスタスクの自動化
へー、という感じなのですが、CloudWatchなどのイベントをトリガーにEC2にインストールしたセキュリティエージェントの保護設定を動的に切り替えていく、みたいな運用ができたらかっこいいですね!(運用の安定性はともかく・・・)
というわけでさっそくAPIを使っていきましょうということで、Cloud One Workload SecurityのAPIについて、公式ドキュメント:The API and SDKを読みました。
どうやらPythonのSDKが提供されているようなので、こちらを利用していこうと思います。
(私はPythonとJSしか書けません!)
Python SDKをセットアップする
Python SDKの設定は、Python SDK ドキュメントを参照しました。
動作要件が「Python 3.4 または 3.7のバージョン」となってます。
やや古いですね。
一応手元のPython 3.9の環境でも問題なく動いたのは確認したのですが、念のためDockerを使ってPython 3.7のランタイム環境を用意しました。
docker pull python:3.7
次に、Python SDK ドキュメントのページから、Python SDKの本体をダウンロードします。
PypyじゃなくてZIPで配信してるんですね。
適当なディレクトリでZIPファイルを展開します。
wget https://cloudone.trendmicro.com/docs/downloads/sdk/ws/v1/c1ws-py-sdk.zip
unzip c1ws-py-sdk.zip
rm c1ws-py-sdk.zip
展開後のファイルツリーはこんな感じでした。
$ tree
.
├── deepsecurity
│   ├── __init__.py
│   ├── api
│   │   ├── 中略
│   ├── api_client.py
│   ├── configuration.py
│   ├── models
│   │   ├── 中略
│   └── rest.py
└── setup.py
3 directories, 314 files
SDKを展開したディレクトリをボリュームとしてDockerコンテナを起動し、以降はこのコンテナの中で作業を進めていきます。
まずはコンテナにログインします。
docker run --rm -it -v `pwd`:/root python:3.7 bash -c "cd /root && bash"
# root@a07271f34eba:~# ls
# deepsecurity/  setup.py
コンテナにログインができたら、setup.pyと同じディレクトリでSDKをpip installします。
インストールが完了したらpip freezeを叩いてみると、deep-security-apiというモジュールと、依存関係のパッケージがインストールされたことが確認できます。
python3 -m pip install .

# pip freeze
WARNING: The directory '/root/.cache/pip' or its parent directory is not owned or is not writable by the current user. The cache has been disabled. Check the permissions and owner of that directory. If executing pip with sudo, you should use sudo's -H flag.
certifi==2021.5.30
deep-security-api @ file:///root
python-dateutil==2.8.2
six==1.16.0
urllib3==1.26.6
これでSDKの準備は完了しました。
公式ドキュメントではここからPyCharmのセットアップ方法が記載されていますが、私はPyCharmは使っていないのでパスします。
CloudOne で APIアクセスキーを作成する
APIを利用するには、当然アクセスキーが必要です。
アクセスキーは、AdministrationタブからAPI Keysを開き、作成することができます。
アクセスキーごとに権限を制限できるようですが、今回はFull Access権限を指定します。
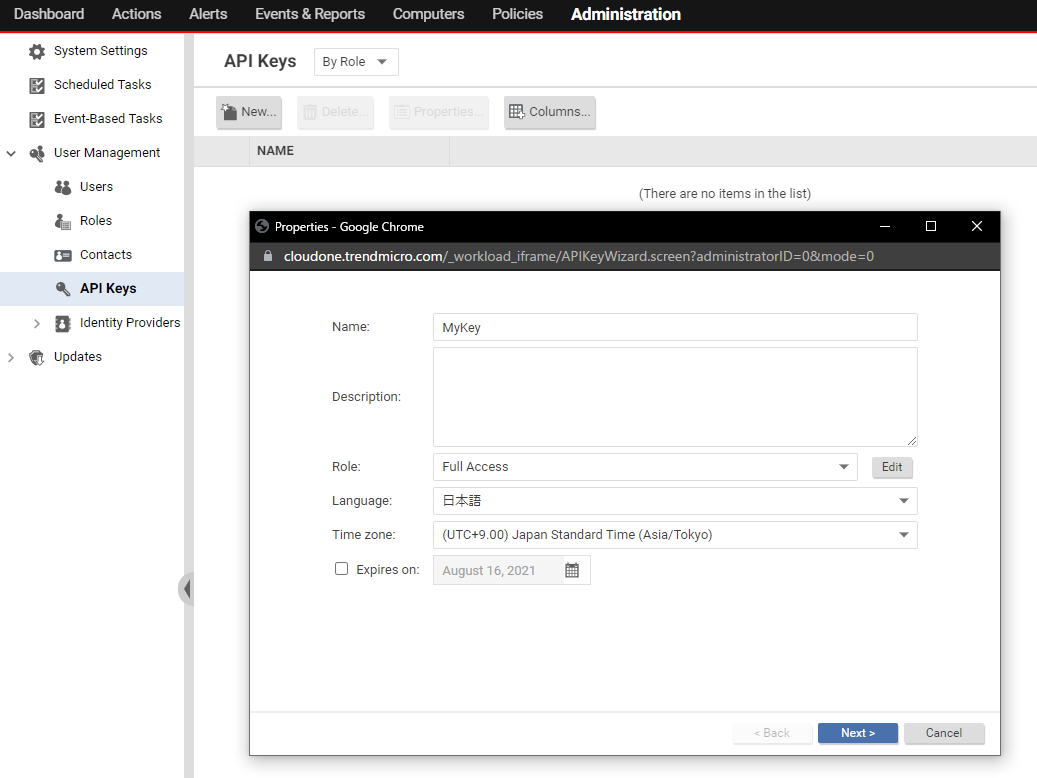
アクセスキーと合わせて必要なのは、APIのアクセスエンドポイントのURLです。
エンドポイントのURLは全然見つからなくて、探すのに苦労しました。
現在はhttps://cloudone.trendmicro.com/apiのURLがAPIのエンドポイントになっているようです。
APIを実行してみる
これでAPIを実行する準備が整ったので、さっそく呼び出してみようと思います。
サンプルコードはAPI referenceに書いてあったので、こちらを利用しました。
※ アクセスキーについては環境変数に格納しています。
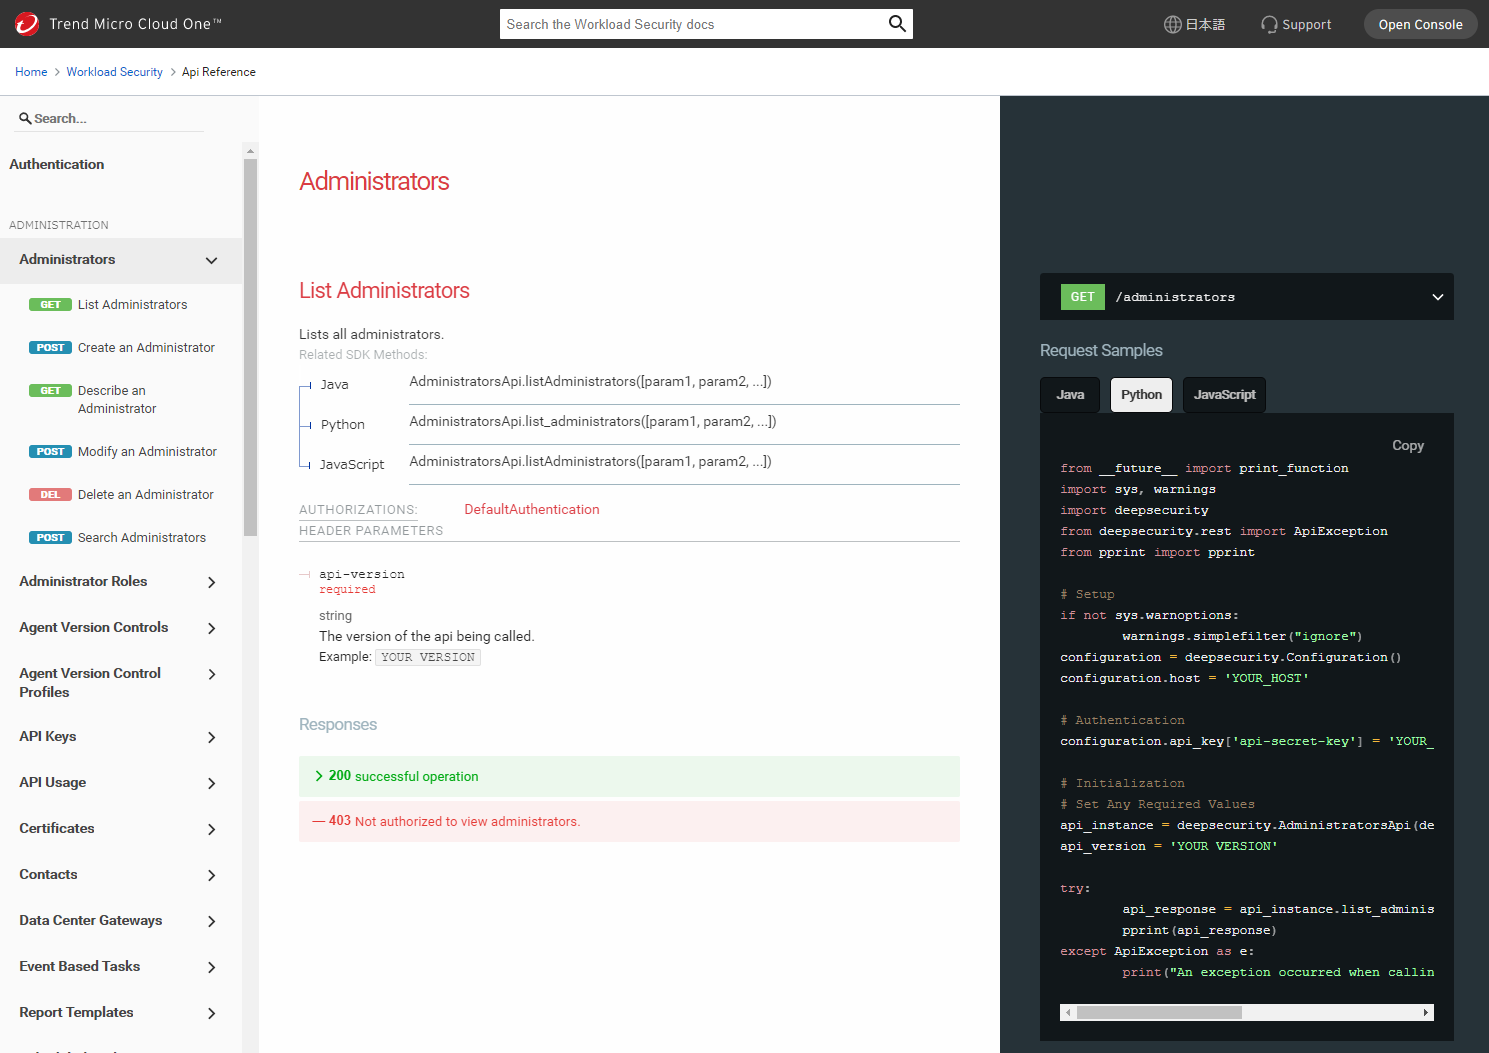
実際に利用したコードはこちらです。
これは、管理者ユーザーの一覧を取得するためのAPIのようですね。
from __future__ import print_function
import os
import sys, warnings
import deepsecurity
from deepsecurity.rest import ApiException
from pprint import pprint

# Setup
if not sys.warnoptions:
	warnings.simplefilter("ignore")
configuration = deepsecurity.Configuration()
configuration.host = os.getenv('ENDPOINT_URL')

# Authentication
configuration.api_key['api-secret-key'] = os.getenv('APIKEY')

# Initialization
# Set Any Required Values
api_instance = deepsecurity.AdministratorsApi(deepsecurity.ApiClient(configuration))
api_version = 'v1'

try:
	api_response = api_instance.list_administrators(api_version)
	pprint(api_response)
except ApiException as e:
	print("An exception occurred when calling AdministratorsApi.list_administrators: %s\n" % e)
試しに実行してみたところ、こんな感じの出力結果が得られました!
(JSONっぽい形式ですが、よくみると標準のJSON形式ではなさそう。)
$ python3 admin_test.py
{'administrators': [{'active': True,
                     'created': 1629031887394,
                     'description': '',
                     'directory_info': None,
                     'directory_name': None,
                     'email_address': '',
                     'external': True,
                     'external_user_id': '',
                     'full_name': '',
                     'id': 1,
                     'last_password_change': None,
                     'last_sign_in': 1629121495862,
                     'locale': 'en-US',
                     'mfa_type': 'none',
                     'mobile_number': '',
                     'pager_number': '',
                     'password': None,
                     'password_never_expires': True,
                     'phone_number': '',
                     'primary_contact': False,
                     'read_only': False,
                     'receive_notifications': False,
                     'report_pdf_password': None,
                     'report_pdf_password_enabled': False,
                     'role_id': 1,
                     'time_format': '24',
                     'time_zone': 'UTC',
                     'type': 'normal',
                     'unlock_time': None,
                     'unsuccessful_sign_in_attempts': 0,
                     'username': 'urn:cloudone:xxxxxxxxxxxx',
                     'utc_offset': 'UTC+0.00'}]}
last_password_changeとかmfaとかrole_idとかのパラメータが確認できるので、もしかしたら社内ポリシーに違反していないか、などをチェックするような運用を想定しているのかもしれませんね。
PythonSDKの構造を見る
本当はこれからいろんなAPIを試してみることをやりたかったのですが、利用できるメソッドの数が結構多かったのと、正直飽きてしまったこともあり、ここからはPython SDKのソースコードを読んでいきたいと思います。
deepsecurity.Configuration()
まずは、先ほどのadmin_test.pyを見てみます。
# Setup
if not sys.warnoptions:
	warnings.simplefilter("ignore")
configuration = deepsecurity.Configuration()
configuration.host = os.getenv('ENDPOINT_URL')

# Authentication
configuration.api_key['api-secret-key'] = os.getenv('APIKEY')
deepsecurity.Configuration()で<class 'deepsecurity.configuration.Configuration'>というオブジェクトを生成して、hostとapi_keyをセットしていることがわかります。
そこで、まずはこのクラスについて見ていくことにします。
ちょっと長いですが、本体はconfigration.pyのConfigrationクラスでした。
hostやapi_key、usernameなどのメンバ変数が確認できます。
コード量が多かったので割愛していますが、興味深い点としては、to_debug_report()などのデバッグ用と思われるメソッドも実装されている点ですね。
どうやって使うんだろ…。
class Configuration(six.with_metaclass(TypeWithDefault, object)):
    """NOTE: This class is auto generated by the swagger code generator program.

    Ref: https://github.com/swagger-api/swagger-codegen
    Do not edit the class manually.
    """

    def __init__(self):
        """Constructor"""
        # Default Base url
        self.host = "https://app.deepsecurity.trendmicro.com/api"
        # Temp file folder for downloading files
        self.temp_folder_path = None

        # Authentication Settings
        # dict to store API key(s)
        self.api_key = {}
        # dict to store API prefix (e.g. Bearer)
        self.api_key_prefix = {}
        # Username for HTTP basic authentication
        self.username = ""
        # Password for HTTP basic authentication
        self.password = ""

        # Logging Settings
        self.logger = {}
        self.logger["package_logger"] = logging.getLogger("deepsecurity")
        self.logger["urllib3_logger"] = logging.getLogger("urllib3")
        # Log format
        self.logger_format = '%(asctime)s %(levelname)s %(message)s'
        # Log stream handler
        self.logger_stream_handler = None
        # Log file handler
        self.logger_file_handler = None
        # Debug file location
        self.logger_file = None
        # Debug switch
        self.debug = False

        # SSL/TLS verification
        # Set this to false to skip verifying SSL certificate when calling API
        # from https server.
        self.verify_ssl = False
        # Set this to customize the certificate file to verify the peer.
        self.ssl_ca_cert = None
        # client certificate file
        self.cert_file = None
        # client key file
        self.key_file = None
        # Set this to True/False to enable/disable SSL hostname verification.
        self.assert_hostname = None

        # urllib3 connection pool's maximum number of connections saved
        # per pool. urllib3 uses 1 connection as default value, but this is
        # not the best value when you are making a lot of possibly parallel
        # requests to the same host, which is often the case here.
        # cpu_count * 5 is used as default value to increase performance.
        self.connection_pool_maxsize = multiprocessing.cpu_count() * 5

        # Proxy URL
        self.proxy = None
        # Safe chars for path_param
        self.safe_chars_for_path_param = ''
ApiClient オブジェクトを作成する
次に、先ほど作成したconfigurationオブジェクトを引数として、ApiClientオブジェクトを作成しています。
そして、そのApiClientオブジェクトを引数として、さらにAdministratorsApiオブジェクトをapi_instanceオブジェクトとして生成している流れです。
実質的に、このapi_instanceオブジェクトがSDKの本体部分といって差し支えなさそうです。
# Initialization
# Set Any Required Values
api_instance = deepsecurity.AdministratorsApi(
    deepsecurity.ApiClient(configuration)
)
api_version = 'v1'
ApiClientオブジェクトクラスのソースコードを見てみましょう。
こちらも全部で700行くらいあるので、一部のみ貼り付けています。
コメントを見ると、Swagger Codegenで自動生成されたコードのようですね。
Swaggerというのはめちゃべんりなツールで、単一のSwagger SpecというAPIの仕様を定義したファイルから、APIリファレンスやAPIスタブを自動生成できるものです。
Cloud One のAPI referenceも、このSwagger SpecからAPIリファレンスを生成するSwagger UIで作成されたものをカスタマイズしたものっぽいですね。
余談はともかく、このクラス定義を見たときに、着目すべき点はself.rest_client = rest.RESTClientObject(configuration)のように見えますね。
このRESTClientObjectが、実際にAPIエンドポイントに対してのHTTPリクエストを送信し、レスポンスを処理しているようです。
ソースコードはrest.pyを見てください。
class ApiClient(object):
    """Generic API client for Swagger client library builds.

    Swagger generic API client. This client handles the client-
    server communication, and is invariant across implementations. Specifics of
    the methods and models for each application are generated from the Swagger
    templates.

    NOTE: This class is auto generated by the swagger code generator program.
    Ref: https://github.com/swagger-api/swagger-codegen
    Do not edit the class manually.

    :param configuration: .Configuration object for this client
    :param header_name: a header to pass when making calls to the API.
    :param header_value: a header value to pass when making calls to
        the API.
    :param cookie: a cookie to include in the header when making calls
        to the API
    """

    PRIMITIVE_TYPES = (float, bool, bytes, six.text_type) + six.integer_types
    NATIVE_TYPES_MAPPING = {
        'int': int,
        'long': int if six.PY3 else long,  # noqa: F821
        'float': float,
        'str': str,
        'bool': bool,
        'date': datetime.date,
        'datetime': datetime.datetime,
        'object': object,
    }

    def __init__(self, configuration=None, header_name=None, header_value=None,
                 cookie=None):
        if configuration is None:
            configuration = Configuration()
        self.configuration = configuration

        self.pool = ThreadPool()
        self.rest_client = rest.RESTClientObject(configuration)
        self.default_headers = {}
        if header_name is not None:
            self.default_headers[header_name] = header_value
        self.cookie = cookie
        # Set default User-Agent.
        self.user_agent = 'Swagger-Codegen/20.0.242/python'

    def __del__(self):
        self.pool.close()
        self.pool.join()
AdministratorsApi オブジェクトを作成する
最後に、AdministratorsApiオブジェクトのソースコードを見てみます。
このクラスが今回利用したSDKの実質的な本体と言っていいかと思いますが、このようなクラスは、APIの種類の数だけ用意されているようです。
例えば、スケジュールタスクの設定に関するAPIを使う際は、ScheduledTasksApiオブジェクトを呼び出しますし、コンピュータの情報を扱う場合はComputersApiオブジェクトを呼び出す仕様になっているようです。
さて、AdministratorsApiオブジェクトのソースコードですが、これも結構長くて、700行弱ありますので割愛します。
クラスのコードを読んでみると、それぞれのメンバ関数が、Cloud OneのAPIと1:1で紐づいていそうなことがわかります。
(もしかしたらAPIリファレンスを読むよりSDKのソースコードを読んだ方がAPIの使い方がわかりやすいかも…)
class AdministratorsApi(object):
    """NOTE: This class is auto generated by the swagger code generator program.

    Do not edit the class manually.
    Ref: https://github.com/swagger-api/swagger-codegen
    """

    def __init__(self, api_client=None):
        if api_client is None:
            api_client = ApiClient()
        self.api_client = api_client

    def create_administrator(self, administrator, api_version, **kwargs):  # noqa: E501
        """Create an Administrator  # noqa: E501

        Create a new administrator.  # noqa: E501
        This method makes a synchronous HTTP request by default. To make an
        asynchronous HTTP request, please pass async_req=True
        >>> thread = api.create_administrator(administrator, api_version, async_req=True)
        >>> result = thread.get()

        :param async_req bool
        :param Administrator administrator: The settings of the new administrator. (required)
        :param str api_version: The version of the api being called. (required)
        :return: Administrator
                 If the method is called asynchronously,
                 returns the request thread.
        """
        kwargs['_return_http_data_only'] = True
        if kwargs.get('async_req'):
            return self.create_administrator_with_http_info(administrator, api_version, **kwargs)  # noqa: E501
        else:
            (data) = self.create_administrator_with_http_info(administrator, api_version, **kwargs)  # noqa: E501
            return data
まとめ
ほんとはもっと色々書くことあったんですが、長くなってしまったのでこれで終わります。
ちなみに、ここでプリントしてるAPIのレスポンス結果なんですが、見ればわかる通り、実は<class 'deepsecurity.models.administrator.Administrator'>のオブジェクトであって、JSON形式じゃないんですよね。
api_response = api_instance.describe_administrator(1, api_version)
pprint(api_response)
SDKのソースコードを見てみると、to_dict()とかto_str()みたいな関数が実装されているので、api_response.to_dict()のようにしてあげれば、辞書型や文字列型に変換できるようになっているようです。
def to_dict(self):
        """Returns the model properties as a dict"""
        result = {}

        for attr, _ in six.iteritems(self.swagger_types):
            value = getattr(self, attr)
            if isinstance(value, list):
                result[attr] = list(map(
                    lambda x: x.to_dict() if hasattr(x, "to_dict") else x,
                    value
                ))
            elif hasattr(value, "to_dict"):
                result[attr] = value.to_dict()
            elif isinstance(value, dict):
                result[attr] = dict(map(
                    lambda item: (item[0], item[1].to_dict())
                    if hasattr(item[1], "to_dict") else item,
                    value.items()
                ))
            else:
                result[attr] = value
        if issubclass(Administrator, dict):
            for key, value in self.items():
                result[key] = value

        return result

    def to_str(self):
        """Returns the string representation of the model"""
        return pprint.pformat(self.to_dict())
また、APIの仕様的には値が存在しない項目は本来は何も返ってこない仕様のようですがSDK側で次のようにswagger_typesやattribute_mapが定義されており、APIのレスポンス内で欠損している値は勝手にNONEとして埋めているようです。
swagger_types = {
    'username': 'str',
    'password': 'str',
    'full_name': 'str',
    'description': 'str',
    'role_id': 'int',
    'locale': 'str',
    'time_zone': 'str',
    'time_format': 'str',
    'password_never_expires': 'bool',
    'active': 'bool',
    'mfa_type': 'str',
    'phone_number': 'str',
    'mobile_number': 'str',
    'pager_number': 'str',
    'email_address': 'str',
    'primary_contact': 'bool',
    'receive_notifications': 'bool',
    'report_pdf_password_enabled': 'bool',
    'report_pdf_password': 'str',
    'created': 'int',
    'last_password_change': 'int',
    'last_sign_in': 'int',
    'unlock_time': 'int',
    'unsuccessful_sign_in_attempts': 'int',
    'directory_name': 'str',
    'directory_info': 'str',
    'external': 'bool',
    'external_user_id': 'str',
    'type': 'str',
    'read_only': 'bool',
    'id': 'int',
    'utc_offset': 'str'
}
つまり、SDKはただ単にAPIのリクエスト/レスポンスを取得しているわけではなく、裏でいろいろと補完しているみたいですね。
なんか癖があって使いにくく感じますが、Swaggerを使って作成したAPIスタブとかは大体こんな感じになるんでしょうか。
ともあれ、SDKのソースコードを読んでみていろいろと勉強になったので良かったです。