拙著RailsチュートリアルのためにDockerコンテナの作成 for Windowsの続きとなります。「Yay! You're on Rails!」と表示されるところまで持っていきます。
前回停止させたコンテナを再び起動
まず、前回停止させたDockerコンテナが存在することを確認します。
$ docker container ls -l
CONTAINER ID        IMAGE               COMMAND             CREATED             STATUS                    PORTS               NAMES
e11d56031051        ruby:2.5.1          "/bin/bash"         22 hours ago        Exited (0) 21 hours ago                       RailsTutorialTest
STATUSも、想定通りExited (0)になっています。
停止状態のDockerコンテナは、docker start {コンテナ名}コマンドで起動することができます。
$ docker start RailsTutorialTest
RailsTutorialTest
改めてdocker lsコマンドを実行します。
$ docker container ls
CONTAINER ID        IMAGE               COMMAND             CREATED             STATUS              PORTS                    NAMES
e11d56031051        ruby:2.5.1          "/bin/bash"         22 hours ago        Up About a minute   0.0.0.0:8080->3000/tcp   RailsTutorialTest
RailsTutorialTestコンテナが正常に起動されています。
続いて、RailsTutorialTestコンテナのシェルに入りましょう。
$ docker container exec -it RailsTutorialTest /bin/bash
root@e11d56031051:/#
正常にRailsTutorialTestコンテナのシェルに入れました。
docker container execのオプション
- -it…ホスト側の標準入出力とDockerコンテナの標準入出力を接続する
- -i…ホスト側の標準入力とDockerコンテナの標準入力を接続する
- -t…Dockerコンテナの標準出力とホスト側の標準出力を接続する
- ホスト側からDockerコンテナ上のシェルを操作するために必要な設定
- コマンドを実行するコンテナの名前
- コンテナで実行するコマンド
- コマンドを実行するコンテナの名前の後に入力する
- 今回は
/bin/bashである
Railsのインストール
# apt update
# apt install -y nodejs
# gem install rails -v 5.1.6
aptリポジトリの一覧を更新
まずはapt updateでaptリポジトリの一覧を更新します。リポジトリを追加・削除した場合には必須となる操作です。
Node.jsのインストール
続いて、apt install -y nodejsでNode.jsをインストールします。
RailsではrubyのExecJS gemを使用し、ExecJS gemの実行にはJavaScriptランタイムが必要となるためです。
CentOS 7.5にRuby on Railsチュートリアルの環境を構築するによると、JavascriptランタイムなしでExecJS gemを実行しようとした場合、以下のようなエラーが発生して実行できないそうです。
$ rails server
/home/vagrant/.gem/ruby/gems/execjs-2.7.0/lib/execjs/runtimes.rb:58:in `autodetect': Could not find a JavaScript runtime. See https://github.com/rails/execjs for a list of available runtimes. (ExecJS::RuntimeUnavailable)
...
Rails本体のインストール
ここまで完了したら、いよいよRailsのインストールです。バージョンはRailsチュートリアルで使っている5.1.6を指定します。
Successfully installed rails-5.1.6
ひとまずここまで到達できました。
Rails本体がインストールされていることの確認
# rails -v
Rails 5.1.6
rails -vコマンドにより、インストールされているRailsのバージョンを確認することができます。Rails 5.1.6が正しくインストールされているようです。
gemをインストールするためにGemfileを修正する
# cd /var/www
# rails _5.1.6_ new hello_app
以下は、rails -vコマンドにより生成されたGemfileとRailsチュートリアルのリスト1.5に記載されていたGemfileの差分です。
 source 'https://rubygems.org'

-git_source(:github) do |repo_name|
-  repo_name = "#{repo_name}/#{repo_name}" unless repo_name.include?("/")
-  "https://github.com/#{repo_name}.git"
-end
-
-
-# Bundle edge Rails instead: gem 'rails', github: 'rails/rails'
-gem 'rails', '~> 5.1.6'
-# Use sqlite3 as the database for Active Record
-gem 'sqlite3'
-# Use Puma as the app server
-gem 'puma', '~> 3.7'
-# Use SCSS for stylesheets
-gem 'sass-rails', '~> 5.0'
-# Use Uglifier as compressor for JavaScript assets
-gem 'uglifier', '>= 1.3.0'
-# See https://github.com/rails/execjs#readme for more supported runtimes
-# gem 'therubyracer', platforms: :ruby
-
-# Use CoffeeScript for .coffee assets and views
-gem 'coffee-rails', '~> 4.2'
-# Turbolinks makes navigating your web application faster. Read more: https://github.com/turbolinks/turbolinks
-gem 'turbolinks', '~> 5'
-# Build JSON APIs with ease. Read more: https://github.com/rails/jbuilder
-gem 'jbuilder', '~> 2.5'
-# Use Redis adapter to run Action Cable in production
-# gem 'redis', '~> 4.0'
-# Use ActiveModel has_secure_password
-# gem 'bcrypt', '~> 3.1.7'
-
-# Use Capistrano for deployment
-# gem 'capistrano-rails', group: :development
+gem 'rails',        '5.1.6'
+gem 'puma',         '3.9.1'
+gem 'sass-rails',   '5.0.6'
+gem 'uglifier',     '3.2.0'
+gem 'coffee-rails', '4.2.2'
+gem 'jquery-rails', '4.3.1'
+gem 'turbolinks',   '5.0.1'
+gem 'jbuilder',     '2.6.4'

 group :development, :test do
-  # Call 'byebug' anywhere in the code to stop execution and get a debugger console
-  gem 'byebug', platforms: [:mri, :mingw, :x64_mingw]
-  # Adds support for Capybara system testing and selenium driver
-  gem 'capybara', '~> 2.13'
-  gem 'selenium-webdriver'
+  gem 'sqlite3',      '1.3.13'
+  gem 'byebug', '9.0.6', platform: :mri
 end

 group :development do
-  # Access an IRB console on exception pages or by using <%= console %> anywhere in the code.
-  gem 'web-console', '>= 3.3.0'
-  gem 'listen', '>= 3.0.5', '< 3.2'
-  # Spring speeds up development by keeping your application running in the background. Read more: https://github.com/rails/spring
-  gem 'spring'
-  gem 'spring-watcher-listen', '~> 2.0.0'
+  gem 'web-console',           '3.5.1'
+  gem 'listen',                '3.1.5'
+  gem 'spring',                '2.0.2'
+  gem 'spring-watcher-listen', '2.0.1'
 end

-# Windows does not include zoneinfo files, so bundle the tzinfo-data gem
+# Windows環境ではtzinfo-dataというgemを含める必要があります
 gem 'tzinfo-data', platforms: [:mingw, :mswin, :x64_mingw, :jruby]
なお、この差分は、以下のコマンドにより取得したものをコピーアンドペーストしたものです。
$ git --no-pager diff HEAD^..HEAD
# cd hello_app
# bundle install
最初の実行結果は、以下の通りになりました。
You have requested:
  spring = 2.0.2

The bundle currently has spring locked at 2.1.0.
Try running `bundle update spring`

If you are updating multiple gems in your Gemfile at once,
try passing them all to `bundle update`
…おや、うまくいっていませんね。というわけで、以下のコマンドを実行してみます。
# bundle update
何やら色々とインストールされていますね。最後に以下のメッセージが表示されるまで待ちます。
Bundle updated!
改めて、以下のコマンドを実行します。
# bundle install
再び何やら色々と表示されましたね。最後に以下のメッセージが表示されるまで待ちます。
Bundle complete! 15 Gemfile dependencies, 64 gems now installed.
Bundled gems are installed into `/usr/local/bundle`
bundle installが無事完了しました。
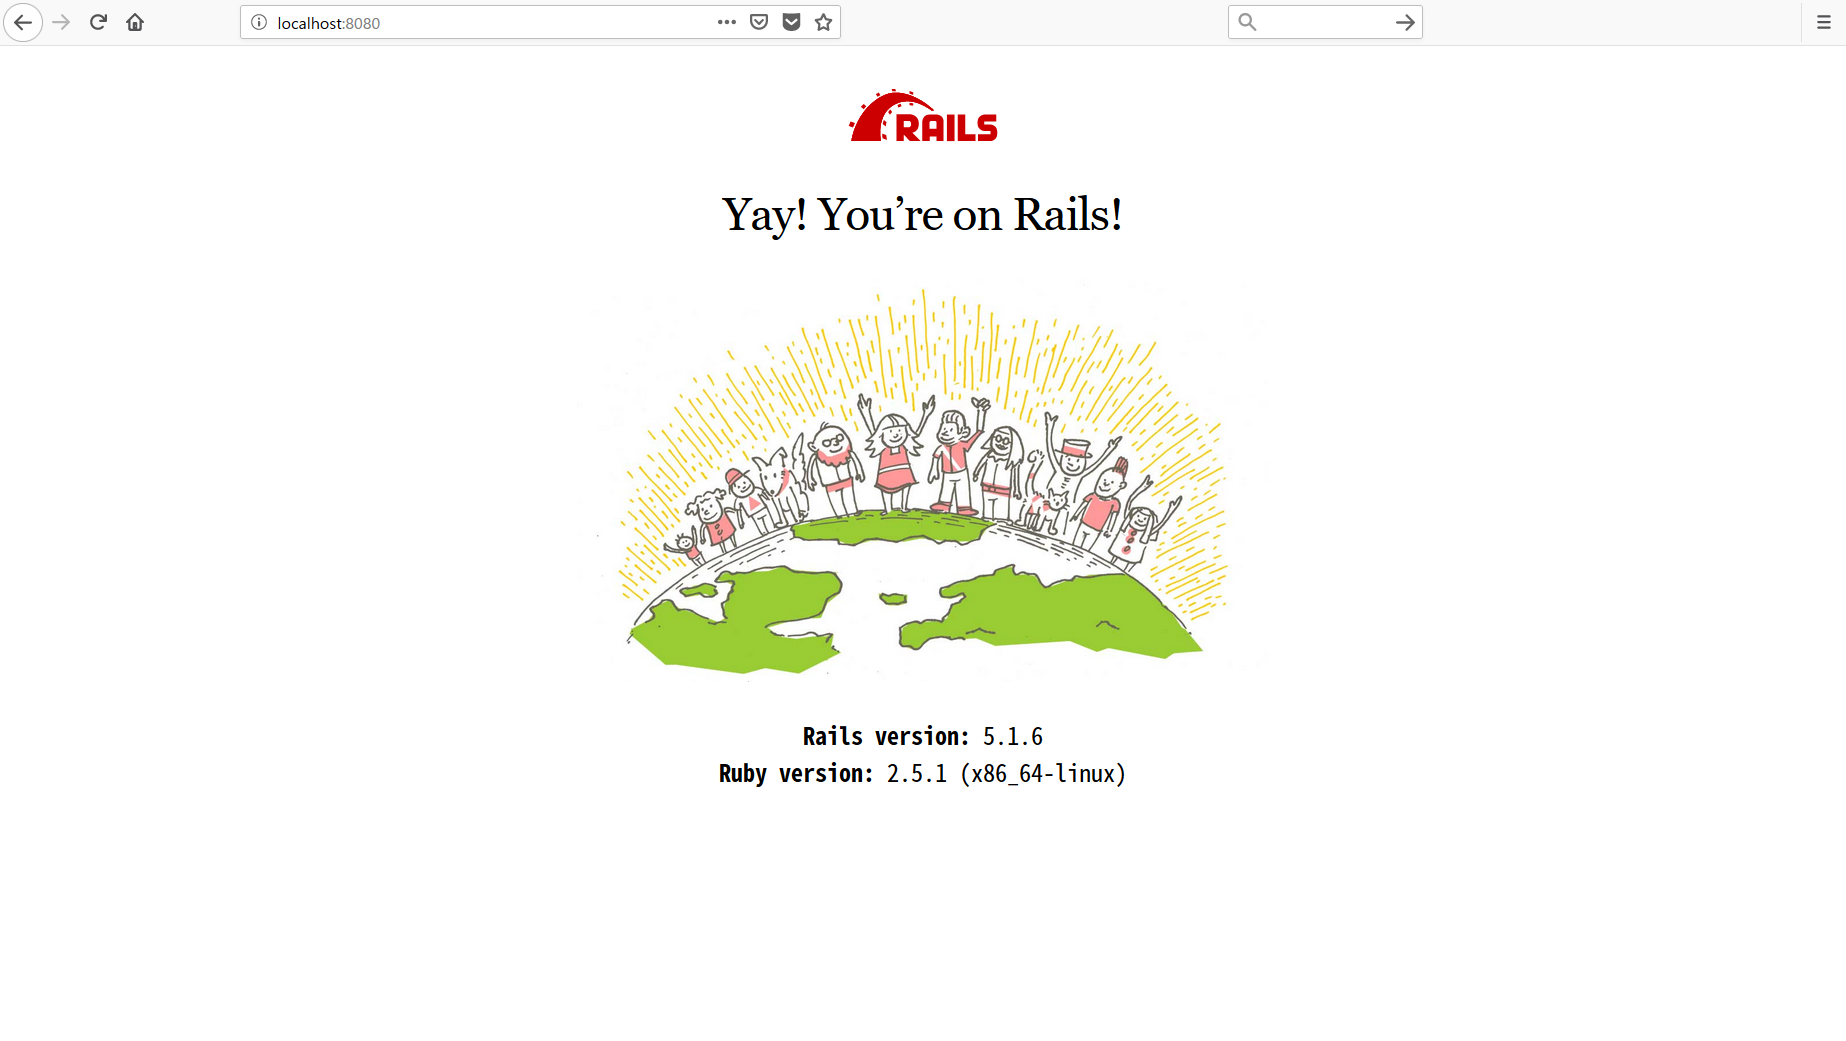
Yay! You're on Rails!
bundle installまで終われば、実際に動かすことができるRailsアプリケーションの作成は完了しています。RailsのローカルWebサーバー機能を使い、生成されたRailsアプリケーションを実際に動かしています。
# rails server
以下のメッセージが表示され、ローカルWebサーバーが起動されます。
=> Booting Puma
=> Rails 5.1.6 application starting in development
=> Run `rails server -h` for more startup options
Puma starting in single mode...
* Version 3.9.1 (ruby 2.5.1-p57), codename: Private Caller
* Min threads: 5, max threads: 5
* Environment: development
* Listening on tcp://0.0.0.0:3000
Use Ctrl-C to stop
Dockerコンテナ側の3000番ポートは、ホスト側の8080番ポートに連結されています。というわけで、ブラウザでhttp://localhost:8080/にアクセスしてみます。
Yay! You're on Rails!…というわけで、無事Railsアプリケーションが動作するところまでの環境構築が完了しました。
演習
1. デフォルトのRailsページに表示されているものと比べて、今の自分のコンピュータにあるRubyのバージョンはいくつになっていますか? コマンドラインでruby -vを実行することで簡単に確認できます。
$ ruby -v
ruby 2.6.3p62 (2019-04-16 revision 67580) [x64-mingw32]
上述の結果になりました。2.6.3p62でしょうか。
2. 同様にして、Railsのバージョンも調べてみましょう。調べたバージョンはリスト 1.1でインストールしたバージョンと一致しているでしょうか?
$ rails -v
rails : 用語 'rails' は、コマンドレット、関数、スクリプト ファイル、または操作可能なプログラムの名前として認識されませ
ん。名前が正しく記述されていることを確認し、パスが含まれている場合はそのパスが正しいことを確認してから、再試行してくだ
さい。
発生場所 行:1 文字:1
+ rails -v
+ ~~~~~
    + CategoryInfo          : ObjectNotFound: (rails:String) [], CommandNotFoundException
    + FullyQualifiedErrorId : CommandNotFoundException
そもそもホストのWindows環境にRailsはインストールされていませんでした。
番外. Gemのバージョンを調べてみましょう。
$ gem -v
3.0.2
Gemのバージョンは3.0.2でした。
関連リンク
- DockerでRailsチュートリアル(環境構築編) - 桜色HelloWorld - 行ったことは、ほぼこちらの後追いです。
- Rails 開発環境のバージョン確認 [自分用メモ] - Qiita - @dawn_628 さんによるQiita記事。3年以上前の記事ですが、コマンドラインの入力内容は現在も変わりありません。
