はじめに
System Consoleは、JTAG経由でFPGAのデバッグが行えるQuartusPrimeに搭載されているツールです。コマンドラインからリアルタイムにレジスタを叩いたり、値を確認したりできるため、個人的に実機でのデバッグの際には重宝しています。使い方に関しては、マクニカさんのページにとても分かりやすい記事があるためそちらにお任せします。
この記事では、PythonプログラムからSystem Consoleを操作する方法について紹介します。
環境
OS: CentOS7 (他のOSでも動くとは思います)
Intel FPGAツール群: 20.1
Python: 3.6
コード
下記のコードの3行目のsystem_console_pathの部分は、自分の環境に合わせて変更してください。
import subprocess

system_console_path = '/eda/intel/20.2/quartus/sopc_builder/bin/system-console'

class altera_system_console:
    def __init__(self):
        sc_path = [system_console_path, '--cli', '--disable_readline']
        self.console = subprocess.Popen(sc_path, stdin=subprocess.PIPE, stdout=subprocess.PIPE)
        self.cmd_count = 1
        self.read_output()

    def __del__(self):
        self.console.terminate()

    def read_output(self, print_flag=True):
        if self.cmd_count == 0:
            print('cmd_count is zero')
            return ''
        txt = ''
        while True:
            r = self.console.stdout.read(1)
            if r == b'%':
                self.console.stdout.read(1)
                if print_flag:
                    print(txt)
                break
            txt += r.decode("utf8")
        self.cmd_count -= 1
        return txt

    def cmd(self, cmd_string, print_flag=True):
        self.console.stdin.write(bytes(cmd_string + '\n', 'utf-8'))
        self.console.stdin.flush()
        self.cmd_count += 1
        return self.read_output(print_flag)

    def write(self, addr, data, bits=32, print_flag=True):
        if not bits in [8, 16, 32]:
            print('bits is an invalid value')
        return self.cmd('master_write_{} $master_path 0x{:x} 0x{:x}'.format(bits, addr, data), print_flag=print_flag)

    def read(self, addr, length, bits=32, print_flag=True):
        if not bits in [8, 16, 32]:
            print('bits is an invalid value')
        self.cmd('master_read_{} $master_path 0x{:x} 0x{:x}'.format(bits, addr, length), print_flag=print_flag)


c = altera_system_console()
使い方
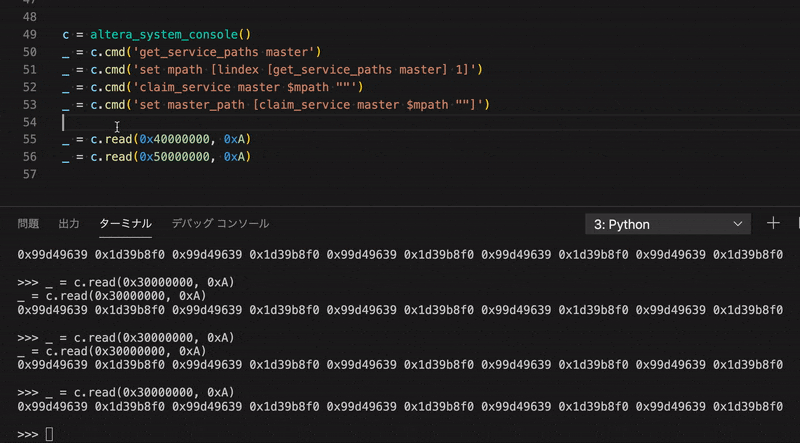
今回は、Pythonのインタラクティブモードを使います。上記のコードをsystem_console.pyという名前で保存し、下記のコマンドを実行することで、system_console.pyを最後まで実行した状態でインタラクティブモードに移行します。
python3 -i system_console.py
うまくいっている場合、System Consoleの出力が表示されます。
--------------------------------------------------------------------------------
--------------------------------------------------------------------------------
 Welcome to Intel's FPGA System Console

 This Tcl console provides access to the hardware modules instantiated in your
 FPGA. You can use System Console for all of the following purposes:

    * To start, stop, or step a Nios II processor
    * To read or write Avalon Memory-Mapped (Avalon-MM) slaves using special
     masters
    * To sample the SOPC system clock as well as system reset signal
    * To run JTAG loopback tests to analyze board noise problems
    * To shift arbitrary instruction register and data register values to
     instantiated system level debug (SLD) nodes

 In addition, the directory <QuartusII Dir>/sopc_builder/system_console/scripts
 contains Tcl files that provide miscellaneous utilities and examples of how to
 access the functionality provided. You can include those macros in your
 scripts by issuing Tcl source commands.
--------------------------------------------------------------------------------

>>>
この状態からc.cmd('System Consoleに対して入力したいコマンド')を入力することでSystem Consoleに対してコマンドを入力できます。
例えば、サービスへの接続(マクニカさんのページを参照)は、下記のように行うことができます。>>>の右側が入力しているコマンドで、その下がSystem Consoleの出力です。
>>> _ = c.cmd('get_service_paths master')
{/devices/10AX115H(1|2|3|4|4E3)|..@1#1-9/(link)/JTAG/(110:132 v1 #0)/phy_0/master} {/devices/10AX115H(1|2|3|4|4E3)|..@1#1-9/(link)/JTAG/(70:34 v3 #0)/nios2_0} {/devices/5M(1270ZF324|2210Z)|EPM2210@2#1-9/(link)/JTAG/(110:130 v3 #0)/jtagmem_0}

>>> _ = c.cmd('set mpath [lindex [get_service_paths master] 1]')
/devices/10AX115H(1|2|3|4|4E3)|..@1#1-9/(link)/JTAG/(70:34 v3 #0)/nios2_0

>>> _ = c.cmd('claim_service master $mpath ""')
/channels/local/(lib)/master_1

>>> _ = c.cmd('set master_path [claim_service master $mpath ""]')
/channels/local/(lib)/master_2
また、アドレスへの読み書きも同様に行うことができます。
>>> _ = c.cmd('master_read_32 $master_path 0x40000000 1')
0x22222222

>>> _ = c.cmd('master_write_32 $master_path 0x40000000 0x11111111')

>>> _ = c.cmd('master_read_32 $master_path 0x40000000 1')
0x11111111
また、altera_system_consoleクラスに、writeやreadメソッドを追加することで下記のようにアドレスへの読み書きができたりもします。
>>> _ = c.write(0x40000004, 0x33333333)

>>> _ = c.read(0x40000000, 0x2)
0x11111111 0x33333333

>>> for i in range(10):
...     _ = c.write(0x40000000 | i * 4, i, print_flag=False)
...
>>> _ = c.read(0x40000000, 0xA)
0x00000000 0x00000001 0x00000002 0x00000003 0x00000004 0x00000005 0x00000006 0x00000007 0x00000008 0x00000009
どういうところが便利なの?
Python経由でデバッグすることによる良い点として以下が挙げられると思います。
- System Console立ち上げ時に必要な固定作業(サービスへの接続等)を事前にPythonプログラムに記述しておくことができる。
- デバッグに必要な一連の処理を関数にしたりクラスにしたりできる。
- for文を使って機械的にデータを書き込んだり、if文で出力結果によって処理を変えたりといったことが容易にできる。
また、VSCodeの機能との組み合わせになるのですが、VSCodeでは、コードを選択した状態でShift+Enterを押すと、そのコードをインタラクティブモードのコンソールに入力することができ、デバッグコマンドを書きながらそれをインタラクティブモードでリアルタイムに確認していくことができるため非常に便利です。