はじめに
世界中の絶景を投稿できるアプリが作れます。
マップの表示方法はGoogleMapsAPIを使いました。
投稿した内容から自動的に軽度と緯度を取得してGoogleMapsAPIのマップ上に表示させます。
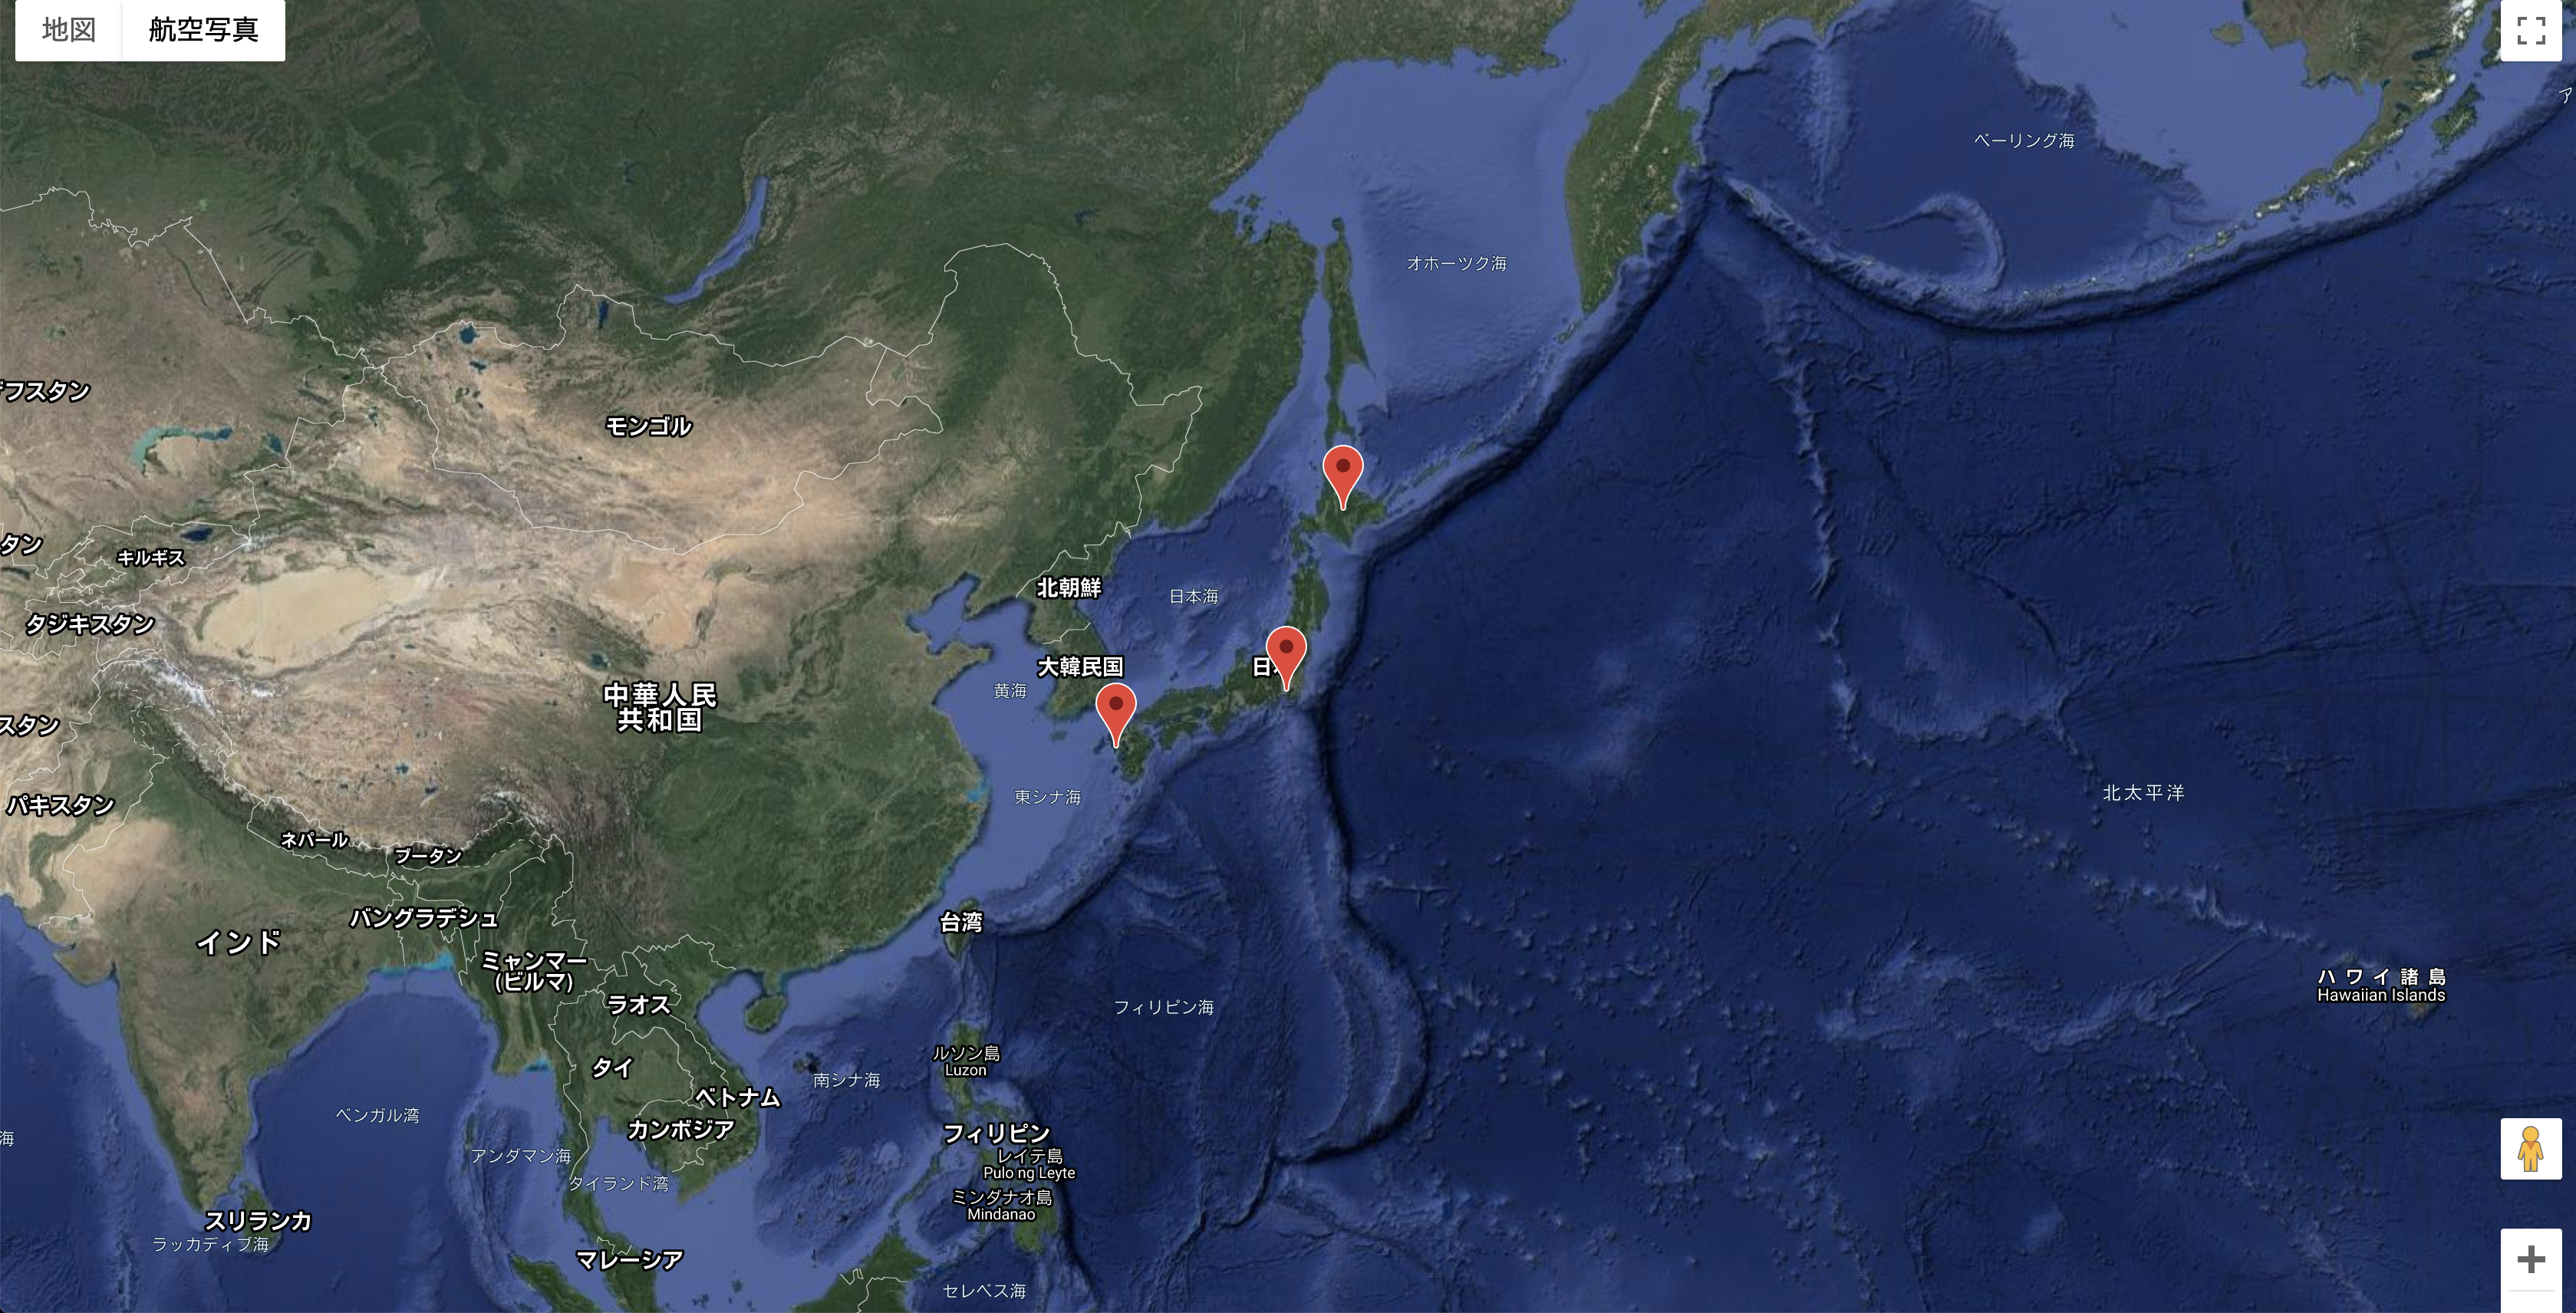
完成形はこんな感じ
環境
- Ruby 2.5.1
- Rails 5.2.3
- MySQL 5.6
目次
- GoogleMapsAPIのKEYを取得
- 簡単なアプリを作成しとりあえずGoogleMapsをアプリ上に表示させる
- 投稿機能を作り軽度、緯度取得し、マップ上に表示
GoogleMapsのKEYを取得
(グーグルアカウントにログインしてから始めてください)
まずGoogle Map PlatformからKEYを取得します
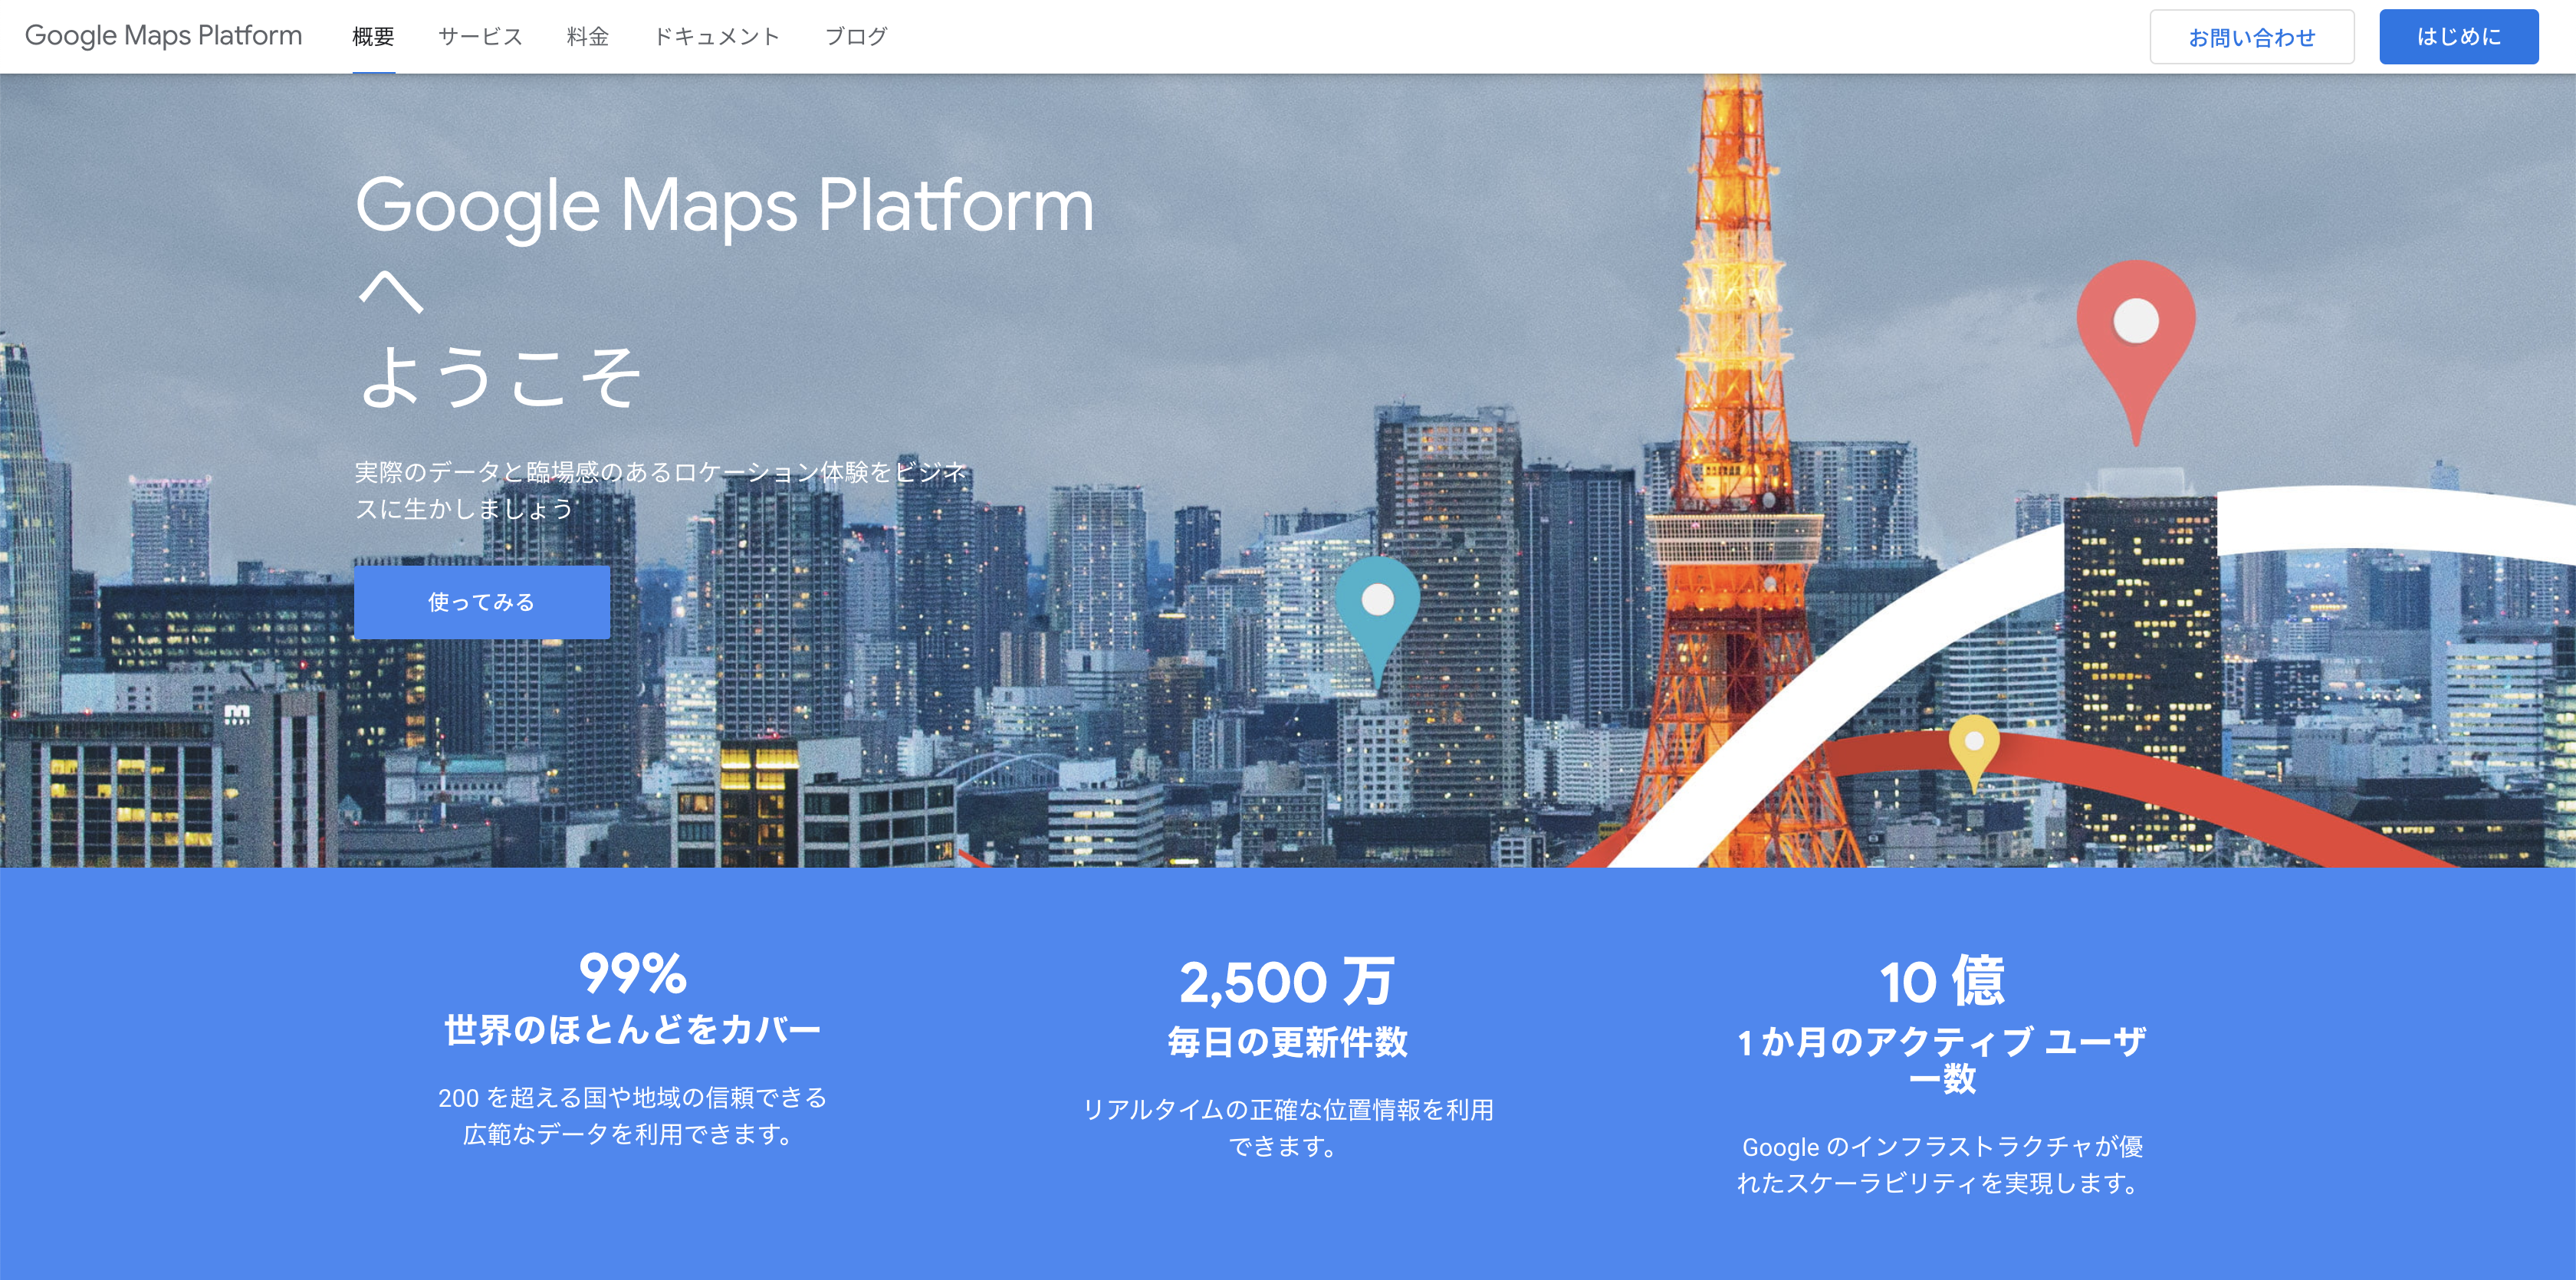
全て選択し続行。
プロジェクト名はなんでもいいですが今回はMyProjectを選択
支払い方法を入力します。
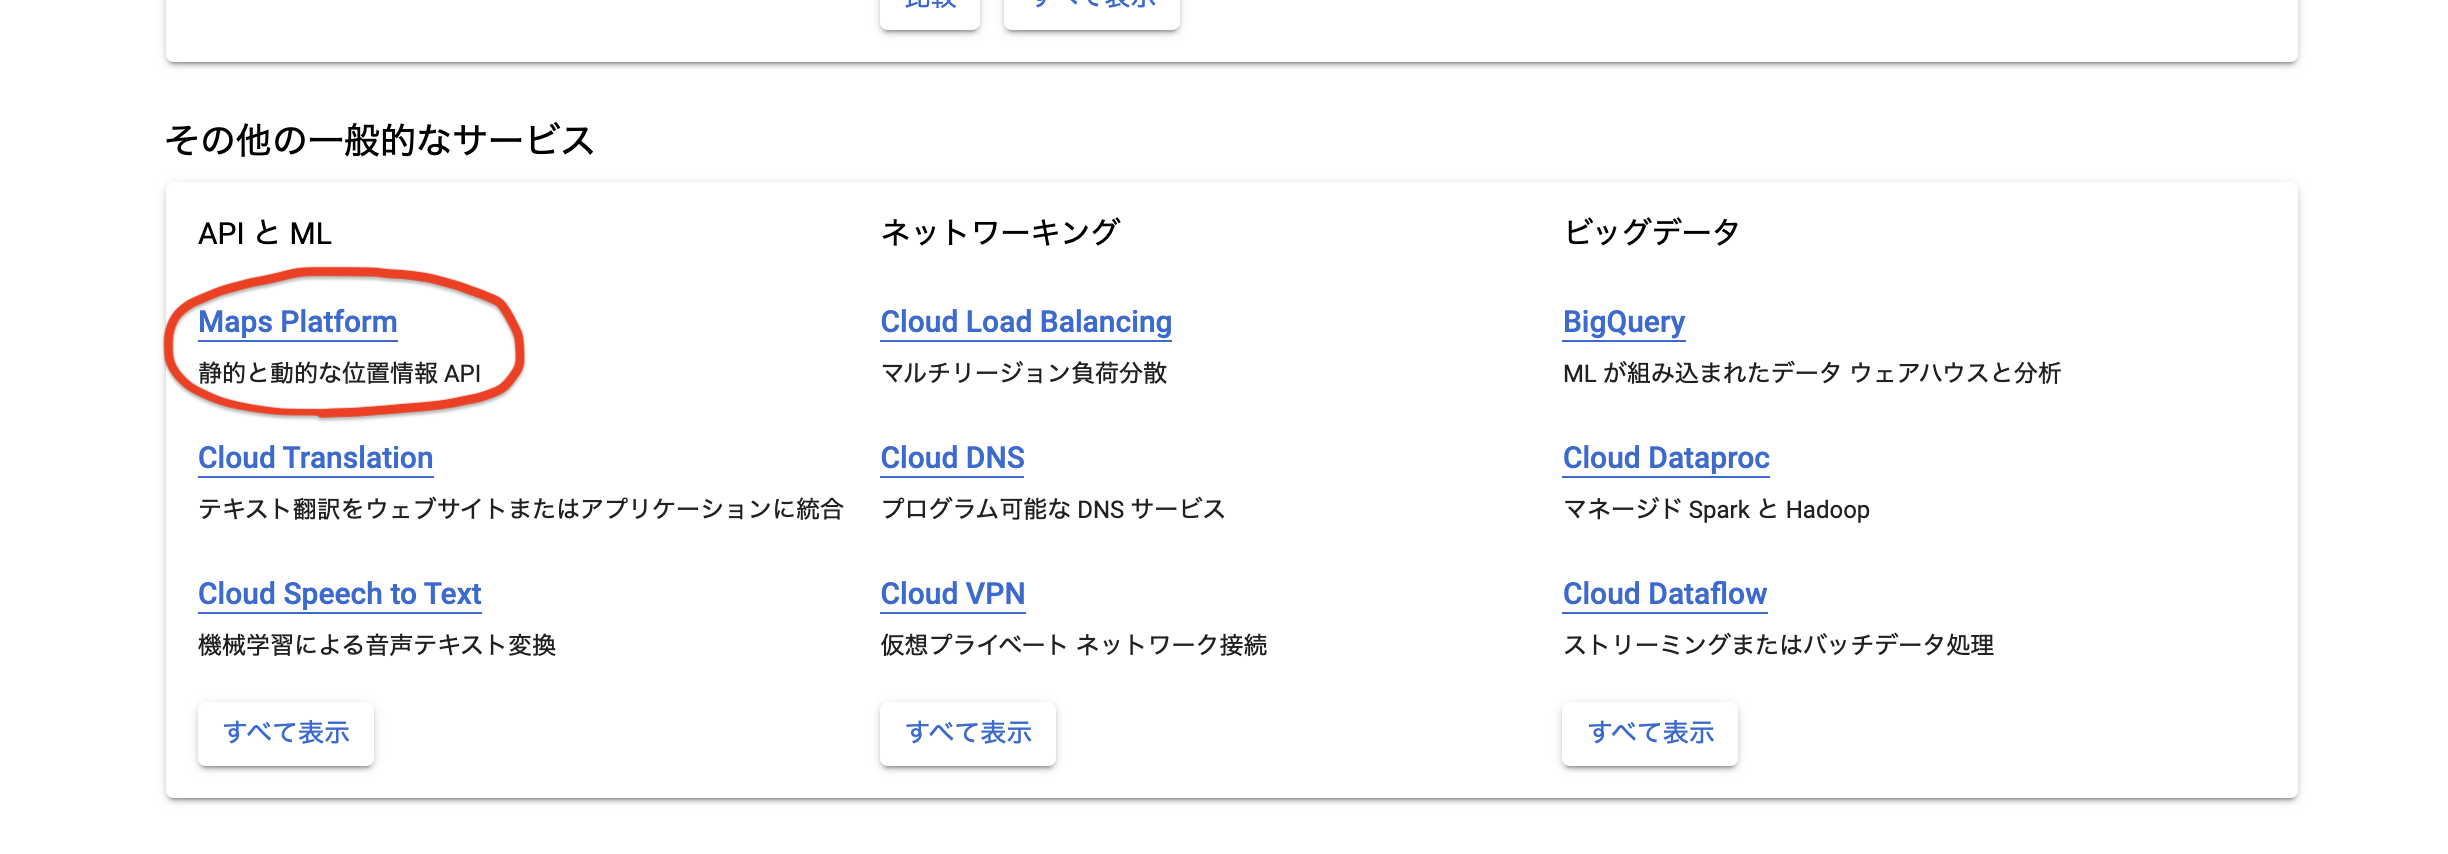
topページに移動しますので下の方のMaps Platfomを選択
Maps JavaScript APIを選択し有効を押します


画面上にあるAPI とサービスの認証情報
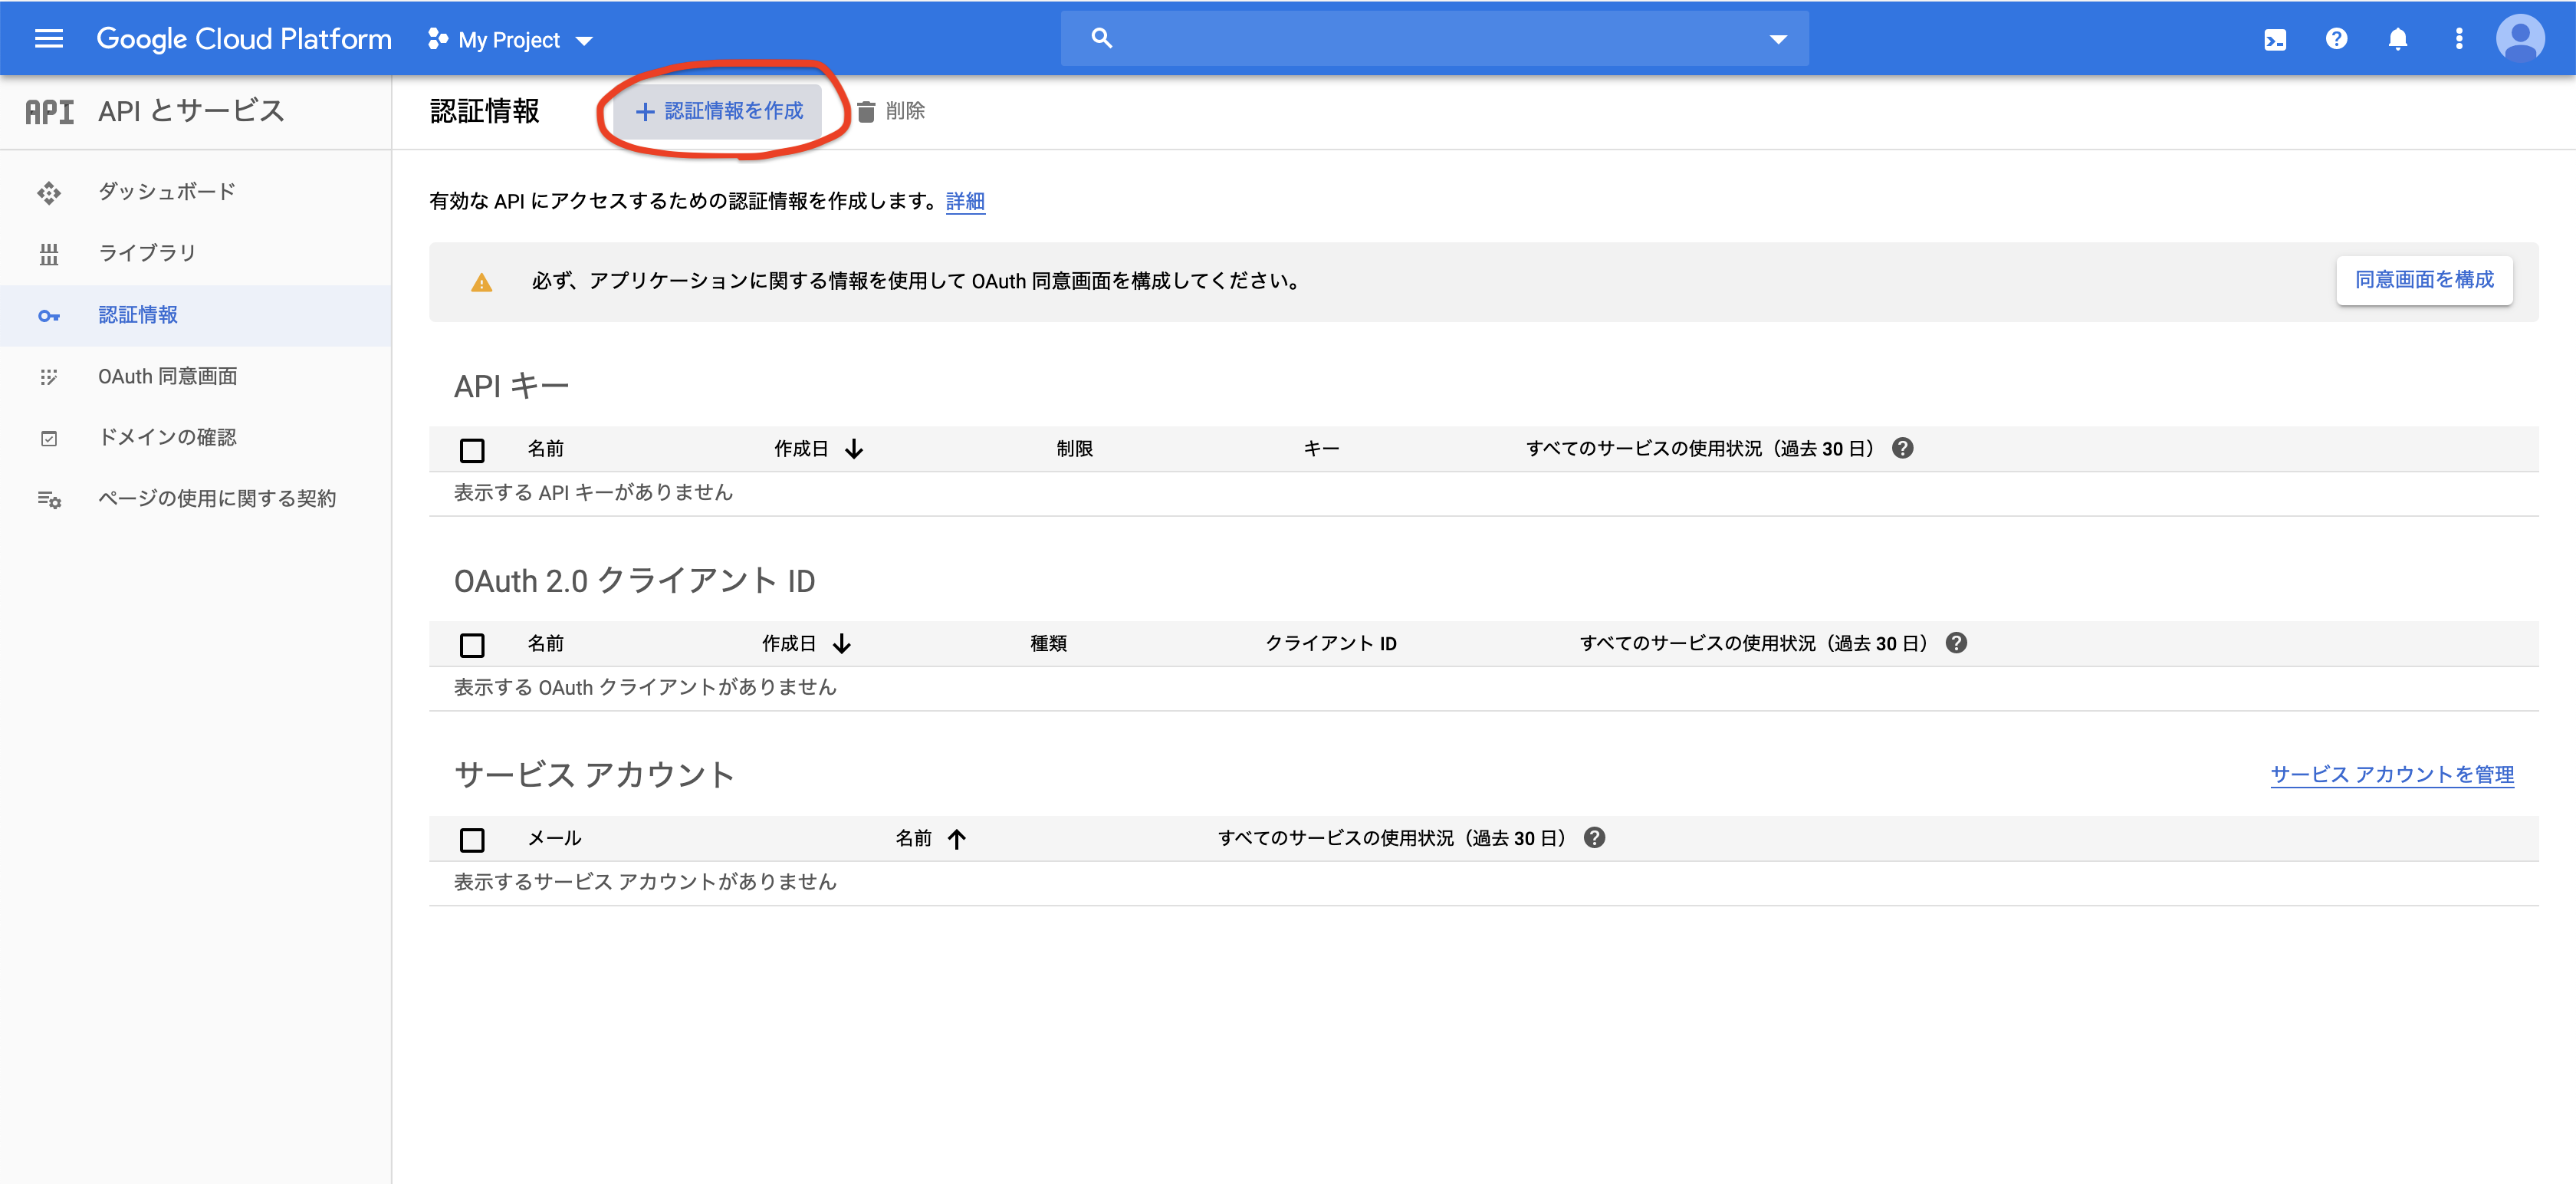
認証情報を作成を選択しAPIを作成。
画面にでてくるのがAPIキーになるので保存しといてください。(必要な場合はキーの制限をしてください)
簡単なアプリを作成しgooglemapをアプリ上に表示させる
アプリ名はここではgmapにします
ここの部分は自分のアプリ名にしてください。
まずアプリの雛形とデータベース設計します
ターミナル上で
rails _5.2.3_ new gmap -d mysql
cd gmap
rails g controller maps
rails db:create
rails db:migrate
erbになっているのでhamlに変換します。
ここは任意で大丈夫です。
※erbをhamlに簡単に変えてくれるサイトです
gem "haml-rails", ">= 1.0", '<= 2.0.1'
bundel install
rails haml:erb2haml
マップを表示させます
rails5.2以上なので今回はcredentialsを使います
Rails.application.routes.draw do
  root to: "maps#index"
end
%div{:style => "width: 100%;"}
  #map{:style => "width: 100%; height: 100vh;"}


:javascript
  function initMap(){
    let map = new google.maps.Map(document.getElementById('map'), {
    center: {lat: -34.397, lng: 150.644},
    zoom: 8
    });
  }

%script{:src => "https://maps.googleapis.com/maps/api/js?key=#{Rails.application.credentials[:GOOGLE_MAP_KEY]}&callback=initMap"}
先ほどのAPIキーをcredentialsで隠しておきます
ターミナル上で
EDITOR="vi" bin/rails credentials:edit
GOOGLE_MAP_KEY: MyAPIKey
MyAPIKeyの部分は先ほど取得したkeyを入力してください
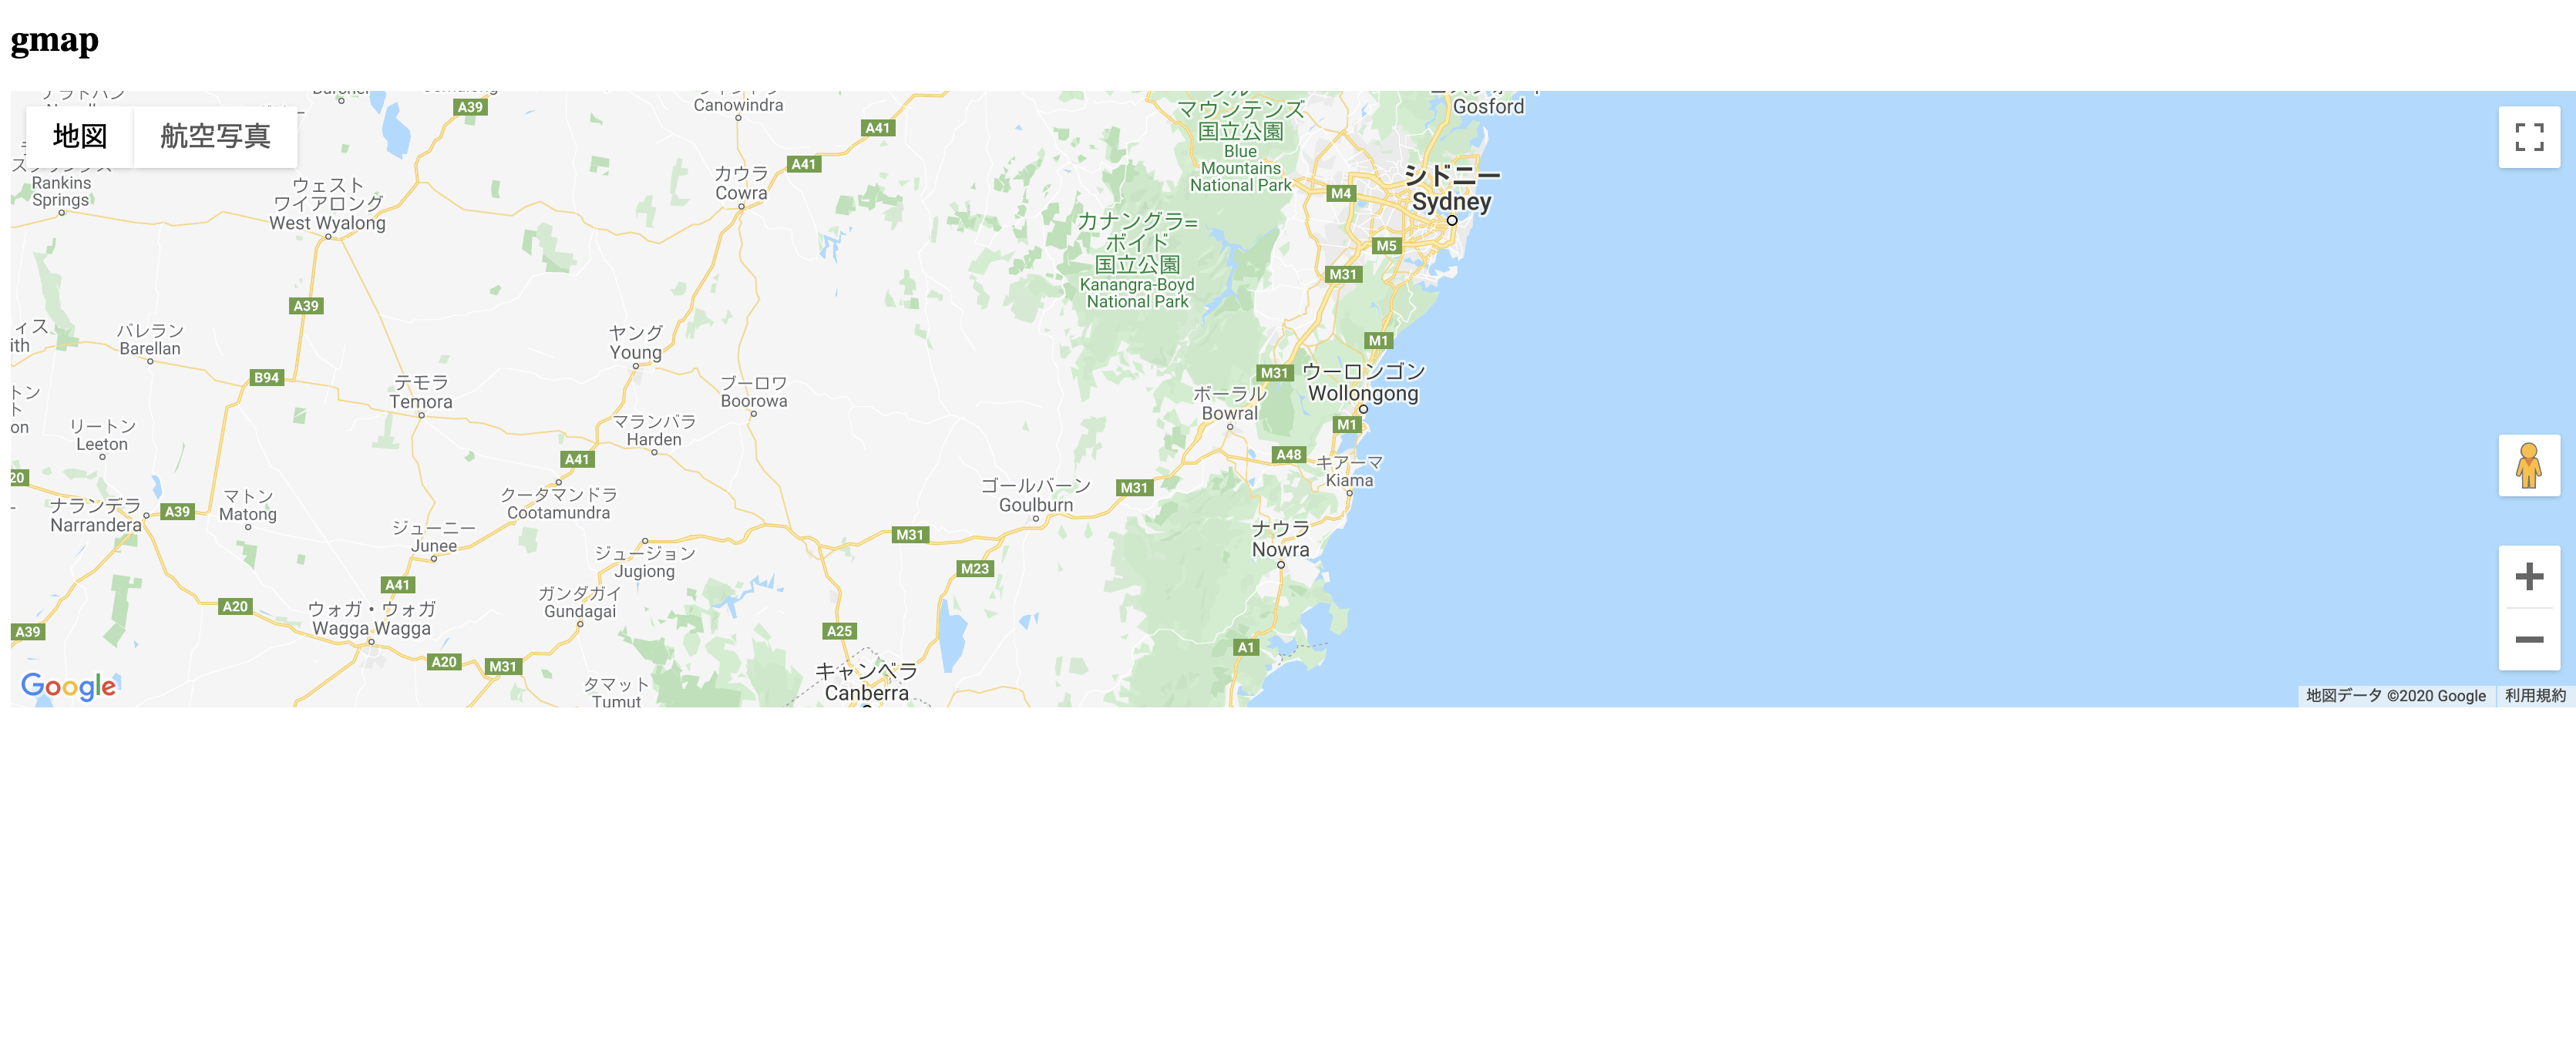
これで一応マップ表示ができたと思います!
投稿機能を作り軽度、緯度取得
まずは投稿機能を作るためにpostsのviewとcontroller,modelを作ります。
rails g scaffold posts name:string description:string latitude:float longitude:float
rake db:migrate
表示をgmaps4railsのgemを使って表示する方法に変えます。
gem 'gmaps4rails'
underscore、gmaps/googleをapplicaton.jsに追加します。
//= require underscore  //追加
//= require gmaps/google  //追加
//= require_tree .
app/assets/javascripts/underscore.jsを作り
こちらの中身を全部コピペ
%div{:style => "width: 100%;"}
  #map{:style => "width: 100%; height: 100vh;"}

:javascript
  handler = Gmaps.build('Google');
  handler.buildMap({
    provider: {mapTypeId: 'hybrid'},
    internal: {id: 'map'}
    },
    function(){
    markers = handler.addMarkers(#{raw @hash.to_json})
    handler.bounds.extendWith(markers);
    handler.fitMapToBounds();
    handler.getMap().setCenter(new google.maps.LatLng(35.681298, 139.7640582));
    handler.getMap().setZoom(4);
  });
provider: {mapTypeId: 'hybrid'}の部分でマップのタイプを変えることができます。
何もなければ最初のタイプです。
他のタイプは下記を参照してください。
ROADMAP 道路や建物などが表示される地図です
SATELLITE 衛星写真を使った地図です
HYBRID ROADMAPとSATELLITEの複合した地図です
TERRAIN 地形情報を使った地図です
applicationにkeyを移してどこでも使えるようにします。
!!!
%html
  %head
    %meta{:content => "text/html; charset=UTF-8", "http-equiv" => "Content-Type"}/
    %title Gmap
    = csrf_meta_tags
    = csp_meta_tag
    = stylesheet_link_tag    'application', media: 'all', 'data-turbolinks-track': 'reload'
    = javascript_include_tag 'application', 'data-turbolinks-track': 'reload'
    %script{:src => "//maps.google.com/maps/api/js?key=#{Rails.application.credentials[:GOOGLE_MAP_KEY]}"}
    %script{:src => "//cdn.rawgit.com/mahnunchik/markerclustererplus/master/dist/markerclusterer.min.js"}

    = yield
コントローラーに投稿した場所にmarkerが立つようにします。
class MapsController < ApplicationController
  def index
    @posts = Post.all
    @hash = Gmaps4rails.build_markers(@post) do |post, marker|
      marker.lat post.latitude
      marker.lng post.longitude
      marker.infowindow post.description
    end
  end
end
marker.infowindow post.descriptionのところに表示させたいカラムを変えれば表示内容を変えれます。
今回はdescriptionにします。
これでマーカーが立つようになりました。
あとは新規投稿で軽度、緯度を取得できるようにします
gem 'geocoder'
class Post < ApplicationRecord
  geocoded_by :name
  after_validation :geocode
end
名前のカラム名で軽度と緯度が取得できるようになったので
あとは送信する時に余計なカラムを消しておきます。
  .field
    = f.label :name
    = f.text_field :name
  .field
    = f.label :description
    = f.text_field :description
  .field
    = f.label :latitude
    = f.text_field :latitude
  .field
    = f.label :longitude
    = f.text_field :longitude
  .actions
    = f.submit 'Save'
のlatitudeとlongitudeの項目を消します。
これで完成です!
最後に
間違っているところがあったら教えてください…
