はじめに
前回に引き続きAndroidアプリ開発について挑戦していきましょう。継続して勉強していると、なんとなく書いていたコードの意味が少しずつですが、考えて書けるようになってきました。しかし、ただ継続するだけだと辛くなってくると思います。そのため、今回は実際に見たことがあるようなワンシーンを作るコードを勉強していこうと思います。実際に見たことあるようなものが作れると達成感がありモチベーションアップにもつながると思います。
リスト画面の作成
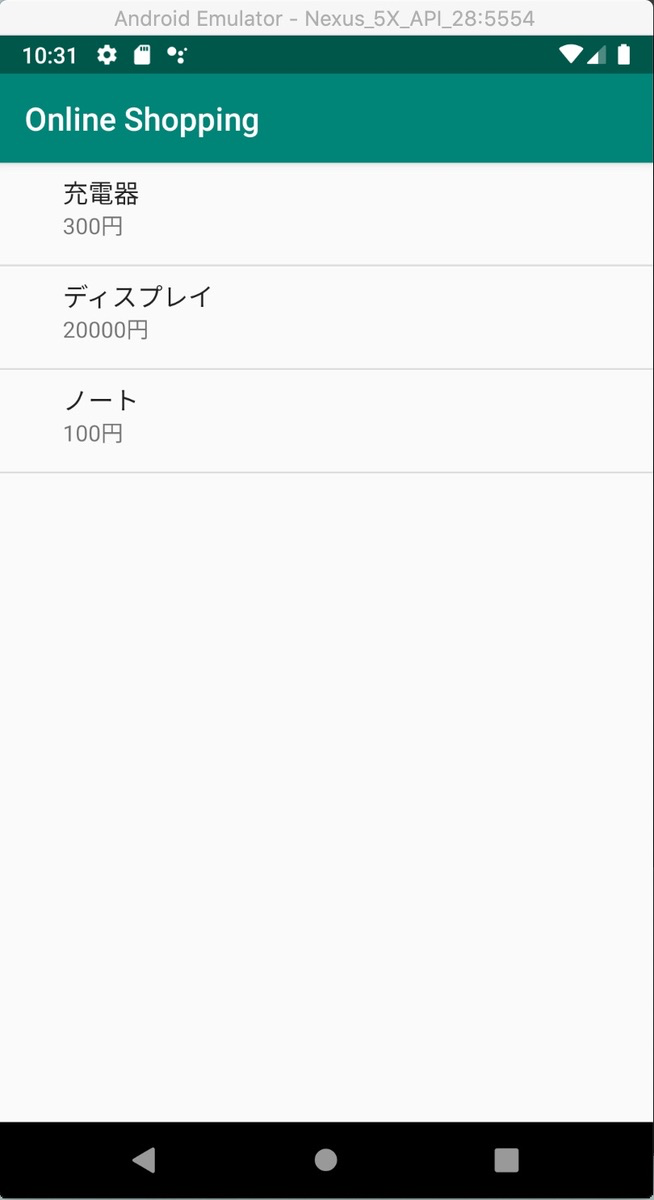
まずは、商品の一覧をリスト表示するコードから書いていきます。ただ商品を羅列するだけでは味気がないので、商品名と値段が2行で表示されるようなリストを作成したいと思います。
res/values/string.xml
<?xml version="1.0" encoding="UTF-8" ?>

<resources>
    <string name="app_name">
        Online Shopping
    </string>

    <string name="tv_thx_title">
        注文完了
    </string>

    <string name="tv_thx_desc">
        以下の商品を注文しました。\nご注文ありがとうございます。
    </string>

    <string name="bt_thx_back">
        一覧に戻る
    </string>

</resources>
res/layout/activity_main.xml
<?xml version="1.0" encoding="utf-8"?>

<ListView
    xmlns:android="http://schemas.android.com/apk/res/android"
    android:id="@+id/lvMenu"
    android:layout_width="match_parent"
    android:layout_height="match_parent"/>
java/com.websarva.wings.android.a03_01_sample1/MainActivity.kt
package com.websarva.wings.android.a03_01_sample1

import androidx.appcompat.app.AppCompatActivity
import android.os.Bundle
import android.widget.ListView
import android.widget.SimpleAdapter

class MainActivity : AppCompatActivity()
{

    override fun onCreate(savedInstanceState: Bundle?)
    {
        super.onCreate(savedInstanceState)
        setContentView(R.layout.activity_main)

        val lvMenu = findViewById<ListView>(R.id.lvMenu)
        val menuList: MutableList<MutableMap<String, String>> = mutableListOf()

        var menu = mutableMapOf("name" to "充電器", "price" to "300円" )
        menuList.add(menu)

        menu = mutableMapOf("name" to "ディスプレイ", "price" to "20000円" )
        menuList.add(menu)

        menu = mutableMapOf("name" to "ノート", "price" to "100円" )
        menuList.add(menu)
     〜繰り返し〜

        val from = arrayOf("name", "price")
        val to = intArrayOf(android.R.id.text1, android.R.id.text2)
        val adapter = SimpleAdapter(applicationContext, menuList, android.R.layout.simple_expandable_list_item_2, from, to)
        lvMenu.adapter = adapter
    }
}
このとき、16行目以降のmenuは変数宣言をすでにしているので改めて宣言する必要はありません。
特に問題なければ次の画像が画面に表示されると思います。
Androidの画面遷移の設定
それでは、今回のメインテーマである画面遷移を設定していきたいと思います。画面遷移では表示される画面が増えますのでAndroid Studioの機能使って追加していきましょう。
[java]フォルダを選択した状態で[File]メニューから、
[New] → [Activity] → [Empty Active]
の順に選択すると次の画像が表示されます。
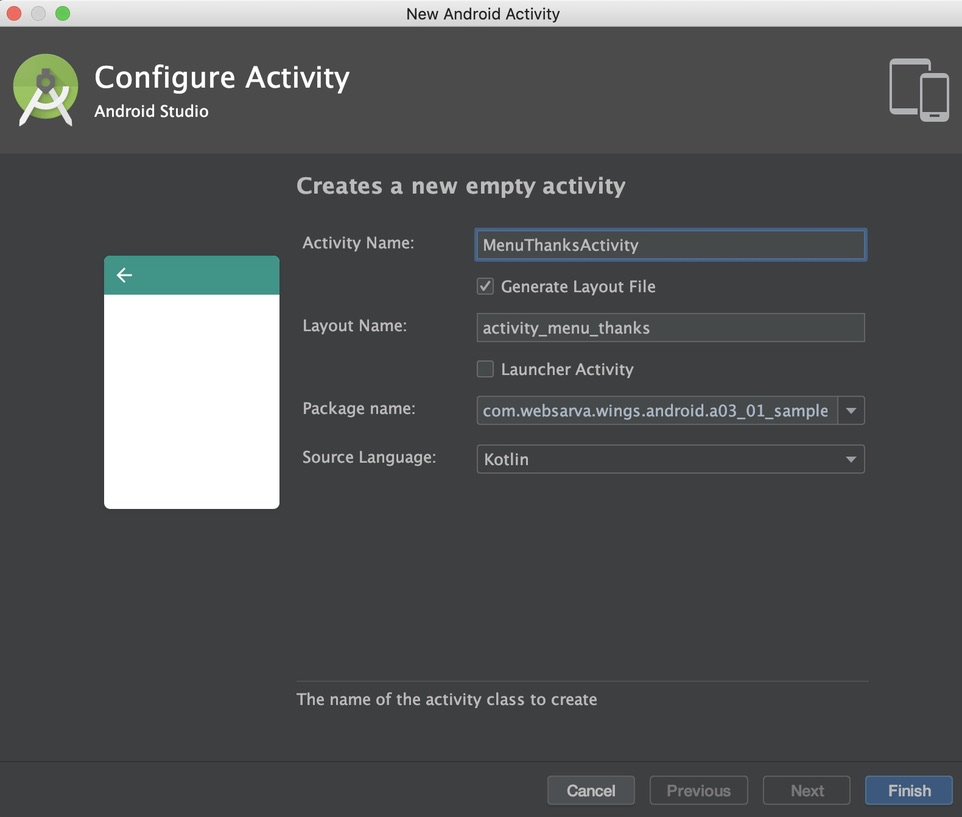
Launcher Activityのチェックボックスのチェックを外すことに注意して[finish]を選択します。
新しくMenuThanksActivity.javaファイルとactive_menu_thanks.xmlファイルが追加されていると思います。
では改めてコードを書いていきましょう。
まずは、注文完了画面のレイアウトを編集していきます。
res/layout/activity_menu_thanks.xml
<?xml version="1.0" encoding="utf-8"?>

<LinearLayout
    xmlns:android="http://schemas.android.com/apk/res/android"
    android:layout_width="match_parent"
    android:layout_height="match_parent"
    android:orientation="vertical">

    <TextView
        android:layout_width="match_parent"
        android:layout_height="wrap_content"
        android:layout_marginBottom="10dp"
        android:gravity="center"
        android:text="@string/tv_thx_title"
        android:textSize="25sp"/>

    <TextView
        android:layout_width="match_parent"
        android:layout_height="wrap_content"
        android:layout_marginBottom="10dp"
        android:text="@string/tv_thx_desc"
        android:textSize="15sp"/>

    <LinearLayout
        android:layout_width="match_parent"
        android:layout_height="wrap_content"
        android:orientation="horizontal">

        <TextView
            android:id="@+id/tvMenuName"
            android:layout_width="0dp"
            android:layout_height="wrap_content"
            android:layout_weight="1"/>

        <TextView
            android:id="@+id/tvMenuPrice"
            android:layout_width="wrap_content"
            android:layout_height="wrap_content"/>

    </LinearLayout>

    <Button
        android:layout_width="match_parent"
        android:layout_height="wrap_content"
        android:onClick="onBackButtonClick"
        android:text="@string/bt_thx_back"/>

</LinearLayout>
次は、画面遷移のコードを記述していきましょう。主に、リストタップのリスト作成とその登録を記述となります。
このコードはリスト画面に対する処理なのでMainActivityに追記していきます。
java/com.websarva.wings.android.a03_01_sample1/MainActivity.kt
        〜省略〜
        lvMenu.adapter = adapter
        lvMenu.onItemClickListener = ListItemClickListener()
    }

    private inner  class ListItemClickListener : AdapterView.OnItemClickListener
    {
        override fun onItemClick(parent: AdapterView<*>, view: View?, position: Int, id: Long)
        {
         val item = parent.getItemAtPosition(position) as MutableMap<String, String>

            val menuName = item["name"]
            val menuPrice = item["price"]

            val intent = Intent(applicationContext, MenuThanksActivity::class.java)

            intent.putExtra("menuName", menuName)
            intent.putExtra("menuPrice", menuPrice)

            startActivity(intent)
        }
    }
}
最後に、注文完了のアクティビティに処理を記述していきましょう。
java/com.websarva.wings.android.a03_01_sample1/MenuThanksActivity.kt
package com.websarva.wings.android.a02_25_sample01

import androidx.appcompat.app.AppCompatActivity
import android.os.Bundle
import android.view.View
import android.widget.TextView

class MenuThanksActivity : AppCompatActivity()
{

    override fun onCreate(savedInstanceState: Bundle?) {
        super.onCreate(savedInstanceState)
        setContentView(R.layout.activity_menu_thanks)

        val menuName = intent.getStringExtra("menuName")
        val menuPrice = intent.getStringExtra("menuPrice")

        val tvMenuName = findViewById<TextView>(R.id.tvMenuName)
        val tvMenuPrice = findViewById<TextView>(R.id.tvMenuPrice)

        tvMenuName.text = menuName
        tvMenuPrice.text = menuPrice
    }

    fun onBackButtonClick(view: View)
    {
        finish()
    }
}
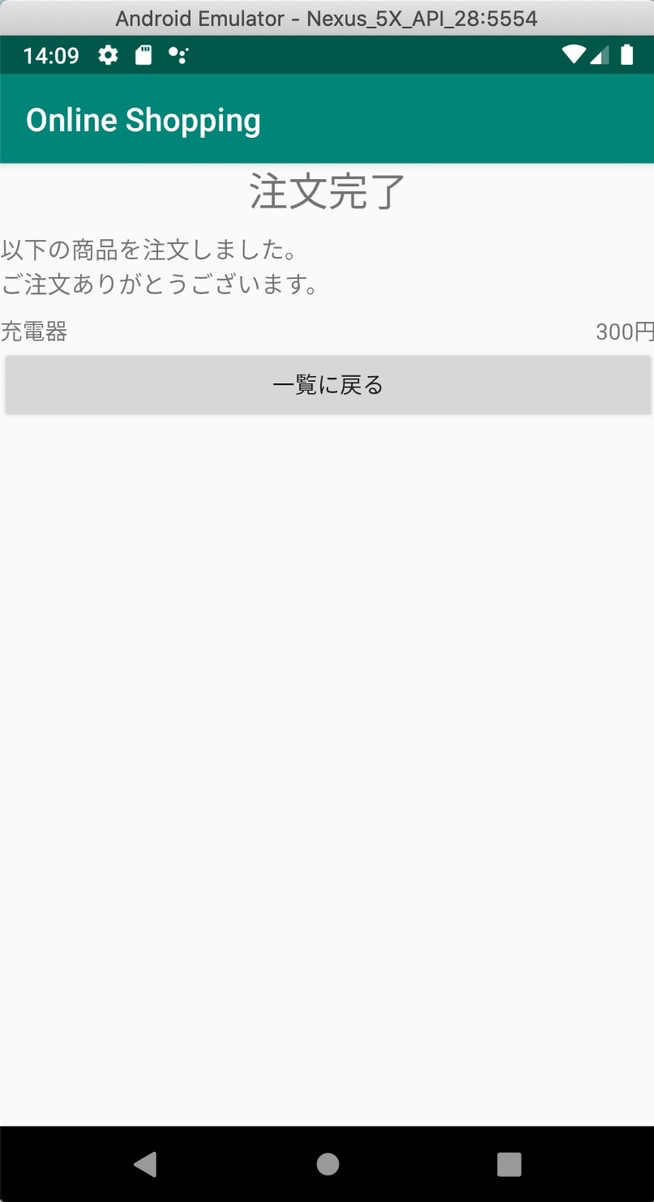
完成です!
では、完成したアプリを開いてみましょう。リストの商品を選択すると次の画面が表示されると思います。
最後に
いかがでしょうか? いかにも通販アプリで見たことあるようなものではないでしょうか。このように少しずづつではありますがAndroidアプリ開発の知識が身に付いているのを感じられたと思います。
本記事は、『基礎&応用力をしっかり育成! Androidアプリ開発の教科書 Kotlin対応 なんちゃって開発者にならないための実践ハンズオン』を参考にしております。