初めに
「いい感じのUIでフローを作成出来るようにしたい!」と要望が上がった際に、React Flowを使ってみました。
試した結果を記事にまとめました。
やってみた
1.まずは基本の型
2.カスタムノード
3.線の付け替え・削除
まずは基本の型
まずは公式が用意している基本のユースケースを試してみます。
Flow.js
import { useCallback } from 'react';
import ReactFlow, {
  MiniMap,
  Controls,
  Background,
  useNodesState,
  useEdgesState,
  addEdge,
} from 'reactflow';
import 'reactflow/dist/style.css';

const initialNodes = [
  {
    id: 'start',
    type: 'input',
    position: { x: 0, y: 0 },
    data: { label: 'start' },
  },
  {
    id: 'middle',
    position: { x: 0, y: 100 },
    data: { label: 'middle' },
  },
  {
    id: 'end',
    type: 'output',
    position: { x: 0, y: 200 },
    data: { label: 'end' },
  },
];

const initialEdges = [
  { id: 'e1', source: 'start', target: 'middle' },
  { id: 'e2', source: 'middle', target: 'end' },
];

function Flow() {
  const [nodes, setNodes, onNodesChange] = useNodesState(initialNodes);
  const [edges, setEdges, onEdgesChange] = useEdgesState(initialEdges);

  const onConnect = useCallback((params) => setEdges((eds) => addEdge(params, eds)), [setEdges]);

  return (
    <ReactFlow
      nodes={nodes}
      edges={edges}
      onNodesChange={onNodesChange}
      onEdgesChange={onEdgesChange}
      onConnect={onConnect}
      fitView
    >
      <MiniMap />
      <Controls />
      <Background />
    </ReactFlow>
  );
}

export default Flow;
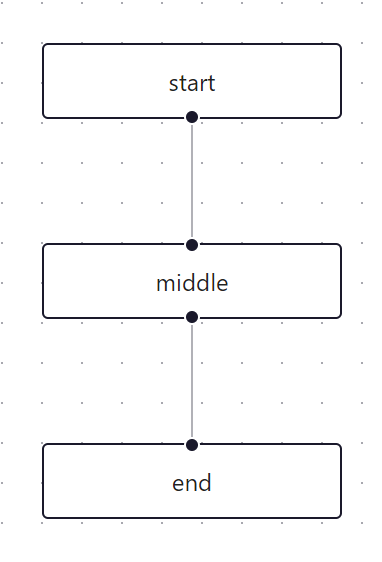
それっぽいのは出ました。
ここから修正を加えていきます。
カスタムノード
ノードをカスタムします。
今回実行したのは以下の通りです。
- ノードのバックグランド変更(条件付き)
- ポートを大きく
- ドラッグ範囲の変更
Flow.js
import { useCallback } from 'react';
import ReactFlow, {
  MiniMap,
  Controls,
  Background,
  useNodesState,
  useEdgesState,
  addEdge,
} from 'reactflow';
import 'reactflow/dist/style.css';

import CustomNode from './CustomNode';

const initialNodes = [
  {
    id: 'start',
    type: 'input',
    position: { x: 0, y: 0 },
    data: { label: 'start' },
  },
  {
    id: 'middle1',
    position: { x: -100, y: 100 },
    data: { label: 'middle1' },
  },
  {
    id: 'middle2',
    type: 'custom',   // カスタムノードを適用
    dragHandle: '.custom-drag-handle',    // ドラッグ領域の指定
    position: { x: 100, y: 100 },
    data: { label: 'middle2' },
  },
  {
    id: 'end',
    type: 'output',
    position: { x: 0, y: 200 },
    data: { label: 'end' },
  },
];

const nodeTypes = {
  custom: CustomNode,
};

const initialEdges = [
  { id: 'e1', source: 'start', target: 'middle' },
  { id: 'e2', source: 'middle', target: 'end' },
];

function Flow() {
  const [nodes, setNodes, onNodesChange] = useNodesState(initialNodes);
  const [edges, setEdges, onEdgesChange] = useEdgesState(initialEdges);

  const onConnect = useCallback((params) => setEdges((eds) => addEdge(params, eds)), [setEdges]);

  return (
    <ReactFlow
      nodes={nodes}
      edges={edges}
      onNodesChange={onNodesChange}
      onEdgesChange={onEdgesChange}
      onConnect={onConnect}
      nodeTypes={nodeTypes}
      fitView
    >
      <MiniMap />
      <Controls />
      <Background />
    </ReactFlow>
  );
}

export default Flow;
CustomNode.js
import { Handle, Position, useStore } from 'reactflow';

const connectionNodeIdSelector = (state) => state.connectionNodeId;

export default function CustomNode({ id, data }) {
  const connectionNodeId = useStore(connectionNodeIdSelector);
  const isTarget = connectionNodeId && connectionNodeId !== id;

  return (
    <div className="customNode">
      <div
        className="customNodeBody"
        style={{
          borderStyle: isTarget ? 'dashed' : 'solid',
          backgroundColor: isTarget ? '#ffcce3' : '#ccd9f6',
        }}
      >
        <Handle
          className="port"
          position={Position.Top}
          type="target"
        />
        <Handle
          className="port"
          position={Position.Bottom}
          type="source"
        />
        {data.label}
        <span className="custom-drag-handle"/>
      </div>
    </div>
  );
}
index.css
/* ポートの色、サイズ */
.react-flow__handle.port {
  width: 10px;
  height: 10px;
  border-radius: 3px;
  background-color: red;
}

/* カスタムノード */
.customNodeBody {
  width: 150px;
  height: 18px;
  padding: 10px;
  border: 1px solid black;
  overflow: hidden;
  border-radius: 10px;
  display: flex;
  justify-content: center;
  align-items: center;
  font-weight: bold;
}

/* ドラッグ */
.custom-drag-handle {
  width: 10px;
  height: 10px;
  position: absolute;
  background-color: teal;
  top: 10%;
  right: 10%;
};
カスタムノードから線をつなぐ際に色が変わります。
また、ノードのドラッグは緑の範囲でのみ可能になります。
線の付け替え削除
ポート接続の変更、削除が出来ないため修正します。
それぞれ何をしているかは以下を参考にしてください。
snapToGrid
useRef
updatable-edge
Flow.js
  const onConnect = useCallback((params:any) => setEdges((eds) => addEdge(params, eds)), [setEdges]);

  // -- ここから追加 --
  const edgeUpdateSuccessful = useRef(true);

  const onEdgeUpdateStart = useCallback(() => {
    edgeUpdateSuccessful.current = false;
  }, []);

  const onEdgeUpdate = useCallback((oldEdge:any, newConnection:any) => {
    edgeUpdateSuccessful.current = true;
    setEdges((els) => updateEdge(oldEdge, newConnection, els));
  }, []);

  const onEdgeUpdateEnd = useCallback((_:any, edge:any) => {
    if (!edgeUpdateSuccessful.current) {
      setEdges((eds) => eds.filter((e) => e.id !== edge.id));
    }

    edgeUpdateSuccessful.current = true;
  }, []);
  // -- ここまで追加 --

  return (
    <ReactFlow
      nodes={nodes}
      edges={edges}
      onNodesChange={onNodesChange}
      onEdgesChange={onEdgesChange}
      // -- ここから追加 --
      snapToGrid
      onEdgeUpdate={onEdgeUpdate}
      onEdgeUpdateStart={onEdgeUpdateStart}
      onEdgeUpdateEnd={onEdgeUpdateEnd}
      // -- ここまで追加 --
      onConnect={onConnect}
      className="touchdevice-flow"
      fitView
    >
      <MiniMap />
      <Controls />
      <Background />
    </ReactFlow>
  );
まとめ
React Flowを触ってみたが、まだまだ出来ることがたくさんあり、ドキュメントも充実してそうな印象です。
興味があれば触ってみてはいかがでしょうか。