document
hello-world
インストール
cliのインストール
$ curl -fsSL https://raw.githubusercontent.com/dapr/cli/master/install/install.sh | /bin/bash
Your system is darwin_amd64
Installing Dapr CLI...

Downloading https://github.com/dapr/cli/releases/download/v0.1.0/dapr_darwin_amd64.tar.gz ...
dapr installed into /usr/local/bin successfully.
cli version: 0.1.0
runtime version: n/a
To get started with Dapr, please visit https://github.com/dapr/docs/tree/master/getting-started
$ dapr --version
cli version: 0.1.0
runtime version: n/a⏎
手元にdaprをインストールする
$ dapr init                                                                        火 10/22 16:46:35 2019
⌛  Making the jump to hyperspace...
✅  Downloading binaries and setting up components...
✅  Success! Dapr is up and running
Note: To see that Dapr has been installed successful, from a command prompt run the docker ps command and check that the daprio/dapr:latest and redis container images are both running.
ほう
$ docker ps 1.9m 火 10/22 16:52:35 2019
CONTAINER ID IMAGE COMMAND CREATED STATUS PORTS NAMES
2d3fdc13d624 redis "docker-entrypoint.s…" 2 minutes ago Up 2 minutes 0.0.0.0:6379->6379/tcp peaceful_keldysh
29bbe0be95c1 daprio/dapr "./placement" 2 minutes ago Up 2 minutes 0.0.0.0:50005->50005/tcp dapr_placement
確かにdaprとredisが立ってる。
Understand the Code
$ git clone https://github.com/dapr/samples.git
$ ls samples/                                                               火 10/22 16:57:29 2019
1.hello-world            4.pub-sub                CONTRIBUTING.md
2.hello-kubernetes       5.bindings               LICENSE
3.distributed-calculator 6.functions-and-keda     README.md
$ cd samples/1.hello-world/
$ ls -l                                                    火 10/22 16:59:07 2019
total 80
-rw-r--r--  1 ryoya  staff   6349 10 22 16:57 README.md
-rw-r--r--  1 ryoya  staff   1343 10 22 16:57 app.js
drwxr-xr-x  5 ryoya  staff    160 10 22 16:57 img
-rw-r--r--  1 ryoya  staff  15625 10 22 16:57 package-lock.json
-rw-r--r--  1 ryoya  staff    319 10 22 16:57 package.json
-rw-r--r--  1 ryoya  staff    155 10 22 16:57 sample.http
-rw-r--r--  1 ryoya  staff     26 10 22 16:57 sample.json
app.jsがexpressアプリケーションらしいのでこれを見ていく。
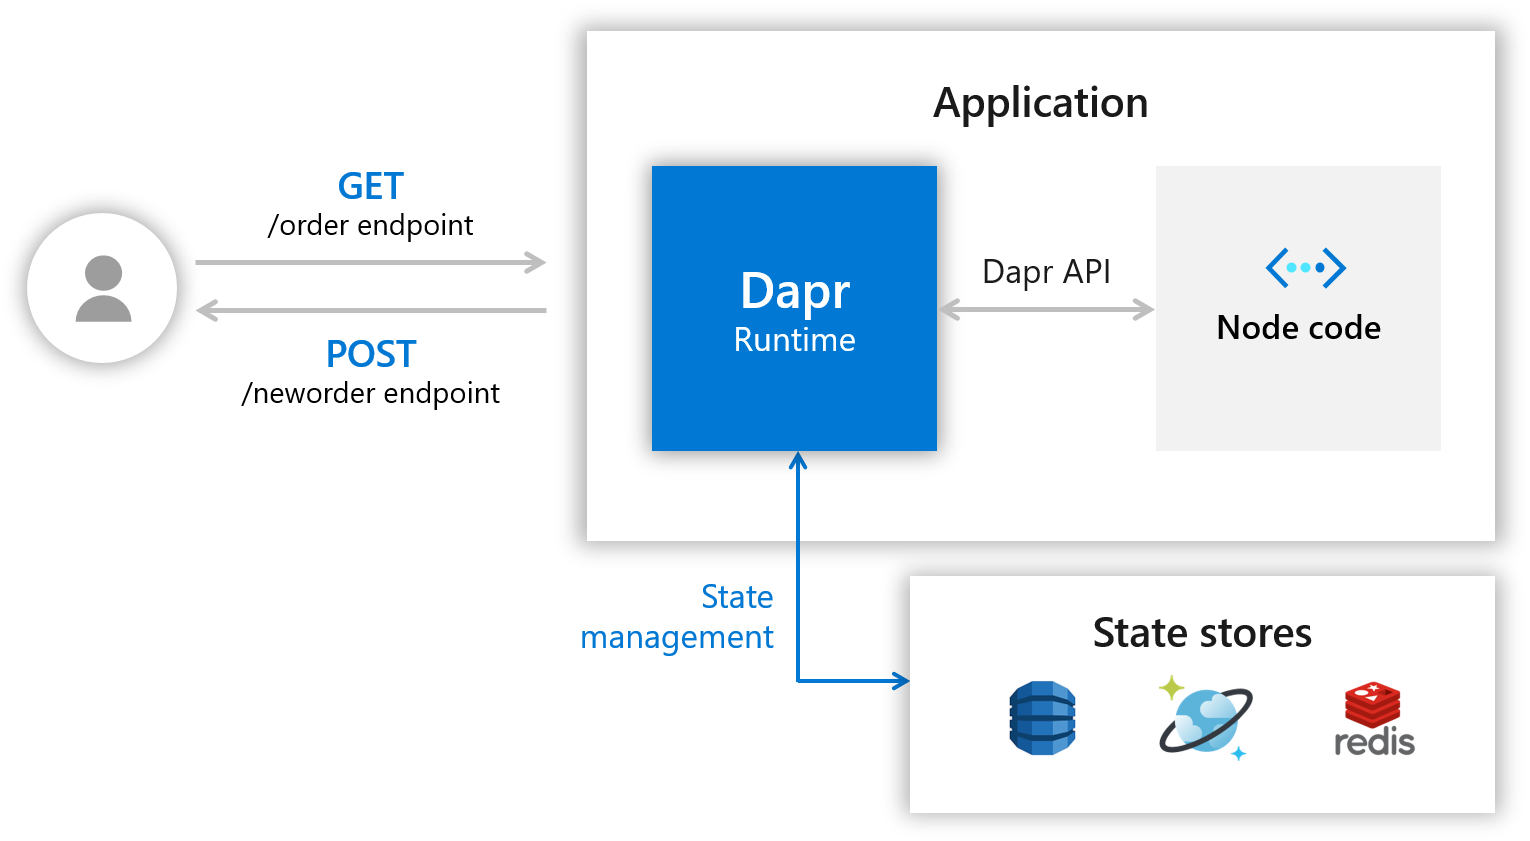
ドキュメントの通り/neworderハンドラーを見てみると
app.post('/neworder', (req, res) => {
    const data = req.body.data;
    const orderId = data.orderId;
    console.log("Got a new order! Order ID: " + orderId);

    const state = [{
        key: "order",
        value: data
    }];

    fetch(stateUrl, {
        method: "POST",
        body: JSON.stringify(state),
        headers: {
            "Content-Type": "application/json"
        }
    }).then((response) => {
        console.log((response.ok) ? "Successfully persisted state" : "Failed to persist state");
    });

    res.status(200).send();
});
stateURLはこんなの
const stateUrl = `http://localhost:${daprPort}/v1.0/state`;
daprの/stateendpointに向いてる。ここではstateを単純にレスポンスとして返す変わりに、daprの/stateエンドポイントに永続化する。
GET /orderは逆にdaprからfetchしたデータを返すエンドポイント
app.get('/order', (_req, res) => {
    fetch(`${stateUrl}/order`)
        .then((response) => {
            return response.json();
        }).then((orders) => {
            res.send(orders);
        });
});
なるほど、${stateUrl}/order。
Run the Node.js App with Dapr
npm install
$ npm install
Run Node.js app with Dapr
$ dapr run --app-id mynode --app-port 3000 --port 3500 node app.js
ℹ️  Starting Dapr with id mynode. HTTP Port: 3500. gRPC Port: 52014
✅  You're up and running! Both Dapr and your app logs will appear here.
フォアグラウンドで動き出す。
Post Messages to your Service
curlでPOSTしてみる。pathが独特
curl -XPOST -d @sample.json http://localhost:3500/v1.0/invoke/mynode/method/neworder
ログに以下のメッセージが表示される。
== APP == Got a new order! Order ID: 42
== APP == Successfully persisted state
GETしてみると
$ curl http://localhost:3500/v1.0/invoke/mynode/method/order
{"orderId":"42"}⏎
ちゃんと永続化できてる。
