Batch (Google Cloud Batch)とは
一言で言うと、Google Cloudでバッチ処理が行えるフルマネージドサービスです
コンピューティングリソースとしてはGoogle Compute Engine (GCE)が用いられています
GPUを用いた高速処理が可能であったり、Spot VMを用いたコスト削減が可能であったりと柔軟なプロビジョニングが可能です
2022年10月にあったGoogle Cloud Next '22にてGAが発表されました(公式ブログ)
2022年7月にプレビュー版が発表されてから機能追加も積極的に行われているようで(リリースノート)、執筆時点(2022/11/7)では日本リージョンには展開されていませんが、日本リージョンで使えるようになる日もそう遠くないのではと思い、今回記事を書きました
Nextflowとは
Nextflowはオープンソースの、バイオインフォマティスク解析で用いられるワークフローエンジンです
ポータビリティに優れており、Grid EngineやSlurmといったジョブスケジューラやKuerbentes、主要クラウドベンダーのマネージドサービスとの統合が可能です
Google Cloudだと、今回取り上げるBatch、およびCloud Life Sciencesとの統合が可能です
※ 私自身現在勉強中ということもあり、今回Nextflow自体の深掘りはしません
実践
今回は、Cloud Life Sciencesのドキュメントに存在するNextflowのチュートリアルをBatchでおこなってみます(ドキュメント)
チュートリアル同様、Cloud ShellにNextflowをインストールして実施しました
専用バケットの作成
まずは実行結果などのログを保存するためのCloud Storageバケットを作成します
$ gsutil mb gs://my-nf-gcb
Creating gs://my-nf-gcb/...
Nextflowのインストール
Cloud ShellにはデフォルトでNextflowが存在していないのでインストールします
$ curl get.nextflow.io | bash
  % Total    % Received % Xferd  Average Speed   Time    Time     Time  Current
                                 Dload  Upload   Total   Spent    Left  Speed
100 14721  100 14721    0     0  24741      0 --:--:-- --:--:-- --:--:-- 24699

      N E X T F L O W
      version 22.10.1 build 5828
      created 27-10-2022 16:58 UTC
      cite doi:10.1038/nbt.3820
      http://nextflow.io


Nextflow installation completed. Please note:
- the executable file `nextflow` has been created in the folder: /home/main
- you may complete the installation by moving it to a directory in your $PATH
$ ls
nextflow
$ ./nextflow -v
nextflow version 22.10.1.5828
※ Nextflowのバージョンが22.07.1-edge以上である必要があります(リリースノート)
また、サンプルコードをダウンロードします
$ git clone https://github.com/nextflow-io/rnaseq-nf.git
Cloning into 'rnaseq-nf'...
remote: Enumerating objects: 437, done.
remote: Counting objects: 100% (205/205), done.
remote: Compressing objects: 100% (39/39), done.
remote: Total 437 (delta 187), reused 166 (delta 166), pack-reused 232
Receiving objects: 100% (437/437), 536.19 KiB | 1.09 MiB/s, done.
Resolving deltas: 100% (237/237), done.
$ ls
nextflow  rnaseq-nf
Configファイル編集
サンプルコードの中にあるnextflow.configというConfigファイルを編集します
nextflow.config内では各ツール(Nextflowにおいては、executorといいます)と統合する際の設定が記載されています
Batchの設定はgcbにて管理されてるので、そこを以下のように変更します
-
workDirをgs://${先ほど作成したバケット}/scratchに -
google.regionをus-central1に(バケットを作成したリージョンに合わせたら良いかと) -
google.projectを追加し、使用するプロジェクトのIDを記載する
# 変更前
gcb {
    params.transcriptome = 'gs://rnaseq-nf/data/ggal/transcript.fa'
    params.reads = 'gs://rnaseq-nf/data/ggal/gut_{1,2}.fq'
    params.multiqc = 'gs://rnaseq-nf/multiqc'
    process.executor = 'google-batch'
    process.container = 'quay.io/nextflow/rnaseq-nf:v1.1'
    workDir = 'gs://rnaseq-nf/scratch' // <- replace with your own bucket!
    google.region  = 'europe-west2'
}

↓

# 変更後
gcb {
    params.transcriptome = 'gs://rnaseq-nf/data/ggal/transcript.fa'
    params.reads = 'gs://rnaseq-nf/data/ggal/gut_{1,2}.fq'
    params.multiqc = 'gs://rnaseq-nf/multiqc'
    process.executor = 'google-batch'
    process.container = 'quay.io/nextflow/rnaseq-nf:v1.1'
    workDir = 'gs://my-nf-gcb/scratch'
    google.region  = 'us-central1'
    google.project = '${プロジェクトID}'
}
パイプライン実行
以上で設定が完了したので、Nextflowでパイプラインを実行することができます
$ ./nextflow run rnaseq-nf/main.nf -profile gcb
N E X T F L O W ~ version 22.10.1
Launching `rnaseq-nf/main.nf` [berserk_mcclintock] DSL2 - revision: 4ba66eb0c8
Downloading plugin nf-google@1.4.4
R N A S E Q - N F P I P E L I N E
===================================
transcriptome: gs://rnaseq-nf/data/ggal/transcript.fa
reads : gs://rnaseq-nf/data/ggal/gut_{1,2}.fq
outdir : results
Uploading local `bin` scripts folder to gs://my-nf-gcb/scratch/tmp/4f/719d1f505103cb12c1555860147567/bin
executor > google-batch (4)
[65/25ccbf] process > RNASEQ:INDEX (transcript) [100%] 1 of 1 ✔
[9c/61a172] process > RNASEQ:FASTQC (FASTQC on gut) [100%] 1 of 1 ✔
[5a/0befdd] process > RNASEQ:QUANT (gut) [100%] 1 of 1 ✔
[3a/71e170] process > MULTIQC [100%] 1 of 1 ✔
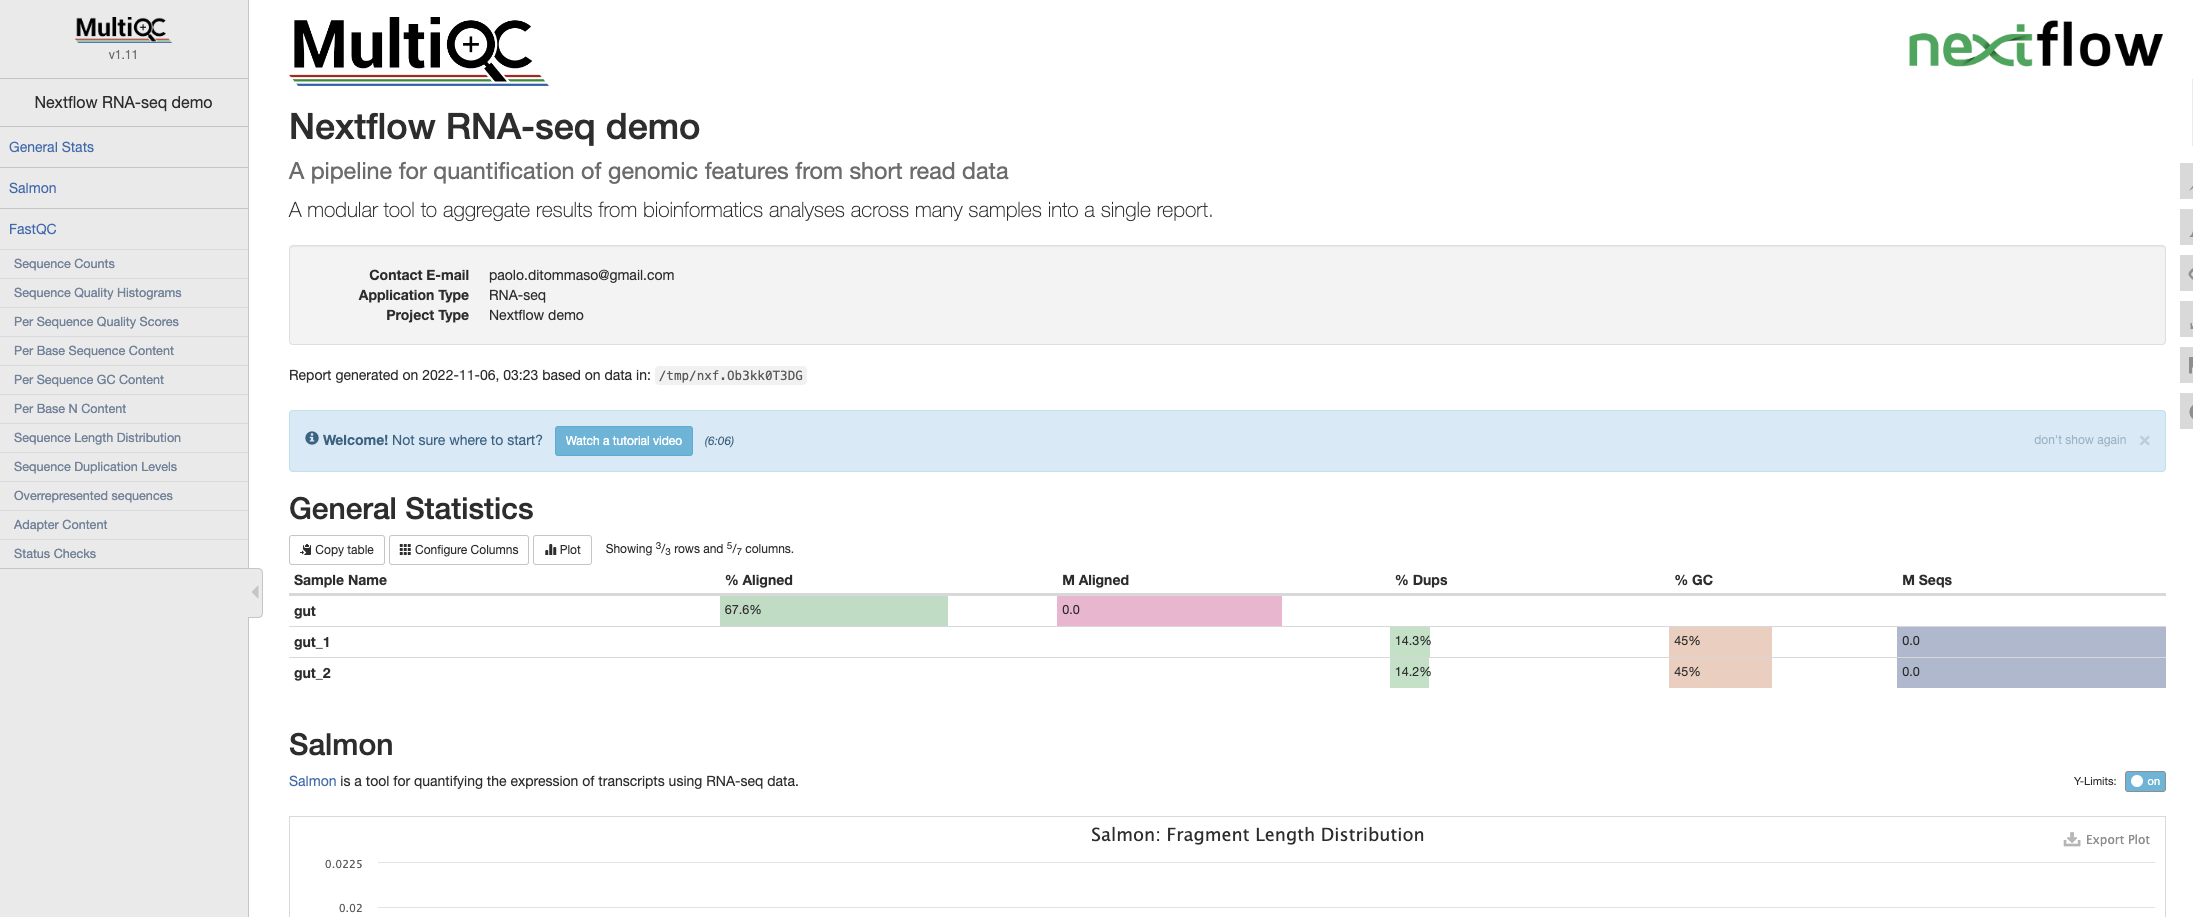
Done! Open the following report in your browser --> results/multiqc_report.html
Completed at: 06-Nov-2022 03:24:26
Duration : 11m 14s
CPU hours : (a few seconds)
Succeeded : 4
$ ls
nextflow nextflow.config.backup README-cloudshell.txt results rnaseq-nf
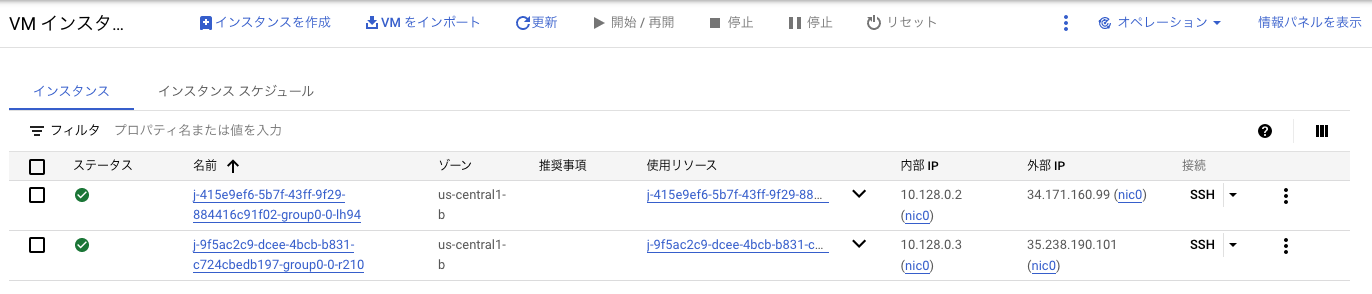
実行中は、順次Batchの方でジョブが生成され、同時にGCEがプロビジョニングされます

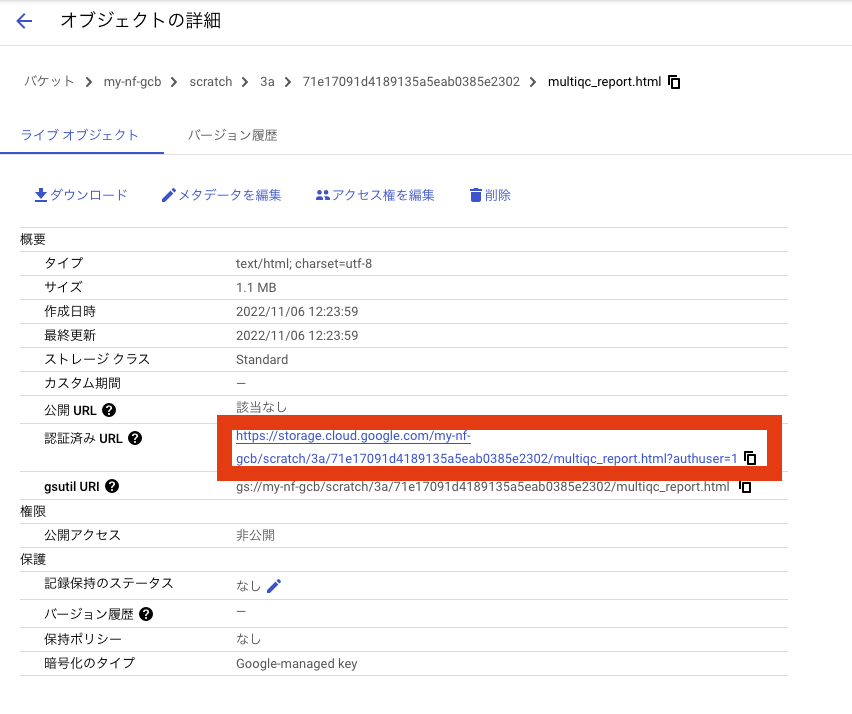
Batchというより、Nextflow内で実行したMultiQCの話になりますが、バケットに生成されたレポートから実行結果については確認することが可能です
MultiQCは今回最後に実行されたので、scratchフォルダ内の3aフォルダの中に結果が格納されてます
マシンタイプを変更してみる
チュートリアルだとリソース周りの設定をしていないので、全て以下の設定でプロビジョニングされました
- 使用コア数 : 1 vCPU
- 使用メモリ : 1.95 GB
- マシンタイプ : e2-highcpu-2
そこでリソースやマシンタイプを指定してみます
Nextflowのドキュメントにある方法だとprocess内にて定義することになります
(もしかしたらもっとスマートな方法があるのかもしれませんが)
具体的には以下の値を指定してやることで設定可能です
- cpus
- memory
- machineType
試しにrnaseq-nf/modules/fastqc/main.nfを次のように変更してパイプラインを実行してみます
# 変更前
params.outdir = 'results'

process FASTQC {
    tag "FASTQC on $sample_id"
    conda 'bioconda::fastqc=0.11.9'
    publishDir params.outdir, mode:'copy'

    input:
    tuple val(sample_id), path(reads)

    output:
    path "fastqc_${sample_id}_logs"

    script:
    """
    fastqc.sh "$sample_id" "$reads"
    """
}

↓

# 変更後
params.outdir = 'results'

process FASTQC {
    tag "FASTQC on $sample_id"
    conda 'bioconda::fastqc=0.11.9'
    publishDir params.outdir, mode:'copy'

    cpus 8
    memory '40 GB'

    input:
    tuple val(sample_id), path(reads)

    output:
    path "fastqc_${sample_id}_logs"

    script:
    """
    fastqc.sh "$sample_id" "$reads"
    """
}
実行した後コンソールで確認すると2番目に実行されたFastQCに対して、e2-highmem-8 (8 vCPU, 64 GB)が割り当てられたことがわかります

CPUとメモリを指定するとよしなにマシンタイプを選定してくれるようです
もちろん、machineTypeで明示的にマシンタイプを指定することも可能です