0
0

Delete article

Deleted articles cannot be recovered.

Draft of this article would be also deleted.

Are you sure you want to delete this article?

More than 5 years have passed since last update.

UnityでAndroidアプリをビルドする

Posted at

準備

・SDK、JDKをインストールしておく。
・Google USB Driverをインストールしておく。

パスの設定

まず、SDKとJDKのパスを設定します。
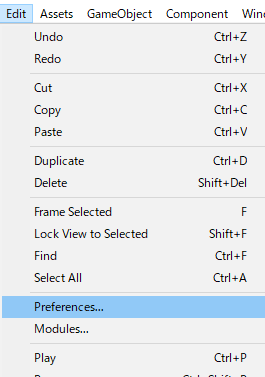
edit.png
Edit>Preferences を選びます。
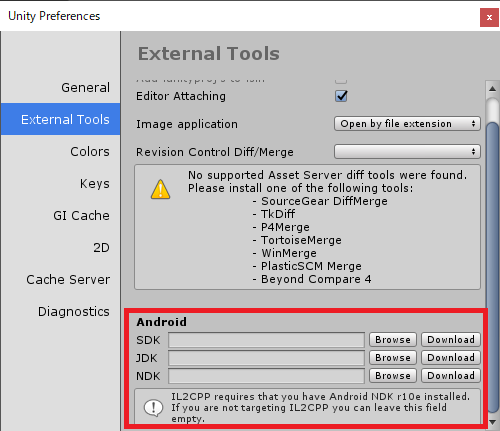
tool.png
External Tools欄を選んで、赤枠内にパスを設定します。
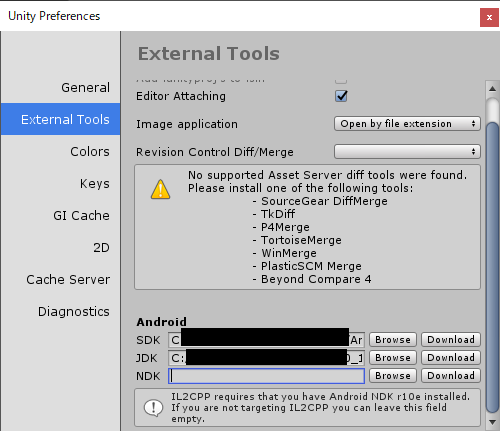
tool2.png
IL2CPPを使う場合はNDKも必要らしいのですが、まだよくわかりません……
とりあえず、まだ設定していません。

ビルド設定

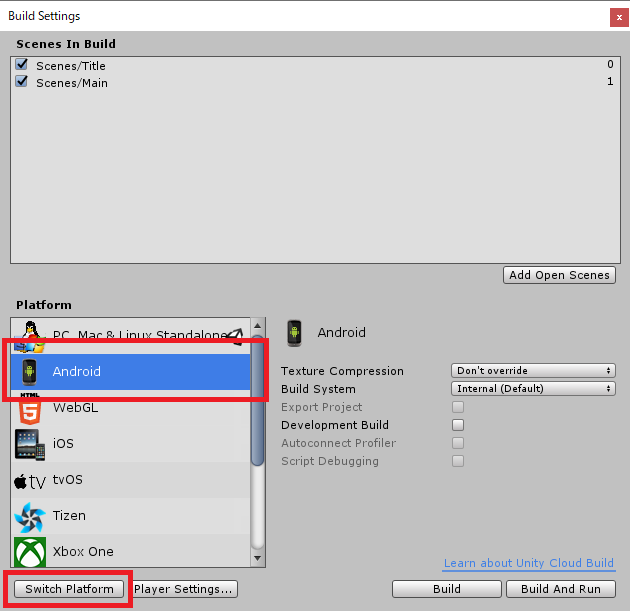
File>Build Settings を選びます。
set1.png
PlatformのAndroidを選択して、左下のSwitch Platformを押します。
もしAndroid Build Supportがインストールされていなければ、インストールボタンがあるので押します。

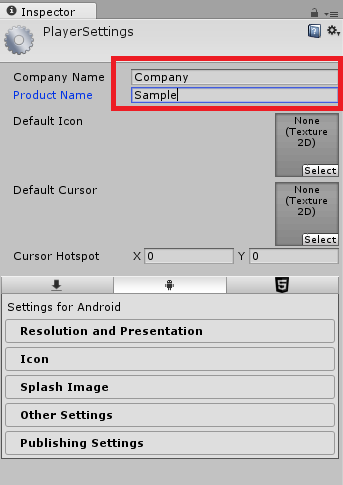
次に、Player Settingsを押します。
set2.png
Company NameとProduct Nameを入力します。
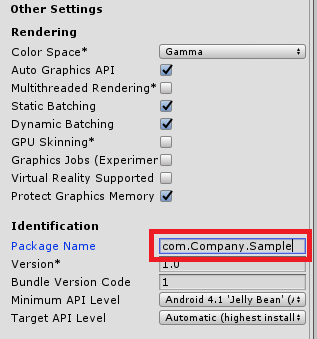
set3.png
次に、Other Settings内のPackage Name欄を入力します。
「com.(Company Name).(Product Name)」で設定します。

他にもいろいろ設定できそうです。

実行

後はBuild And Runを押して実行です。

0
0
0

Register as a new user and use Qiita more conveniently

  1. You get articles that match your needs
  2. You can efficiently read back useful information
  3. You can use dark theme
What you can do with signing up
0
0

Delete article

Deleted articles cannot be recovered.

Draft of this article would be also deleted.

Are you sure you want to delete this article?