OpenShift Virtualization
Red Hat® OpenShift® Virtualization は Red Hat OpenShift に含まれる機能であり、組織が新規および既存の仮想マシン (VM) ワークロードを実行およびデプロイするための先進的なプラットフォームを提供します。このソリューションにより、従来の仮想マシンを、信頼できる、一貫した包括的なハイブリッドクラウド・アプリケーション・プラットフォームに簡単に移行できます。
OpenShift Virtualization は、VM の移行を単純化するとともに、クラウドネイティブ・アプリケーション・プラットフォームのシンプルさと速度を利用してインフラストラクチャのモダナイゼーションの道筋を提供します。また、先進的な管理の原則を取り入れつつ既存の仮想化への投資を維持することを目指しており、Red Hat の包括的な仮想化ソリューションの基盤となります。
Creating VMs from custom images
OCP 4.17 Bare Metal 環境 OpenShift Virtualization (OCP-V) で Virtual Machine (VM) を作成してみます。ここでは以下の手順を参考に、独自に作成した Custom Image から作成してみます。
Creating VMs from custom images
Custom Image では以下の4つの方法がありますが、今回は3番目の方法で行ってみます。
- Importing the image as a container disk from a registry.
Optional: You can enable auto updates for your container disks. See Managing automatic boot source updates for details.- Importing the image from a web page.
- Uploading the image from a local machine.
- Cloning a persistent volume claim (PVC) that contains the image.
なお、それぞれの方法によってサポートされるフォーマットが指定されています。
CDI supported operations matrix
また、処理の過程で Scratch Space (一時ストレージ領域) を使用します。
Preparing CDI scratch space
Uploading the image from a local machine
今回は、Red Hat 公式サイトの Red Hat Enterprise Linux 9.5 KVM Guest Image (QCOW2 Format File) を使用してみます。使用する QCOW2 は、予め以下からダウンロードしておきます。
Download Red Hat Enterprise Linux

OCP Console から Virtualization -> Catalog を表示します。画面が Template catalog Tab になっている事を確認します。
左上の Project に VM を作成する Project として z-ocpv-vmtest-custom を指定した上で、Red Hat Enterprise Linux 9 VM Template を選択します。Disk source から Upload (Upload a new file to a PVC) を選択し、Upload data の Browse ボタンから、操作している PC 上のファイルを指定します。

その他の必要な箇所の設定変更を行います。今回は VirtualMachine name のみ rhel9-custom01-upload に変更しています。

Quick create VirtualMachine ボタンを押して VM を作成します。Upload の進捗状況が表示されます。

なお、Upload の状況によって DataVolumne のステータスが以下のようになります。
$ oc project -q
z-ocpv-vmtest-custom

# Upload 実行中
$ oc get datavolume
NAME                     PHASE         PROGRESS   RESTARTS   AGE
rhel9-custom01-upload    UploadReady   N/A                   5m51s

# DataVolume 処理完了
$ oc get datavolume
NAME                     PHASE       PROGRESS   RESTARTS   AGE
rhel9-custom01-upload    Succeeded   N/A                   9m31s
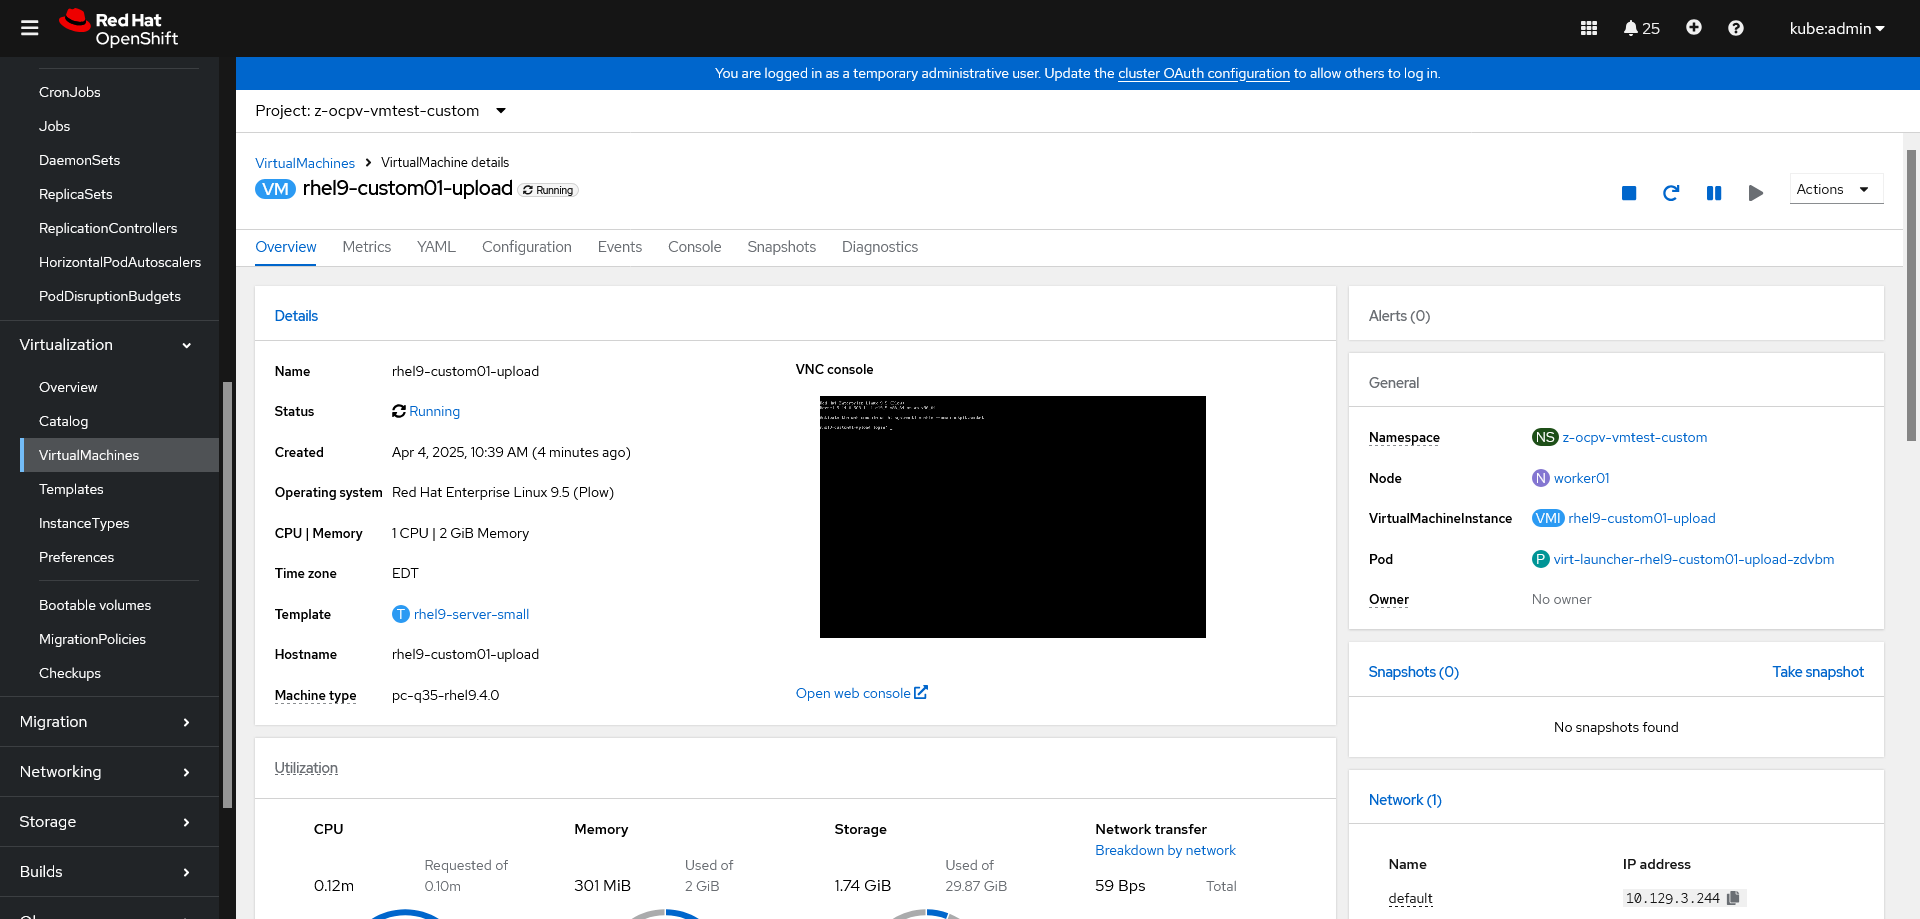
以下のような画面が表示され、Status Running になれば完了です。
なお、今回の手順では、以下のような DataVolume が作成されます。
$ oc get datavolume
NAME                     PHASE       PROGRESS   RESTARTS   AGE
rhel9-custom01-upload    Succeeded   N/A                   29m

$ oc -o yaml get datavolume rhel9-custom01-upload
apiVersion: cdi.kubevirt.io/v1beta1
kind: DataVolume
metadata:
  annotations:
    cdi.kubevirt.io/storage.bind.immediate.requested: "true"
    cdi.kubevirt.io/storage.usePopulator: "true"
  generation: 1
  name: rhel9-custom01-upload
  namespace: z-ocpv-vmtest-custom
spec:
  source:
    upload: {}
  storage:
    resources:
      requests:
        storage: 30Gi
~省略~
v1beta1.DataVolumeSourceUpload