はじめに
UnityでPost Processingを使う方法です。
全体の流れを見てわからないところは詳細な手順でご確認下さい。
今回は例として画面全体をぼかしてみます。
Unity 2017.3 で確認。
全体の流れ
- Post Processing Stack をAssetストアから入れる
- カメラに Post Processing Behaviour を追加
- Post-Processing Profile を作成し,3. に適用
- Post-Processing Profile を調整
詳細な手順
アセットストアからPost Processing Stackを取ってくる
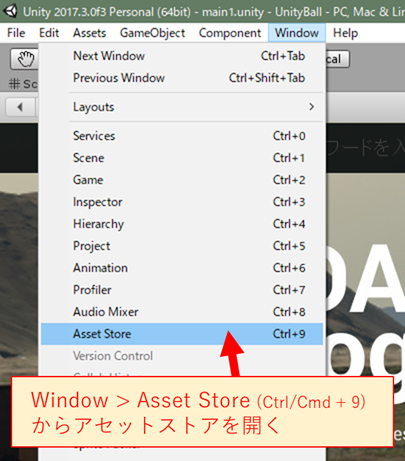
1. アセットストアを開く
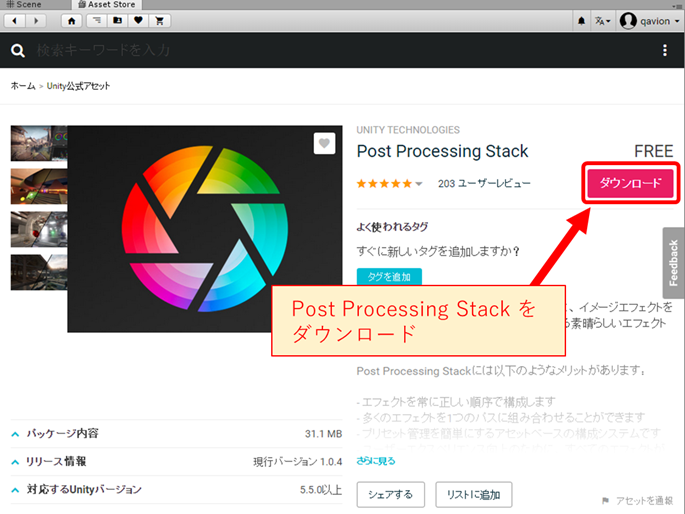
2. Post Processing Stack を ダウンロード
上の検索欄に Post Processing Stack と入力して検索してAssetを探し出し,ダウンロードをクリックします。
ダウンロードが完了するまでしばらく待ちます。
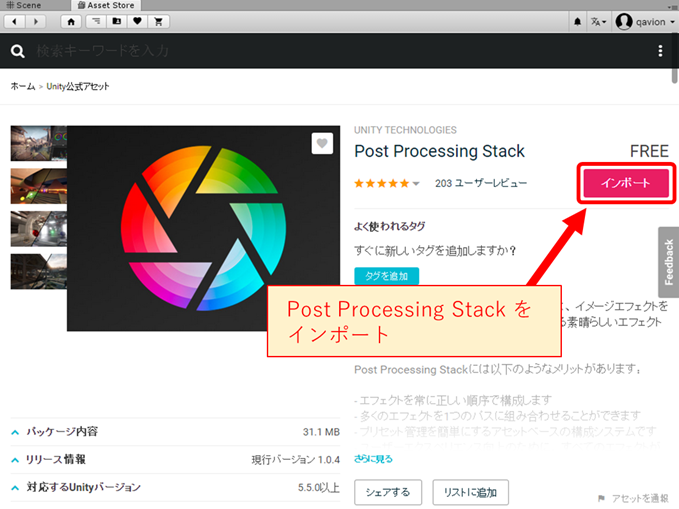
3. Post Processing Stack を インポート
ダウンロードが完了したらプロジェクトにインポートしていきます。
まずはインポートをクリックします。
少し待つと Import Unity Package が表示されるので Import をクリック。
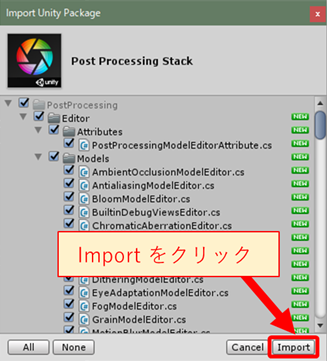
ImportとHold Onが完了するまでしばらく待ちます。
途中で API Update Required が出てきてAPIの更新を要求されるかもしれませんが,その場合は一応バックアップを取ってから I Made a Backup. Go Ahead! をクリックして下さい。
(終了すると Finished updating scripts / assemblies とコンソールに表示されます。)
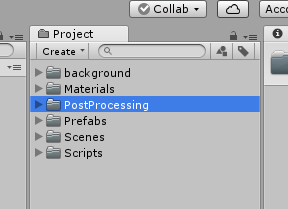
これらが終了すると Projectビュー に PostProcessing というフォルダが追加されます。
Post Processing Stack を適用する
ここから,Post Processing Stack を適用してエフェクトをかけていきます。
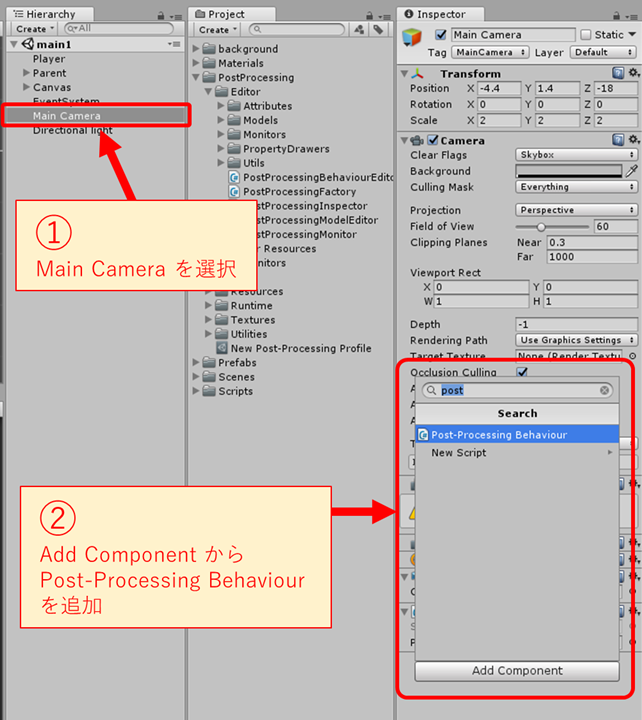
1. Post Proccessing Behaviour を追加
- Main Camera を選択
- Add Component
- post と検索
- Post-Processing Behaviour をクリック
2. Post-Processing Profile を作成
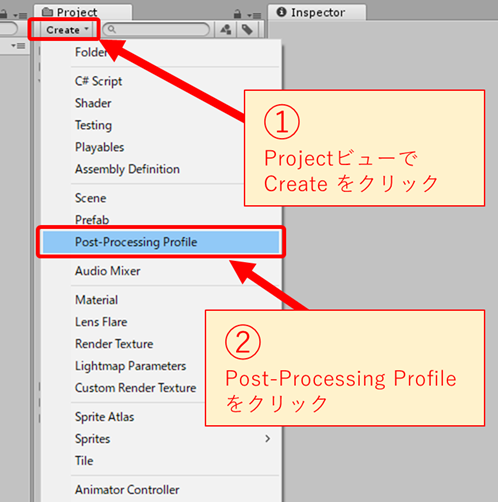
- Projectビューで Create をクリック
- Post-Processing Profile をクリック
- 適当に名前を付ける
今回はそのままの名前にしました。
必要な場合はファイルの場所も変更して下さい。
4. 生成したProfileの適用
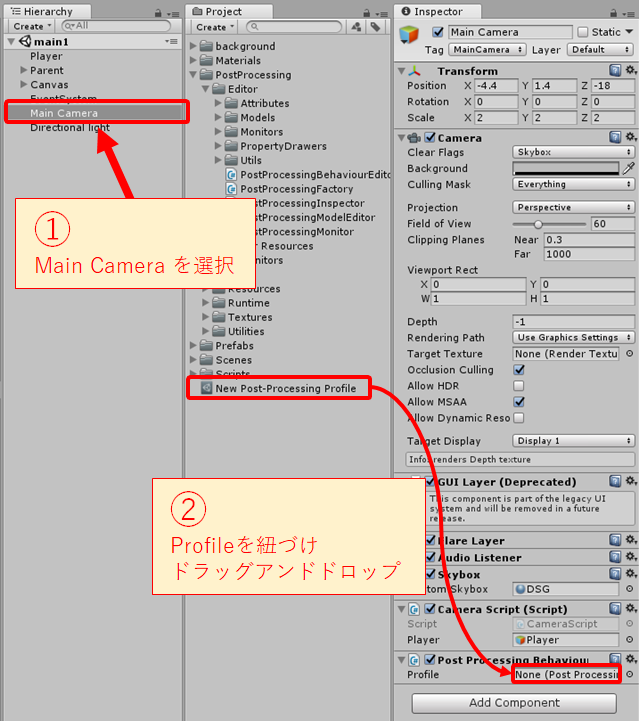
- Main Camera を選択
- 先程追加した Post Processing Behaviour の Profile に 先程生成したプロファイルを紐づけ
5. Profile の変更
ここからは, Profile を変更することで効果を付けていきます。
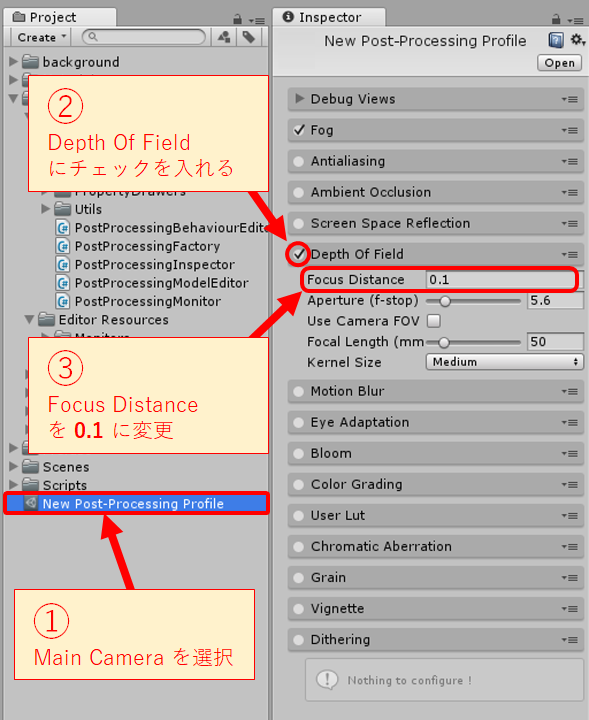
- 先ほど作成した Post-Processing Profile を選択
- Inspectorビューでエフェクトを調整
各項目の内容に関しては 公式ドキュメント - Post Processing Stack ![]() を参照して下さい。
を参照して下さい。
ためしに 被写界深度 ![]() を変更することで画面全体にぼかしをかけてみます。
を変更することで画面全体にぼかしをかけてみます。
- Depth Of Field にチェックを入れる
- Focus Distance を 0.1 に変更する
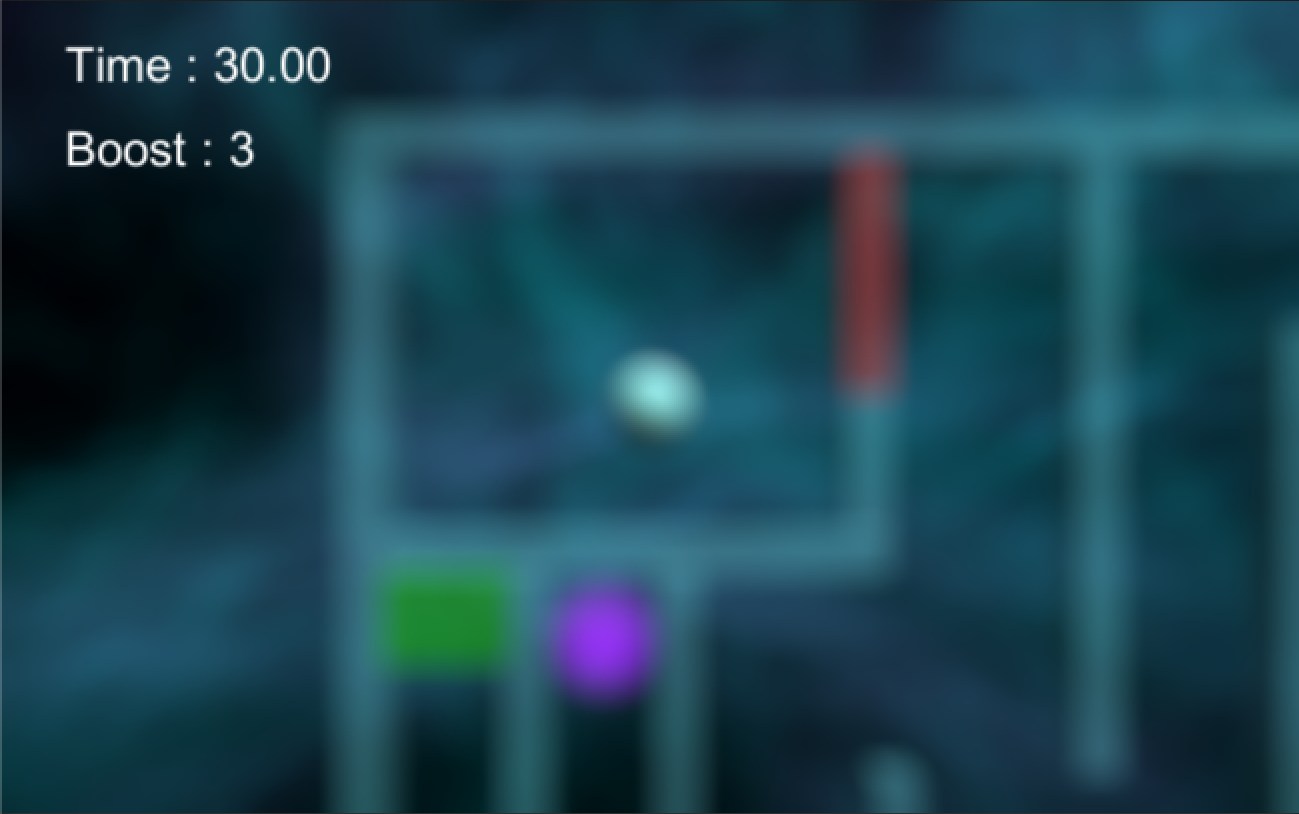
カメラの焦点距離が変更され,画面全体をぼかすことができました!
以上です。
