PHPも学びたくなったなーということで、入り口としてWordpressのテンプレートを自作してみようと思います。
まったく初心者なので、とりあえずテンプレート作成です。
必要なファイル
最低限、下記のファイル作成が必要です。
- style.css
- functions.php
- header.php
- footer.php
- sidebar.php
- index.php
- single.php
- page.php
- 404.php
各種テンプレートを作成します
テンプレート毎にサンプルを記載していきます。
style.css
スタイルシートですね、デザインを指定するときには、当ファイルに記述していきます。
ちなみに、下記項目は出来る限り入力しておきます。
| 項目 | 概要 | 必須 |
|---|---|---|
| Theme Name | テーマの名称 | ● |
| Theme URL | テーマのURL | |
| Description | テーマの説明 | |
| Version | テーマのバージョン |
@charset "utf-8";
/*
theme Name: wordpressテンプレートお試し作成byPyTomo
Author: Tomo
Discription: original theme
version: 1.0.0
*/
/*cssのリセット*/
html,body,div,span,object,iframe,h1,h2,h3,h4,h5,h6,p,
blockquote,pre,abbr,address,cite,code,del,dfn,em,img,
ins,kbd,q,samp,small,strong,sub,sup,var,b,i,dl,dt,dd,
ol,ul,li,fieldset,form,label,legend,table,caption,
tbody,tfoot,thead,tr,th,td,article,aside,canvas,details,
figcaption,figure,footer,header,hgroup,menu,nav,section,
summary,time,mark,audio,video {
  font-size: 100%;
  margin: 0;
  padding: 0;
  vertical-align: baseline;
  border: 0;
  outline: 0;
  background: transparent;
}

body {
  line-height: 1;
}

article,aside,details,figcaption,figure,
footer,header,hgroup,menu,nav,section {
  display: block;
}

nav ul {
  list-style: none;
}

blockquote,
q {
  quotes: none;
}

blockquote:before,
blockquote:after,
q:before,
q:after {
  content: '';
  content: none;
}

a {
  font-size: 100%;
  margin: 0;
  padding: 0;
  vertical-align: baseline;
  background: transparent;
}

ins {
  text-decoration: none;
  color: #000;
  background-color: #ff9;
}

mark {
  font-weight: bold;
  font-style: italic;
  color: #000;
  background-color: #ff9;
}

del {
  text-decoration: line-through;
}

abbr[title],
dfn[title] {
  cursor: help;
  border-bottom: 1px dotted;
}

table {
  border-spacing: 0;
  border-collapse: collapse;
}

hr {
  display: block;
  height: 1px;
  margin: 1em 0;
  padding: 0;
  border: 0;
  border-top: 1px solid #ccc;
}


/*サイト全体の基準となるCSS*/
html {
  font-size: 16px;
}

body {
  /*フォントの指定*/
  font-family: 'メイリオ', 'Meiryo', 'ヒラギノ角ゴ Pro', 'Hiragino Kaku Gothic Pro', 'Noto Sans Japanese', Osaka, 'MS Pゴシック', 'MS PGothic', sans-serif;
  /*行間の指定*/
  line-height: 1.4;
  margin: 0;
  padding: 0;
  /*サイトのデフォルトとなる文字の色を指定*/
  color: #333;
}

/*見出しを全て太字で表示 + 文字色を黒に*/
h1, h2, h3, h4, h5, h6 {
  font-weight: bold;
  color: #000;
}

img {
  max-width: 100%;
  height: auto;
}
functions.php
オリジナル関数や定義づけをします。
カスタム投稿やショートコードを作成するときに記述します。
<?php
//テーマのセットアップ
// HTML5でマークアップさせる
add_theme_support( 'html5', array( 'search-form', 'comment-form', 'comment-list', 'gallery', 'caption' ) );
// Feedのリンクを自動で生成する
add_theme_support( 'automatic-feed-links' );
//アイキャッチ画像を使用する設定
add_theme_support( 'post-thumbnails' );
header.php
各ページのヘッダー部分になります。
使用される箇所はindex.phpとsingle.phpです。
bodyタグの上までを記述します。
<!DOCTYPE html><!--htmlで書かれていることを宣言-->
<html lang="ja"><!--日本語のサイトであることを指定-->
<head>
<meta charset="utf-8"><!--エンコードがUTF-8であることを指定-->
<meta name="viewport" content="width=device-width, initial-scale=1.0 "><!--viewportの設定-->
<link rel="stylesheet" href="<?php echo get_stylesheet_uri(); ?>"><!--スタイルシートの呼び出し-->
<link rel="stylesheet" href="https://use.fontawesome.com/releases/v5.0.13/css/all.css" integrity="sha384-DNOHZ68U8hZfKXOrtjWvjxusGo9WQnrNx2sqG0tfsghAvtVlRW3tvkXWZh58N9jp" crossorigin="anonymous"><!--font-awesomeのスタイルシートの呼び出し-->

<?php wp_head(); ?><!--システム・プラグイン用-->
</head>
<body <?php body_class(); ?>>
<header>
  <div class="header-inner">

  </div><!--end header-inner-->
</header>
footer.php
各サイトのフッターになります。
headerと同じく、index.phpとsingle.phpで使用されます。
bodyタグより下を記述します。
<footer id="footer" class="footer">
  <div class="footer-inner">

  </div><!--end footer-inner-->
</footer>
<?php wp_footer(); ?><!--システム・プラグイン用-->
</body>
</html>
sidebar.php
サイドバーを表示するときに使用されるテンプレートになります。
ここでも、index.phpとsingle.phpで使用されます。
2カラム以上ある場合に表示されます。
<aside id="sidebar" class="sidebar">
  <div class="sidebar-inner">

  </div><!--end sidebar-inner-->
</aside>
index.php
トップページを表示する際に使用します。
ここで、上記で作成したヘッダーやフッターなどを呼び出すことになります。
<?php get_header(); ?>
<div class="container">
  <div class="contents">

  </div><!--end contents-->
  <?php get_sidebar(); ?>
</div><!--end container-->
<?php get_footer(); ?>
single.php
投稿ページのテンプレートです。
<?php get_header(); ?>
<div class="container">
  <div class="contents">

  </div><!--end contents-->
  <?php get_sidebar(); ?>
</div><!--end container-->
<?php get_footer(); ?>
page.php
なくても良いですが、作成すると固定ページを作成するときに使用されるテンプレートです。
<?php get_header(); ?>
<?php if (have_posts()):
              while (have_posts()) :
                 the_post();
                 the_content();
              endwhile;
           endif; ?>;
<?php get_footer(); ?>
404.php
存在しないURLにアクセスした場合に表示するテンプレートです。
<?php get_header(); ?>
記事が見つかりません。
<?php get_footer(); ?>
シンプルな自作テンプレートであれば、これで完了です。
さっそくアップロードしていきます。
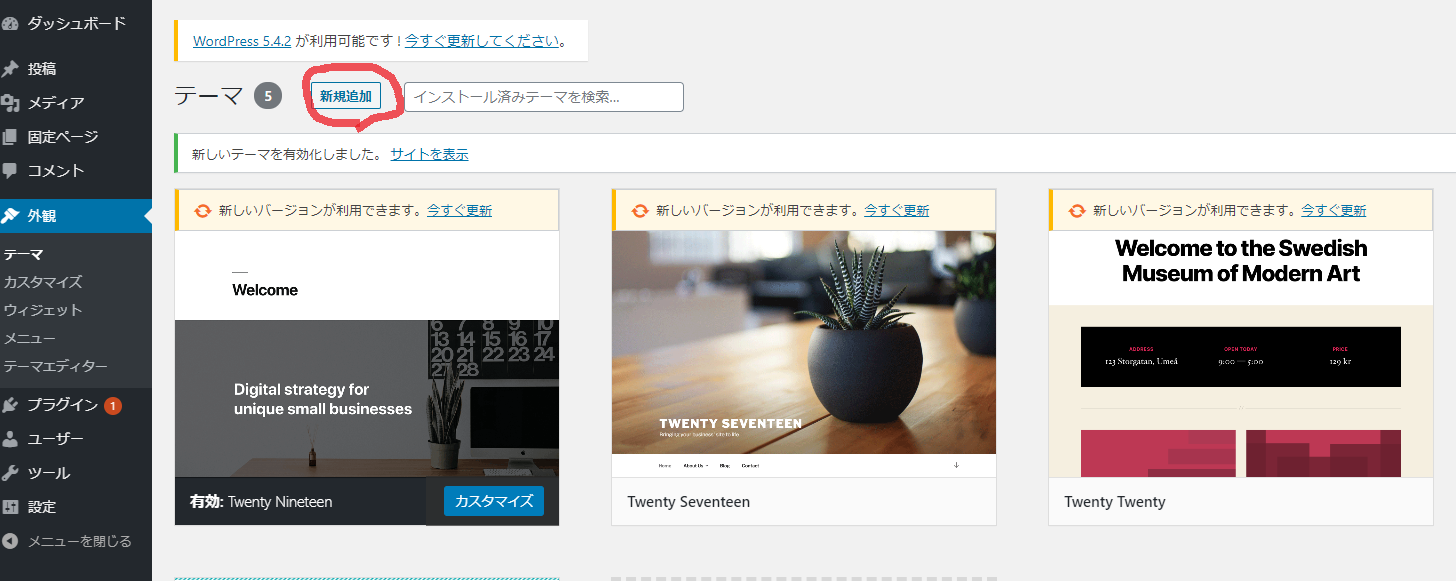
Wordpressにアップロード
まずは、作成したファイルをフォルダに格納しZip形式に圧縮します。
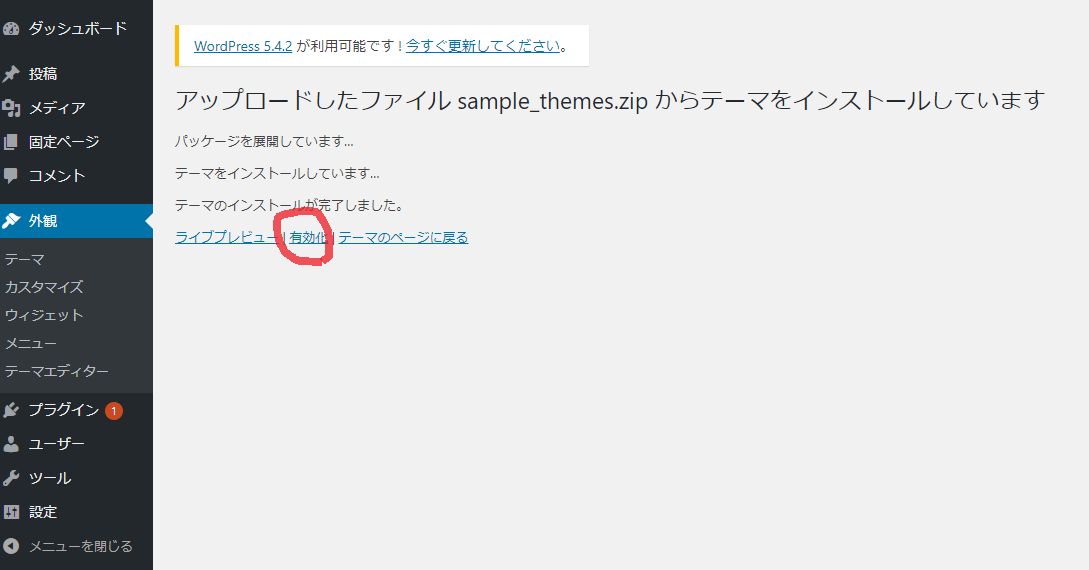
Wordpressの管理画面にログインして「新規追加」ボタンからテーマをアップロードしていきます。
アップロードが完了したら「有効化」します。
よし出来た!と思ってサイトを表示するも。。。まっしろ。
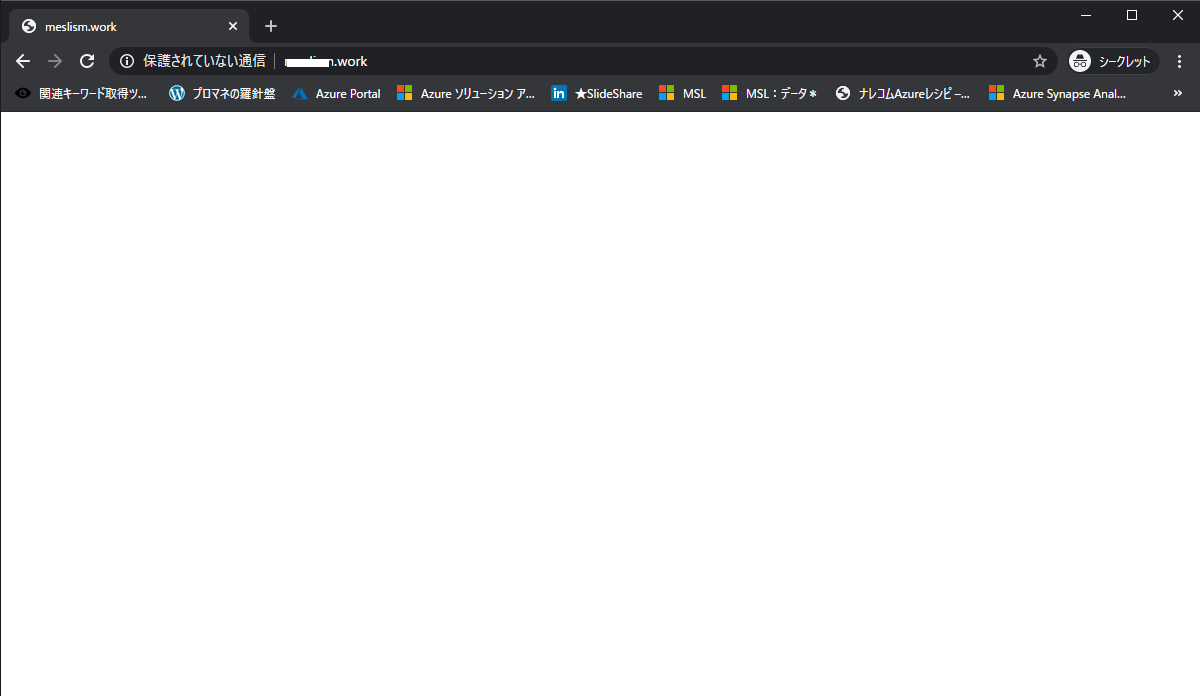
よく考えると当然ですね。要素が何もないから何も表示するものがないだけです。
このあとの作業としては下記があります。
- サイトレイアウトの決定して骨組みの調整
- ヘッダーの編集
- サイドバーの編集
- フッターの編集
- コンテンツ部分の編集
- 投稿ページの編集
- メタ情報や細かな調整
今回はここまでとさせていただきます。
また後日、続きを投稿できればと思います。