今回は、storyboardの使います。既存のプロジェクトでは、すべてxibを使って実装していましたが、
いい機会なので、storyboardを使うことにします。
結構凝った画面遷移を実現するため、すべてをstroyboardで実現するのは無理があるので、
1画面、1storyboardで実装していきます。
この方法、共同開発の場合に画面ごとに担当すれば、
storyboardのコンフリクトを防げるため、一石二鳥です。
storyboardの新規作成
まずは、storyboardを新規作成します。
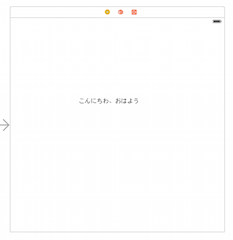
ここに、ViewControllerをドラックアンドドロップします。
テストように、UILabelを1つ追加してみました。
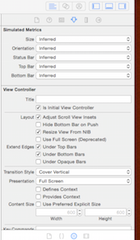
で、ここで重要なのが、 is initial view controller です。
これをつけることで、このviewControllerがstoryboardの初期のviewだよって教えてあげます。
これをつけると、viewControllerの右に矢印が付いたのがわかるとおもいます。
実装
実装は簡単でした。まだ、引数の引き渡しなどはなにも行っていません。
遷移したいviewに、
var story = UIStoryboard(name: "HogeViewController", bundle:nil);
let view:AnyObject = story.instantiateInitialViewController();
self.presentViewController(view as UIViewController, animated: true, completion: nil)
HogeViewControllerというのは、ストーリーボードのファイル名です。
ちょっとはまったのが、
story.instantiateInitialViewController();がAnyObjectという方で返してきます。
これを、presentViewControllerの第一引数に渡さないといけないのですが、
第一引数の方はもちろん、UIViewControllerです。
なので、キャストしてあげました。
もっといいやり方をご存知でしたら、教えてください。
実行
無事表示されました☆:.。. o(≧▽≦)o .。.:☆

