はじめに
ネットワークのテストで検証用のプロキシサーバーが必要になり、Mac上で構築した際の備忘録用の作業ログになります。と言いましても、基本的にはここを参考にしてます。ただ、環境などが若干異なる影響か、異なる内容もあります。
作業ログ
1. Terminalを立ち上げて、BrewでSquidをインストールする。
% brew install squid
2. Squidのバージョン確認(入れる時に表示されるが。。)
% brew info squid
==> squid: stable 6.10 (bottled), HEAD
(略)
3. Squidを起動
% brew services run squid
==> Successfully ran `squid` (label: homebrew.mxcl.squid)
4. 動作確認(Basic認証無)
Squidはデフォルトでは3128で動作するらしい。
Curlで以下を入力して応答が来るか試す。
(何となくGoogle検索に繋いだが、別になんでも良い。)
・Squid起動時
% curl https://www.google.com -x http://localhost:3128
<!doctype html><html itemscope="" itemtype="http://schema.org/WebPage" lang="en">
(という感じで想定のHTMLフォーマット返ってくる)
・参考までにSquid未起動時
% curl https://www.google.com -x http://localhost:3128
curl: (7) Failed to connect to localhost port 3128 after 0 ms: Couldn't connect to server
5. 設定ファイルの存在確認
Brewインストールフォルダ先の/etc/の下にsquid.confファイルがあるらしい。
それを確認する。
% brew --prefix
/opt/homebrew
% ls /opt/homebrew/etc/squid.conf
/opt/homebrew/etc/squid.conf
% cat /opt/homebrew/etc/squid.conf
#
# Recommended minimum configuration:
#

# Example rule allowing access from your local networks.
# Adapt to list your (internal) IP networks from where browsing
# should be allowe
6. htpasswdファイルの作成
Basic認証用のパスワードファイルを作る。
とりあえず/opt/homebrew/etc、の下にsquidフォルダを切ってそこに作成する。
% mkdir /opt/homebrew/etc/squid
% htpasswd -c /opt/homebrew/etc/squid/.htpasswd [ユーザー名]
New password:
Re-type new password:
Adding password for user [ユーザー名]
# 以後、ユーザを追加したい場合、-cオプションを取って同様に実行する
% htpasswd /opt/homebrew/etc/squid/.htpasswd [ユーザー名]
(略)
適切に動作するかを下記で確認する。OKが出ればよい。
設定が間違っていたらERRと表示されます。
% % /opt/homebrew/opt/squid/libexec/basic_ncsa_auth /opt/homebrew/etc/squid/.htpasswd
[ユーザ名] [パスワード]
OK
7. squid.confファイルの編集
Basic認証が動くように、先頭のコメント直後に次を記載する。
(パスは環境によって異なる可能性があるので、調べてから入力のこと)
% vi squid.conf
#
# Recommended minimum configuration:
#

#Basic Auth
auth_param basic program /opt/homebrew/opt/squid/libexec/basic_ncsa_auth /opt/homebrew/etc/squid/.htpasswd
auth_param basic children 5 startup=5 idle=1
auth_param basic realm Squid proxy-caching web server
auth_param basic credentialsttl 2 hours

# Define an ACL for authenticated users
acl authenticated_users proxy_auth REQUIRED

# Allow authenticated users
http_access allow authenticated_users
(略)
8. squidのサービスを再起動する
Basic認証が動くように、Squidを再起動する
% brew services restart squid
Stopping `squid`... (might take a while)
==> Successfully stopped `squid` (label: homebrew.mxcl.squid)
==> Successfully ran `squid` (label: homebrew.mxcl.squid)
9. 要Basic認証のプロキシサーバーの稼働確認
Basic認証が動くように、Squidを再起動する
・認証情報無しでcurlを実行
% curl https://www.google.com -x http://localhost:3128
<!DOCTYPE html PUBLIC "-//W3C//DTD HTML 4.01//EN" "http://www.w3.org/TR/html4/strict.dtd">
<html><head>
<meta type="copyright" content="Copyright (C) 1996-2023 The Squid Software Foundation and contributors">
<meta http-equiv="Content-Type" content="text/html; charset=utf-8">
<title>ERROR: Cache Access Denied</title>
(という感じでSquidからエラーが返ってくる)
・認証情報有りでcurlを実行
% curl https://www.google.com -x http://[ID]:[パスワード]@localhost:3128
<!DOCTYPE html PUBLIC "-//W3C//DTD HTML 4.01//EN" "http://www.w3.org/TR/html4/strict.dtd">
<html><head>
<meta type="copyright" content="Copyright (C) 1996-2023 The Squid Software Foundation and contributors">
<meta http-equiv="Content-Type" content="text/html; charset=utf-8">
<title>ERROR: Cache Access Denied</title>
(という感じで想定のHTMLフォーマット返ってくる)
とりあえず、挙動に問題無し。
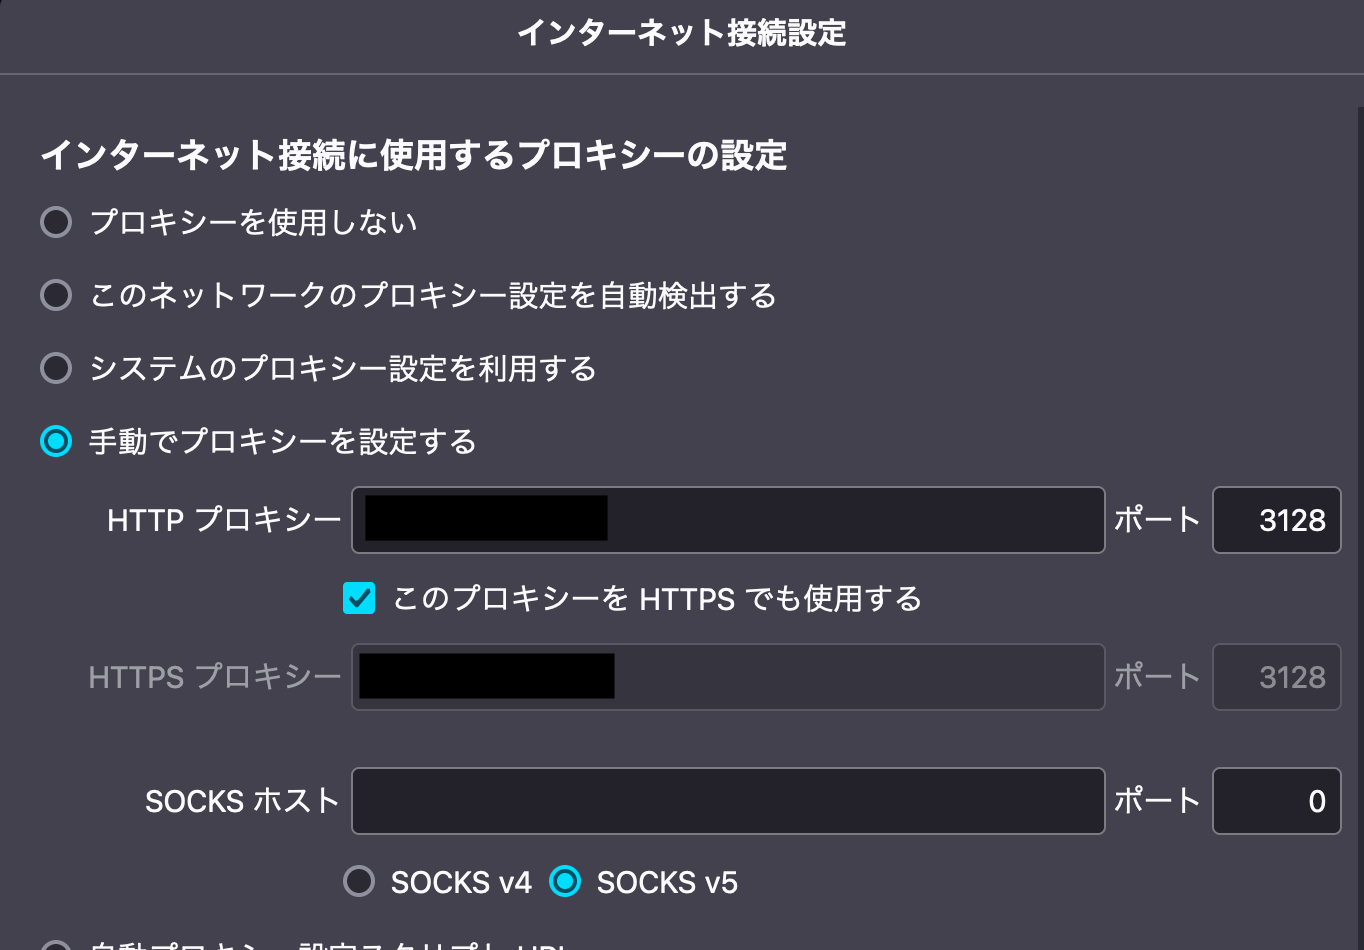
10. 同一ネットワーク上の他PCのFirefoxからのアクセスを確認する
Firefoxはブラウザ単位でProxyの設定ができるので採用。
アプリケーションメニュー→設定→ネットワーク設定の接続設定→手動設定
ここで、IPとポートを設定する。

接続時に認証を求められればOK!
11. ログの確認
/opt/homebrew/var/logsに
- cache.log
- access.log
があるので、tail -f などでアクセスしながら、ログが増えていることを念の為確認してOK。
さいごに
ただの対応記録のメモですが、もしも参考になりましたら幸いです
実行環境
- Mac OS Sonoma 14.5(23F79)
- Squid 6.10
- Firefox 128.0
参考文献
- MacにHomebrewでsquidをインストールし、Basic認証つきのプロキシサーバーを立てる
-
Squid公式ページ
(他にも見たのですが、失念。。思い出したら記載します。)