はじめに
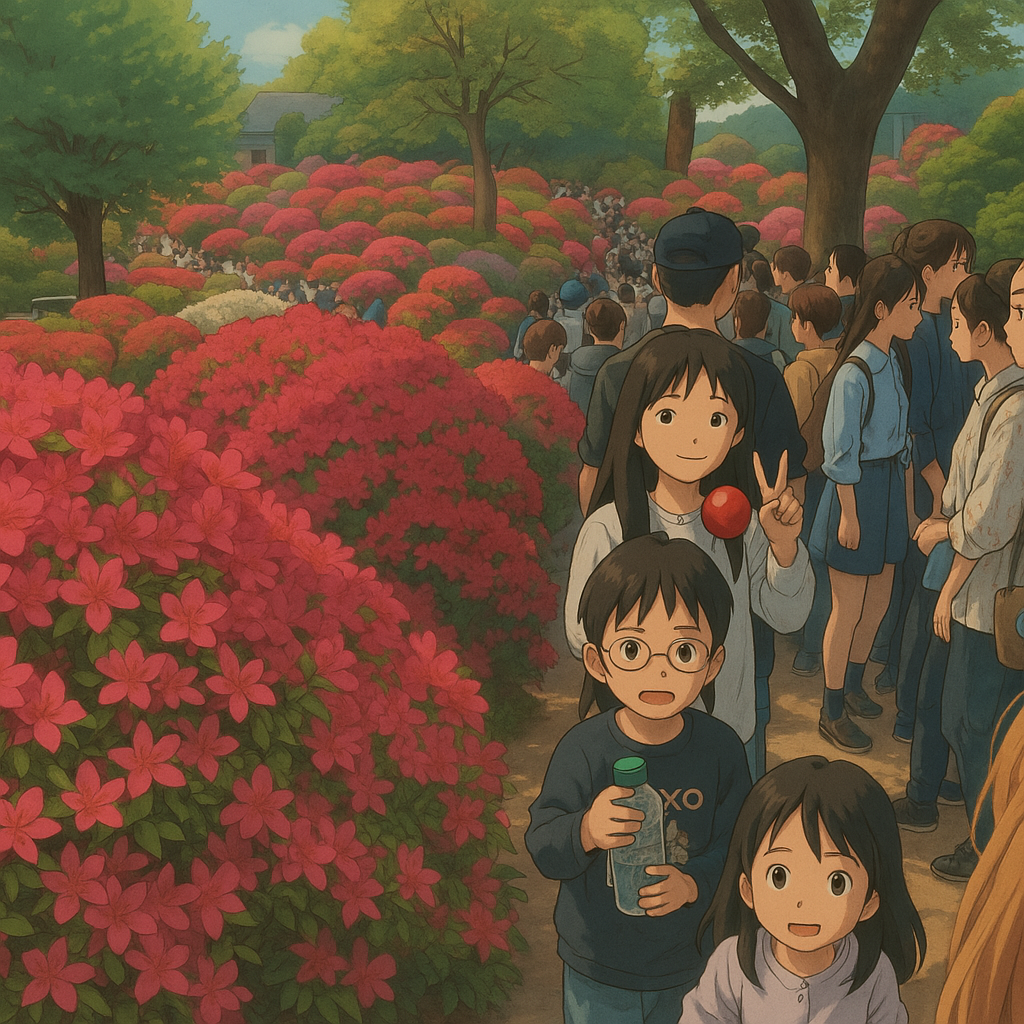
少し前にXをジ〇リ風画像で埋め尽くしていたOpenAIのgpt-image-1が遂にAzure OpenAI Serviceにパブリックプレビューでやってきました!
まだプライグラウンドでは対応しておらず、REST APIでしか実行できないためPython、PowerShell、Bashのサンプルコード作成しましたのでぜひ試してみてください!
gpt-image-1へのアクセスリクエスト
4/26時点ではgpt-image-1はフォームからアクセスリクエストをしないと使えません。私の場合リクエストしたら1日もせず承認されました。
Request access: gpt-image-1 limited access model application
gpt-image-1のモデル作成
4/26時点で対応しているリージョンは以下のため、該当リージョンにない場合はリソース作成から実施してください。
- West US 3 (Global Standard)
- UAE North (Global Standard)
アクセスリクエストが通っていれば、以下のようにモデルを作成できます。

ジ〇リ風にしたい写真を用意してgpt-image-1 API実行
ジ〇リ風にしたい写真を用意したら、以降にあるサンプルコードのReplace with your valuesの部分を任意の値に修正して実行してみてください。
注意が必要だった点としては、APIを実行した時のレスポンスが公式ドキュメントのOutputと実際のイメージが異なる点です。ドキュメントはすぐ修正されると思いますが、ご注意ください。
- 実際のレスポンス
{
    'created': 1745646127,
    'data': [
        {
            'b64_json': 'iVBOR ・・・ =='
        }
    ],
    'usage': {
        'input_tokens': 364,
        'input_tokens_details': {
            'image_tokens': 323,
            'text_tokens': 41
        },
        'output_tokens': 4160,
        'total_tokens': 4524
    }
}
Pythonコード
Python 3.12.10で動作確認
import requests
import base64

# Replace with your values
resource_name = "your-resource-name"
deployment_name = "your-deployment-name"
api_version = "2025-04-01-preview"
api_key = "your-api-key"
image_path = "path/to/your/input-image.png"
prompt = "ジ〇リ風の画像にしてください。"
output_image_file = "path/to/your/output-image.png"

# API endpoint
url = f"https://{resource_name}.openai.azure.com/openai/deployments/{deployment_name}/images/edits?api-version={api_version}"

# Request headers
headers = {
    "api-key": api_key
}

# Request body
data = {
    "prompt": prompt,
    "model": "gpt-image-1",
    "size": "1024x1024",
    "n": 1,
    "quality": "high"
}

# Create the multipart/form-data payload
files = {
    'image': open(image_path, 'rb')  # 画像ファイルを直接送信
}

# Send POST request
response = requests.post(url, headers=headers, data=data, files=files)

# Check response status and parse the result
if response.status_code == 200:
    result = response.json()
    print("Image edited successfully!")

    # Extract and decode base64 image data
    if "data" in result and len(result["data"]) > 0 and "b64_json" in result["data"][0]:
        b64_image = result["data"][0]["b64_json"]
        image_data = base64.b64decode(b64_image)

        # Save the decoded image data to a file
        with open(output_image_file, "wb") as img_file:
            img_file.write(image_data)
        print(f"Image saved as {output_image_file}")
    else:
        print("Base64 image data not found in response.")
else:
    print(f"Failed to edit image. Status code: {response.status_code}")
    print("Response:", response.text)
PowerShell
PowerShell 7.4.7で動作確認
# Replace with your values
$resource_name = "your-resource-name"
$deployment_name = "your-deployment-name"
$api_version = "2025-04-01-preview"
$api_key = "your-api-key"
$image_path = "path/to/your/input-image.jpg"
$prompt = "ジ◯リ風の画像にしてください。"
$output_image_file = "path/to/your/output-image.jpg"

# API endpoint
$url = "https://$resource_name.openai.azure.com/openai/deployments/$deployment_name/images/edits?api-version=$api_version"

# Create the multipart/form-data payload
$form = [System.Net.Http.MultipartFormDataContent]::new()
$form.Add([System.Net.Http.StringContent]::new($prompt), "prompt")
$form.Add([System.Net.Http.StringContent]::new("gpt-image-1"), "model")
$form.Add([System.Net.Http.StringContent]::new("1024x1024"), "size")
$form.Add([System.Net.Http.StringContent]::new("1"), "n")
$form.Add([System.Net.Http.StringContent]::new("high"), "quality")
$form.Add([System.Net.Http.ByteArrayContent]::new([System.IO.File]::ReadAllBytes($image_path)), "image", [System.IO.Path]::GetFileName($image_path))

# Create HttpClient and set headers
$httpClient = [System.Net.Http.HttpClient]::new()
$httpClient.DefaultRequestHeaders.Add("api-key", $api_key)

# Send POST request
$response = $httpClient.PostAsync($url, $form).Result

# Check response status and parse the result
if ($response.StatusCode -eq [System.Net.HttpStatusCode]::OK) {
    Write-Host "Image edited successfully!"
    $result = $response.Content.ReadAsStringAsync().Result | ConvertFrom-Json

    # Extract and decode base64 image data
    if ($result.data -and $result.data.Count -gt 0 -and $result.data[0].b64_json) {
        $b64_image = $result.data[0].b64_json
        $image_data = [System.Convert]::FromBase64String($b64_image)

        # Save the decoded image data to a file
        [System.IO.File]::WriteAllBytes($output_image_file, $image_data)
        Write-Host "Image saved as $output_image_file"
    } else {
        Write-Host "Base64 image data not found in response."
    }
} else {
    Write-Host "Failed to edit image. Status code: $($response.StatusCode)"
    Write-Host "Response: $($response.Content.ReadAsStringAsync().Result)"
}

# Clean up
$httpClient.Dispose()
$form.Dispose()
Bash
Ubuntu 22.04.3 LTSで動作確認
#!/bin/bash

# Replace with your values
resource_name="your-resource-name"
deployment_name="your-deployment-name"
api_version="2025-04-01-preview"
api_key="your-api-key"
image_path="path/to/your/input-image.jpg"
prompt="ジ〇リ風の画像にしてください。"
output_image_file="path/to/your/output-image.jpg"

# API endpoint
url="https://${resource_name}.openai.azure.com/openai/deployments/${deployment_name}/images/edits?api-version=${api_version}"

# Create the multipart/form-data payload and send POST request
response=$(curl -s -X POST "$url" \
  -H "api-key: $api_key" \
  -F "prompt=$prompt" \
  -F "model=gpt-image-1" \
  -F "size=1024x1024" \
  -F "n=1" \
  -F "quality=high" \
  -F "image=@$image_path")

# Check response status
status_code=$(echo "$response" | jq -r '.status_code')
if [[ $status_code -eq 200 ]]; then
  echo "Image edited successfully!"

  # Extract and decode base64 image data
  b64_image=$(echo "$response" | jq -r '.data[0].b64_json')
  if [[ -n $b64_image ]]; then
    echo "$b64_image" | base64 --decode > "$output_image_file"
    echo "Image saved as $output_image_file"
  else
    echo "Base64 image data not found in response."
  fi
else
  echo "Failed to edit image. Status code: $status_code"
  echo "Response: $response"
fi
まとめ
各コードを実行したらoutput_image_fileで指定した先に画像が生成されます。ぜひ皆様も試してみてください!
(👇の画像は先週行ったつつじ祭りの写真を基にせい)
