2
0

Delete article

Deleted articles cannot be recovered.

Draft of this article would be also deleted.

Are you sure you want to delete this article?

More than 3 years have passed since last update.

【github】空のリポジトリを作ろう 初学者用

Last updated at Posted at 2020-01-21

#githubって?
githubはこちら
ここでは説明しないので、各自調べましょう(出だしから投げやり)

###この記事の前提

  • githubへのアカウント登録が終わっていること

では、この記事の目的である空のリポジトリを作っていきましょう

#githubで空のリポジトリを作ろう

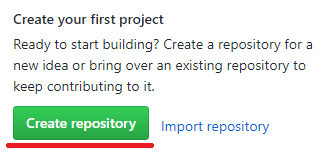
  1. まずはgithubホームページからサインインして、最初のページの左上に下記のようなボタンがあるのでクリック(リポジトリ作成開始)
create repository01.png
create repository00.png

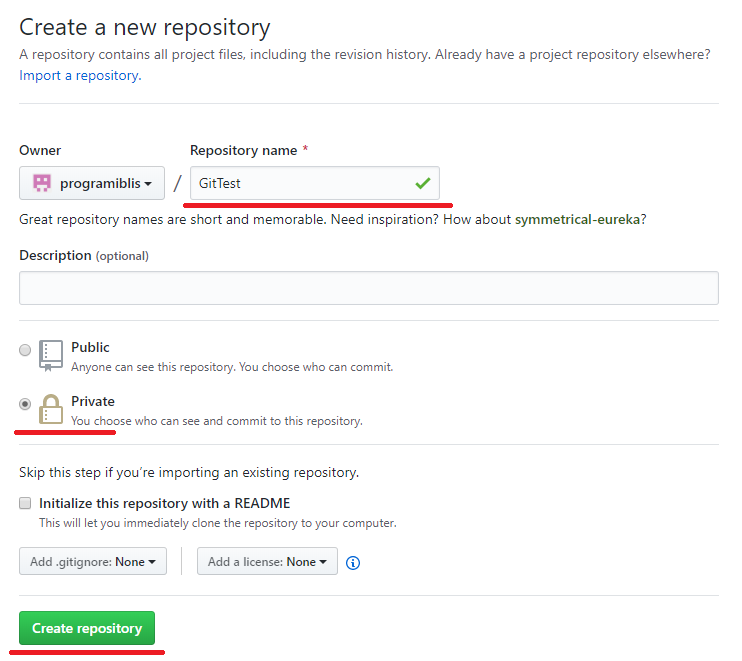
  1. Repository nameに「GitTest」と入力(リポジトリの名前を決める、好きな名前でよい)
  2. Privateにチェックを入れ、非公開設定で作成する(公開したい場合は後から変更できるよ)
  3. Create repositoryと書かれた緑色のボタンを押す
create repository02.png

  1. create a new fileをクリック(新しいファイルを作って始めようと言われています)
create repository03.png

  1. 下線部に「test」と入力(好きな名前でよい、すぐに消します)
create repository04.png

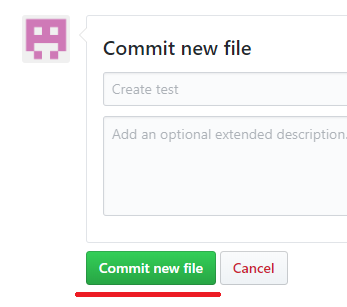
  1. 下のほうにあるCommit new fileをクリック
  • (コミットはざっくり言うと保存するということで、ゲームでいうセーブ的なやつ)
create repository05.png

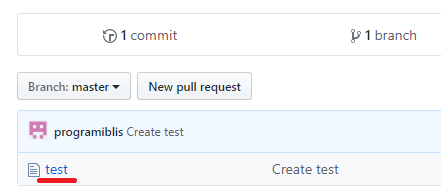
  1. 作ったファイル名をクリック
create repository06.png

  1. ゴミ箱マークをクリック
create repository07.png

  1. 下のほうにあるCommit changesをクリック(ここでは変更を保存する、つまり削除したことを保存する)
create repository08.png

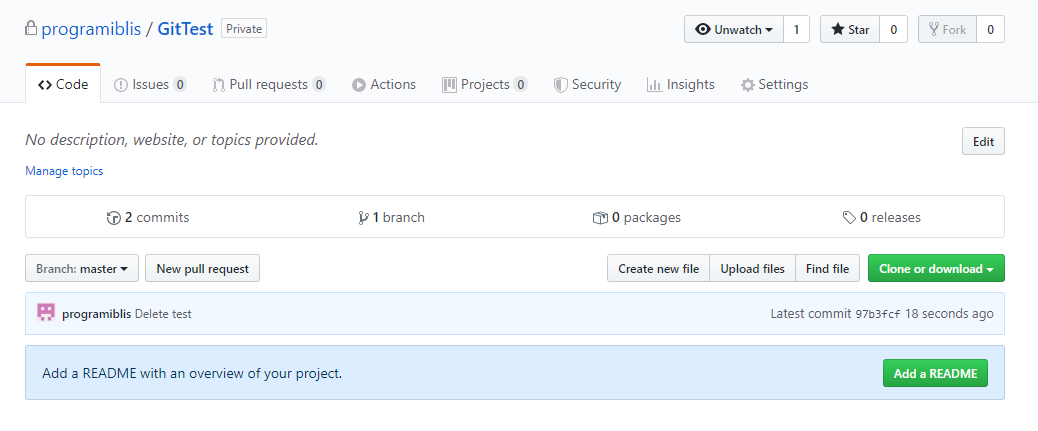
  • 空でまっさらなリポジトリが完成
create repository09.png

#おまけ
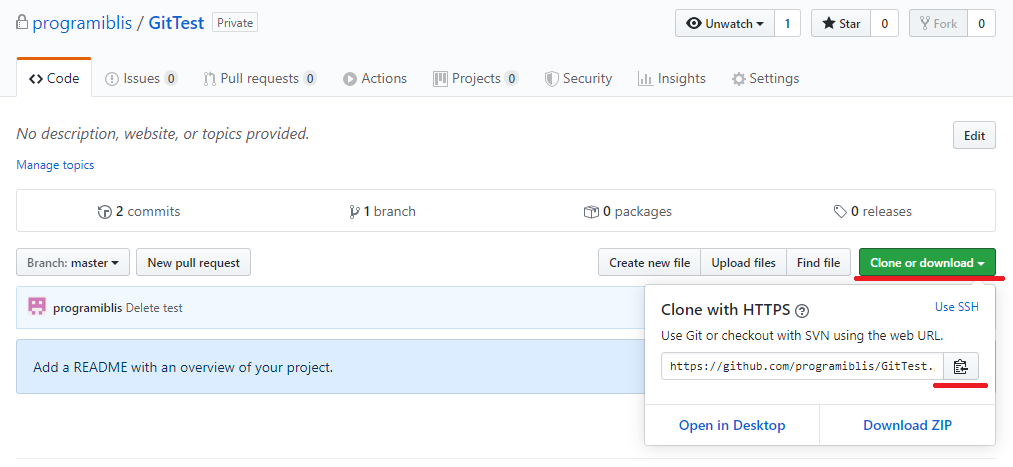
リポジトリのURLをコピーしよう

  1. Clone or downloadの緑色のボタンをクリック
  2. コピーのマークをクリックするとコピー完了
create repository10.png
2
0
0

Register as a new user and use Qiita more conveniently

  1. You get articles that match your needs
  2. You can efficiently read back useful information
  3. You can use dark theme
What you can do with signing up
2
0

Delete article

Deleted articles cannot be recovered.

Draft of this article would be also deleted.

Are you sure you want to delete this article?