はじめに
上記記事を見て、Vueで拡張機能を作ってみたい!と思い挑戦してみました。
Vueは初めて触りましたが、Nuxt2、3には少し触れた経験があります。
Chromeの拡張機能は作ったことはありませんが、userscriptは書いたことがあります。
本記事の前半ではcontent_scriptsをVueで書く上で迷った部分を説明します。
後半では、その他の事柄や感想について書いていきます。
上記記事を頼りに一通り動くところまで設定してから、content_scriptsを追加していきます。
ディレクトリ構成とmanifest.json
root/
    src/
        background/
        content/
            components/
                otherComponent.vue
            content.ts
            content.vue
        popup/
        scripts/
        types/
content_scripts: [
    {
      matches: ['https://example.com/*'],
      js: ['src/content/content.ts'],
    },
  ],
注意
jsやservice_workerでは拡張子.tsまで含めて指定します。
拡張子無しでも動いているように見えましたが、HMRが効きませんでした。
content_scriptsでvueを差し込む
import { createApp } from "vue";
import Content from "./content.vue";
import "../assets/tailwind.css";
const root = document.createElement("div");
document.body.prepend(root); //なくてもいい?
createApp(Content).mount(root);
content.vueでhtmlを追加しない場合は、documentにrootを追加する必要はなさそうです。
ただし、content.vueにtemplateの記述がないとエラーが出ます。
これでメインの処理をcontent.vueのscriptに記述できるようになりました
content.vueでトップレベルawaitを使うときはSuspenseで囲む必要がある
<script setup lang="ts>
const sleep = (ms = 1000) => new Promise((resolve) => setTimeout(resolve, ms));
await sleep();
console.log('hi')
</script>
<template>
  <div>content</div>
</template>
上記のようにトップレベルでawaitを使うと以下のエラーが出ます。
[Vue warn]: Component <Anonymous>: setup function returned a promise, but no <Suspense>
 boundary was found in the parent component tree. A component with async setup() must be
 nested in a <Suspense> in order to be rendered. at <Content>
挙動を見てみるとscriptは最後の行まで実行されていますが、マウントが実行されていません。
awaitを使うとpromiseを返すコンポーネントになるので、<Suspense>で囲む必要があるようです。
方法①dummyを経由してSuspenseで囲む
エラーを回避するために以下のようにします。
content.tsを変更
content_provide.vueを作成
import { createApp } from "vue";
import ContentProvide from "./content_provide.vue";
import "../assets/tailwind.css";
const root = document.createElement("div");
document.body.prepend(root);
createApp(ContentProvide).mount(root);
<script setup lang="ts">
import Content from "./content.vue";
</script>
<template>
  <Suspense>
    <template #default><Content /></template>
    <template #fallback> ...loading</template>
  </Suspense>
</template>
これでscriptのトップレベルでawaitを使ってもエラーが出なくなりました。
方法②createAppで直接Suspenseで囲む(未解決)
以下のようにすれば、とりあえずSuspenseで囲むことはできます。
createApp({
  render: () => h(Suspense, () => h(Content)),
}).mount(root);
しかし、上記①の#fallbackの部分の指定方法がわかりませんでした。
何も指定していなくても動きますが、awaitの待ち時間は何も表示されません。
今回はごく短時間の待ち時間しか発生しないと思うので、この方法で行くことにしました。
そもそもSuspenseはまだ非推奨?
<Suspense> is an experimental feature and its API will likely change.
らしいので使わない選択肢も考えたほうがいいようです。
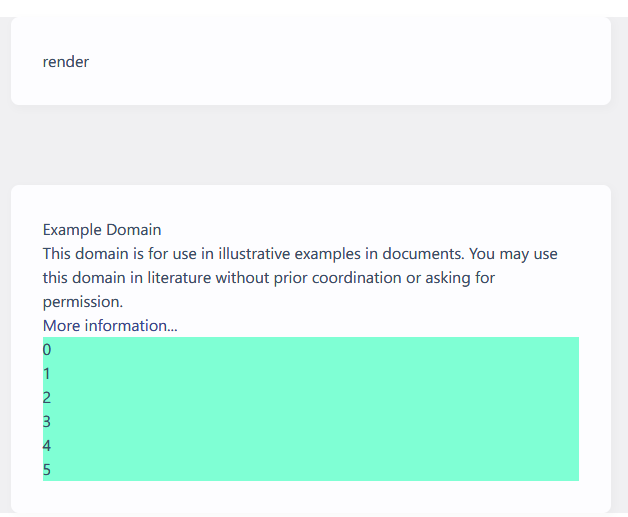
親子関係にない場所にコンポーネントを差し込む
親子関係にない場所にvueコンポーネントを生やしたい場合は以下のようにします。
<script setup lang="ts">
import { createApp, h } from 'vue'
import OtherComponent from './components/OtherComponent.vue'
const renderOther = () => {
  const target = document.querySelector('body > div:nth-child(2)')
  const root = document.createElement('p')
  root.id = 'other'
  target?.append(root)
  createApp({
    render: () => h(OtherComponent),
  }).mount(root)
}
</script>
<template>
  <button @click="renderOther">render</button>
</template>
これでボタンをクリックする度にOtherComponentがどんどん増えていくと思います。
createAppでpropsを渡す
渡したいpropsがある場合は以下のようにします。
props, emitsの理解が浅いためemits関連の復習が多く入ってます。
let counter = 0
const renderOther = () => {
  const target = document.querySelector('body > div:nth-child(2)')
  const root = document.createElement('p')
  root.id = 'other'
  target?.append(root)
  createApp({
    render: () => h(OtherComponent, { counter: counter }),
  }).mount(root)
  counter++
}
<script setup lang="ts">
interface Props {
  counter: number
}
const props = defineProps<Props>()
</script>
<template>
  <p>{{ props.counter }}</p>
</template>
これで押す度に増えるカウンターを表示できるようになりました。
今回は素の変数をそのまま渡しているので押す度にカウンターが1ずつ増えます、一度描画したコンポーネントの表示は変わりません。
propsとして渡すcounterをrefやreactiveで定義すれば全部のカウンターの表示を合わせることもできます。

1回だけレンダリングする
const renderOther = () => {
  let root = document.querySelector('#other-root')
  if (!root) {
    const target = document.querySelector('body > div:nth-child(2)')
    root = document.createElement('p')
    root.id = 'other-root'
    target?.append(root)
    createApp({
      render: () => h(OtherComponent, { counter: state.counter }),
    }).mount(root)
  }
  state.counter++
}
1度しかマウントしないようにします。
OtherComponentからのemitを受け取る
export interface Status {
  stateA: boolean
  stateB: boolean
}
const status = ref<Status>({
  stateA: false,
  stateB: false,
})

const renderOther = () => {
  let root = document.querySelector('#other-root')
  if (!root) {
    const target = document.querySelector('body > div:nth-child(2)')
    root = document.createElement('p')
    root.id = 'other-root'
    target?.append(root)
    createApp({
      render: () =>
        h(OtherComponent, {
          status: status.value,
          onChange: (res) => {
            status.value = { ...res }
          },
        }),
    }).mount(root)
  }
}

//const handleChange = (res: Status) => {
//  status.value = { ...res }
//}
interface Props {
  status: Status
}
const props = defineProps<Props>()
interface Emits {
  (e: 'change', value: Status): void
}
const emits = defineEmits<Emits>()

const handleChange = (e: Event) => {
  if (!(e.target instanceof HTMLInputElement)) return
  if (e.target.id === 'stateA') {
    emits('change', { ...props.status, stateA: e.target.checked })
  }
  if (e.target.id === 'stateB') {
    emits('change', { ...props.status, stateB: e.target.checked })
  }
}
    <div class="form-control">
      <label class="label cursor-pointer">
        <span class="label-text">StateA </span>
        <input
          id="stateA"
          type="checkbox"
          :checked="status.stateA"
          @change="handleChange"
          class="checkbox"
        />
      </label>
    </div>
content→otherへは status: state.value で渡しています
other→contentは emits('change', status)を onChangeで受け取っています。
createAppの部分はrender: の記述方法がお得
createApp()の部分は以下のように書くこともできますがデメリットが大きいです
    //createApp({
    //  render: () =>
    //    h(OtherComponent, {
    //      status: status.value,
    //      onChange: (res) => {
    //        status.value = { ...res }
    //      },
    //    }),
    //}).mount(root)

    createApp(OtherComponent, {
      status: status.value,
      onChange: (res) => {
        status.value = { ...res }
      },
    }).mount(root)
render:で書くとdefineEmitsの内容でemitにintelliSenseが効きますし, (res)に型が付きます。
propに関してはどちらでもintelliSenseは効かないようでした、正しく入力した後は型が付きます。
テキストを渡してotherコンポーネントで変更する
const inputText = ref('')
~略~
        h(OtherComponent, {
          status: status.value,
          onChange: (res) => {
            status.value = { ...res }
          },
          text: inputText.value,
          'onUpdate:text': (event) => {
            inputText.value = event.target.value
          }
        }),
emitの名前にコロンが入っているのでonUpdate:textをカンマで囲わないといけなくなってます。
interface Emits {
  (e: 'change', value: Status): void
  (e: 'update:text', value: Event): void
}

<input type="text" :value="text" @input="(event) => emits('update:text', event)"/>
v-modelで書くといい感じにエラーが出ないんですが、同じように書けませんでした。
それならupdate:textも適当な名前に変えてカンマで囲わなくて済むようにしてもよさそう。
TailwindCSS/daisyUIを使う場合の注意
content_scriptsとpopupなど複数箇所でTailwindCSSを使う場合に、daisyUIのthemeが思わぬところで適用されてしまうことがありました。
daisyui: {
    themes: [
      {
        default: {},
      },
      'night',
      'winter',
    ],
},
上記のようにdaisyUIのthemesの1つ目を空にすることでデフォルト設定が無効になります。
defaultの部分は名前は何でも良いです。
HMR関連のよくわかっていない部分
HMRは快適ですが、変更が効かずに「あれ?」となることも多いです。
拡張をリロードしたり、viteの再起動をしたりして解決することもあります。
ついでに色々試してみた
今回は作成物が小規模だったこともあり。ついでに色々な知らないものに手を出してみることにしました。
eslint/prettier導入
JavaScriptの勉強をはじめたときには既にTS環境でしたが、lintは導入が難しく、strict:trueでコードも書けないために見送っていました。
今回eslintを入れてみましたが書いているコードがだいぶ読みやすくなった気がします!
イイ感じでした。
prettierは三項演算子のformatがイヤなことだけが欠点ですが、我慢してます。
pnpm導入
$ pnpm installが早い!
拡張機能を作り始めるときには、環境をコピペでインストールして始めるので速度が上がるのは嬉しいです。
これはいいぞーということで作成中の他のNuxt3のプログラムでも試してみましたが、そっちではJestのエラー、firebaseのdeployエラー回避のためにnode_modulesからアレコレしている部分が解決できないなどすんなり行かずに断念。
@extend-chrome/storage
拡張機能のstorage回りのコーディングがすごい楽になりました。
vue-i18n
ハローワールドすらできずに断念。
viteのバージョンを下げれば簡単そうですが、標準のi18nで足りるので見送りました。
pugとの決別(してない)
lintを導入しているところでeslint-plugin-tailwindcssというものもあったので試してみましたが、templateをpugにしていると効かなそう?
pugでなければ簡単に導入できたので、pugを離れるときが来たのかもしれない。と思いながら今回はそのままにしました。
checkboxのtrue-valueの指定方法がわからなかった
input(v-model="theme" type="checkbox" true-value="dark" false-value="light")
チェックボックスでtheme(lightまたはdark)を切り替えようとしていました。
上記のように書いたのですが、この部分は期待通りに動作するものの。TypeScriptのエラーが出ます。
型 'ThemeType' を型 'any[] | Set<any> | Booleanish | undefined' に割り当てることはできません。
runtime-dom.d.ts(646, 3): 予期された型は、型 'ElementAttrs<InputHTMLAttributes>' に対してここで宣言されたプロパティ 'checked' から取得されています
解決もできず、無視するとビルドも通らないため "light"|"dark"とbooleanを変換・再変換して回避しました。
reactで同じものを作った
勉強を兼ねてreactでも同じ動きをするプログラムを書いてみました、なんとか動きましたが参照する変数が古かったり、コードがやたら長くなってしまったり勉強不足すぎました。
終わりに
Chrome拡張をvueで書いてみて、導入が簡単で快適でした。
またプログラムが小規模だったこともあり、気になっていたものを導入してみるいい機会になりました。
作った拡張機能はChromeストアに申請もしてみたので、審査が終わったら続きを書くかもしれません。