GoogleMapSDKを使ってMapを表示してみました
基本的には公式の通りになります
SDKをいれる
Podfileに以下を書いてpod installを叩く
target 'hogehoge' do
    pod 'GoogleMaps'
    pod 'GooglePlaces'
end
地図を表示する
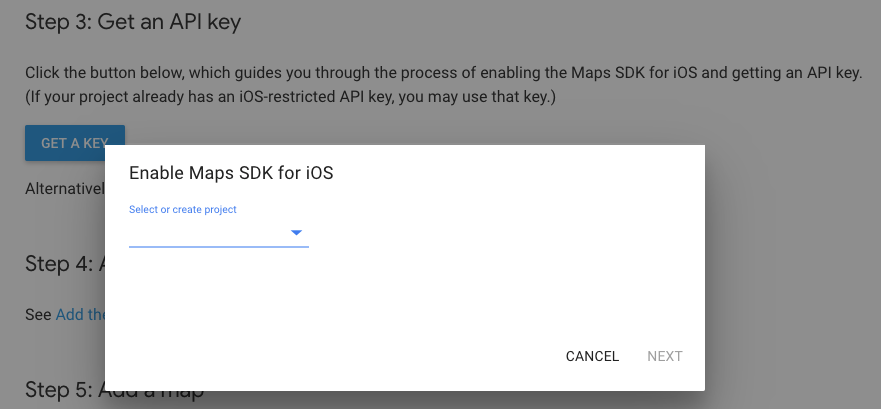
まずAPIKeyを公式のGet The APIKeyでプロジェクトを選択して取得します
APIkeyを取得したらAppdelegate.swit - application(_:didFinishLaunchingWithOptions:) メソッドでアプリに入れます
import GoogleMaps
import GooglePlaces

@UIApplicationMain
class AppDelegate: UIResponder, UIApplicationDelegate {

    var window: UIWindow?


    func application(_ application: UIApplication, didFinishLaunchingWithOptions launchOptions: [UIApplication.LaunchOptionsKey: Any]?) -> Bool {
        GMSServices.provideAPIKey("取得したAPIKeyを入れる")
        GMSPlacesClient.provideAPIKey("取得したAPIKeyを入れる")

        return true
    }
準備ができたのでここからMapを表示するための実装をしていきます
GMSCameraPositionインスタンスを緯度経度を指定し生成し、これを使ってGMSMapView インスタンスを生成します。
import GoogleMaps

class ViewController: UIViewController {

    override func viewDidLoad() {
        super.viewDidLoad()
        // Do any additional setup after loading the view.
    }

    override func loadView() {
        // マップに指定の緯度経度の場所を指定の倍率で表示するように指示
        let camera = GMSCameraPosition.camera(withLatitude: -33.86, longitude: 151.20, zoom: 10.0)

        // GMSMapViewインスタンスを生成
        let mapView = GMSMapView.map(withFrame: CGRect.zero, camera: camera)
        view = mapView
    }
}
ユーザーが地図上のGoogleロゴをクリックすると、Google Maps SDK for iOSによってブラウザ版のGoogleMapが開かれます
目標座標にピンをたてる
    override func loadView() {
        let camera = GMSCameraPosition.camera(withLatitude: -33.86, longitude: 151.20, zoom: 10.0)

        let mapView = GMSMapView.map(withFrame: CGRect.zero, camera: camera)
        view = mapView

        // 追加箇所
        // markerはピンの場所
        let marker = GMSMarker()
        marker.position = CLLocationCoordinate2D(latitude: -33.86, longitude: 151.20)
        marker.title = "Sydney"
        marker.snippet = "Australia"
        marker.map = mapView
    }
現在地を表示する
#認証リクエストのためにinfo.plistの設定
iOSアプリではユーザーのプライバシー情報を取得する場合、ユーザーから許可を得る必要があります
あらかじめinfo.plistのPrivacy - Location When In Use Usage Descriptionで(このアプリは位置情報を取得しますなど)位置情報を使用する旨を記載する必要があります
アプリがユーザーから得られる認証は下の3つ
authorizedAlways(常に許可する)
authorizedWhenInUse(使用中だけ許可する)
denied(許可しない)
今回は使用中だけ許可したいからinfo.plistのKeyにPrivacy - Location When In Use Usage Description、valueに適当に現在地を取得しますと設定した

#認証リクエストのためにコード側実装
コード側もCLLoacationManagerクラスのインスタンスメソッドrequestWhenInUseAuthorization()でリクエストを送る
- CLLocationManagerはiOS SDKで標準で用意されている位置情報関連のライブラリCoreLocationをインポートすることで使えるようになるはずだが、CoreLocation自体をインポートしなくてもGoogleMapsをインポートしたためか使えた
import GoogleMaps

class ViewController: UIViewController {
// GoogleMapをインポートしているためか、CoreLocationをインポートしなくてもCLLocationManagerオブジェクトを生成できる
    let locationManager = CLLocationManager() // ← NEW

    override func viewDidLoad() {
        super.viewDidLoad()

    }

    override func loadView() {
        (省略)
    }

    func setupLocationManager() {
         // ユーザーに対して位置情報を取得する許可をリクエストする      ← NEW
         locationManager.requestWhenInUseAuthorization()
    }
}
#位置情報取得の開始
ユーザから「アプリ使用中の位置情報取得」の許可が得られた場合に、位置情報を取得します
CLLocationManagerのプロパティのdistanceFilterに値を設定し、何メートル移動するごとに現在地を更新するか決めることができます
import GoogleMaps

class ViewController: UIViewController {
// GoogleMapをインポートしているためか、CoreLocationをインポートしなくてもCLLocationManagerオブジェクトを生成できる
    let locationManager = CLLocationManager()

    override func viewDidLoad() {
        super.viewDidLoad()
            setupLocationManager() ← NEW
    }

    override func loadView() {
        (省略)
    }

    func setupLocationManager() {
         // ユーザーに対して位置情報を取得する許可をリクエストする
         locationManager.requestWhenInUseAuthorization()
    }

    func setupLocationManager() {
        locationManager.requestWhenInUseAuthorization()
        // ↓NEW
        if .authorizedWhenInUse == CLLocationManager.authorizationStatus() {
            // 何メートル移動ごとに情報を取得するか。ここで設定した距離分移動したときに現在地を示すマーカーも移動する
            locationManager.distanceFilter = 1
            // 位置情報取得開始
            locationManager.startUpdatingLocation()
        }
    }
}
#プロトコル採用とデリゲートメソッド実装
CLLocationManagerDelegateを採用し、「アプリ使用中の位置情報取得」の許可が得られた場合にのみ、ViewControllerクラスがCLLocationManagerのデリゲート先になるようにする
import GoogleMaps

class ViewController: UIViewController {
// GoogleMapをインポートしているためか、CoreLocationをインポートしなくてもCLLocationManagerオブジェクトを生成できる
    let locationManager = CLLocationManager()

    override func viewDidLoad() {
        super.viewDidLoad()

    }

    override func loadView() {
        (省略)
    }

    func setupLocationManager() {
         // ユーザーに対して位置情報を取得する許可をリクエストする
         locationManager.requestWhenInUseAuthorization()
    }

    func setupLocationManager() {
        locationManager.requestWhenInUseAuthorization()
        if .authorizedWhenInUse == CLLocationManager.authorizationStatus() {
            // 何メートル移動ごとに情報を取得するか。ここで設定した距離分移動したときに現在地を示すマーカーも移動する
            locationManager.distanceFilter = 1
            // 位置情報取得開始
            locationManager.startUpdatingLocation()
        }
    }

    // 位置情報を取得・更新するたびに呼ばれる ← NEW
    func locationManager(_ manager: CLLocationManager, didUpdateLocations locations: [CLLocation]) {
        print(locations)
    }
}
コード全体
最後にコード全体を載せておしまい
import UIKit
import GoogleMaps

class ViewController: UIViewController, CLLocationManagerDelegate {

    let locationManager = CLLocationManager()

    override func viewDidLoad() {
        super.viewDidLoad()
        setupLocationManager()
    }

    override func loadView() {
        // マップに指定の緯度経度の場所を指定の倍率で表示するように指示
        let camera = GMSCameraPosition.camera(withLatitude: -33.86, longitude: 151.20, zoom: 10.0)

        // 指定のフレームとcameraPositionでmapviewをビルドして返す
        let mapView = GMSMapView.map(withFrame: CGRect.zero, camera: camera)
        mapView.isMyLocationEnabled = true
        view = mapView

        // markerはピンの場所
        let marker = GMSMarker()
        marker.position = CLLocationCoordinate2D(latitude: -33.86, longitude: 151.20)
        marker.title = "Sydney"
        marker.snippet = "Australia"
        marker.map = mapView
    }

    func setupLocationManager() {
        locationManager.requestWhenInUseAuthorization()

        // 「アプリ使用中の位置情報取得」の許可が得られた場合のみ、CLLocationManagerクラスのstartUpdatingLocation()を呼んで、位置情報の取得を開始する
        if .authorizedWhenInUse == CLLocationManager.authorizationStatus() {

            // 許可が得られた場合にViewControllerクラスがCLLoacationManagerのデリゲート先になるようにする
            locationManager.delegate = self
            // 何メートル移動ごとに情報を取得するか。ここで設定した距離分移動したときに現在地を示すマーカーも移動する
            locationManager.distanceFilter = 1
            // 位置情報取得開始
            locationManager.startUpdatingLocation()
        }
    }

    // 位置情報を取得・更新するたびに呼ばれる
    func locationManager(_ manager: CLLocationManager, didUpdateLocations locations: [CLLocation]) {
        let location = locations.first
        let latitude =  location?.coordinate.latitude
        let longitude = location?.coordinate.longitude

        print("latitude: \(latitude!)\n longitude: \(longitude!)")
    }
}
参照
https://developers.google.com/maps/documentation/ios-sdk/start
https://qiita.com/koogawa/items/adc2dd19015586bda39b
https://qiita.com/chino_tweet/items/db3a536234a43a3c31d9#%E3%83%93%E3%83%AB%E3%83%89
