AWS Cognitoを操れるようになったら、今度は生成されたIDトークン/アクセストークンを利活用してみます。
今回は例として4つを挙げました。
- Googleの Actions on Google のアカウントリンクに、AWS Cognitoで認証した結果のトークンをリンクさせる
- Amazonの Alexaスキル のアカウントリンクに、AWS Cognitoで認証した結果のトークンをリンクさせる
- AWS API Gateway で、AWS Cognitoで認証した結果のトークンがないと呼び出せないようにする
- Google Cloud Platform の Cloud Endpoint で、AWS Cognitoで認証した結果のトークンがないと呼び出せないようにする
Googleの Actions on Google のアカウントリンクに、AWS Cognitoで認証した結果のトークンをリンクさせる
Actions on Googleのアカウントリンクとは、Actions on GoogleすなわちGoogleアシスタントがインストールされたスマホから、対応アプリに話している人が誰なのかをきちんと認識させる機能です。それによって、Googleアシスタントに話している人に特化した応答を返せるようになります。
(参考)
https://developers.google.com/actions/identity/
アカウントリンク機能の宣言
アカウントリンク機能を使うことを宣言する場所は、Actions on Google コンソール のAccount linking にあります。
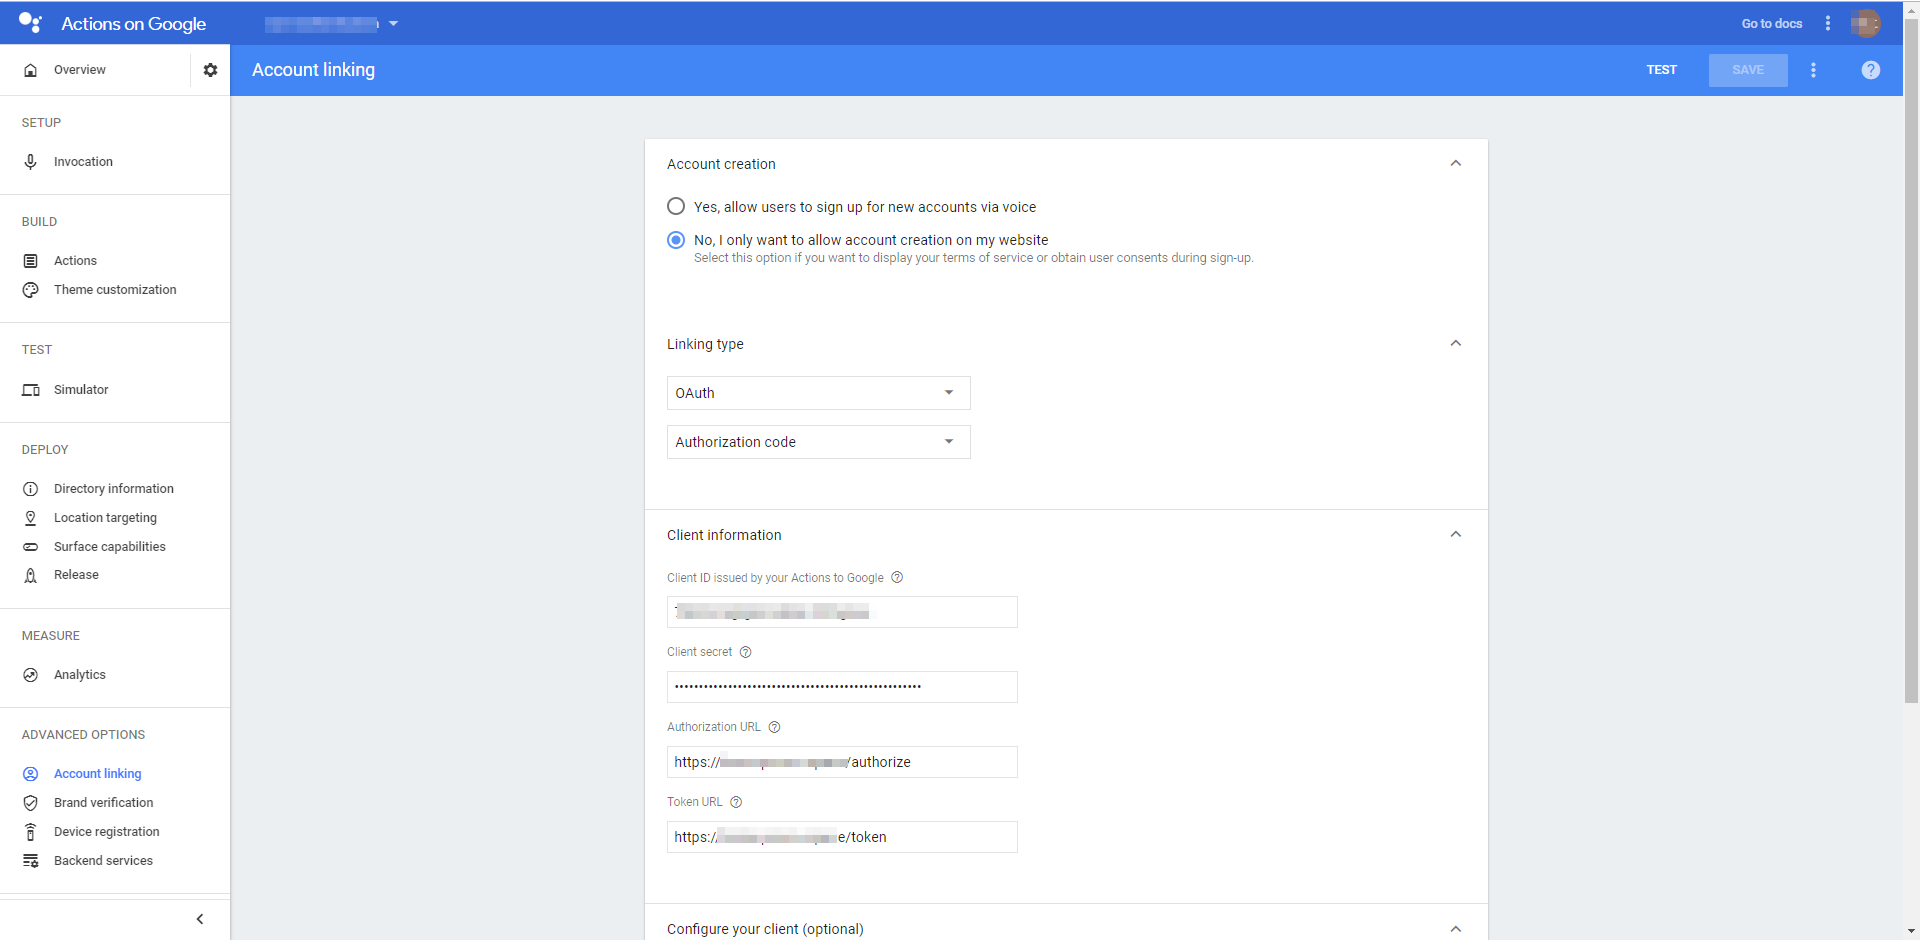
左側のナビゲータの、ADVANCED OPTIONS の Account linking のところです。
Account creation には、「No, I only want to allow account creation on my website」を選択します。
Linking Typeは、「OAuth」「Authorization code」を選択します。(セキュリティのことを考えて、なるべくImplicitは避けましょう)
Clinet information の Client ID issued by your Actions to Google には、AWS Cognito のアプリクライアントIDを指定します。同様に、Client secretには、アプリクライアントのシークレットを指定します。ここで指定するアプリクライアントとしては、許可されている OAuth フロー でAuthorization code grant が有効なアプリクライアントを選びます。
Authorization URL には、Cognitoが提供するエンドポイントのうちの認証エンドポイント(/oauth2/authorize) を指定します。
同様に、Token URLには、トークンエンドポイント(/oauth2/token)を指定します。
Configure your client(optional)のScopesには、お好みに応じて指定します。使いたいGo ogleのリソースを指定します。例えば、openidとemailを指定します。
Google to transmit clientID and secret via HTTP basic auth header にはチェックを入れます。
Testing instructions は何を指定すればよいか、わかりませんでした。何か適当に入れても動きます。
最後に、右上にある「SAVE」ボタンを押下します。
AWS Cognitoの方には、事前に、アプリクライアント設定のコールバックURLに以下を加えておきます。
https://oauth-redirect.googleusercontent.com/r/【プロジェクトID】
AWS Cognitoと認証した後にトークンを戻す先のURLを登録しておく必要があるためです。
これでアカウントリンクする準備ができました。
アカウントリンク開始応答の実装
それでは、アカウントリンクするように、応答を作成していきます。
今回想定する呼び出し関係は以下の通りです。
Googleアシスタント→Actions on Google→Dialogflow→AWS Lambda
フロントエンドはDialogflowを利用するので、Webhookを使ってバックエンドサーバ(Lambdaなど)に転送する設定にしておきます。
Dialogflowコンソール
https://console.dialogflow.com
AWS Lambdaの中で、アカウントリンクを開始する応答を作成します。
応答の作成には、Actions on Google SDKを利用しました。
$ npm install --save actions-on-google
(参考)
https://github.com/actions-on-google/actions-on-google-nodejs
以下では、「Signin」というインテントが来たら、アカウントリンクの処理を開始するようにしています。
const {SignIn} = require('actions-on-google');

app.intent('Signin', (conv) => {
    conv.ask(new SignIn('サインインします。'));
});
SignInをnewしたインスタンスを返すことで、クライアント側ではAuthorization Code Grantによる認証フローが開始されます。
認証した結果は、Signinedというインテントで受け取るようにします。
そのために、Dialogflowにおいて、SigninedインテントのEventsには、「actions_intent_SIGN_IN」 を指定しておく必要があります。

それによって、Authorization Code Grantによる認証が完了したとき、Signinedインテントが通知されるようになります。認証が成功したかどうかは、signin.statusで確認できます。conv.user.access.token にアクセストークンが保持されているため、その内容を調べたり、アクセストークンを使って他システムのリソースにアクセスしたりすることができます。
トークン解析に、jwt_decodedを使っています。
app.intent('Signined', (conv, params, signin) => {
    if (signin.status === 'OK') {
        const access_token = conv.user.access.token // possibly do something with access token
        var decoded = jwt_decode(access_token);
        console.log(decoded);
        conv.ask('サインイン成功。emailは' + decoded.email + 'です。');
    } else {
        conv.ask('認証できませんでした')
    }
});
また、リフレッシュトークンも保持してくれており、アクセストークンの有効期限が切れたら自動的にリフレッシュしてくれるそうです。
ちなみに、Actions on Googleでは、受け取ったトークンが、IDトークンかアクセストークンなのかは特に区別はしていないようです。
Amazonの Alexaスキル のアカウントリンクに、AWS Cognitoで認証した結果のトークンをリンクさせる
今度は、Alexaのアカウントリンクです。基本的には、Actions on Googleのアカウントリンクと同様の機能です。
アカウントリンク機能を宣言
alexa developer consoleのスキル一覧からリンクさせたいスキルを選択します。
左側のナビゲーションのアカウントリンクを選択します。

「ユーザーがアカウントや既存アカウントへのリンクを作成することを許可しますか? 」のチェックをOnにします。
「ユーザーがアカウントリンクなしでスキルを有効にすることを許可してください」のチェックはどちらでもよいですが、Onにしておきます。Onにすると、インテントごとに定義することができますが、Offにすると、スキルへのアクセスに必ずアカウントリンクが要求されます。
ページの下の方には、リダイレクト先のURL として3つのURLが付記されています。認証した後のトークンを返す先のURLです。ですので、これらのURLを、AWS Cognito のアプリクライアントの設定のコールバックURLに追加しておきます。
アカウントリンク要求応答の実装
応答の作成に、Alexa Skills Kit for Node.js ver.2 を利用しました。
$ npm install --save ask-sdk-model
$ npm install --save ask-sdk-core
const LaunchRequestHandler = {
  canHandle(handlerInput) {
    return handlerInput.requestEnvelope.request.type === 'LaunchRequest';
  },
  handle(handlerInput) {
    let accessToken = handlerInput.requestEnvelope.context.System.user.accessToken;
    if( accessToken === undefined ){
      return handlerInput.responseBuilder
            .withLinkAccountCard()
            .getResponse();
    }else{
        var decoded = jwt_decode(access_token);
        const speechText = 'こんにちは。emailは、' + decoded.email +'です。';
      return handlerInput.responseBuilder
        .speak(speechText)
        .reprompt(speechText)
        .withSimpleCard('Hello World', speechText)
        .getResponse();
    }
  },
};
トークン解析に、jwt_decodedを使っています。
ポイントは、「withLinkAccountCard()」の部分です。
このようにクライアントに返すと、スマホのAlexaアプリに、アカウントリンクが必要な旨のカードが表示されます。
利用者は、スキルを選択して、アカウントリンクを有効にするとAWS Cognitoのログイン画面が表示され、認証が完了すると、リンク完了状態になります。
再度、そのインテントにアクセスすると、handlerInput.requestEnvelope.context.System.user.accessToken にアクセストークンが保持されている状態となっているのがわかります。
AWS API Gateway で、AWS Cognitoで認証した結果のトークンがないと呼び出せないようにする
以前にも以下のような投稿をしましたが、その時は自サイトで発行したトークンを使っていました。今回は、他のサイトのトークンをAPI Gateway+Lambdaの呼び出し条件にします。
(参考)
[AWS Cognitoにサインインしないと見れないLambdaを作る]
(https://qiita.com/poruruba/items/86668c9c63844e1afd32)
他のサイトのトークンを扱うには、AWS API Gatewayのカスタムオーソライザを使います。
このとき、オーソライザのタイプとして、Lambdaを指定します。
詳細は。。。。
他のいろんな方が紹介されていますので、割愛(すみません)
Google Cloud Platform の Cloud Endpoint で、AWS Cognitoで認証した結果のトークンがないと呼び出せないようにする
みなさん、GCPのCloud Endpointを使っている方はどれくらいいるのでしょうか?
まだ発展途上なので、まだこれからですかね。
(参考)
https://cloud.google.com/endpoints/docs/openapi/get-started-compute-engine?hl=ja
Compute Engine VMインスタンスの作成
まずは、認証なしのRESTful呼び出しを受け付けるRESTful環境を構築します。
先に、RESTfulを受け付けるCompute Engine VMインスタンスを作成しておきます。
- OSイメージ:Debian 8
- ファイアウォール:HTTPトラフィックを許可する、HTTPSトラフィックを許可する
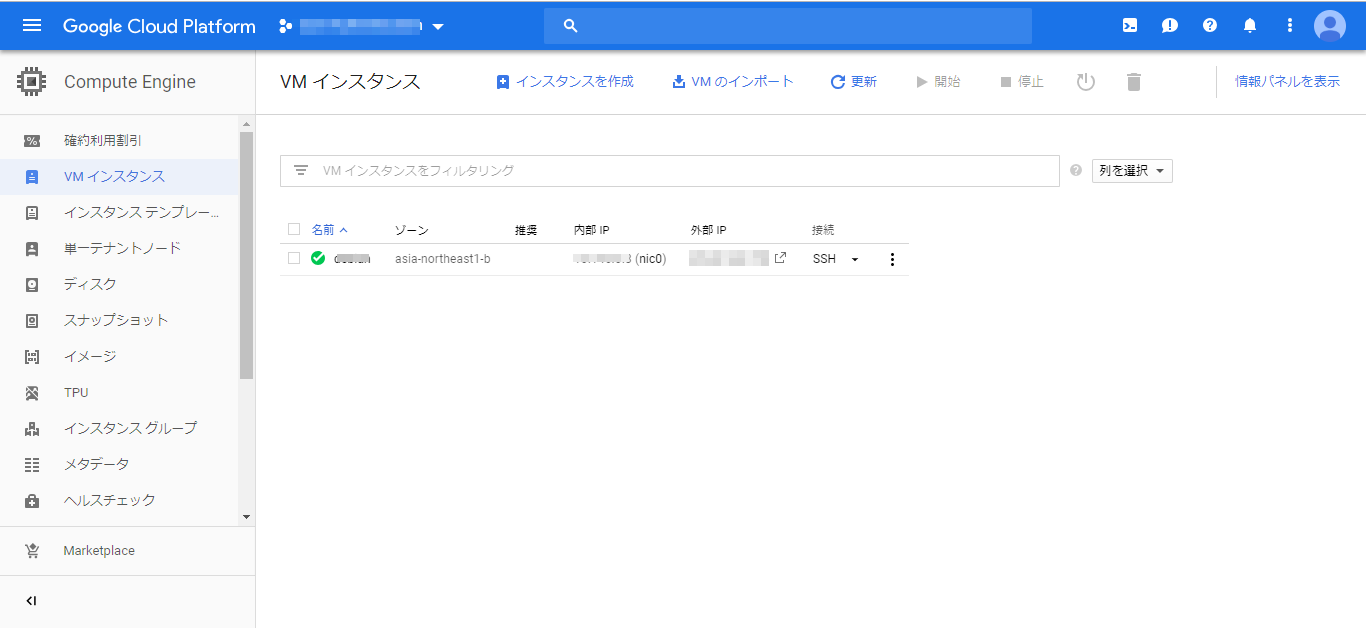
gcloud compute ssh debian
を実行してみて、Compute Engine VMにログインできることを確認します。TeraTermでもよいです。
このVMの外部IPは後で使うので覚えておきます。
Swagger定義ファイルの作成
先に、RESTful環境として接続を受け付けるURLの接頭辞(サービス名)を決めておきます。
今回は、「sample-api」とします。
では、実際にSwagger定義ファイルを作成します。
(参考)
[Swagger定義ファイルの書き方(超手抜き編)]
(https://qiita.com/poruruba/items/8b541ec730ca070b2bb0)
swagger: "2.0"
info:
  description: "A simple Google Cloud Endpoints API example."
  title: "Endpoints Example"
  version: "1.0.0"
host: "【サービス名】.endpoints.【プロジェクトID】.cloud.goog"
x-google-endpoints:
- name: "【サービス名】.endpoints.【プロジェクトID】.cloud.goog"
  target: "【Compute Engine VMの外部IPアドレス】"
# [END swagger]
consumes:
- "application/json"
produces:
- "application/json"
schemes:
# Uncomment the next line if you configure SSL for this API.
- "https"
- "http"

paths:
  "/echo":
    post:
      x-swagger-router-controller: echo
      operationId: "echo"
      security:
#      - jwtAuth: []
#      produces:
      - "application/json"
      responses:
        200:
          description: "Echo"
          schema:
            type: object
      parameters:
      - description: "Message to echo"
        in: body
        name: message
        required: true
        schema:
          type: object

definitions:
  Empty:
    type: "object"
    title: "Empty Schema"

securityDefinitions:
  # This section configures authentication using Google API Service Accounts
  # to sign a json web token. This is mostly used for server-to-server
  # communication.
  jwtAuth:
    authorizationUrl: ""
    flow: "implicit"
    type: "oauth2"
    # This must match the 'iss' field in the JWT.
    x-google-issuer: "https://cognito-idp.ap-northeast-1.amazonaws.com/【CognitoのプールID】"
    # Update this with your service account's email address.
    x-google-jwks_uri: "https://cognito-idp.ap-northeast-1.amazonaws.com/【CognitoのプールID】/.well-known/jwks.json"
    # This must match the "aud" field in the JWT. You can add multiple
    # audiences to accept JWTs from multiple clients.
    x-google-audiences: "【CognitoのアプリクライアントID】"
注意すべきところは以下の部分です。
host: "【サービス名】.endpoints.【プロジェクトID】.cloud.goog"
x-google-endpoints:
- name: "【サービス名】.endpoints.【プロジェクトID】.cloud.goog"
  target: "【Compute Engine VMの外部IPアドレス】"
サービス名は、さきほどの「sample-api」です。
securityDefinitions や jwtAuth の部分の定義も気になりますが後述します。
GCPのエンドポイントの設定
作成したSwagger定義ファイルをGCPのエンドポイントに設定します。
gcloud endpoints services deploy openapi.yaml
いろいろ表示されますが、以下が表示されれば成功しているようです。
Service Configuration [XXXX-XX-XXrX] uploaded for service [【サービス名】.endpoints.【プロジェクトID】.cloud.goog]
GCPのコンソールのエンドポイントに、sample-apiが追加されているのがわかります。

ちょっと戻って、Compute Engine のVMインスタンスに、カスタムメタデータを設定します。
VMインスタンスの詳細 → カスタムメタデータの設定
- endpoints-rollout-strategy : managed
- endpoints-service-name : 【サービス名】.endpoints.【プロジェクトID】.cloud.goog
コマンドラインから設定する場合は以下のように実行します。
gcloud compute instances add-metadata debian --metadata endpoints-service-name=【サービス名】.endpoints.【プロジェクトID】.cloud.goog,endpoints-rollout-strategy=managed
この設定により、GCPのエンドポイントがRESTful呼び出しを転送する先のCompute Engine VMを特定することができるようになります。
実際のところ、RESTful呼び出しは、以下の順番で転送されます。
インターネット→GCPエンドポイント→ESP→Node.js
ESP(Extensible Service Proxy)のインストール
Compute Engine VMインスタンスで、以下を実行することで、ESPをセットアップできます。
export CLOUD_ENDPOINTS_REPO="google-cloud-endpoints-jessie"
echo "deb http://packages.cloud.google.com/apt $CLOUD_ENDPOINTS_REPO main" | sudo tee /etc/apt/sources.list.d/google-cloud-endpoints.list
curl --silent https://packages.cloud.google.com/apt/doc/apt-key.gpg | sudo apt-key add -
sudo apt-get update && sudo apt-get install google-cloud-sdk
sudo apt-get install endpoints-runtime
必要に応じて、以下のポート番号を設定します。
ESPの入力ポート番号の指定
/etc/default/nginx → PORT=80
ESPの出力先ポート番号の指定(基本、変更不要)
/etc/nginx/endpoint/nginx.conf
upstream app_server0 {
server 127.0.0.1:8081;
keepalive 128;
}
ESP(nginx)の起動
sudo service nginx restart
バックエンドサーバの構築
さて、localhostの8081に転送されるため、次は、それを待ち受けるバックエンドサーバを配備します。バックエンドサーバとして、node/expressを採用しました。
リモートでのデバッグがちょっと面倒なので、趣向を凝らして、ローカルサーバに転送して、そちらでデバッグを試みます。
'use strict';

const express = require('express');
const bodyParser = require('body-parser');
const app = express();

var cors = require('cors');
app.use(cors());
require('dotenv').config();

app.set('case sensitive routing', true);
app.use(bodyParser.json());

var proxy_url = process.env.PROXY_URL || 'http://localhost:10010';
var path_post = process.env.PATH_POST || '/*';
var path_get = process.env.PATH_GET || '/*';

console.log('PROXY_URL:' + proxy_url);
console.log('PATH_POST:' + path_post);
console.log('PATH_GET:' + path_get);

var request = require('request');

app.post(path_post, (req, res) => {
//    console.log(req);
    var proxy_path = proxy_url + req.path;
    console.log('proxy_path ' + proxy_path);

    const headers = {};
    if( req.headers['content-type'] !== undefined )
        headers['Content-Type'] = req.headers['content-type'];
    if( req.headers['authorization'] !== undefined )
        headers['Authorization'] = req.headers['authorization'];
    if( req.headers['user-agent'] !== undefined )
        headers['User-Agent'] = req.headers['user-agent'];
    try{
        return request({
            url: proxy_path,
            qs: req.query,
            method: req.method,
            headers: headers,
            json: true,
            body: req.body
        }).pipe(res);
    }catch(error){
        console.log(error);
    }
});

app.get(path_get, (req, res) =>{
//    console.log(req);
    var proxy_path = proxy_url + req.path;
    console.log('proxy_path ' + proxy_path);

    const headers = {};
    if( req.headers['content-type'] !== undefined )
        headers['Content-Type'] = req.headers['content-type'];
    if( req.headers['authorization'] !== undefined )
        headers['Authorization'] = req.headers['authorization'];
    if( req.headers['user-agent'] !== undefined )
        headers['User-Agent'] = req.headers['user-agent'];
    try{
        return request({
            url: proxy_path,
            qs: req.query,
            method: req.method,
            headers: headers,
            json: true,
            body: req.body
        }).pipe(res);
    }catch(error){
        console.log(error);
    }
});

if (module === require.main) {
  const PORT = process.env.PORT || 80;
  app.listen(PORT, () => {
    console.log(`App listening on http port ${PORT}`);
    console.log('Press Ctrl+C to quit.');
  });

  var https = require('https');
  var fs = require('fs');
  try{
    var options = {
      key:  fs.readFileSync('./cert/server.key'),
      cert: fs.readFileSync('./cert/server.crt'),
      ca: fs.readFileSync('./cert/JPRS_DVCA_G2_PEM.cer')
  //    key: fs.readFileSync('./cert/oreore/private-key.pem'),
  //    cert: fs.readFileSync('./cert/oreore/certificate.pem')
    };
    var sport = Number(process.env.SPORT) || 443;
    var servers = https.createServer(options, app);
    console.log('https PORT=' + sport );
    servers.listen(sport, () => {
        console.log(`App listening on https port ${sport}`);
        console.log('Press Ctrl+C to quit.');
    });
  }catch(error){
//    console.log(error);
    console.log('can not load https');
  }
}

module.exports = app;
{
  name: "templ_forward",
  version: "1.0.0",
  description: "",
  main: "app.js",
  scripts: {
    start: "node app.js",
    test: "echo "Error: no test specified" && exit 1"
  },
  author: "",
  license: "ISC",
  dependencies: {
    body-parser: "^1.18.3",
    cors: "^2.8.4",
    dotenv: "^6.0.0",
    express: "^4.16.3",
    request: "^2.88.0"
  }
}
PATH_POST="/*"
PATH_GET="/*"
PORT=8081
PROXY_URL="https://sample.destination.com"
これで、https://sample.destination.com に転送されるようになるので、そこにRESTfulサーバを立ち上げればよくなります。
環境に合わせて.envを書き換えてください。(なんとなく分かります?)
RESTfulサーバの立ち上げ
RESTful呼び出しに対する応答が実装されるRESTfulサーバを作成します。
https://sample.destination.com と設定した場所です。
(参考)
[SwaggerでRESTful環境を構築する]
(https://qiita.com/poruruba/items/72d8c85f8923bc78b918)
Swagger定義ファイルとして、先ほど作成したopenapi.yamlを使います。
ただし、swagger-nodeでは、ファイル名がswagger.yaml固定ですので、リネームするか、シンボリックリンクを作成します。
立ち上げ終わったら、以下のURLにアクセスしてみましょう。
http://【サービス名】.endpoints.【プロジェクトID】.cloud.goog/echo
SwaggerのRESTful環境で実装したレスポンスが返ってきたかと思います。
トークン検証の追加
さて、今度は、いよいよ、トークンの出番です。
AWS Cognitoで生成されたトークンがAuthorizationヘッダに指定されていないとechoを呼び出せないようにします。
openapi.yaml のechoの定義において、jwtAuth のコメントを外します。
  "/echo":
    post:
      x-swagger-router-controller: echo
      operationId: "echo"
      security:
      - jwtAuth: []
・・・
それから、以下の部分をAWS Cognitoの設定に合わせて修正します。
securityDefinitions:
  jwtAuth:
    authorizationUrl: ""
    flow: "implicit"
    type: "oauth2"
x-google-issuer: "https://cognito-idp.ap-northeast-1.amazonaws.com/【AWSのプールID】"
    x-google-jwks_uri: "https://cognito-idp.ap-northeast-1.amazonaws.com/【AWSのプールID】/.well-known/jwks.json
以下を実行してGCPエンドポイントに再設定します。
gcloud endpoints services deploy openapi.yaml
では、もう一度echoを呼び出してみます。
今度は以下のエラーが戻ってきてRESTful呼び出しに失敗しました。想定通りです。
{
    "code": 16,
    "message": "JWT validation failed: Missing or invalid credentials",
    "details": [
        {
            "@type": "type.googleapis.com/google.rpc.DebugInfo",
            "stackEntries": [],
            "detail": "auth"
        }
    ]
}
Authorizationヘッダに、以下のような形式でトークンを指定して呼び出してみます。
Authorization: Bearer [トークン]
無事に成功しましたでしょうか?
Authorizationヘッダに指定したトークンに対して、以下のチェックを行っているようです。
- issがx-google-issuerで指定したものと同じであること
- トークンの検証が、x-google-jwks_uri で指定されたURLから取得される公開鍵で検証OKであること
- トークンの有効期限が切れていないこと
※ちなみに、有効期限切れの場合、以下のレスポンスとなります。
{
    "code": 16,
    "message": "JWT validation failed: TIME_CONSTRAINT_FAILURE",
    "details": [
        {
            "@type": "type.googleapis.com/google.rpc.DebugInfo",
            "stackEntries": [],
            "detail": "auth"
        }
    ]
}
以上です。(長かったですね。投稿を分割すればよかったかも)