ヤマレコは、山登りのための記録や情報交換ができるサービスです。
スマホにインストールすると、工程を計画できたり、軌跡を記録できたり、途中の写真を保持してくれるので、いい感じです。
さらに、ヤマレコはWebAPIを提供してくれているので、自分で好きなように整理できそうです。
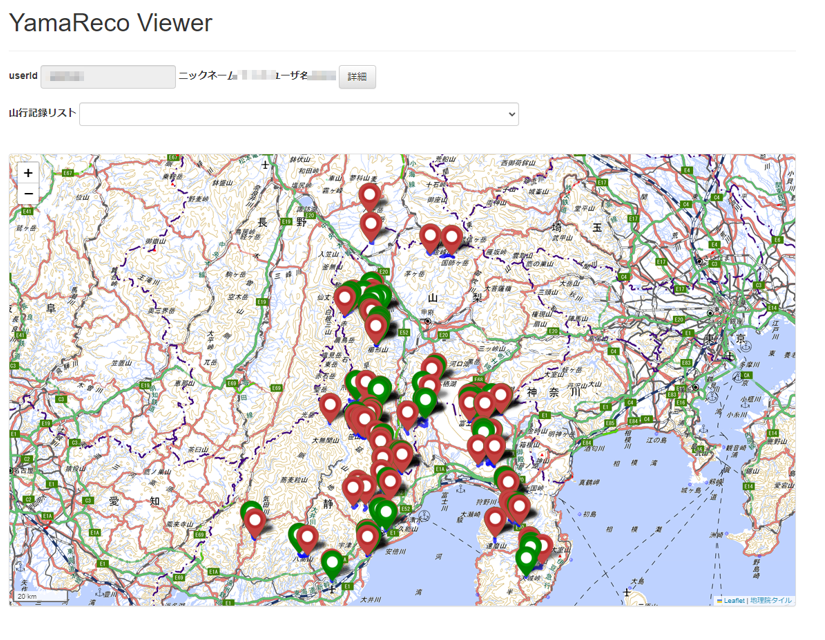
今回は、自分か特定ユーザが登ってきたすべての軌跡を地図上に一度に表示してみます。そうすることで、どのあたりを多く登ってきたのかがわかります。
地図の表示には、Leafletを使います。また、地図上の軌跡の表示には、緯度経度の情報であるGPXファイルを使います。ヤマレコは、このGPXファイルを出力していただいているので都合がよかったです。
ソースコードもろもろは以下に置きました。
使用するWebAPI
WebAPIは、以下に説明があります。
今回使うのは、以下の2つです。(認証不要です)
getReclist:山行記録リストの取得
これで、指定したユーザのすべての山行記録リストを取得します。
getUserInfo:ユーザ情報の取得
これで、ユーザIDからユーザ名などのユーザ情報を参照します。
これとは別に、GPXファイルの取得もしています。以下のURLから取得できます。山行記録のIDであるRecIdがわかれば取得できます。
https://www.yamareco.com/modules/yamareco/track-[RecId].gpx
しかしながら、CORSエラーにより、ブラウザからは取得できないです。そこで、Node.jsサーバを立ち上げてそこから取得して、ブラウザに転送するようにします。
サーバ側(Node.js)
サーバ側は、Node.jsサーバにします。
以下のエンドポイントを持ちます。
・/yamareco-get-list (POST)
ユーザIDを入力として、そのユーザが持つ山行記録リストを取得します。内部でgetReclistを呼び出しています。
ただし、1度に20個しか取得できないため、繰り返しgetRecListを呼び出しています。
if( event.path == '/yamareco-get-list' ){
    var body = JSON.parse(event.body);
    console.log(body);

    var counter = 1;
    var userId = body.userId;
    var response = await do_get(base_url + "/getReclist/user/" + userId + '/' + counter++);
    console.log(response);
    if( response.err != 0 )
      throw response.errcode;
    var reclist = response.reclist;
    try{
      while(true){
        var response = await do_get(base_url + "/getReclist/user/" + userId + '/' + counter++);
        console.log(response);
        if( response.err != 0 )
          throw response.errcode;
        reclist = reclist.concat(response.reclist);
      }
    }catch(error){}
    return new Response(reclist);
  }else
・/yamareco-get-user (POST)
ユーザIDを入力として、ユーザの情報を取得します。getUserInfoを呼び出しています。
  if( event.path == '/yamareco-get-user' ){
    var body = JSON.parse(event.body);
    console.log(body);

    var userId = body.userId;
    var response = await do_get(base_url + "/getUserInfo/" + userId);
    console.log(response);
    if( response.err != 0 )
      throw response.errcode;
    return new Response(response.userinfo);
  }else
・/yamareco-get-gpx (GET)
RecIdを入力として、GPXファイルをダウンロードします。先ほどのURLからGPXファイルを取得して転送しているだけです。HTTP GETとしているのは、後程説明するクライアント側ライブラリが、GETで直接GPXファイルを取得するI/Fを利用するためです。
  if( event.path == '/yamareco-get-gpx' ){
    var qs = event.queryStringParameters;
    console.log(qs);
    var recId = qs.recId;
    var response = await do_get_text(base_url_gpx + "track-" + recId + '.gpx');
    return new TextResponse("application/gpx+xml", response);
  }
クライアント側:Leaflet
Leafletの情報です。
Leafletは、CDNもあるので、それを使わせていただきました。
  <link rel="stylesheet" href="https://cdnjs.cloudflare.com/ajax/libs/leaflet/1.9.3/leaflet.min.css" />
  <script src="https://cdnjs.cloudflare.com/ajax/libs/leaflet/1.9.3/leaflet.js"></script>
順番にJavascriptの方を説明します。
                map = L.map('mapcontainer', {
                    zoomControl: true,
                });
まずは、HTMLのエレメント(mapcontainer)のところに、地図の領域を確保します。zoomControl: true として、拡大縮小ボタンも表示するようにしています。
HTMLの方はこんな感じになっています。
<div id="mapcontainer" style="width:100%; height:70vh" class="img-thumbnail"></div>
map.setView([35.40, 136], 5);
地図の中心位置の緯度経度と、拡大率を指定しています。
                L.control.scale({
                    imperial: false
                }).addTo(map);
縮尺を表示しています。メートルだけでよいので、imperial:false も指定しています。
                L.tileLayer('https://cyberjapandata.gsi.go.jp/xyz/std/{z}/{x}/{y}.png', {
                    attribution: "<a href='https://maps.gsi.go.jp/development/ichiran.html' target='_blank' rel='noopener noreferrer'>地理院タイル</a>"
                }).addTo(map);
地図の右下にちょっとした表記を入れています。。。
                for( let i = 0 ; i < this.rec_list.length ; i++ ){
                    let item = this.rec_list[i];

                    if( item.is_track != "1" )
                        continue;

                    this.gpx_list[i] = await new Promise((resolve, reject) =>{
                        const recId = item.rec_id;
                        const gpx_url = "/yamareco-get-gpx?recId=" + recId;
                        new L.GPX(gpx_url, {
                            async: true,
                            marker_options: {
                                startIconUrl: 'img/pin-icon-start.png',
                                endIconUrl: 'img/pin-icon-end.png',
                                shadowUrl: 'img/pin-shadow.png'
                            },
                            polyline_options: {
                                color: 'blue',
                                opacity: 0.75,
                                weight: 5,
                                lineCap: 'round'
                            }
                        }).on('loaded', (e) => {
                            resolve(e.target);
                        }).on('error', (e) => {
                            reject(e);
                        }).on('addpoint', (e) => {
                            e.point.bindTooltip(" <h3>(" + (i + 1) + ") " + item.place + "</h3> ");
                        }).addTo(map);
                    });
これがまさに、山行記録ごとの工程を地図上に表示する処理です。
Leafletには、GPXを扱うためのプラグインがあるので、それを使いました。
以下で取り込みます。
<script src="https://cdnjs.cloudflare.com/ajax/libs/leaflet-gpx/1.7.0/gpx.min.js"></script>
GPXファイルのHTTP Getは、このプラグインの中でやってくれています。
marker_optionsは、マーカーの指定です。
polyline_optionsは、軌跡の線の指定です。
'addpoint'の中で読んでいるe.point.bindTooltipは、端点にマウスを持って行った時の表示するツールチップの指定です。
一応これで、日本地図の中に、すべての山行記録の軌跡が表示されます。
さらに、ひとつの山行記録のみを選択的に表示したい場合もあると思います。そこで以下の関数を用意しました。
        yamareco_select: function(rec_id){
            this.rec_index = this.rec_list.findIndex(item => item.rec_id == rec_id );
            if( this.rec_index >= 0 && this.rec_list[this.rec_index].is_track == '1' ){
                map.fitBounds(this.gpx_list[this.rec_index].getBounds());
                this.gpx_current = this.gpx_list[this.rec_index];
            }
        },
GPS情報から得られる工程情報
GPXファイルには、GPSの情報である緯度経度の情報が羅列されており、これを使って、移動時間や速度など、いろんな統計情報を算出することができそうです。
まさに、利用しているプラグインがその計算をしてくれています。
以下を見ればわかりますかね。。。Vue2とBootstrap3を使ってます。
        <div class="modal fade" id="gpx_detail">
          <div class="modal-dialog" v-if="rec_index >= 0">
            <div class="modal-content">
              <div class="modal-header">
                <h4 class="modal-title">{{rec_list[rec_index].place}}</h4>
              </div>
              <div class="modal-body">
                <img v-bind:src="rec_list[rec_index].thumb_url" class="img-thumbnail"><br>
                <label>日程</label> {{rec_list[rec_index].start}}<span v-if="rec_list[rec_index].start != rec_list[rec_index].end">~{{rec_list[rec_index].end}}</span><br>
                <label>エリア</label> {{rec_list[rec_index].area}}<br>
                <label>詳細ページ</label> <a v-bind:href="rec_list[rec_index].page_url" target="_blank" rel="noopener noreferrer">{{rec_list[rec_index].place}}</a><br>
                <span v-if="rec_list[rec_index].is_track=='1'">
                  <br>
                  <label>距離</label> {{(gpx_current.get_distance() / 1000).toFixed(2)}} km<br>
                  <label>期間</label> {{new Date(gpx_current.get_start_time()).toLocaleString()}} ~ {{new Date(gpx_current.get_end_time()).toLocaleString()}}<br>
                  <label>時間</label> {{(gpx_current.get_total_time() / 60000).toFixed(2)}} 分<br>
                  <label>移動時間</label> {{(gpx_current.get_moving_time() / 60000).toFixed(2)}} 分<br>
                  <label>移動ペース</label> {{(gpx_current.get_moving_pace() / 60000).toFixed(1)}} 分/km、{{gpx_current.get_moving_speed().toFixed(1)}} km/h<br>
                </span>
              </div>
              <div class="modal-footer">
                <button class="btn btn-default" v-on:click="dialog_close('#gpx_detail')">閉じる</button>
              </div>
            </div>
          </div>
        </div>
使い方
まずは、ヤマレコのサイトから、見たい人のプロフィールのページに行きます。以下例です。
https://www.yamareco.com/modules/yamareco/userinfo-742655-prof.html
そうすると、URLのところにuserinfo-に続けて、数字があります。これがユーザIDすまわち会員番号です。スマホの場合にはどうするんだろう。。。自分のは、会員証を表示でわかるのですが。。。
それでは、今回立ち上げたWebページを開きます。
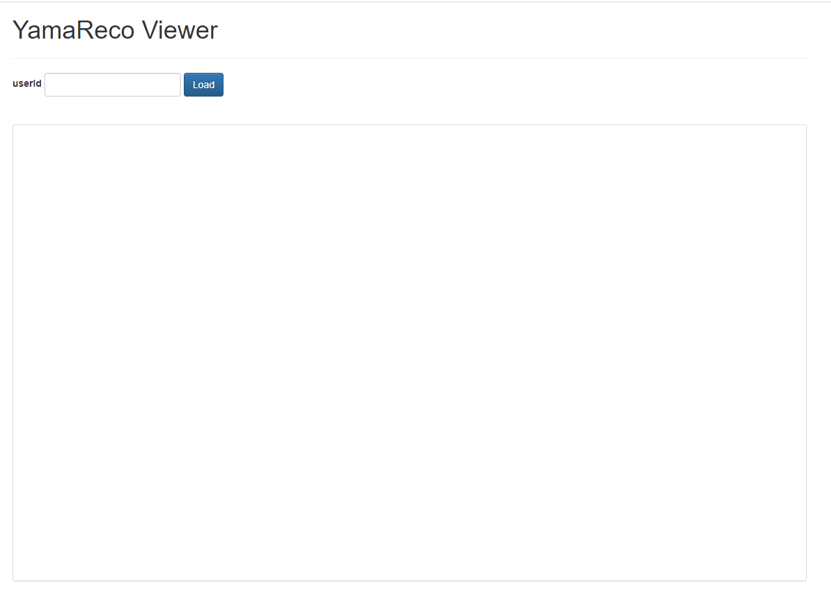
さきほどのユーザIDをuserIdのところに入力して、Loadボタンを押下します。
どうでしょうか。たくさんの軌跡が表示されているのがわかります。(今のところ私の軌跡は少ないので別の人のです)
さらに、山行記録リストのSelectエレメントから、見たい記録を選択すればクローズアップされます。
また、詳細ボタンを押せば、今回の記録の統計情報が見れます。
(参考)立ち上げ方
一応、npmを使えばすぐ立ち上げられるようにしておきましたが、面倒であれば、Cyclicからでも立ち上げられるように、GitHubにボタンを用意しておきました。
ボタンを押せば、すぐにサーバ側にインストールされます。楽ちんです!
(詳細) Cyclic
以上


