前回、前々回に引き続き、SlackBotをカスタマイズしていきます。
今更ながらSlackBotを作ってみた
今更ながらSlackBotを作ってみた:Slach Commands
今回は、Interactive Componentsです。
絵文字や文字装飾でもある程度表現できますが、やはりボタンやセレクトや画像を使った方がより直感的にやりとりできます。
前々回の環境をそのまま使います。まだの方はぜひご参照ください。
(参考情報)
Making messages interactive
https://api.slack.com/interactive-messages
Interactive Componentsを有効化する
いつものslack apiのSettings-Basic Informationから行います。
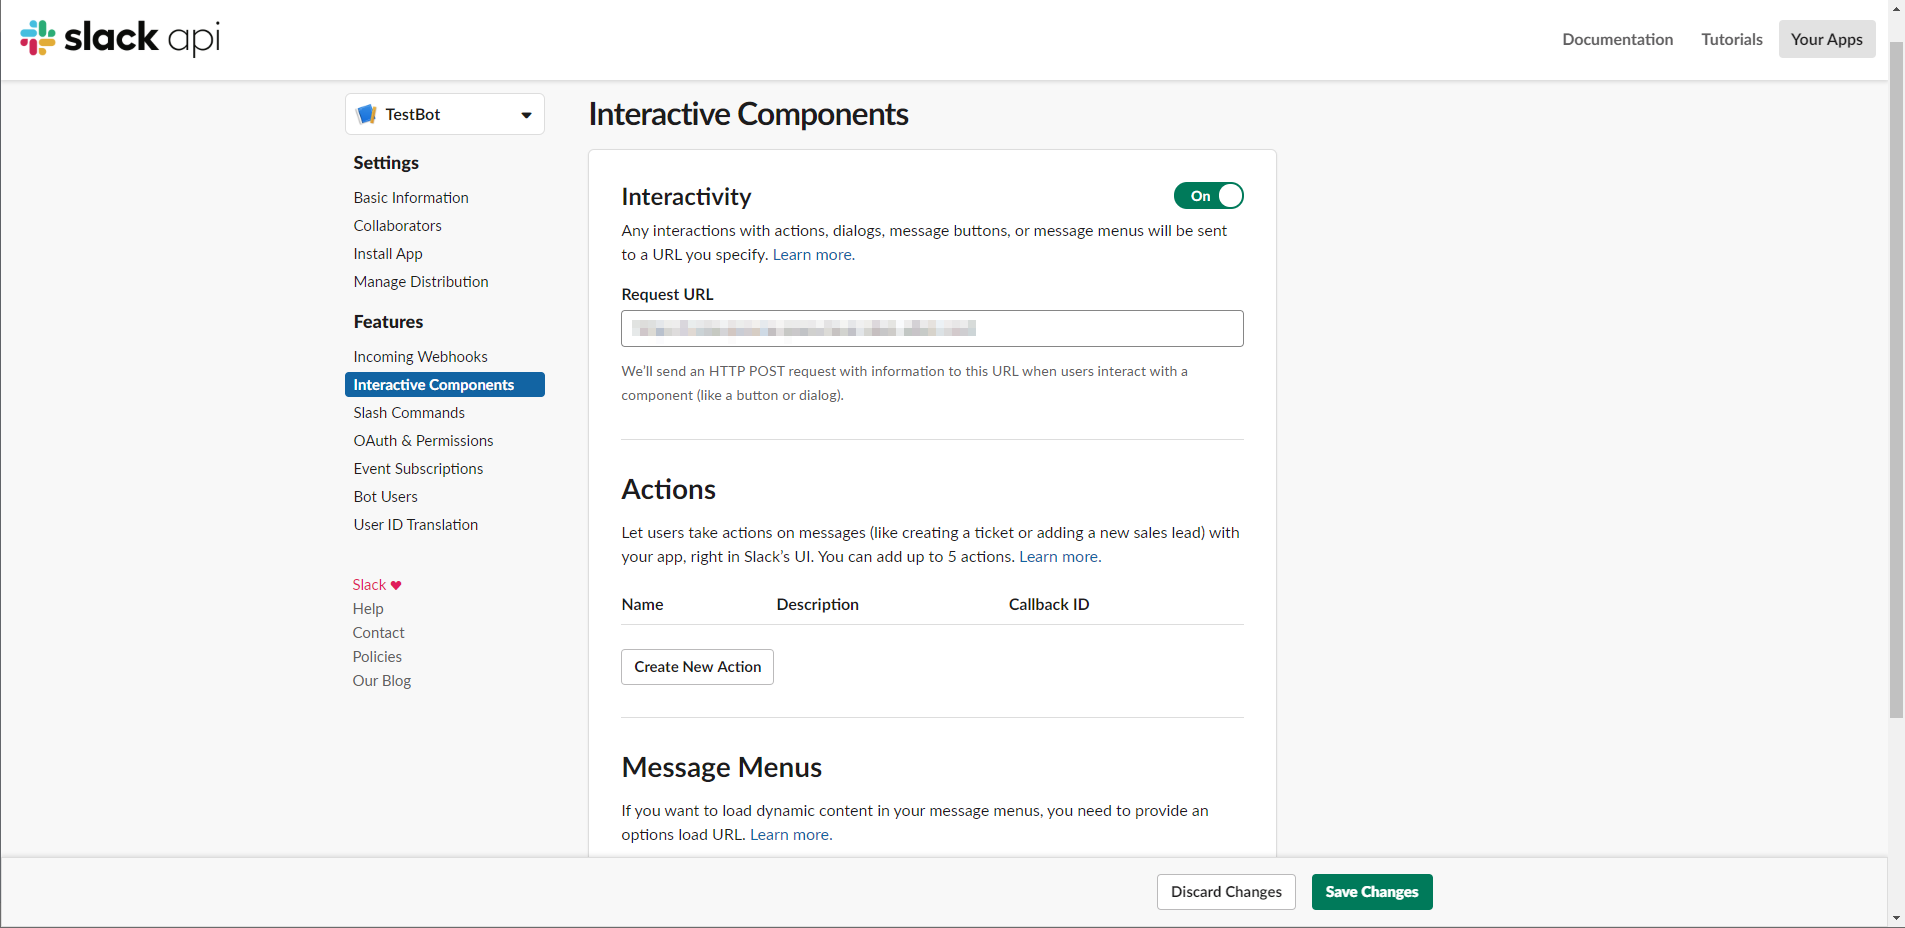
Interactive Componentsを選択し、InteractivityをOnにします。
入力欄「Request URL」に立ち上げたサーバのURLをフルパスで入力します。「/slack-testbot-cmd」の方です。最後にSave Changesボタンを押下します。
これで、表現力豊かなUIからの通知を受けることができました。
UIを作成する
UIを配置していきたいのですが、便利なツールがあります。
GUIで配置結果を見ながら作れるので便利です。(少々使いにくいですが)
Block Kit Builder
https://api.slack.com/tools/block-kit-builder
以下のようなUIを作成しました。
[
	{
		"type": "actions",
		"elements": [
			{
				"type": "static_select",
				"placeholder": {
					"type": "plain_text",
					"text": "Select an item"
				},
                "action_id": "select1",
				"options": [
					{
						"text": {
							"type": "plain_text",
							"text": "アイテム1"
						},
						"value": "item1"
					},
					{
						"text": {
							"type": "plain_text",
							"text": "アイテム2"
						},
						"value": "item2"
					},
					{
						"text": {
							"type": "plain_text",
							"text": "アイテム3"
						},
						"value": "item3"
					}
				]
			}
        ]
    },
    {
        "type": "actions",
        "elements":[
            {
              "type": "button",
              "text": {
                "type": "plain_text",
                "text": "ボタン1"
              },
              "action_id": "button1"
            },
            {
              "type": "button",
              "text": {
                "type": "plain_text",
                "text": "ボタン2"
              },
              "action_id": "button2"
            }
		]
	}
]
サーバ側の実装
その前に、Interactive ComponentsのUIを表示させるトリガーを用意します。
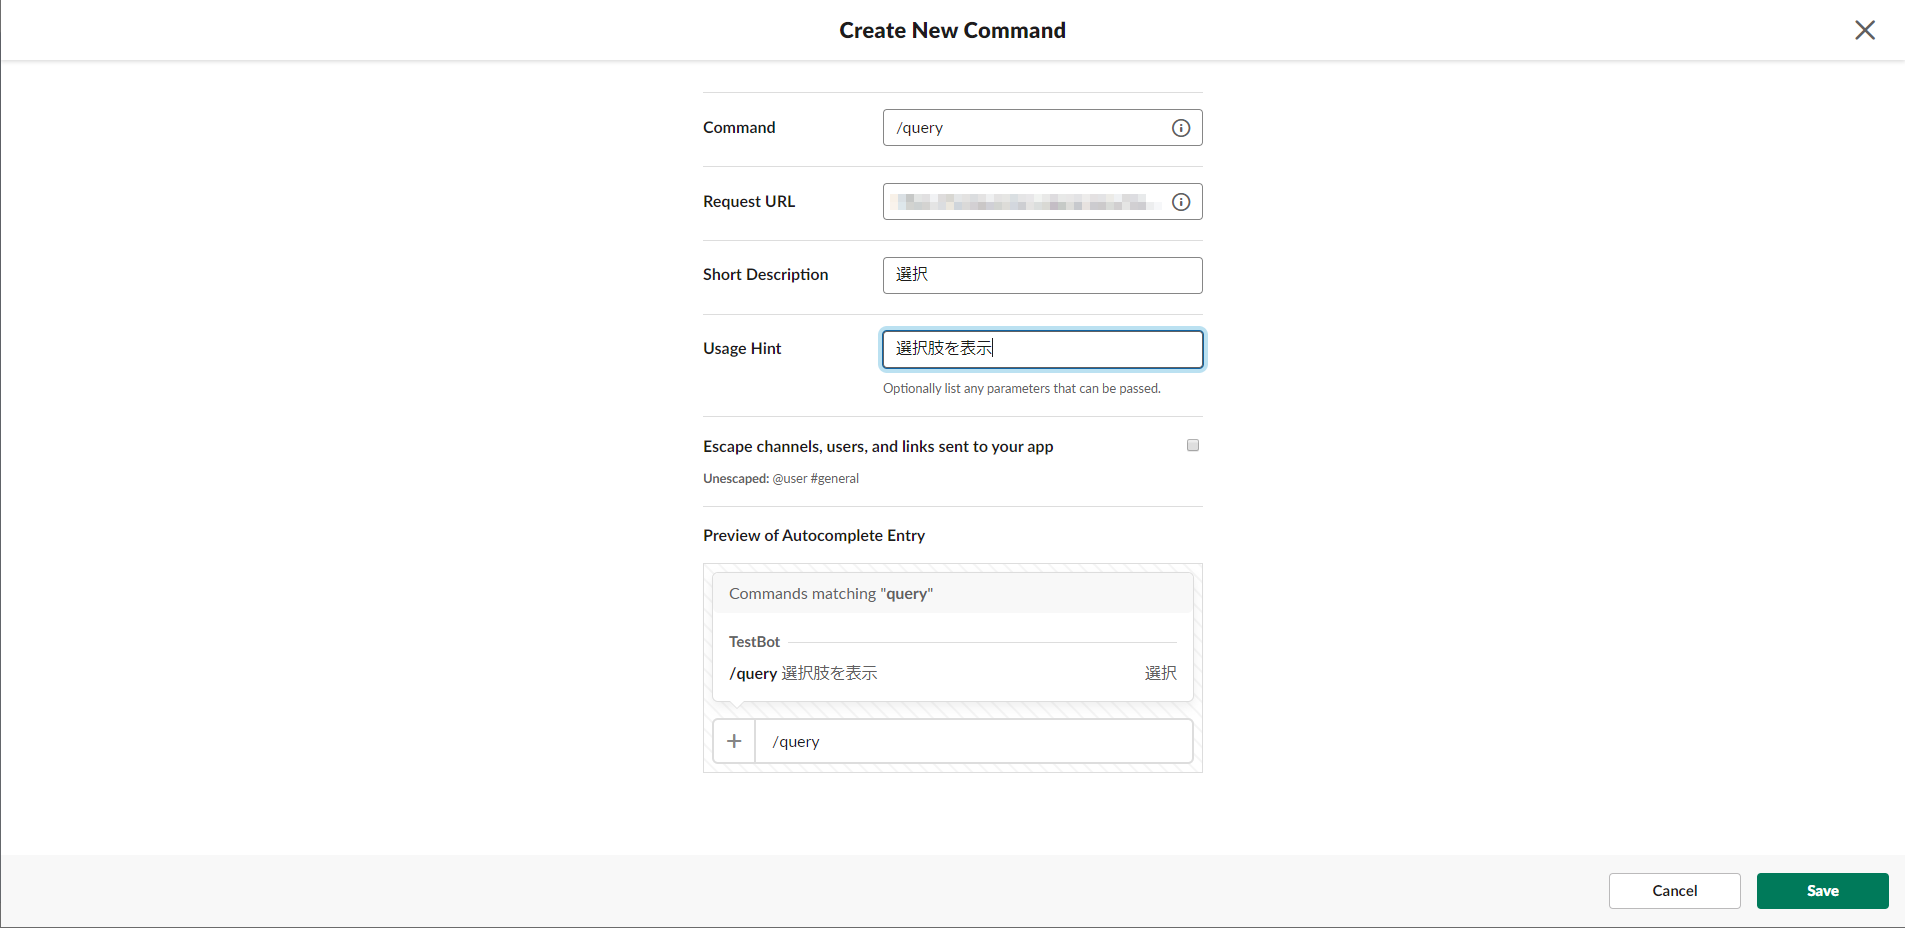
なんでもよいのですが、もう一つSlashCommandsを作って、それを呼び出すとUIを表示するようにしたいと思います。
例えば、以下のように、「/query」というコマンドを作ってみましょう
それではさっそく、サーバ側の実装です。
app.commandは変更で、それ以外は追加です。
app.command(async (body, web) =>{
    if(body.command == '/hi'){
        var hour = new Date().getHours();

        var greeting = 'こんにちは';
        if( 5 <= hour && hour <= 9 )
            greeting = 'おはよう';
        else if( 18 <= hour && hour < 5 )
            greeting = 'こんにちは';

        var message = {
            text: greeting + '!' + (body.text ? (' ' + body.text + " です。") : '')
        };
        app.responseMessage(body.response_url, message );
    }else if( body.command == '/query'){
        var message = {
            text: "選択肢を表示します。",
            blocks: blocks,
        };
        app.responseMessage(body.response_url, message );
    }
});

app.action(async (body, web) =>{
    var text = '';
    for( var i = 0 ; i < body.actions.length ; i++ ){
        var action = body.actions[i];
        text += action.action_id;
        if( action.type == 'static_select')
            text += 'の' + action.selected_option.value;
        text += 'が選択されました。\n';
    }
    var message = {
        text: text
    };
    app.responseMessage(body.response_url, message );
});

var blocks = [
	{
		"type": "actions",
		"elements": [
			{
				"type": "static_select",
				"placeholder": {
					"type": "plain_text",
					"text": "Select an item"
				},
                "action_id": "select1",
				"options": [
					{
						"text": {
							"type": "plain_text",
							"text": "アイテム1"
						},
						"value": "item1"
					},
					{
						"text": {
							"type": "plain_text",
							"text": "アイテム2"
						},
						"value": "item2"
					},
					{
						"text": {
							"type": "plain_text",
							"text": "アイテム3"
						},
						"value": "item3"
					}
				]
			}
        ]
    },
    {
        "type": "actions",
        "elements":[
            {
              "type": "button",
              "text": {
                "type": "plain_text",
                "text": "ボタン1"
              },
              "action_id": "button1"
            },
            {
              "type": "button",
              "text": {
                "type": "plain_text",
                "text": "ボタン2"
              },
              "action_id": "button2"
            }
		]
	}
];
app.commandにおいて、/queryが来たら、作成したUIを返すようにしています。
そして、ユーザによってUIの部品を選択すると、都度app.actionが呼び出されます。選択された部品名をレスポンスメッセージにして返しています。
ちなみに、今回のUIの場合は、UIを選択されたとき、以下のような応答がSlackから返ってきています。
選択肢が選択された場合
  "actions": [{
    "action_id": "select1",
    "block_id": "hTeDk",
    "selected_option": {
      "text": {
        "type": "plain_text",
        "text": "アイテム2",
        "emoji": true
      },
      "value": "item2"
    },
    "type": "static_select",
    "action_ts": "1557116165.623264"
  }]
ボタンがクリックされた場合
  "actions": [{
    "action_id": "button2",
    "block_id": "KEM",
    "text": {
      "type": "plain_text",
      "text": "ボタン2",
      "emoji": true
    },
    "type": "button",
    "value": "button2",
    "action_ts": "1557116194.565853"
  }]
動作確認
AndroidのSlackアプリから操作してみました。
/queryコマンドを入力すると、
UIが表示されました。
解像度が小さいスマホで表示させたので、解像度が大きい場合は見え方が違うと思います。
選択肢を選択すると
という感じに、レスポンスメッセージが返ってきました。
補足
UIの各部品が選択されるごとに、メッセージが通知されました。
次回は、ダイアログを紹介します。都度通知ではなくすべての入力完了時に通知されるようになります。
以上


