VirtualBOX上のCentOS7 にkickstartサーバを作る。
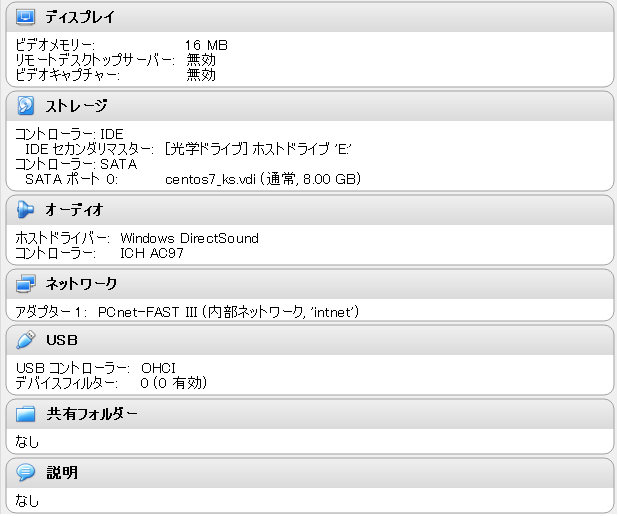
下記の環境に作成していきたいと思います![]()
[root@server ~]# uname -a
Linux server 3.10.0-862.el7.x86_64 #1 SMP Fri Apr 20 16:44:24 UTC 2018 x86_64 x86_64 x86_64 GNU/Linux
[root@server ~]#
Kickstartサーバには下記サービスを稼働させる必要があります。
- tftp
- dhcp
- httpd
- syslinux
起動の流れとしては下記。
- OSインストール対象マシンをPXE(Pre eXecition Environment) で起動。
- DHCP サーバから
- IP アドレス
- ブートローダのファイル名
を取得する。
- TFTP サーバから
- ブートローダファイル(pxelinux.0)を取得する。
- ブートローダ(pxelinux.0)でブート
- TFTP サーバから起動する方法が書かれた pxelinux.cfg/default を取得する。
- pxelinux.cfg/default に書かれている方法で起動する。
##ということでまずはyumにてインストールしていきます。
[root@server ~]# yum install tftp-server dhcp httpd syslinux
====================================================================================================================================
 Package                        アーキテクチャー          バージョン                                  リポジトリー             容量
====================================================================================================================================
インストール中:
 dhcp                           x86_64                    12:4.2.5-68.el7.centos.1                    base                    513 k
 syslinux                       x86_64                    4.05-15.el7                                 base                    990 k
 tftp-server                    x86_64                    5.2-22.el7                                  base                     47 k
更新します:
 httpd                          x86_64                    2.4.6-88.el7.centos                         base                    2.7 M
依存性関連でのインストールをします:
 mtools                         x86_64                    4.0.18-5.el7                                base                    203 k
依存性関連での更新をします:
 dhclient                       x86_64                    12:4.2.5-68.el7.centos.1                    base                    284 k
 dhcp-common                    x86_64                    12:4.2.5-68.el7.centos.1                    base                    175 k
 dhcp-libs                      x86_64                    12:4.2.5-68.el7.centos.1                    base                    131 k
 httpd-tools                    x86_64                    2.4.6-88.el7.centos                         base                     90 k

トランザクションの要約
====================================================================================================================================
インストール  3 パッケージ (+1 個の依存関係のパッケージ)
更新          1 パッケージ (+4 個の依存関係のパッケージ)

総ダウンロード容量: 5.1 M
Is this ok [y/d/N]: y
syslinux とはLinuxカーネルを起動するためのブートローダです。
このブートローダをtftpにて配布可能な場所へコピーします。
[root@server syslinux]# mkdir /var/lib/tftpboot/pxelinux
[root@server syslinux]# cp /usr/share/syslinux/pxelinux.0 /var/lib/tftpboot/pxelinux/
次にpxelinux設定ファイルディレクトリを作成します。
[root@server syslinux]# mkdir /var/lib/tftpboot/pxelinux/pxelinux.cfg
[root@server syslinux]# mkdir /var/www/html/ks
次にインストールに必要なrpmを httpd の公開ディレクトリへコピーします。
VirtualBox にてインストールiso をコントローラIDEへマウントしておく。
[root@server html]# mount /dev/cdrom /mnt/cdrom
[root@server html]# mkdir /var/www/html/RHEL7
[root@server html]# cp -a /mnt/cdrom/* ./RHEL7/
[root@server html]# cd RHEL7/
[root@server RHEL7]# ls
CentOS_BuildTag  EULA  LiveOS    RPM-GPG-KEY-CentOS-7          TRANS.TBL  isolinux
EFI              GPL   Packages  RPM-GPG-KEY-CentOS-Testing-7  images     repodata
[root@server RHEL7]# umount /mnt/cdrom
今コピーしたファイルの中にインストーラ起動用のカーネル、初期RAMディスクについてTFTP公開用ディレクトリへもコピーする。
[root@server pxeboot]# cp /var/www/html/CENTOS7/images/pxeboot/vmlinuz /var/lib/tftpboot/pxelinux/CENTOS7/
[root@server pxeboot]# cp /var/www/html/CENTOS7/images/pxeboot/initrd.img /var/lib/tftpboot/pxelinux/CENTOS7/
次にDHCPサーバの設定
/etc/dhcp/dhcp.conf に下記のように設定を入れる。
subnet 192.168.0.0 netmask 255.255.255.0 {
        range 192.168.0.200 192.168.0.205;
        class "pxeclients" {
                match if substring (option vendor-class-dentifier, 0, 9) = "PXEClient";
                next-server 192.168.0.1;
                filename "pxelinux/pxelinux.0";
        }
}
中身について詳しい解説は割愛。
次にブートストラップイメージのメニュー設定
/var/lib/tftpboot/pxelinux/boot.msg
-------------------------
Welcome to Kickstart Install!!!
-------------------------
1. CentOS 7 - preconfigured
2. CentOS 7
複数OSを入れる場合は、メニュー番号が増えていくかんじ。
今回は
1.は設定済の構成で自動インストール
2.はインストール画面にて対話的に設定。
次にこのメニュー番号に対応したPXE起動用の設定を入れる。
/var/lib/tftpboot/pxelinux/pxelinux.cfg/default
prompt 1
display boot.msg

label 1
kernel /CENTOS7/vmlinuz
append initrd=/CENTOS7/initrd.img ks=http://192.168.0.1/ks/ks_1.cfg

label 2
kernel /CENTOS7/vmlinuz
append initrd=/CENTOS7/initrd.img ks=http://192.168.0.1/ks/ks_2.cfg
起動用の設定をラベルごとに分けて、ks_*.cfg の設定ファイルを参照させる。
ここまで来たらTFTPサーバ、DHCPサーバ、HTTPDサーバを立ち上げておく。
次のファイアウォールの設定
http,tftp,dhcpのサービスを開放する。
私の環境では、インストール先サーバのセグメントは internalゾーンに所属しているので、--zone=internal としている。
[root@server pxelinux.cfg]# firewall-cmd --zone=internal --add-service=http
success
[root@server pxelinux.cfg]# firewall-cmd --zone=internal --add-service=tftp
success
[root@server pxelinux.cfg]# firewall-cmd --zone=internal --add-service=dhcp
success
[root@server pxelinux.cfg]# firewall-cmd --zone=internal --add-service=http --permanent
success
[root@server pxelinux.cfg]# firewall-cmd --zone=internal --add-service=tftp --permanent
success
[root@server pxelinux.cfg]# firewall-cmd --zone=internal --add-service=dhcp --permanent
success
次にキックスタートファイルを作成する。
REDHATのkickstart generator を使いたいところだが、ライセンスがいるものらしいので、割愛。
先ほどブートメニューの作成にて、自動構成用のメニューも作ったが、こちらは generator を使えないので、
対話インストール用のみ作成する。
/var/www/html/ks/ks_1.cfg,ks_2.cfg
url --url=http://192.168.0.1/CENTOS7
これだけです。
インストール対象サーバの起動
今回はVirtual Box に作成しているので、Kick Start サーバと同じセグメントに新規サーバを起動させる。
システムのメインメモリは1024MB ではなぜかPXEブート中に容量が足りないと怒られたので、4096MB にて起動したところ成功した。
