- 環境
- Windows 10 Pro 64bit バージョン1903
- GitBash(mintty 3.1.0)
zipをダウンロードして配置する
curlコマンドを使わないで
The Central Repository Search Engine > [Downloads] > [zip]からzipファイルをダウンロードでもOK
# zipファイルをダウンロードして
$ curl -OL https://search.maven.org/remotecontent?filepath=fish/payara/distributions/payara/5.2020.7/payara-5.2020.7.zip
  % Total    % Received % Xferd  Average Speed   Time    Time     Time  Current
                                 Dload  Upload   Total   Spent    Left  Speed
100   134  100   134    0     0     61      0  0:00:02  0:00:02 --:--:--    63
  0     0    0     0    0     0      0      0 --:--:--  0:00:02 --:--:--     0
100  138M  100  138M    0     0  12.0M      0  0:00:11  0:00:11 --:--:-- 21.2M

# 解凍して任意の場所に解凍する
$ unzip payara-5.2020.7.zip -d /c/app/
Archive:  payara-5.2020.7.zip
   creating: /c/app/payara5/
   creating: /c/app/payara5/mq/
   creating: /c/app/payara5/mq/lib/
  inflating: /c/app/payara5/mq/lib/imqbroker.jar
# ...省略...
PATHを設定する
# 場所確認用にバージョンを確認する
$ /c/app/payara5/bin/asadmin version
Version string could not be obtained from Server [localhost:4848].
(Turn debugging on e.g. by setting AS_DEBUG=true in your environment, to see the details.)
Using locally retrieved version string from version class.
Version = Payara Server  5.2020.7 #badassfish (build 2130)
Command version executed successfully.

# .bash_profileにPATHを設定する
$ vi ~/.bash_profile
$ cat ~/.bash_profile | grep -i payara
export PAYARA_HOME="/c/apps/payara5"
export PATH=$PATH:$PAYARA_HOME/bin

# 設定を反映する
$ source ~/.bash_profile

# PATHが設定されたことを確認するために再度バージョンを確認する
$ asadmin version
Version string could not be obtained from Server [localhost:4848].
(Turn debugging on e.g. by setting AS_DEBUG=true in your environment, to see the details.)
Using locally retrieved version string from version class.
Version = Payara Server  5.2020.7 #badassfish (build 2130)
Command version executed successfully.
Payaraを起動する
$ asadmin start-domain
Attempting to start domain1.... Please look at the server log for more details.....
http://localhost:8080/ でPayaraのページが表示されればOK!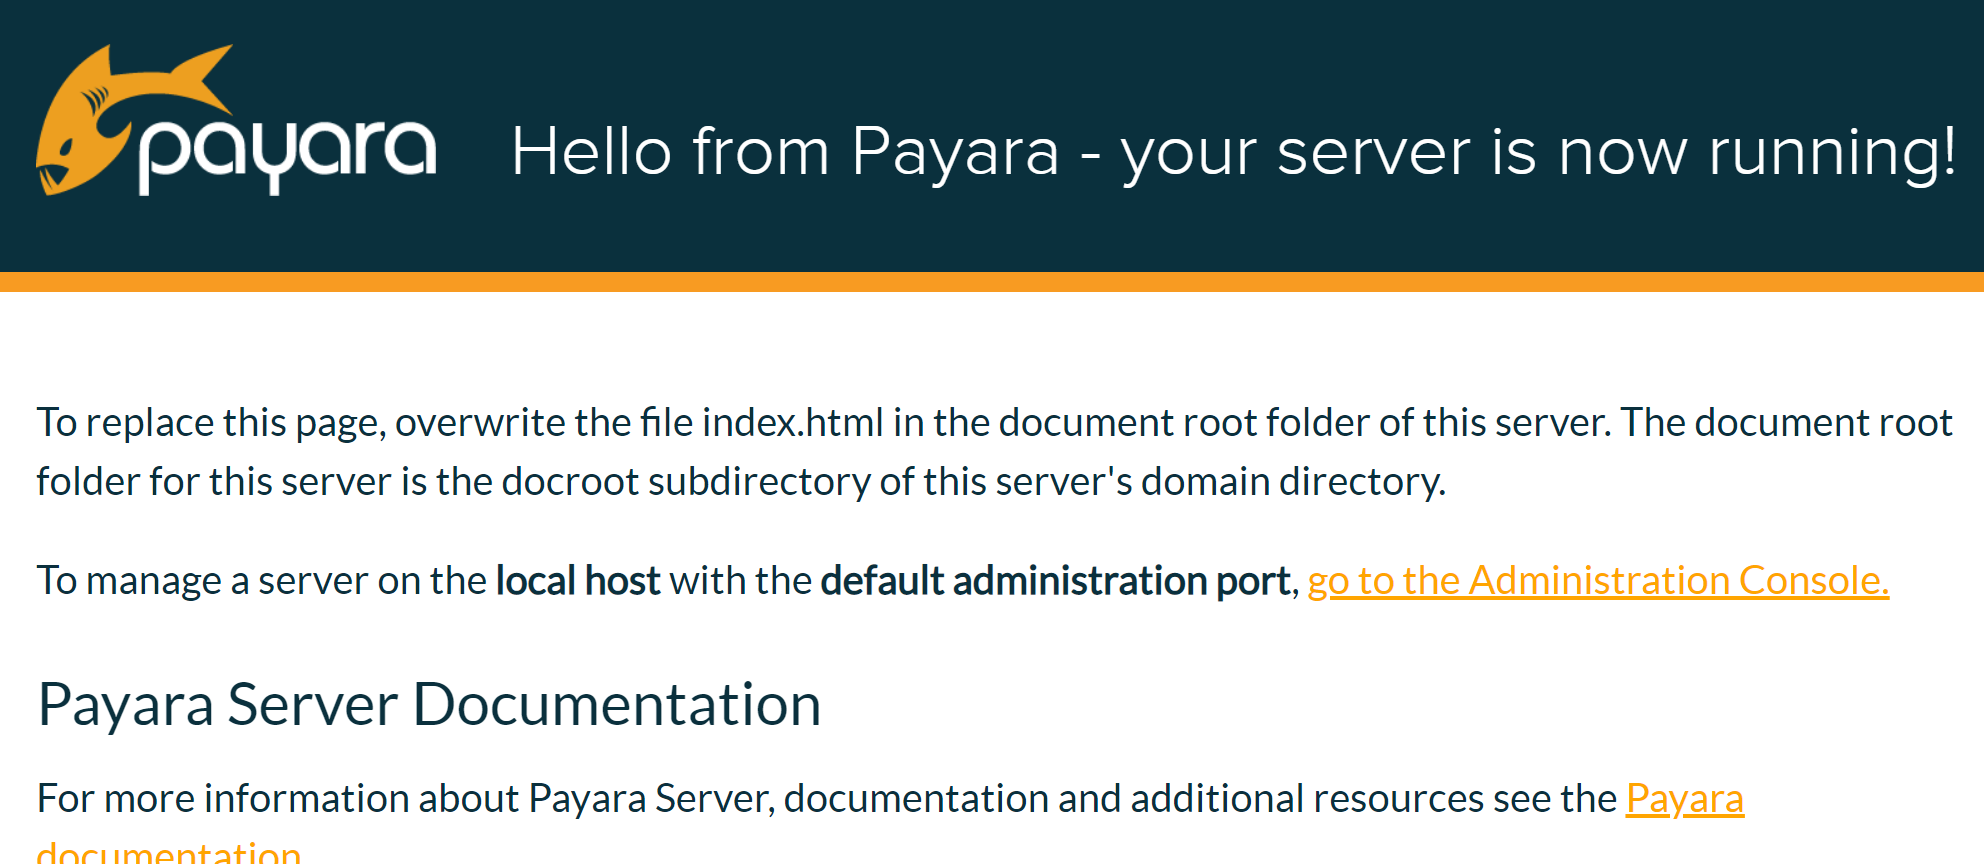
- 失敗事例
接続設定を行う
必要に合わせて接続先や使用するものに合わせて接続設定を行う
MySQLを設定する
MySQLのJDBCドライバをインストールする
参考 : Payara ServerでMySQL 8.0を使用する – My Note
-
MySQL :: Begin Your DownloadからJDBCドライバのzipファイルをダウンロードする
- 今回ダウンロードしたのは、mysql-connector-java-8.0.19.zip
- zipファイルを任意の場所に解凍する
- 今回は、後でインストールするためのものなのでダウンロードフォルダに置きっぱなし
- Payaraにjarをインストールする
Payaraにjarをインストールする
$ asadmin add-library /c/Users/ponsuke/Downloads/mysql-connector-java-8.0.19/mysql-connector-java-8.0.19/mysql-connector-java-8.0.19.jar
Command add-library executed successfully.
接続設定をする
接続先に合わせてasadmin add-resourcesで接続設定のxmlファイルを取り込んだり、domain.xmlに接続設定を行ったりする。
domain.xmlの場所 : {インストールディレクトリ}/payara5/glassfish/domains/domain1/config/domain.xml
MySQLへの接続を確認する
# 1. Payaraを再起動する
$ asadmin restart-domain domain1
Successfully restarted the domain
Command restart-domain executed successfully.

# 2. 接続確認を行う
$ asadmin ping-connection-pool {domain.xmlのjdbc-connection-poolに設定したname属性値}
Command ping-connection-pool executed successfully.
- 参考
メモリサイズを設定する
# JVMオプション削除 : 最大ヒープサイズ
$ asadmin delete-jvm-options -Xmx512m
Deleted 1 option(s)
Command delete-jvm-options executed successfully.

# JVMオプション追加 : 最大ヒープサイズ
$ asadmin create-jvm-options -Xmx1024m
Created 1 option(s)
Command create-jvm-options executed successfully.

# JVMオプション追加 : クラスデータの領域設定
$ asadmin create-jvm-options "-XX\:MaxMetaspaceSize=256m"
Created 1 option(s)
Command create-jvm-options executed successfully.
有効期限が切れているSSL証明書情報を削除する
有効期限が切れているSSL証明書がある場合、sever.logを見るとThe SSL certificate has expiredというメッセージが出力されているので有効期限が切れているSSL証明書情報を削除する。
EclipseにPayaraを設定する
使用する場合はEclipseにPayaraを設定する