30日でできる!OS自作入門(記事一覧)[Ubuntu16.04/NASM]
目的
"30日でできる!OS自作入門"の内容をUbuntu(Linux)で実行するには本の内容だけでは厳しいので調べた結果をメモ。(リンクと動作確認済みコード・コメント)
このテキストを読む上でUbuntuとnasmを使う方の参考になればと思っております。
(テキストが無いと厳しいです)
Ubuntu 16.04 LTS
(追記:2018/05/29)
ソースコードは以下のGitHubにあげています。
https://github.com/pollenjp/myHariboteOS
1. C言語からメモリに書き込む - harib01a
変更する部分は以下の2つ
-
nasmfunc.asmにVRAMに書き込むための関数を定義する -
bootpack.cから関数を呼び出し、実際に書き込む処理を行う
; nasmfunc.asm
; TAB=4

section .text
        GLOBAL  io_hlt
        GLOBAL  write_mem8;

io_hlt:             ; void io_hlt(void);
        HLT
        RET

write_mem8:         ; void write_mem8(int addr, int data);
        MOV     ECX, [ESP+4]        ; [ESP+4]にaddrが入っているのでそれをECXに読み込む
        MOV     AL, [ESP+8]         ; [ESP+8]にdataが入ってのでそれをALに読み込む
        MOV     [ECX], AL
        RET
// bootpack.c

extern void io_hlt(void);
extern void write_mem8(int addr, int data);

void HariMain(void)
{
  int i;
  for (i = 0xa0000; i <= 0xaffff; i++){
    write_mem8(i, 15);
  }

  for(;;){
    io_hlt();
  }
}
※テキストではi486であることをnaskに渡していますが、自分はそれをnasmに対して行っていません。しかし、上手くいったのであまり気にしていません。(ご存じの方がいればコメントください。)
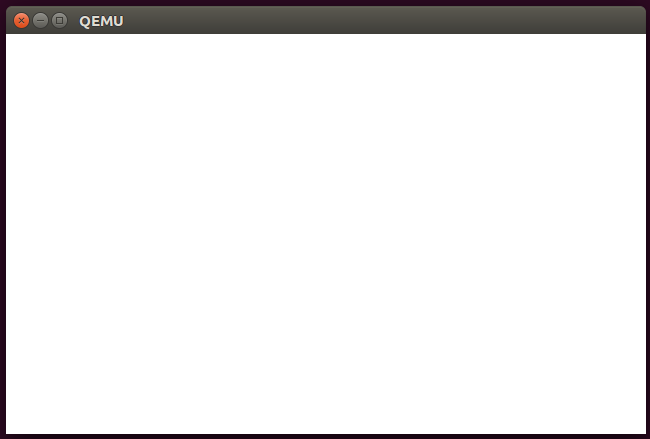
$ make runしてもらうと今まで黒かった画面が真っ白な画面になっているはずです(真っ黒な画面のままの方は「30日でできる!OS自作入門(3日目-gdbデバッグ体験記)Ubuntu16.04/NASM」を参考にデバッグ祭りです)
自分はここで白にならず、このあと数十時間デバッグ作業が続きました(○ ⚈ ◡ ⚈ ○)
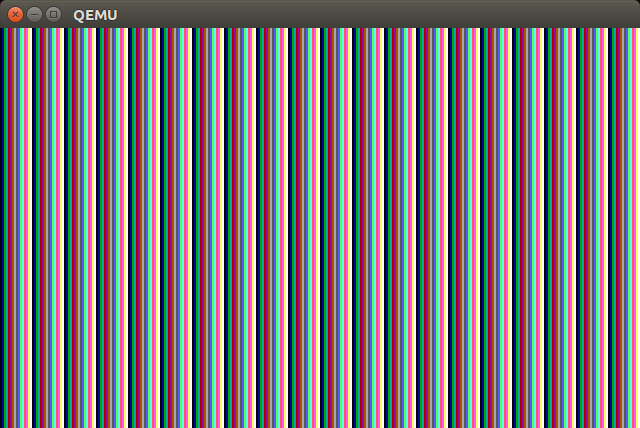
2. しましま - harib01b
// bootpack.c

extern void io_hlt(void);
extern void write_mem8(int addr, int data);

void HariMain(void)
{
  for (int i = 0xa0000; i <= 0xaffff; i++){
    write_mem8(i, i & 0x0f);    // 16画素(下位4bit)ごとに色変更
  }

  for(;;){
    io_hlt();
  }
}
3. ポインタ - harib01c
// bootpack.c

extern void io_hlt(void);
// extern void write_mem8(int addr, int data);

void HariMain(void)
{
  char *p;  // BYTE [...]用番地

  for (int i = 0xa0000; i <= 0xaffff; i++){
    p = i;
    *p = i & 0x0f;
    // write_mem8(i, i & 0x0f);
    // と同じ処理
  }

  for(;;){
    io_hlt();
  }
}
$ make runした際にコンパイル時点で以下の警告が表示されます。(実行が2回目以降の際は$ make cleanしてくださいね。)
bootpack.c:11:7: warning: assignment makes pointer from integer without a cast [-Wint-conversion]
     p = i;
       ^
テキストの説明で十分かと思いますのでエラー内容については省略。
// bootpack.c

extern void io_hlt(void);
// extern void write_mem8(int addr, int data);

void HariMain(void)
{
  char *p;  // BYTE [...]用番地

  for (int i = 0xa0000; i <= 0xaffff; i++){
    p = (char *) i;
    *p = i & 0x0f;
    // write_mem8(i, i & 0x0f);
    // または
    // *((char *) i) = i & 0x0f;
    // と同じ処理
  }

  for(;;){
    io_hlt();
  }
}
4. ポインタ応用(1) - harib01d
説明すること無いのでコードだけ。
// bootpack.c

extern void io_hlt(void);

void HariMain(void)
{
  char *p;  // BYTE [...]用番地
  p = (char *) 0xa0000;

  for (int i=0; i <= 0xffff; i++){
    *(p + i) = i & 0x0f;
  }

  for(;;){
    io_hlt();
  }
}
5. ポインタ応用(2) - harib01e
これも特に説明することは無いですね。。。(主にC言語使うあたりからテキストで十分になってきましたね(嬉))
// bootpack.c

extern void io_hlt(void);

void HariMain(void)
{
  char *p;  // BYTE [...]用番地
  p = (char *) 0xa0000;

  for (int i=0; i <= 0xffff; i++){
    p[i] = i & 0x0f;
  }

  for(;;){
    io_hlt();
  }
}
6. 色番号設定 - harib01f
配色設定はテキストのをそのまま持ってくると以下のようですね。
# 000000 : 黒
# ff0000 : 明るい赤
# 00ff00 : 明るい緑
# ffff00 : 黄色
# 0000ff : 明るい青
# ff00ff : 明るい紫
# 00ffff : 明るい水色
# ffffff : 白
# c6c6c6 : 明るい灰色
# 840000 : 暗い赤
# 008400 : 暗い緑
# 848400 : 暗い黄色
# 000084 : 暗い青
# 840084 : 暗い紫
# 008484 : 暗い水色
# 848484 : 暗い灰色
変更コードはbootpack.cとnasmfunc.asmのみ
// bootpack.c

extern void io_hlt(void);
extern void io_cli(void);
extern void io_out8(int port, int data);
extern int io_load_eflags(void);
extern void io_store_eflags(int eflags);

void init_palette(void);
void set_palette(int start, int end, unsigned char *rgb);

void HariMain(void)
{
  char *p;  // BYTE [...]用番地
  p = (char *) 0xa0000;

  for (int i=0; i <= 0xffff; i++){
    p[i] = i & 0x0f;
  }

  for(;;){
    io_hlt();
  }
}

void init_palette(void)
{
  static unsigned char table_rgb[16 * 3] = {
    0x00, 0x00, 0x00,   // 000000 : 0 : 黒
    0xff, 0x00, 0x00,   // ff0000 : 1 : 明るい赤
    0x00, 0xff, 0x00,   // 00ff00 : 2 : 明るい緑
    0xff, 0xff, 0x00,   // ffff00 : 3 : 黄色
    0x00, 0x00, 0xff,   // 0000ff : 4 : 明るい青
    0xff, 0x00, 0xff,   // ff00ff : 5 : 明るい紫
    0x00, 0xff, 0xff,   // 00ffff : 6 : 明るい水色
    0xff, 0xff, 0xff,   // ffffff : 7 : 白
    0xc6, 0xc6, 0xc6,   // c6c6c6 : 8 : 明るい灰色
    0x84, 0x00, 0x00,   // 840000 : 9 : 暗い赤
    0x00, 0x84, 0x00,   // 008400 : 10: 暗い緑
    0x84, 0x84, 0x00,   // 848400 : 11: 暗い黄色
    0x00, 0x00, 0x84,   // 000084 : 12: 暗い青
    0x84, 0x00, 0x84,   // 840084 : 13: 暗い紫
    0x00, 0x84, 0x84,   // 008484 : 14: 暗い水色
    0x84, 0x84, 0x84,   // 848484 : 15: 暗い灰色
  };
  set_palette(0, 15, table_rgb);
  return;

    // static char 命令は、データにしか使えないけどDB命令担当
}

void set_palette(int start, int end, unsigned char *rgb)
{
  int i, eflags;
  eflags = io_load_eflags();    // 割り込み許可フラグの値を記録
  io_cli();                     // 許可フラグを0にして割り込みを禁止する
  io_out8(0x03c8, start);
  for (i = start; i <= end; i++){
    io_out8(0x03c9, rgb[0] / 4);
    io_out8(0x03c9, rgb[1] / 4);
    io_out8(0x03c9, rgb[2] / 4);
    rgb += 3;
  }
  io_store_eflags(eflags);    // 割り込み許可フラグを元にもどす
  return;
}
; nasmfunc.asm
; TAB=4

section .text
        GLOBAL  io_hlt, io_cli, io_sti, io_stihlt
        global  io_in8, io_in16, io_in32
        global  io_out8, io_out16, io_out32
        global  io_load_eflags, io_store_eflags

io_hlt:             ; void io_hlt(void);
        HLT
        RET

io_cli:     ; void io_cli(void);
        cli
        ret

io_sti:     ; void io_sti(void);
        sti
        ret

io_stihlt:      ; void io_stihlt(void);
        sti
        hlt
        ret

io_in8:     ; int io_in8(int port);
        mov     edx, [esp + 4]      ; port
        mov     eax, 0
        in      al, dx              ; 8
        ret

io_in16:        ; int io_in16(int port);
        mov     edx, [esp + 4]      ; port
        mov     eax, 0
        in      ax, dx              ; 16
        ret

in_in32:        ; int io_in16(int port);
        mov     edx, [esp + 4]      ; port
        in      eax, dx             ; 32
        ret

io_out8:        ; void io_to_in_out8;
        mov     edx, [esp + 4]      ; port
        mov     al, [esp + 8]       ; data
        out     dx, al              ; 8
        ret

io_out16:       ; void io_to_in_out16;
        mov     edx, [esp + 4]      ; port
        mov     eax, [esp + 8]      ; data
        out     dx, ax              ; 16
        ret

io_out32:       ; void io_to_in_out32;
        mov     edx, [esp + 4]      ; port
        mov     eax, [esp + 8]      ; data
        out     dx, eax             ; 32
        ret

io_load_eflags:     ; int io_load_eflags(void);
        pushfd      ; push eflags double-word
        pop     eax
        ret

io_store_eflags:        ; void io_store_eflags(int eflags);
        mov     eax, [esp + 4]
        push    eax
        popfd       ; pup eflags double-word
        ret
ビデオDAコンバータ - VGA - oswiki.osask.jp
- パレットのアクセスの手順
- まず一連のアクセス中に割り込みなどが入らないようにする(たとえばCLI)。
- 0x03c8に設定したいパレット番号を書き込み、続いて、R、G、Bの順に0x03c9に書き込む。もし次のパレットも続けて設定したいのなら、パレット番号の設定を省略して、さらにRGBの順に0x03c9に書き込んでよい。
- 現在のパレット状態を読み出すときは、まず0x03c7にパレット番号を書き込んで、0x03c9を3回読み出す。これが順にR、G、Bになっている。これももし次のパレットも読み出したいときは、パレット番号の設定を省略してRGBの順に読み出してよい。
- 最初にCLIした場合は、最後にSTIする。
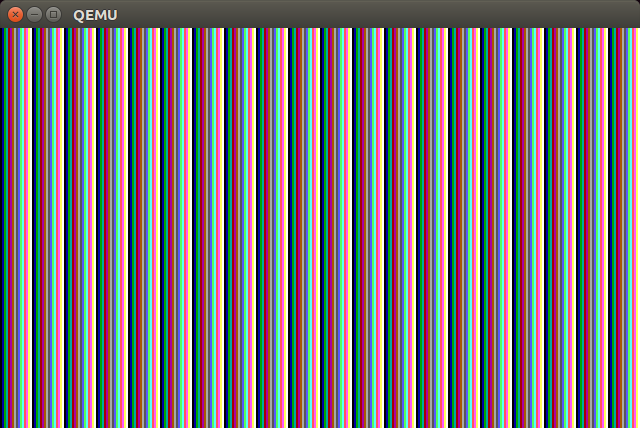
実行結果
7. 四角形 - harib01g
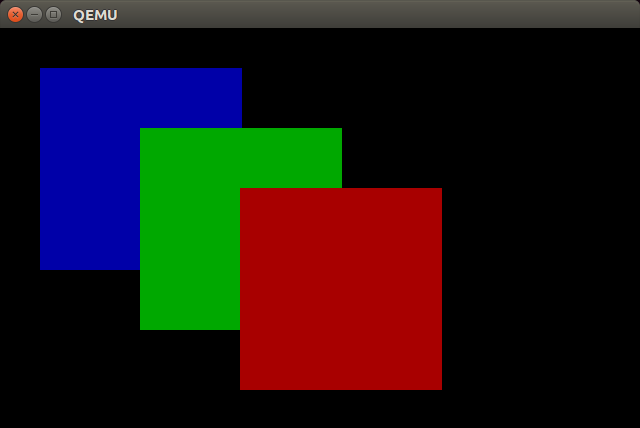
次は四角形を描画します。
// bootpack.c

extern void io_hlt(void);
extern void io_cli(void);
extern void io_out8(int port, int data);
extern int io_load_eflags(void);
extern void io_store_eflags(int eflags);

void init_palette(void);
void set_palette(int start, int end, unsigned char *rgb);
void boxfill8(unsigned char *vram,
              int xsize,
              unsigned char c,
              int x0,
              int y0,
              int x1,
              int y1);


# define COL8_000000		0
# define COL8_FF0000		1
# define COL8_00FF00		2
# define COL8_FFFF00		3
# define COL8_0000FF		4
# define COL8_FF00FF		5
# define COL8_00FFFF		6
# define COL8_FFFFFF		7
# define COL8_C6C6C6		8
# define COL8_840000		9
# define COL8_008400		10
# define COL8_848400		11
# define COL8_000084		12
# define COL8_840084		13
# define COL8_008484		14
# define COL8_848484		15


void HariMain(void)
{
  char *p;  // BYTE [...]用番地
  p = (char *) 0xa0000;

  boxfill8(p, 320, COL8_FF0000,  20, 20, 120, 120);
  boxfill8(p, 320, COL8_00FF00,  70, 50, 170, 150);
  boxfill8(p, 320, COL8_0000FF, 120, 80, 220, 180);

  for(;;){
    io_hlt();
  }
}

void init_palette(void)
{
  static unsigned char table_rgb[16 * 3] = {
    0x00, 0x00, 0x00,   // 000000 : 0 : 黒
    0xff, 0x00, 0x00,   // ff0000 : 1 : 明るい赤
    0x00, 0xff, 0x00,   // 00ff00 : 2 : 明るい緑
    0xff, 0xff, 0x00,   // ffff00 : 3 : 黄色
    0x00, 0x00, 0xff,   // 0000ff : 4 : 明るい青
    0xff, 0x00, 0xff,   // ff00ff : 5 : 明るい紫
    0x00, 0xff, 0xff,   // 00ffff : 6 : 明るい水色
    0xff, 0xff, 0xff,   // ffffff : 7 : 白
    0xc6, 0xc6, 0xc6,   // c6c6c6 : 8 : 明るい灰色
    0x84, 0x00, 0x00,   // 840000 : 9 : 暗い赤
    0x00, 0x84, 0x00,   // 008400 : 10: 暗い緑
    0x84, 0x84, 0x00,   // 848400 : 11: 暗い黄色
    0x00, 0x00, 0x84,   // 000084 : 12: 暗い青
    0x84, 0x00, 0x84,   // 840084 : 13: 暗い紫
    0x00, 0x84, 0x84,   // 008484 : 14: 暗い水色
    0x84, 0x84, 0x84,   // 848484 : 15: 暗い灰色
  };
  set_palette(0, 15, table_rgb);
  return;

    // static char 命令は、データにしか使えないけどDB命令担当
}

void set_palette(int start, int end, unsigned char *rgb)
{
  int i, eflags;
  eflags = io_load_eflags();    // 割り込み許可フラグの値を記録
  io_cli();                     // 許可フラグを0にして割り込みを禁止する
  io_out8(0x03c8, start);
  for (i = start; i <= end; i++){
    io_out8(0x03c9, rgb[0] / 4);
    io_out8(0x03c9, rgb[1] / 4);
    io_out8(0x03c9, rgb[2] / 4);
    rgb += 3;
  }
  io_store_eflags(eflags);    // 割り込み許可フラグを元にもどす
  return;
}

void boxfill8(unsigned char *vram,
              int xsize,
              unsigned char c,
              int x0,
              int y0,
              int x1,
              int y1)
{
  for (int y = y0; y <= y1; y++){
    for (int x = x0; x <= x1; x++){
      vram[y * xsize + x] = c;
    }
  }
}
実行結果
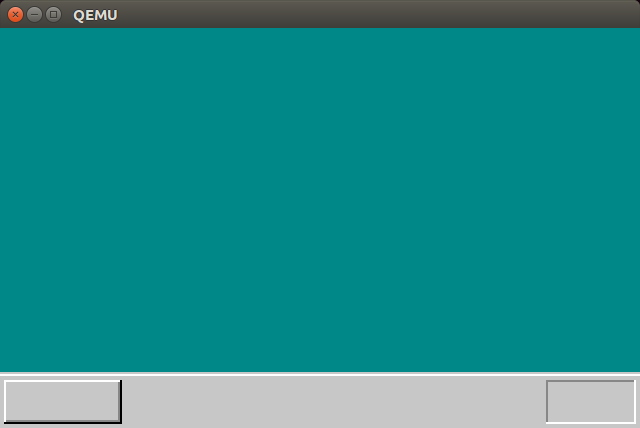
8. 仕上げ - harib01h
いよいよ4日目最後ですね。
bootpack.cに手を加えます。
// bootpack.c

extern void io_hlt(void);
extern void io_cli(void);
extern void io_out8(int port, int data);
extern int io_load_eflags(void);
extern void io_store_eflags(int eflags);

void init_palette(void);
void set_palette(int start, int end, unsigned char *rgb);
void boxfill8(unsigned char *vram,
              int xsize,
              unsigned char c,
              int x0,
              int y0,
              int x1,
              int y1);


# define COL8_000000		0
# define COL8_FF0000		1
# define COL8_00FF00		2
# define COL8_FFFF00		3
# define COL8_0000FF		4
# define COL8_FF00FF		5
# define COL8_00FFFF		6
# define COL8_FFFFFF		7
# define COL8_C6C6C6		8
# define COL8_840000		9
# define COL8_008400		10
# define COL8_848400		11
# define COL8_000084		12
# define COL8_840084		13
# define COL8_008484		14
# define COL8_848484		15


void HariMain(void)
{

	char *vram;
	int xsize, ysize;

	init_palette();
	vram = (char *) 0xa0000;
	xsize = 320;
	ysize = 200;

	boxfill8(vram, xsize, COL8_008484,  0,         0,          xsize -  1, ysize - 29);
	boxfill8(vram, xsize, COL8_C6C6C6,  0,         ysize - 28, xsize -  1, ysize - 28);
	boxfill8(vram, xsize, COL8_FFFFFF,  0,         ysize - 27, xsize -  1, ysize - 27);
	boxfill8(vram, xsize, COL8_C6C6C6,  0,         ysize - 26, xsize -  1, ysize -  1);

	boxfill8(vram, xsize, COL8_FFFFFF,  3,         ysize - 24, 59,         ysize - 24);
	boxfill8(vram, xsize, COL8_FFFFFF,  2,         ysize - 24,  2,         ysize -  4);
	boxfill8(vram, xsize, COL8_848484,  3,         ysize -  4, 59,         ysize -  4);
	boxfill8(vram, xsize, COL8_848484, 59,         ysize - 23, 59,         ysize -  5);
	boxfill8(vram, xsize, COL8_000000,  2,         ysize -  3, 59,         ysize -  3);
	boxfill8(vram, xsize, COL8_000000, 60,         ysize - 24, 60,         ysize -  3);

	boxfill8(vram, xsize, COL8_848484, xsize - 47, ysize - 24, xsize -  4, ysize - 24);
	boxfill8(vram, xsize, COL8_848484, xsize - 47, ysize - 23, xsize - 47, ysize -  4);
	boxfill8(vram, xsize, COL8_FFFFFF, xsize - 47, ysize -  3, xsize -  4, ysize -  3);
	boxfill8(vram, xsize, COL8_FFFFFF, xsize -  3, ysize - 24, xsize -  3, ysize -  3);

  for(;;){
    io_hlt();
  }
}

void init_palette(void)
{
  static unsigned char table_rgb[16 * 3] = {
    0x00, 0x00, 0x00,   // 000000 : 0 : 黒
    0xff, 0x00, 0x00,   // ff0000 : 1 : 明るい赤
    0x00, 0xff, 0x00,   // 00ff00 : 2 : 明るい緑
    0xff, 0xff, 0x00,   // ffff00 : 3 : 黄色
    0x00, 0x00, 0xff,   // 0000ff : 4 : 明るい青
    0xff, 0x00, 0xff,   // ff00ff : 5 : 明るい紫
    0x00, 0xff, 0xff,   // 00ffff : 6 : 明るい水色
    0xff, 0xff, 0xff,   // ffffff : 7 : 白
    0xc6, 0xc6, 0xc6,   // c6c6c6 : 8 : 明るい灰色
    0x84, 0x00, 0x00,   // 840000 : 9 : 暗い赤
    0x00, 0x84, 0x00,   // 008400 : 10: 暗い緑
    0x84, 0x84, 0x00,   // 848400 : 11: 暗い黄色
    0x00, 0x00, 0x84,   // 000084 : 12: 暗い青
    0x84, 0x00, 0x84,   // 840084 : 13: 暗い紫
    0x00, 0x84, 0x84,   // 008484 : 14: 暗い水色
    0x84, 0x84, 0x84,   // 848484 : 15: 暗い灰色
  };
  set_palette(0, 15, table_rgb);
  return;

    // static char 命令は、データにしか使えないけどDB命令担当
}

void set_palette(int start, int end, unsigned char *rgb)
{
  int i, eflags;
  eflags = io_load_eflags();    // 割り込み許可フラグの値を記録
  io_cli();                     // 許可フラグを0にして割り込みを禁止する
  io_out8(0x03c8, start);
  for (i = start; i <= end; i++){
    io_out8(0x03c9, rgb[0] / 4);
    io_out8(0x03c9, rgb[1] / 4);
    io_out8(0x03c9, rgb[2] / 4);
    rgb += 3;
  }
  io_store_eflags(eflags);    // 割り込み許可フラグを元にもどす
  return;
}

void boxfill8(unsigned char *vram,
              int xsize,
              unsigned char c,
              int x0,
              int y0,
              int x1,
              int y1)
{
  for (int y = y0; y <= y1; y++){
    for (int x = x0; x <= x1; x++){
      vram[y * xsize + x] = c;
    }
  }
}
実行結果
やっと4日目終わった〜!
お疲れ様でした!
